 User Manual Q&A
Answer

Nov 25, 2025 - 08:53 AM
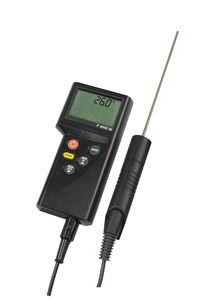
To set up the DATALOGGER THERMOMETER for recording temperature data with specific thermocouple types and intervals, follow these steps based on the user manual:


1. **Select Thermocouple Type:**

   - Press the SETUP button to enter setup options.

   - Use the up and down buttons to select the desired thermocouple type (K, J, E, or T).


2. **Setting Interval Time for Data Logging:**

   - Press the SETUP button to enter setup options.

   - Use the up and down buttons to set the minute or second intervals for data logging.


3. **Set Offset to Compensate for Probe Errors:**

   - Adjust the readings of the thermometer to compensate for errors against a specific thermocouple.

   - Select the thermocouple channel and adjust the offset value using the up and down buttons.


4. **Set Alarm Point (for Channel T1):**

   - Turn on the alarm mode and set high and low limits for temperature readings.

   - Ensure that the low alarm set is not greater than the high alarm set.


5. **Set T1-T2 Subtraction Mode:**

   - Turn on or off the T1-T2 subtraction mode to display temperature differentials.

   - Use the up and down buttons to toggle this setting.


6. **Set Auto Power Off Time:**

   - Select the auto power off option from 10 minutes to 8 hours or disable the feature.

   - Use the up and down buttons to choose the desired auto power off time.


By following these steps, you can configure the DATALOGGER THERMOMETER to record temperature data using specific thermocouple types and intervals as per your requirements. Refer to the user manual for detailed instructions and additional setup options.


Add New Comment