1. Instruções importantes de segurança
Please read all instructions carefully before using this appliance. Failure to follow these instructions may result in electric shock, fire, or serious personal injury.
- Não toque em superfícies quentes. Use alças ou botões.
- Para se proteger contra choques elétricos, não mergulhe o cabo, os plugues ou o aparelho em água ou outro líquido.
- É necessária supervisão rigorosa quando qualquer aparelho for usado por crianças ou perto delas.
- Desligue da tomada quando não estiver em uso e antes de limpar. Deixe esfriar antes de colocar ou retirar peças.
- Não opere nenhum aparelho com o cabo ou plugue danificado ou após o aparelho apresentar mau funcionamento ou ter sido danificado de qualquer forma.
- O uso de acessórios não recomendados pelo fabricante do aparelho pode causar ferimentos.
- Não utilize ao ar livre.
- Não deixe o cabo pendurado na borda da mesa ou do balcão, nem toque em superfícies quentes.
- Não coloque sobre ou perto de um queimador a gás ou elétrico quente, nem em um forno aquecido.
- Deve-se ter extremo cuidado ao mover um aparelho que contenha óleo quente ou outros líquidos quentes.
- Sempre conecte primeiro o plugue ao aparelho e, em seguida, ligue o cabo na tomada. Para desconectar, gire qualquer controle para a posição "desligado" e, em seguida, retire o plugue da tomada.
- Não utilize o aparelho para outro fim que não o pretendido.
- Alimentos grandes ou utensílios de metal não devem ser inseridos em uma torradeira, pois podem causar incêndio ou risco de choque elétrico.
- Pode ocorrer um incêndio se o forno estiver coberto ou em contato com materiais inflamáveis, incluindo cortinas, tapeçarias, paredes e similares, quando em operação.
- Não coloque nenhum material além dos acessórios recomendados pelo fabricante neste forno quando não estiver em uso.
- Não coloque nenhum dos seguintes materiais no forno: papel, papelão, plástico ou materiais similares.
- Não cubra a bandeja de migalhas ou qualquer parte do forno com papel-alumínio. Isso causará superaquecimento do forno.
2. Produto acabadoview
This 22L tabletop electric mini oven is designed for household baking and toasting. It features adjustable temperature control, a 120-minute timer, and a three-layer baking position for versatile cooking.

Figura 1: Frente view of the 22L Tabletop Electric Mini Oven with food cooking inside.

Figure 2: Dimensions of the oven: 421mm (width), 252mm (depth), 273mm (height).
3. Configuração
3.1 Desembalagem
- Retire cuidadosamente o forno e todos os materiais de embalagem da caixa.
- Remove any protective films or stickers from the oven surfaces.
- Verifique se houve danos durante o transporte. Se houver danos, não utilize o produto e entre em contato com o suporte ao cliente.
3.2 Posicionamento
- Coloque o forno sobre uma superfície estável, plana e resistente ao calor.
- Ensure there is adequate ventilation around the oven (at least 10 cm clearance on all sides).
- Não coloque o forno perto de materiais inflamáveis, como cortinas ou paredes.
- Certifique-se de que o cabo de alimentação não esteja obstruído ou preso.
3.3 Antes do primeiro uso
- Wash the baking tray, wire rack, and crumb tray in warm, soapy water. Rinse and dry thoroughly.
- Limpe o interior e exterior do forno com adamp pano.
- To eliminate any manufacturing odors, operate the oven empty for approximately 15 minutes at 200°C (400°F). Ensure the area is well-ventilated during this process.
4. Instruções de operação
4.1 controles acimaview
The oven features three mechanical control knobs:
- Botão superior: Temperature Control (0-250°C)
- Botão do meio: Function Selector (Controls upper/lower heating elements)
- Botão inferior: Temporizador (0-120 minutos)

Figure 3: Temperature control knob, adjustable from 70°C to 250°C.

Figure 4: Timer knob, adjustable from 0 to 120 minutes.
4.2 Pré-aquecimento do forno
- Place the wire rack or baking tray in the desired position.
- Gire o botão de controle de temperatura para a temperatura desejada.
- Turn the Timer knob to the desired preheating time (e.g., 10-15 minutes). The power indicator light will illuminate.
- Once the preheating time has elapsed, the oven is ready for use.
4.3 Baking and Roasting
This oven offers three-layer baking positions and independent temperature control for upper and lower heating tubes.

Figure 5: The 22L capacity oven features three distinct baking positions for versatile cooking.
- Preheat the oven as described above.
- Carefully place your food on the baking tray or wire rack into the desired baking position. Use oven mitts.
- Select the appropriate temperature using the Temperature Control knob (0-250°C).
- Use the Function Selector knob to choose between upper heating, lower heating, or simultaneous upper and lower heating, depending on your recipe's requirements. This allows for precise control over browning and cooking.
- Set the cooking time using the Timer knob (0-120 minutes). The oven will automatically shut off and ring a bell when the timer expires.
- Monitor food through the wide view janela.

Figure 6: The wide viewing window allows for easy monitoring of food changes during cooking.
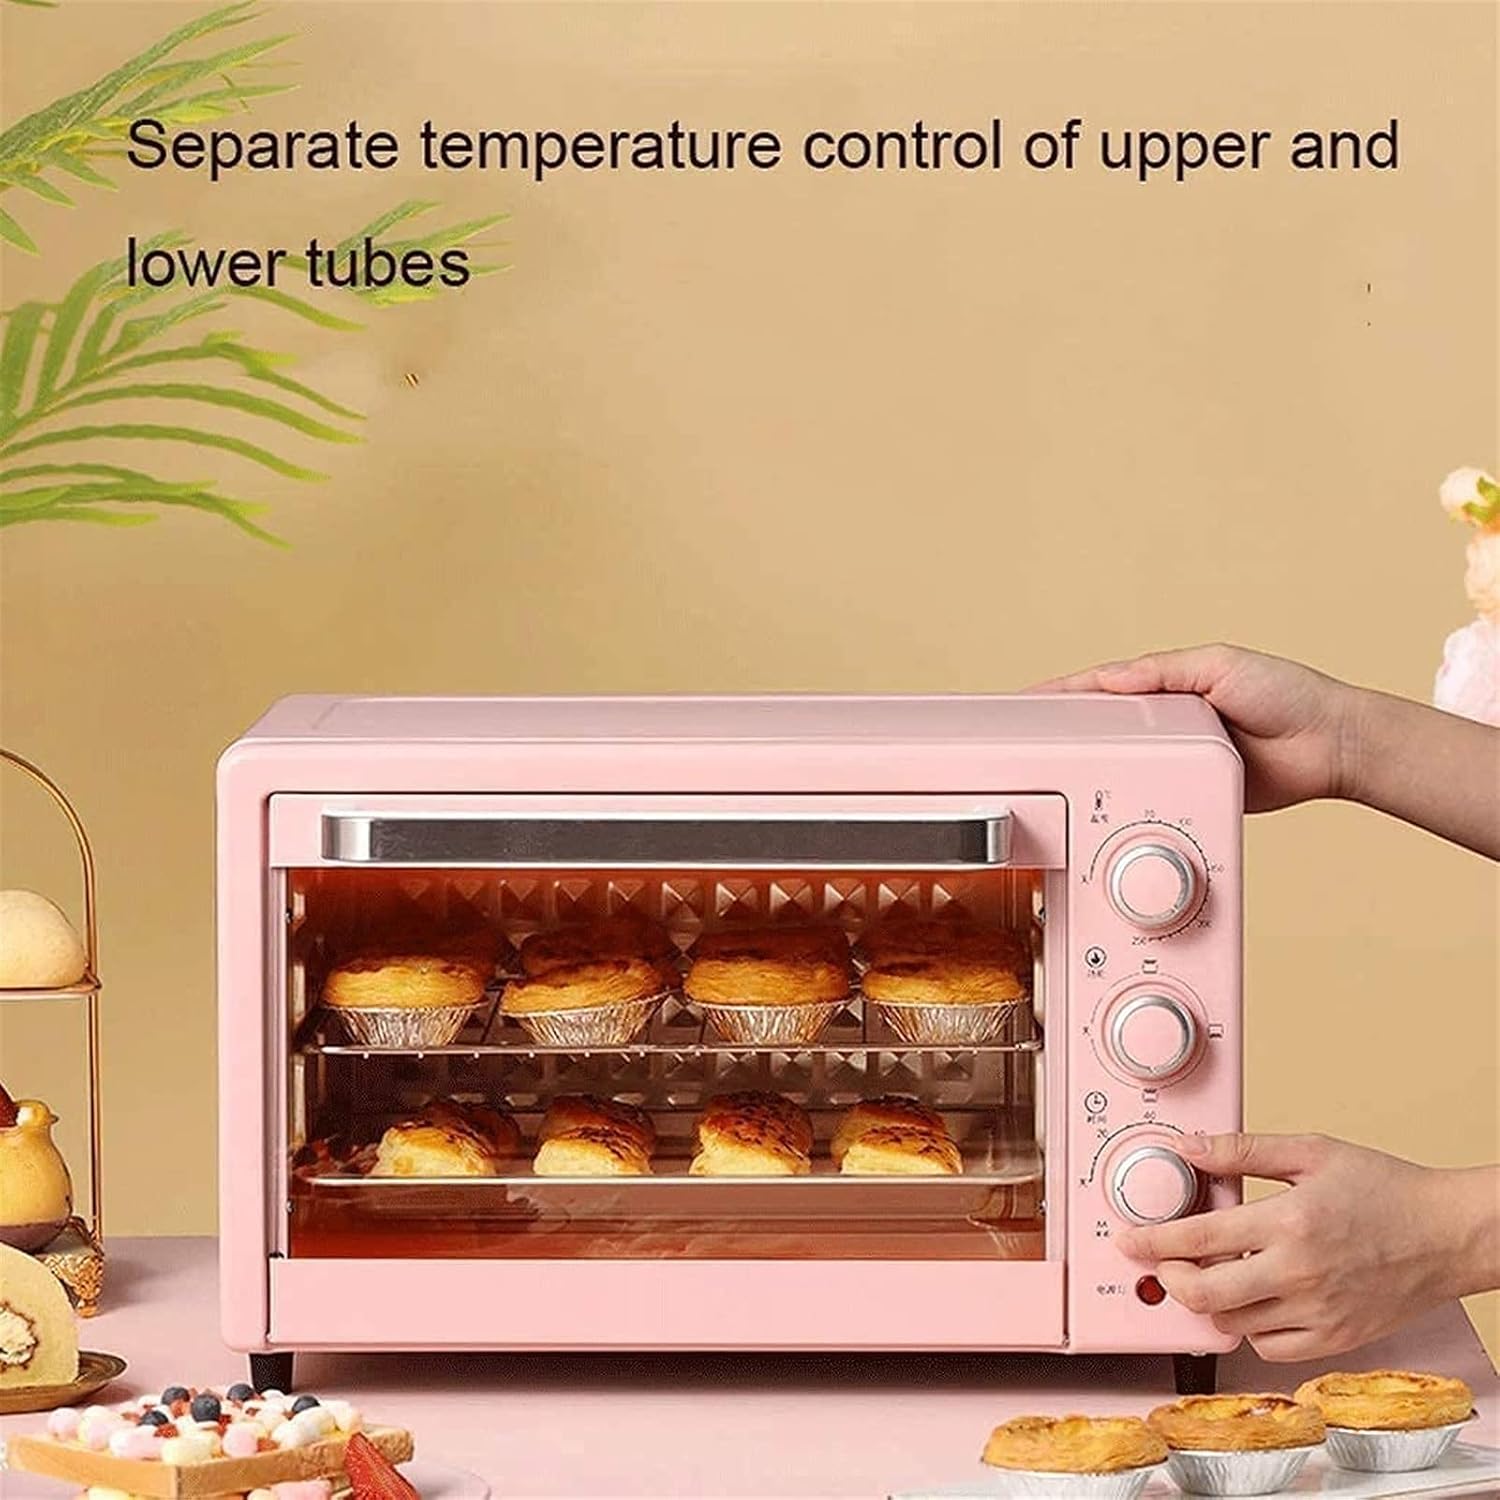
Figure 7: The oven features separate temperature control for upper and lower heating tubes, enabling precise cooking.
5. Manutenção e Limpeza
5.1 Limpeza Geral
- Desligue sempre o forno da tomada e deixe-o arrefecer completamente antes de o limpar.
- Não mergulhe o corpo do forno, o cabo de alimentação ou a ficha em água ou qualquer outro líquido.
- Limpe o exterior com adamp pano e detergente neutro. Não use produtos de limpeza abrasivos ou esfregões.
5.2 Cleaning Interior and Accessories
- Remove the baking tray, wire rack, and crumb tray. Wash them in warm, soapy water. For stubborn stains, soak them before cleaning.
- As paredes internas podem ser limpas com adesivo.amp cloth and mild detergent. Avoid touching the heating elements.
- Ensure all parts are thoroughly dry before reassembling and storing the oven.

Figure 8: The oven door features a three-layer safety explosion-proof glass for enhanced durability and safety, including a transparent layer, tempered glass layer, and oil-proof cleaning layer.
6. Solução De Problemas
If you encounter any issues with your oven, please refer to the following common problems and solutions:
- O forno não liga:
- Certifique-se de que o cabo de alimentação esteja firmemente conectado a uma tomada elétrica em funcionamento.
- Check if the timer knob is set to a cooking duration. The oven will not operate if the timer is at "OFF" or "0".
- Verifique se o disjuntor não desarmou.
- A comida não está cozinhando uniformemente:
- Ensure the oven is preheated to the correct temperature.
- Check that the correct heating function (upper, lower, or both) is selected for your recipe.
- Rotate food halfway through cooking for more even results.
- Ensure there is adequate space around the food for heat circulation.
- Smoke or unusual odor during first use:
- This is normal during the initial use as manufacturing oils burn off. Ensure good ventilation. If it persists after the first few uses, discontinue use and contact support.
7. Especificações
| Recurso | Especificação |
|---|---|
| Modelo | Miniforno 22L |
| Capacidade | 22 litros |
| Vol avaliadotage | 110 V-240 V/50 Hz |
| Potência nominal | 1300 W |
| Faixa de temperatura | 0-250°C (Controllable) |
| Temporizador de cozimento | 0-120 Minutes with Bell Ring and Auto Shut Off |
| Heating Tube Material | Stainless Steel (4 tubes) |
| Material do forro | Chapa galvanizada |
| Método de controle | Botões mecânicos |
| Dimensões (L×P×A) | 421 mm × 252 mm × 273 mm |
| Estilo de porta | Porta suspensa |
8. Garantia e Suporte
8.1 Garantia limitada
This product comes with a limited warranty against defects in materials and workmanship. Please refer to the warranty card included with your purchase or contact the retailer for specific warranty terms and conditions. Keep your proof of purchase for warranty claims.
8.2 Suporte ao cliente
For technical assistance, troubleshooting, or parts replacement, please contact the retailer where you purchased the product. If purchased directly from the manufacturer, refer to the contact information provided in your packaging or on their official website.