1. Introdução
This manual provides detailed instructions for the operation and maintenance of your POCREATION PLJ8LEDH Frequency Counter. This device is designed for accurate frequency measurement up to 2.4 GHz, featuring a unique gate control system and a three-channel input design. Please read this manual thoroughly before use to ensure proper functionality and safety.
2. Informações de segurança
Observe as seguintes precauções de segurança para evitar ferimentos e danos ao dispositivo:
- Não exponha o dispositivo à umidade ou temperaturas extremas.
- Garantir a fonte de alimentação adequada voltage is used as specified.
- Avoid touching internal components when the device is powered on.
- Não tente modificar ou desmontar o dispositivo além do que está descrito neste manual.
- Mantenha o dispositivo longe de campos eletromagnéticos fortes.
3. Conteúdo da embalagem
Verifique se todos os itens estão presentes no seu pacote:
- 1 x POCREATION PLJ8LEDH Frequency Counter
- 2 x Cabos de Conexão

Figure 3.1: The POCREATION PLJ8LEDH Frequency Counter module shown with its two included connection cables.
4. Produto acabadoview
The POCREATION PLJ8LEDH is a compact frequency counter module featuring a bright LED display and simple controls. It is designed for precise frequency measurement across a wide range.
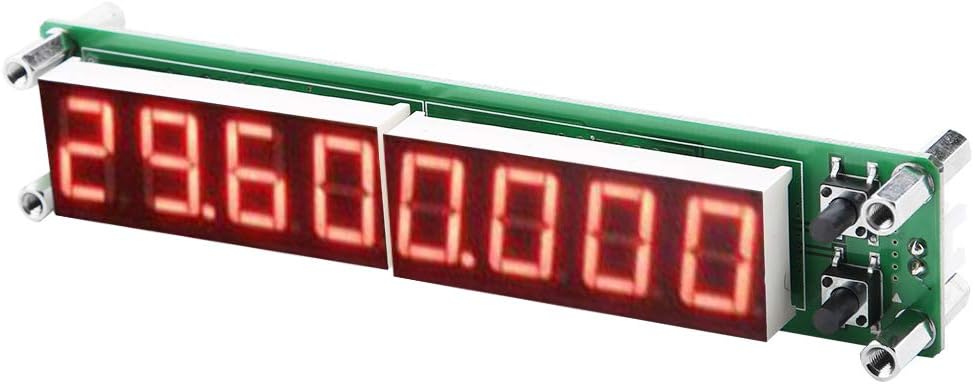
Figura 4.1: Angulado view of the frequency counter, highlighting the LED display and compact design.
4.1. Internal Components (PCB View)
The device utilizes a Microchip PIC16F648A microcontroller and a voltage-controlled crystal oscillator for stable and accurate measurements.

Figura 4.2: Visão de cima para baixo view of the frequency counter's circuit board, showing the various electronic components.
5. Configuração
5.1. Conexão de energia
Connect the provided power cable to the appropriate power input on the frequency counter module. Ensure the power source matches the device's voltage requisitos.
5.2. Input Connection
Connect the signal source to be measured to the input channel. The device features single-ended input design for low, high, and auto channel frequency measurement.
6. Instruções de operação
The frequency counter features a simple two-button control system for ease of use.

Figure 6.1: The frequency counter module, highlighting the two control buttons for operation.
6.1. Operação básica
- Power on the device. The LED display will illuminate.
- Connect the signal to be measured to the appropriate input.
- The device will automatically display the frequency.
- Use the control buttons to adjust settings such as gate time or channel selection (if manual override is desired). Settings are automatically saved.
6.2. Gate Time Settings
The gate time determines the measurement accuracy and refresh rate. Available gate times are:
- 0.01 S: Fastest refresh, lower accuracy.
- 0.10 S: Balanced refresh and accuracy.
- 1.0 S: Slowest refresh, highest accuracy.
Refer to the device's control buttons for adjusting this setting.
6.3. Measurement Channels
The device supports three measurement channels:
- Low Channel: Measures frequencies from 0.1 MHz to 60 MHz.
- High Channel (divided by 64): Measures frequencies from 20 MHz to 2.4 GHz.
- Auto Channel: Automatically selects between low and high channels based on the input frequency, identifying frequencies around 60 MHz. If the input amplitude for frequencies above 60 MHz is insufficient, manually select the High Channel.
6.4. IF Settings
The device supports IF (Intermediate Frequency) settings. Specific instructions for adjusting IF settings are typically accessed via the control buttons. Consult the on-screen display or button combinations for detailed configuration.
7. Manutenção
7.1. Limpeza
To clean the device, gently wipe the exterior with a soft, dry cloth. Do not use abrasive cleaners, solvents, or immerse the device in liquids.
7.2. Armazenamento
When not in use, store the frequency counter in a cool, dry place, away from direct sunlight and excessive dust.
8. Solução De Problemas
- Nenhuma exibição:
- Certifique-se de que o cabo de alimentação esteja firmemente conectado e que a fonte de alimentação esteja ativa.
- Verifique o volume da fonte de alimentaçãotage está correto.
- Leituras imprecisas:
- Check that the input signal is within the specified measurement range for the selected channel.
- Ensure the input connection is secure and free from interference.
- Try adjusting the gate time for higher accuracy (e.g., 1.0 S).
- If using Auto Channel, and measuring frequencies above 60 MHz with low amplitude, manually select the High Channel.
- No Frequency Detected:
- Confirm the signal source is active and producing a signal.
- Check the input cable for damage or loose connections.
- Verify the signal amplitude meets the sensitivity requirements for the selected channel.
9. Especificações
| Recurso | Especificação |
|---|---|
| Modelo | PLJ8LEDH |
| Gate Time Options | 0.01 S, 0.10 S, 1.0 S |
| Low Channel Measuring Range | 0.1 MHz ~ 60 MHz |
| Low Channel Accuracy (1.0 S gate) | ± 1Hz |
| Low Channel Sensitivity (0.1-10 MHz) | Better than 60mVPP |
| High Channel Measuring Range (divided by 64) | 20 MHz ~ 2.4 GHz |
| High Channel Accuracy (1.0 S gate) | ± 64Hz |
| High Channel Sensitivity (30-60 MHz) | Better than 50mVPP |
| Microcontroladores | Microchip PIC16F648A |
| Dimensões do produto | 5.12 x 1.18 x 1.18 polegadas |
| Peso do item | 1.66 onças |
| Fabricante | POCREATION |
10. Garantia e Suporte
For warranty information and technical support, please refer to the official POCREATION brand store or contact your retailer. Keep your purchase receipt for warranty claims.
Visite o POCREATION Store para maiores informações.