1. Introdução
Obrigado pela compra.asing the MODEBHD American Modern Pendant Light. This manual provides detailed instructions for the safe installation, operation, and maintenance of your new lighting fixture. Please read this manual thoroughly before installation and retain it for future reference.

Imagem 1.1: Terminadoview of the MODEBHD American Modern Pendant Light (3-Pack). These elegant fixtures feature a black crystal lampshade and brass-colored ceiling mounts, designed to provide ambient lighting.
2. Instruções de segurança
Para garantir uma instalação e operação seguras, observe as seguintes precauções:
- Desligue sempre a energia no disjuntor principal antes de instalar, realizar manutenção ou substituir lâmpadas.
- Installation should be performed by a qualified electrician or a person with adequate knowledge of electrical wiring.
- Certifique-se de que a superfície de montagem suporte o peso da luminária.
- Não exceda o wat especificadotage para a lâmpada.
- Manuseie os componentes de vidro com cuidado para evitar quebras.
- Mantenha materiais inflamáveis longe da luminária.
- Este acessório foi projetado apenas para uso interno.
3. Conteúdo da embalagem
Carefully unpack the box and ensure all components are present and undamaged. If any parts are missing or damaged, please contact customer support before proceeding with installation.
- Pendant Light Fixture (x3 for 3-Pack)
- Acessórios de montagem (parafusos, conectores de fio, etc.)
- Manual de instruções
Note: G9 light bulbs are not included and must be purchased separately.
4. Especificações
Consulte a tabela abaixo para obter as especificações detalhadas do produto:
| Recurso | Detalhe |
|---|---|
| Marca | MODE BHD |
| Modelo | B0CDRXT6D4 (3-Pack) |
| Material | K9 Crystal, Brass |
| Cor | Black (Crystal), Brass (Accents) |
| Lampshade Dimensions | 11 cm (4.3 inches) diameter, 14 cm (5.5 inches) height |
| Comprimento da corda | 200 cm (78.8 polegadas), ajustável |
| Light Source Base | G9 (Bulb not included) |
| Number of Lights (per fixture) | 1 |
| Volumetage | 110-240V |
| Estilo | Moderno |
| Recurso especial | Altura de suspensão ajustável |

Image 4.1: Detailed dimensions of the pendant light, illustrating the 4.3-inch diameter, 5.5-inch height, and the 78.8-inch adjustable cord length. The diagram also indicates the G9 light source base and 10cm suction plate.
5. Configuração e instalação
Follow these steps for proper installation of your pendant light fixture:
- Prepare-se para a Instalação:
- Turn off power at the main circuit breaker to the junction box where the fixture will be installed.
- Certifique-se de que a superfície de montagem esteja limpa, seca e estruturalmente sólida.
- Gather necessary tools: screwdriver, wire strippers, drill (if needed for mounting holes).
- Fixe o suporte de montagem:
- Fixe o suporte de montagem (normalmente incluído com o kit de instalação) à caixa de junção do teto utilizando os parafusos fornecidos. Certifique-se de que esteja firmemente fixado.
- Ajuste o comprimento do cabo:
- Determine the desired hanging height for your pendant light. The cord is adjustable up to 78.8 inches (200 cm).
- Adjust the cord length by pushing the cord through the cord grip in the canopy until the desired length is achieved. Secure the cord in place.
- Conexões de fios:
- Carefully connect the fixture's wires to the corresponding wires from the junction box using wire nuts:
- Conecte o preto (Live/Hot) wire from the fixture to the preto (Live/Hot) wire from the junction box.
- Conecte o branco Fio neutro da luminária para o branco Fio neutro da caixa de junção.
- Conecte o verde or cobre nu (Ground) wire from the fixture to the verde or cobre nu (Ground) wire from the junction box.
- Certifique-se de que todas as conexões estejam seguras e isoladas com fita isolante, se necessário.
- Carefully connect the fixture's wires to the corresponding wires from the junction box using wire nuts:
- Monte o dispositivo:
- Coloque cuidadosamente todos os fios na caixa de junção.
- Align the fixture's canopy with the mounting bracket and secure it using the canopy screws.
- Instalar Lâmpada:
- Insert a G9 base bulb (not included) into the socket. Do not overtighten.
- Restaurar energia:
- Ligue novamente a energia no disjuntor principal.
- Teste a luminária para garantir que ela funcione corretamente.

Image 5.1: Close-up of the G9 bulb socket within the crystal lampshade, illustrating where the bulb should be inserted during installation.
6. Instruções de operação
The MODEBHD American Modern Pendant Light operates via a standard wall switch connected to your home's electrical circuit. Simply toggle the wall switch to turn the light on or off.
- Ligado/Desligado: Use the connected wall switch to control the light.
- Escurecimento: If you wish to use a dimmable G9 bulb and a compatible dimmer switch (not included), ensure both are rated for dimming. Follow the dimmer switch manufacturer's instructions for installation and operation.

Image 6.1: The pendant lights in operation, showcasing their aesthetic appeal and the warm light they emit in a bedroom setting.
7. Manutenção
Regular maintenance will help preserve the appearance and functionality of your pendant light:
- Limpeza:
- Before cleaning, ensure the power is turned off at the circuit breaker and the fixture has cooled down.
- Wipe the crystal lampshade and metal parts with a soft, dry, or slightly damp pano.
- Não utilize produtos de limpeza abrasivos, solventes ou polidores, pois podem danificar o acabamento.
- Substituição de lâmpada:
- Turn off power at the circuit breaker and allow the bulb to cool completely.
- Carefully remove the old G9 bulb by pulling it straight out.
- Insert a new G9 bulb, ensuring it is fully seated in the socket.
- Restaure a energia e teste a luz.
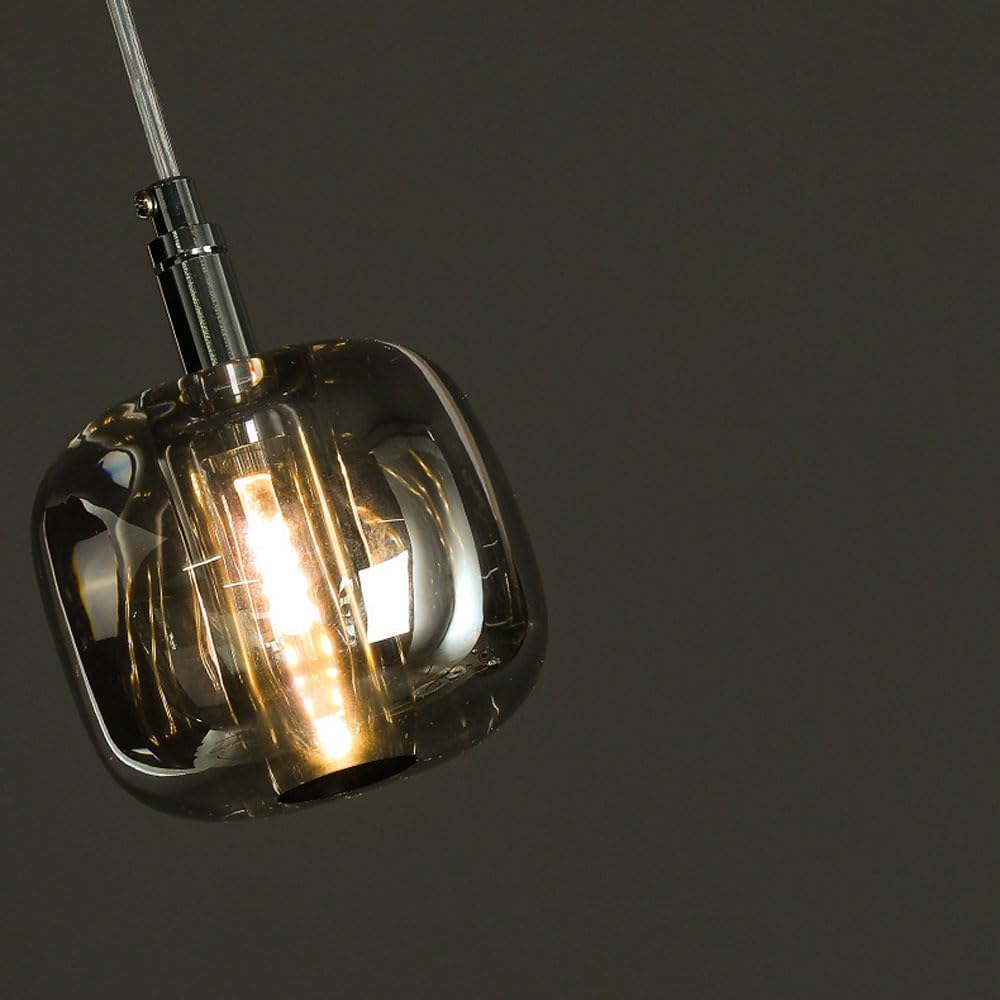
Imagem 7.1: Angulada view of the pendant light, highlighting the crystal and brass elements that require regular cleaning to maintain their luster.
8. Solução De Problemas
Se você tiver problemas com sua luminária pendente, consulte o seguinte guia de solução de problemas:
| Problema | Possível causa | Solução |
|---|---|---|
| A luz não acende. |
|
|
| A luz pisca. |
|
|
| Fixture is hot to the touch. |
|
|
Se o problema persistir após tentar essas soluções, entre em contato com o suporte ao cliente.
9. Garantia e Suporte
MODEBHD is committed to providing high-quality products and customer satisfaction. While specific warranty details are not provided in this manual, we offer comprehensive after-sales service.
If you have any questions about our products or services, or if you receive any product with issues, please do not hesitate to contact us. We aim to respond within 24 hours to provide the best possible service and ensure your satisfaction.
For support, please refer to the contact information provided at your point of purchase or visit the official MODEBHD website.