
1. Introdução
Thank you for choosing the Smart Sensor AR867 Digital Thermometer Hygrometer. This device is designed to provide accurate measurements of indoor and outdoor temperature, as well as indoor humidity. It features a clear LCD display, calendar, and alarm clock functions, making it a versatile tool for monitoring your environment. Please read this manual carefully before use to ensure proper operation and to maximize the product's lifespan.
2. Informações de segurança
- Não exponha o dispositivo a temperaturas extremas, luz solar direta ou alta umidade.
- Evite deixar cair o dispositivo ou submetê-lo a impactos fortes.
- Mantenha o dispositivo longe de água e outros líquidos.
- Não tente desmontar ou reparar o dispositivo por conta própria. Contate pessoal qualificado para assistência técnica.
- Descarte as baterias usadas de maneira responsável, de acordo com os regulamentos locais.
- Mantenha as pilhas fora do alcance das crianças.
3. Conteúdo da embalagem
- 1 x Smart Sensor AR867 Digital Thermometer Hygrometer
- 1 x Outdoor Temperature Probe (attached)
- 1 x Manual do Usuário
Note: 1 x AAA 1.5V battery is required and not included in the package.
4. Recursos do Produto
- Amplo visor LCD para leitura clara e fácil.
- Simultaneous display of indoor/outdoor temperature, indoor humidity, and time.
- Unidades de temperatura selecionáveis: Celsius (°C) ou Fahrenheit (°F).
- Selectable time display format: 12-hour or 24-hour.
- Records maximum and minimum temperature/humidity values.
- Integrated calendar function (1999/1/1 - 2048/12/31).
- Alarm clock function.
- Freeze point alarm function (-1°C to 4°C).
- Low power consumption with high stability and accuracy.
5. Configuração
5.1 Instalação da bateria
- Localize a tampa do compartimento da bateria na parte traseira do dispositivo.
- Deslize a tampa para baixo para abrir o compartimento.
- Insert one AAA 1.5V battery, ensuring the correct polarity (+/-).
- Recoloque a tampa do compartimento da bateria deslizando-a para cima até ouvir um clique.

This image shows the rear of the Smart Sensor AR867 device with the battery compartment open, revealing the slot for a single AAA battery. The stand is also visible.
5.2 Posicionamento
- Place the main unit indoors in a location where you want to monitor the indoor temperature and humidity. Ensure it is not in direct sunlight or near heat sources/vents.
- The outdoor temperature probe can be extended outside through a window or door frame. Ensure the probe tip is exposed to the outdoor environment but protected from direct rain or snow.
6. Instruções de operação
6.1 Compreendendo o visor e os botões

This diagram illustrates the main components of the Smart Sensor AR867. It highlights the LCD screen, temperature display, humidity display, clock display, clock button, set button, and the indoor/outdoor switch button.
- Tela LCD: Displays all information.
- Exibição de temperatura: Shows indoor or outdoor temperature.
- Exibição de umidade: Shows indoor humidity.
- Exibição do relógio: Mostra a hora atual.
- Botão MAX/MIN: Pressione para view maximum/minimum recorded temperature and humidity. Hold to reset.
- Botão ENTRADA/SAÍDA: Switches between indoor and outdoor temperature display.
- Botão de configuração: Utilizado para entrar no modo de configurações e confirmar as seleções.
6.2 Initial Power On and Display
Upon battery installation, the device will power on and display current indoor temperature, indoor humidity, and the default time. The outdoor temperature will be displayed when the external probe is connected and selected.
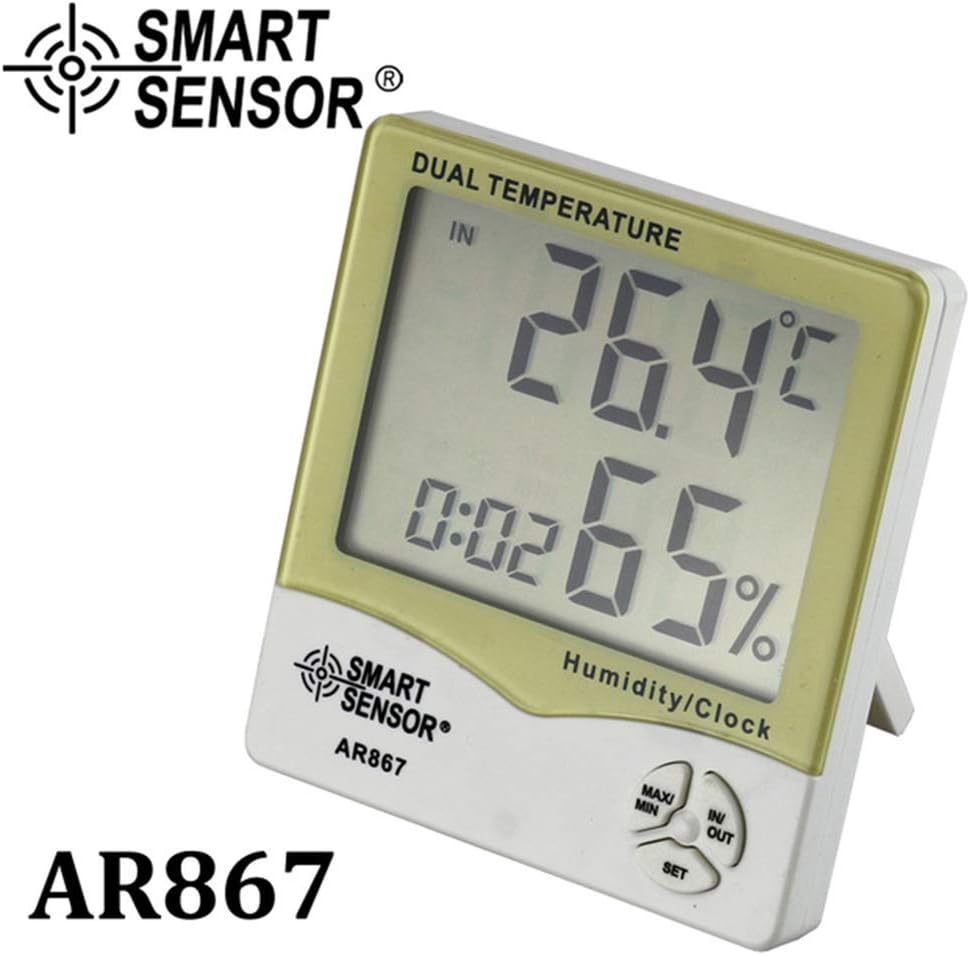
This image shows the Smart Sensor AR867 displaying an indoor temperature of 26.4°C and indoor humidity of 65%.

This image shows the Smart Sensor AR867 displaying an outdoor temperature of 30.2°C and indoor humidity of 76%, with the external temperature probe visible.
6.3 Configuração de hora e data
- Pressione e segure o DEFINIR button for a few seconds until the year display starts flashing.
- Use o MÁX/MÍN Botão para ajustar o ano. Pressione DEFINIR Para confirmar e passar para a próxima configuração (mês, dia, hora, minuto).
- Repeat step 2 for month, day, hour, and minute.
- Após definir os minutos, pressione DEFINIR to exit the time/date setting mode.
6.4 Unidades de temperatura de comutação (°C/°F)
No modo de exibição normal, pressione o botão DENTRO/FORA Botão para alternar entre as unidades de temperatura Celsius (°C) e Fahrenheit (°F).
6.5 Switching 12/24 Hour Display
No modo de exibição normal, pressione o botão DEFINIR button briefly to switch between 12-hour and 24-hour time formats.
6.6 Viewing MAX/MIN Readings
- Pressione o MÁX/MÍN Pressione o botão uma vez para exibir a temperatura e a umidade máximas registradas.
- Pressione o MÁX/MÍN Pressione novamente o botão para exibir a temperatura e a umidade mínimas registradas.
- Pressione o MÁX/MÍN Pressione o botão uma terceira vez para retornar às leituras atuais.
- Para limpar os registros MÁXIMO/MÍNIMO, pressione e segure o botão. MÁX/MÍN button for approximately 3 seconds while MAX/MIN values are displayed.
6.7 Using the Alarm Clock
- No modo de exibição normal, pressione o botão DEFINIR button twice to enter alarm setting mode. The alarm hour will flash.
- Use o MÁX/MÍN button to adjust the alarm hour. Press DEFINIR to confirm and move to alarm minutes.
- Use o MÁX/MÍN button to adjust the alarm minutes. Press DEFINIR para confirmar.
- Para ativar/desativar o alarme, pressione o DENTRO/FORA button while in alarm setting mode. An alarm icon will appear/disappear on the display.
- Imprensa DEFINIR Para sair do modo de configuração de alarme.
7. Manutenção
- Limpe o dispositivo regularmente com um pano macio e seco. Não utilize produtos de limpeza abrasivos ou solventes.
- If the display becomes dim or the device functions erratically, replace the battery.
- Quando não estiver em uso por longos períodos, remova a bateria para evitar vazamentos.
8. Solução De Problemas
- Nenhuma exibição: Check battery installation and ensure polarity is correct. Replace with a new AAA battery if necessary.
- Leituras imprecisas: Ensure the device is placed away from direct heat sources, cold drafts, or direct sunlight. For outdoor temperature, ensure the probe is correctly positioned and protected.
- Botões não respondem: Remove and reinsert the battery to perform a soft reset. If the issue persists, replace the battery.
9. Especificações
| Recurso | Especificação |
|---|---|
| Materiais | abdômen |
| Cor | Amarelo |
| Faixa de temperatura interna | -10 ° C ~ + 50 ° C (14 ° F ~ 122 ° F) |
| Faixa de temperatura externa | -50°C ~ +70°C (-58°F ~ +158°F) |
| Precisão da temperatura | ±2°C |
| Resolução de temperatura | 0.1°C (0.1°F) |
| Faixa de medição de umidade | 20%RH - 99%RH |
| Precisão da medição de umidade | ± 5% RH |
| Resolução de Umidade | 1% UR |
| Freeze Point Alarm | -1°C ~ 4°C |
| Intervalo do calendário | 1999/1/1 - 2048/12/31 |
| Bateria | 1 x pilhas AAA 1.5V (não incluídas) |
| Dimensões do produto | 10.8 x 10 x 2.2 cm (4.25 x 3.93 x 0.86 polegadas) |
| Peso do produto | 126g |

This image provides a visual representation of the Smart Sensor AR867's dimensions, showing its length, width, and thickness.
10. Garantia e Suporte
This product comes with a standard manufacturer's warranty against defects in materials and workmanship. For specific warranty details, please refer to the documentation provided with your purchase or contact your retailer. For technical support or inquiries, please reach out to the customer service department of your place of purchase.