پاور اې اډوانtage Wireless Controller for Nintendo Switch 2 - Mario & Yoshi
Model: NSGP0569-01V
پیژندنه
This manual provides comprehensive instructions for the PowerA Advantage Wireless Controller, designed for use with the Nintendo Switch family of devices. It covers setup, operation, maintenance, and troubleshooting to ensure optimal performance and longevity of your controller.
کلیدي ځانګړتیاوې
Hall Effect Modules: Equipped with contact-free magnetic sensors in the thumbsticks to prevent stick drift, offering smoother control, enhanced precision, and increased longevity.
Advanced Gaming Buttons: Two mappable buttons can be programmed on the fly during gameplay without needing to access system settings.
Intuitive Motion Controls: Experience fluid and responsive motion controls for aiming, steering, flying, and other in-game actions.
C تڼۍ: Provides quick access to GameChat features.
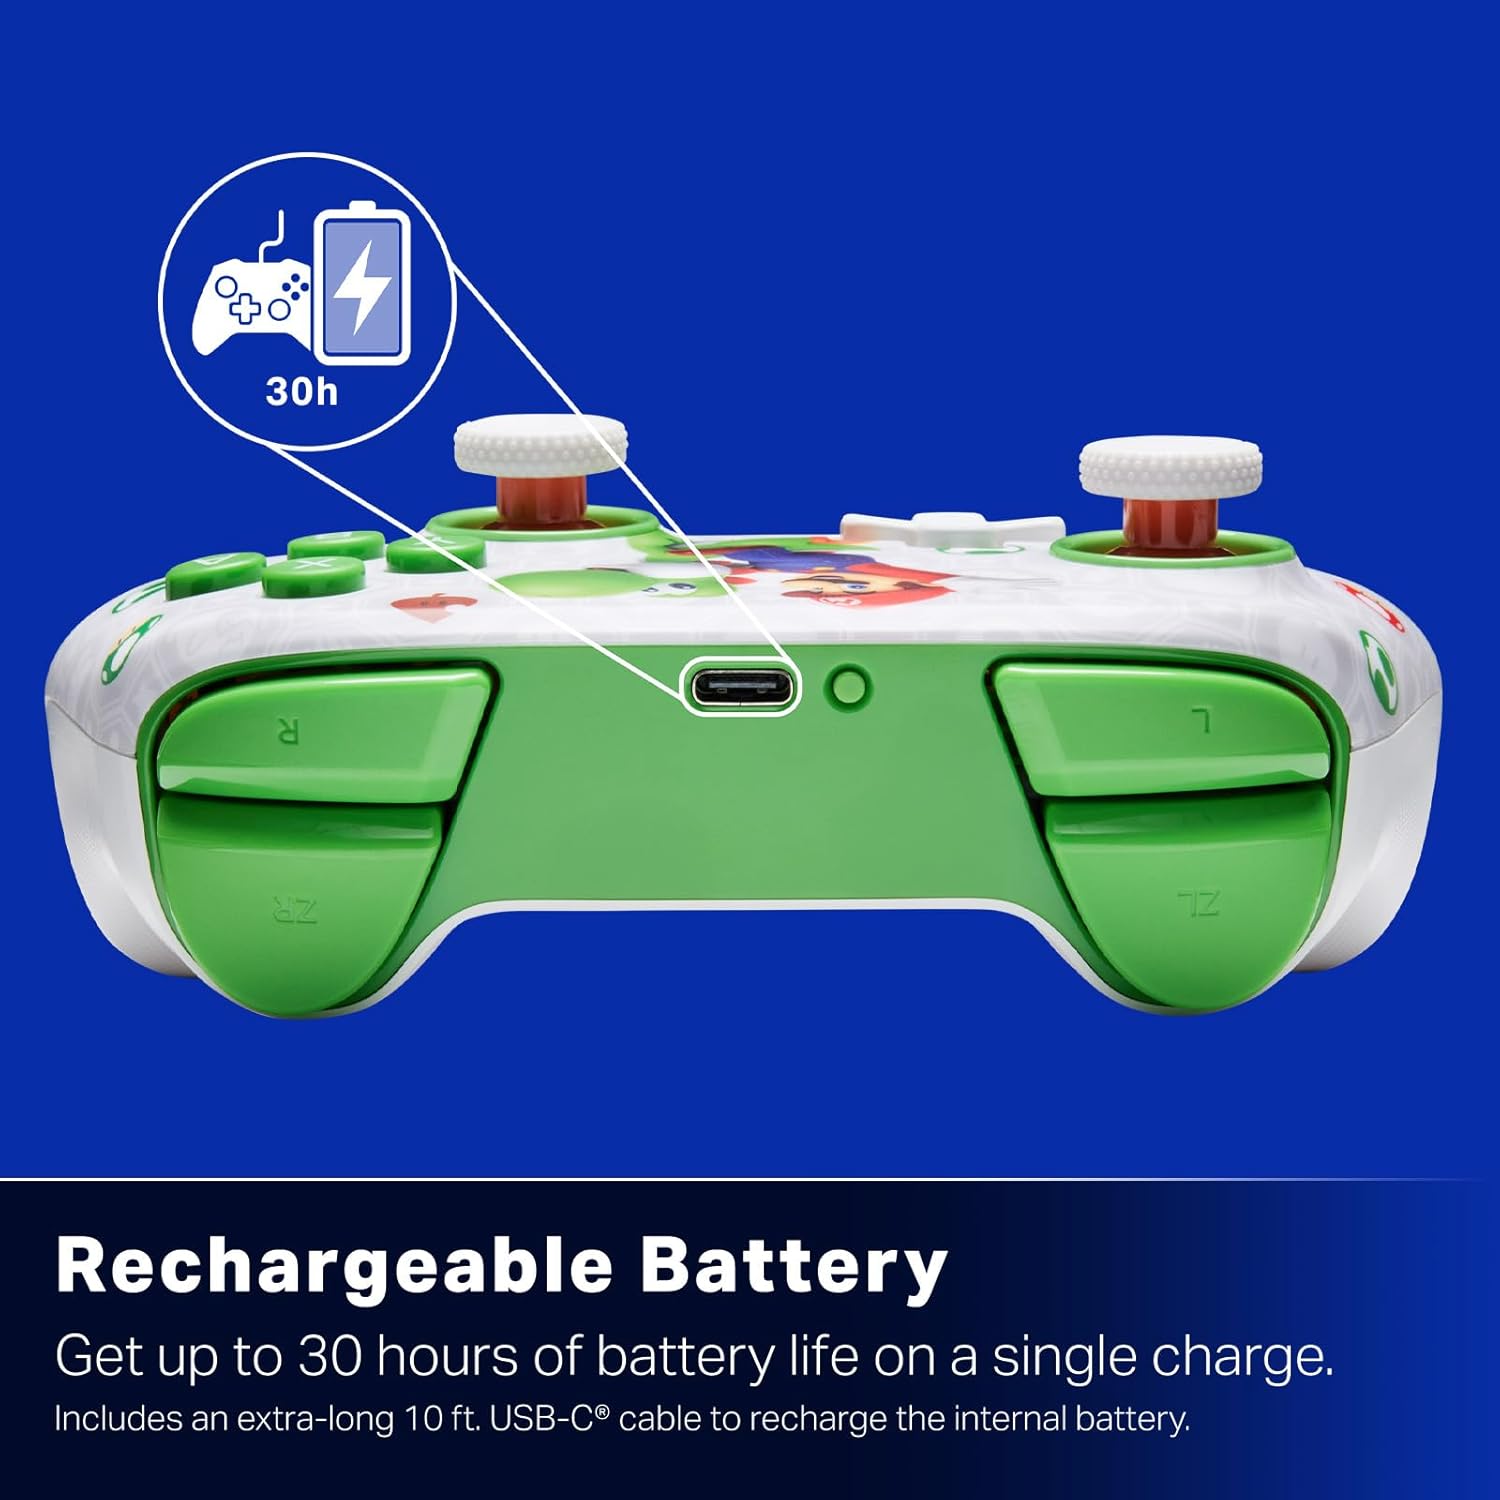
د چارج وړ بیټرۍ: Offers up to 30 hours of gameplay on a single charge. Includes a 10 ft. (3m) USB-C cable for recharging.
ارګونومیک ډیزاین: Crafted for comfort during extended gaming sessions, utilizing cutting-edge ergonomics and high-quality materials.
Nintendo Family Compatibility: Compatible with Nintendo Switch 2, Nintendo Switch, Nintendo Switch – OLED Model, and Nintendo Switch Lite.
رسمي جواز: PowerA products undergo rigorous testing by Nintendo to ensure compatibility and quality.
د تنظیم کولو لارښوونې
۱. ابتدايي چارج کول
Before first use, fully charge your PowerA Advantage Wireless Controller. Connect the included 10 ft. (3m) USB-C cable to the controller's USB-C port and the other end to a powered USB port on your Nintendo Switch dock or a USB wall adapter.
Figure 1: Controller connected via USB-C for charging, highlighting the rechargeable battery feature.
۱. د نینټینډو سویچ سره جوړه کول
ډاډ ترلاسه کړئ چې ستاسو د نینټینډو سویچ کنسول فعال دی او وروستي سیسټم سافټویر ته تازه شوی دی.
د کور مینو څخه ، غوره کړئ کنټرولونکي، بیا گرفت / نظم بدل کړئ.
On the PowerA Advantage Wireless Controller, press and hold the د SYNC تڼۍ located on the top edge of the controller for at least three seconds. The player indicator LEDs on the bottom of the controller will begin to flash.
Once the controller successfully pairs, the player indicator LED(s) corresponding to the controller number will remain lit.
فشار ورکړئ يوه ت .ۍ to confirm and exit the pairing screen.
For subsequent uses, simply press the HOME button on the controller to wake it up and automatically reconnect to your Switch console.
عملیاتي لارښوونې
بنسټیز کنټرولونه
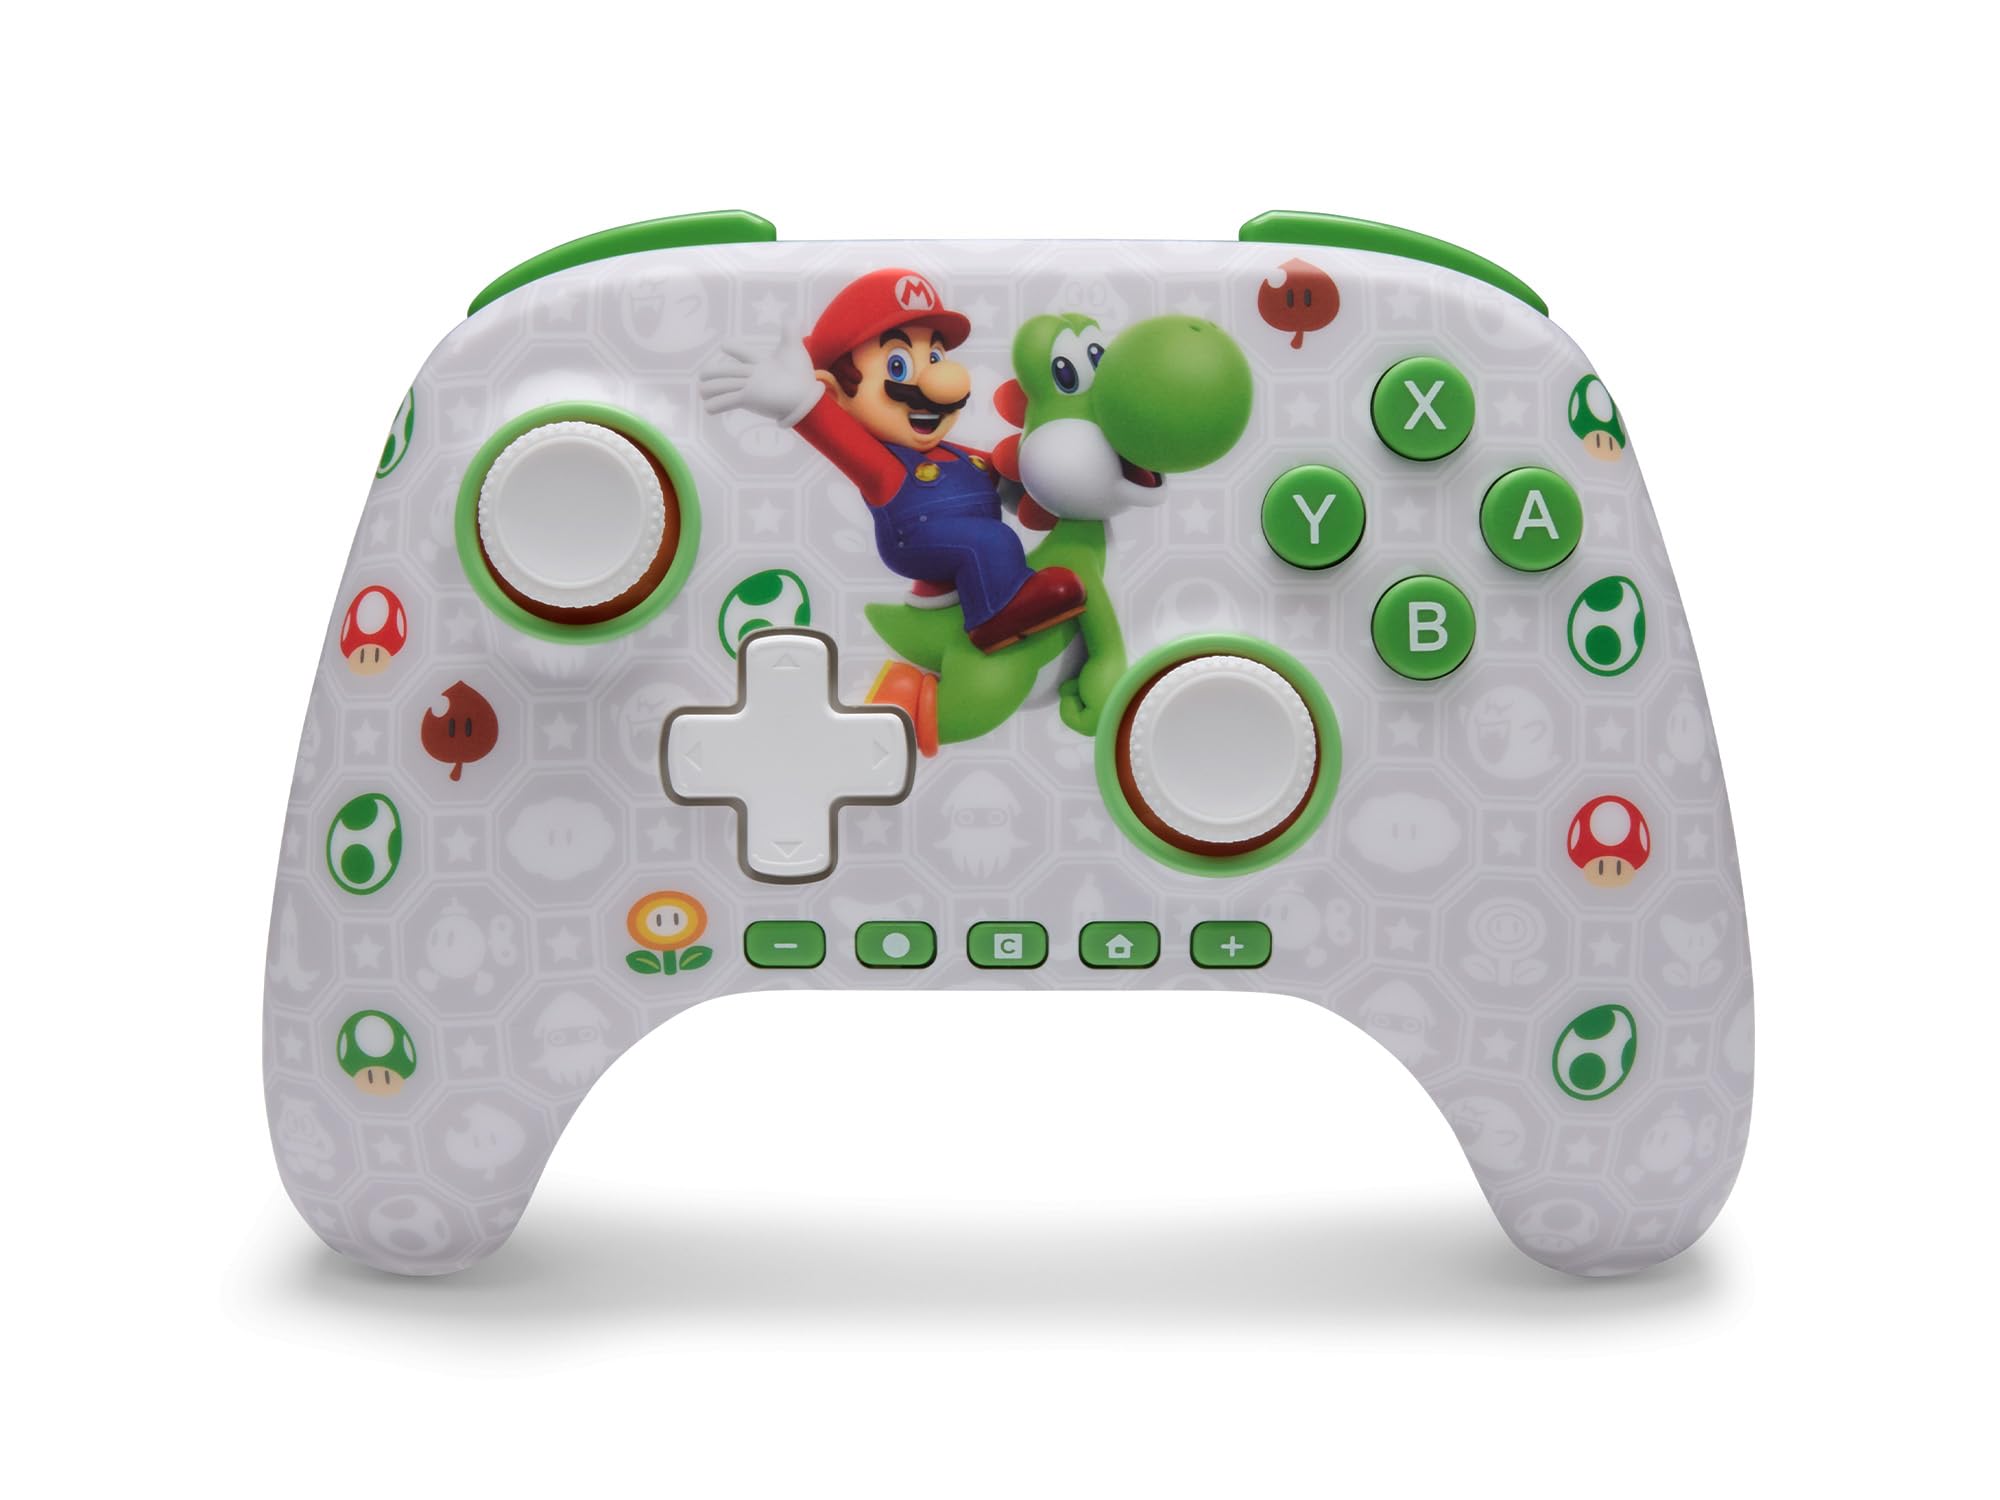
د پاور اې اډوانtage Wireless Controller features standard Nintendo Switch button layouts, including A, B, X, Y buttons, L/R and ZL/ZR shoulder buttons, a D-pad, and dual analog sticks. Familiarize yourself with these controls for general gameplay.
شکل 2: مخکی view of the PowerA Advantage Wireless Controller, highlighting the Mario and Yoshi design and button layout.
Advanced Gaming Buttons (AGB)
The controller includes two mappable Advanced Gaming Buttons (AGR and AGL) on the back. These buttons can be assigned to replicate any other button on the controller for quick access during gameplay.
فشار ورکړئ Program Button (PRGM) on the back of the controller. The Program LED will flash.
فشار ورکړئ Advanced Gaming Button (AGR or AGL) you wish to map. The Program LED will flash rapidly.
فشار ورکړئ تڼۍ you want to assign to the Advanced Gaming Button (e.g., A, B, X, Y, L, R, ZL, ZR, D-pad directions). The Program LED will stop flashing, indicating successful mapping.
To clear a mapped button, repeat steps 1-2, then press the د پروګرام تڼۍ بیا
Figure 3: Advanced Gaming Buttons (AGB) on the back of the controller, with an illustration of mappable functions.
د حرکت کنټرولونه
The controller supports motion controls, allowing for intuitive interaction in compatible games. These controls are automatically enabled when supported by the game.
Figure 4: Controller demonstrating motion control capabilities through tilting.
C Button (GameChat)
The dedicated C Button provides quick access to GameChat features in supported titles, enhancing your multiplayer experience.
Figure 5: The 'C' button, used for GameChat features.
ساتنه
پاکول: د کنټرولر پاکولو لپاره نرم، وچ ټوکر وکاروئ. د سختو کیمیاوي موادو یا کثافاتو موادو کارولو څخه ډډه وکړئ.
ذخیره کول: کنټرولر په یخ او وچ ځای کې د مستقیم لمر وړانګو او سختې تودوخې څخه لرې وساتئ.
Verify the Nintendo Switch console is updated to the latest system software.
Repeat the pairing process (see "Pairing with Nintendo Switch" in Setup Instructions).
If issues persist, try restarting both the controller and the Nintendo Switch console.
Stick Drift
د پاور اې اډوانtage Controller features Hall Effect modules designed to prevent stick drift. If you experience any unintended input, ensure the controller's firmware is up to date (check PowerA's official webد تازه معلوماتو لپاره سایټ).
Recalibrate the joysticks through the Nintendo Switch system settings if necessary (System Settings > Controllers and Sensors > Calibrate Control Sticks).
د بیټرۍ لنډ ژوند
Ensure the controller is fully charged before each use.
Battery life can vary based on game usage and features enabled.
Use the provided USB-C cable for optimal charging.
مشخصات
فیچر
تفصیل
د ماډل شمیره
NSGP0569-01V
ارتباط
Wireless (Bluetooth), USB-C (for charging)
مطابقت لرونکې وسیلې
Nintendo Switch 2, Nintendo Switch, Nintendo Switch – OLED Model, Nintendo Switch Lite
د بیټرۍ ژوند
تر 30 ساعتونو پورې (د کارونې سره توپیر لري)
د کیبل اوږدوالی
10 ft. (3m) USB-C
ابعاد
5.88 x 4.21 x 2.36 انچه
وزن
0.66 پونډه
ځانګړي ځانګړتیاوې
Hall Effect Thumbsticks, Mappable Advanced Gaming Buttons, Motion Controls, C Button
تضمین او ملاتړ
د پاور اې اډوانtage Wireless Controller comes with a دوه کاله محدود تضمین. For detailed warranty information, product support, or to register your product, please visit the official PowerA webپه سایټ کې PowerA.com/Support.
Figure 6: Official Nintendo Licensed Product badge, ensuring quality and compatibility.
Ask a question about this manual
Ask about setup, troubleshooting, compatibility, parts, safety, or missing instructions. Manuals+ will review the question and use this page’s manual context to help answer it.