
1. Wprowadzenie
This manual provides essential information for the proper handling, installation, and testing of your Ygpmoiki LCD Touch Screen Digitizer Assembly. This replacement part is designed for the Samsung Galaxy A07 4G, specifically compatible with models SM-A075F, SM-A075F/DS, SM-A075M, and SM-A075M/DS.
Ważne środki ostrożności: The screen panel contact is highly fragile. Installation of this component should only be performed by professional personnel. Prior to any permanent installation, the display must be thoroughly tested.
2. Koniec produktuview
The Ygpmoiki LCD Touch Screen Digitizer Assembly is a complete replacement unit for your device's display. It includes the LCD panel, touch screen digitizer, and associated flex cables, designed to resolve issues such as poor touch response, abnormal display, or a broken screen.
2.1 Zawartość opakowania
- 1x Ygpmoiki LCD Touch Screen Digitizer Assembly for Samsung Galaxy A07 4G (6.7 inches)
- 1x Set of Installation Tools
2.2 Zgodność
This display assembly is compatible with the following Samsung Galaxy A07 4G models:
- SM-A075F
- SM-A075F/DS
- SM-A075M
- SM-A075M/DS
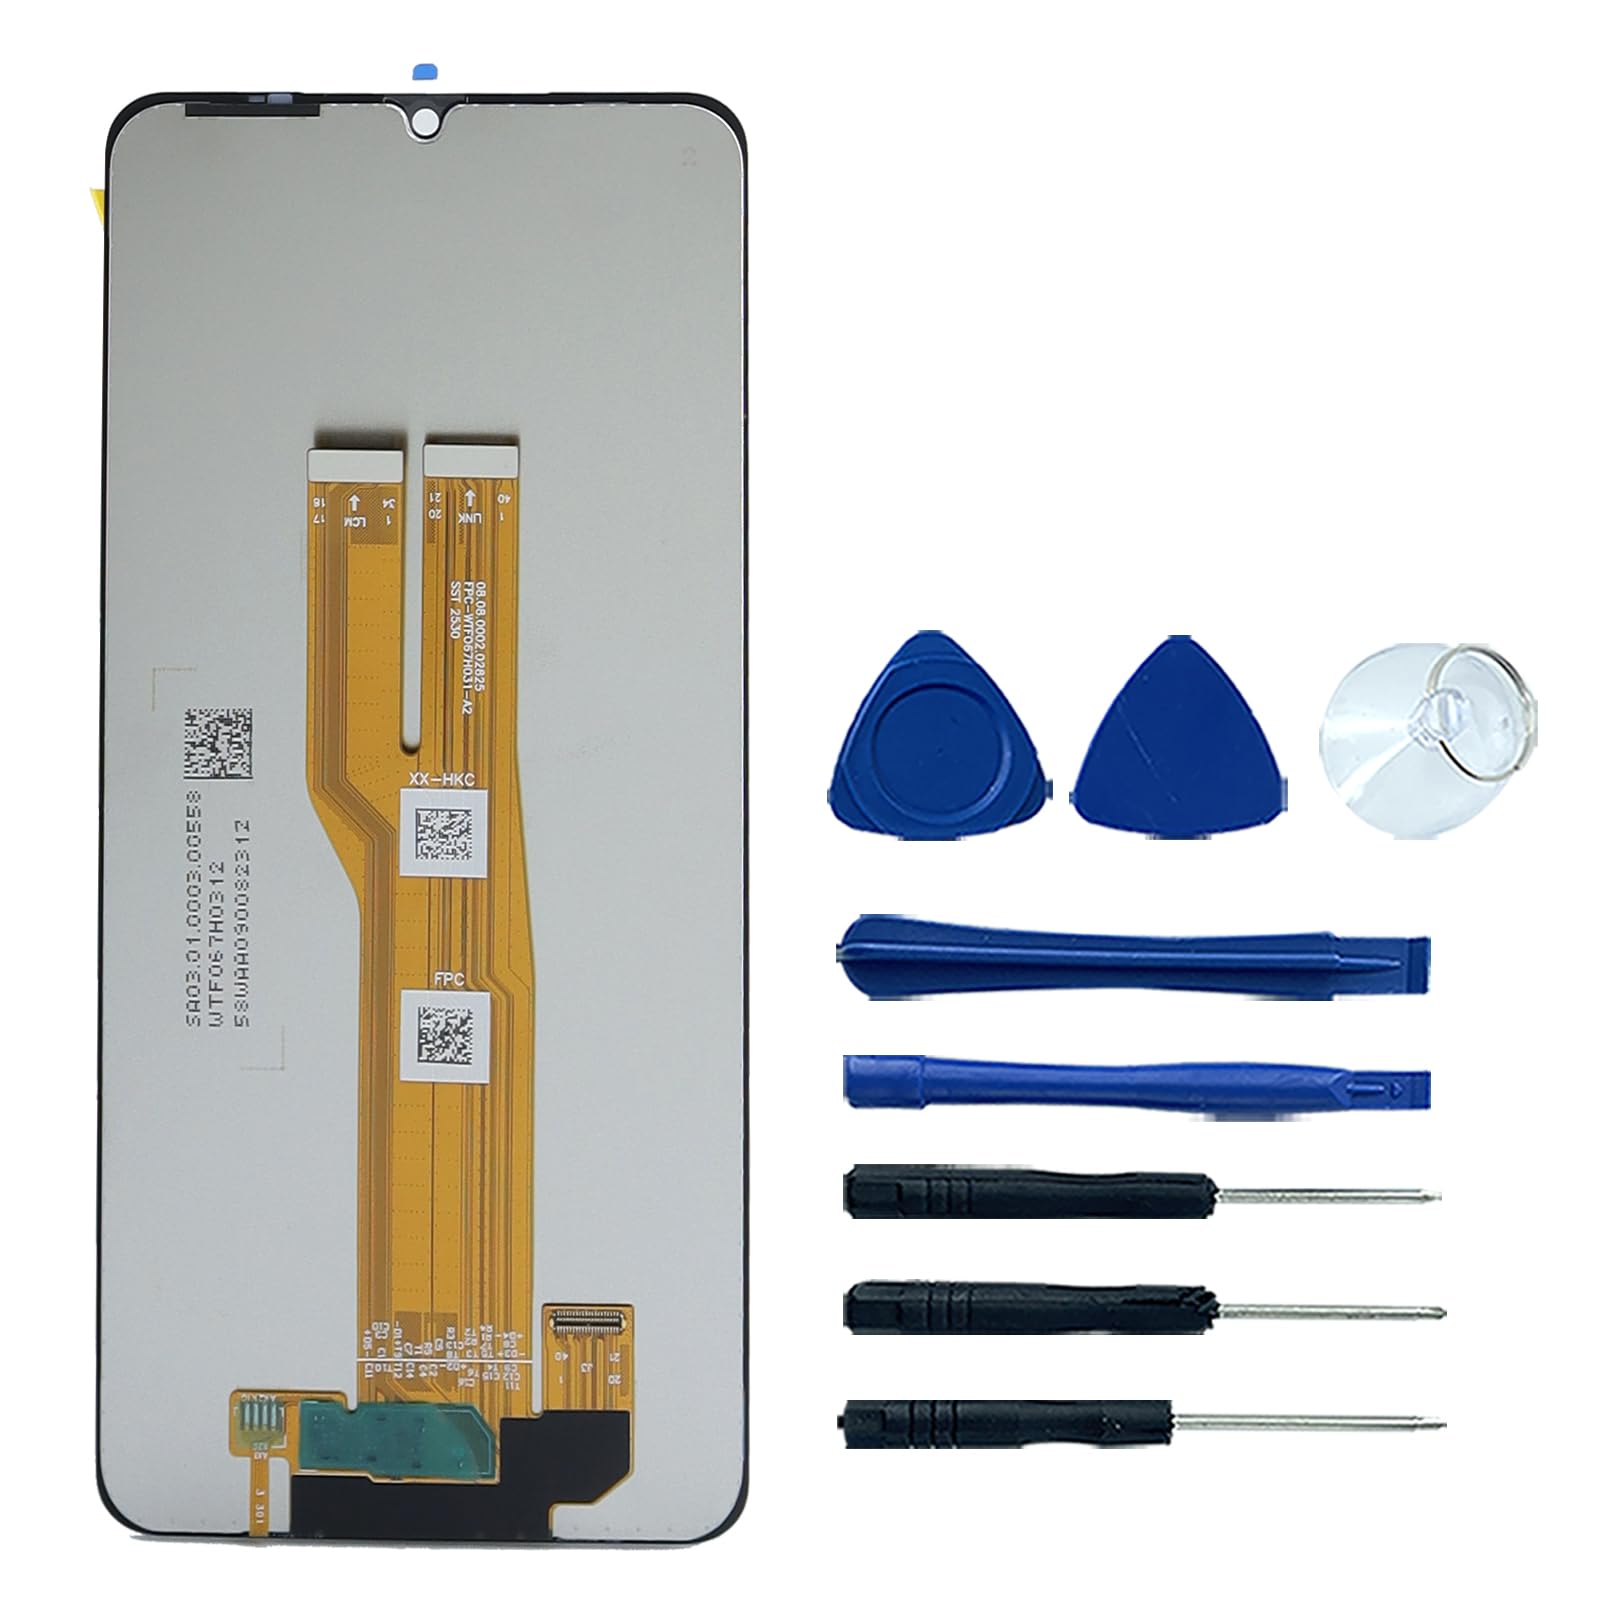
Obraz 2.1: Przód view of the Ygpmoiki LCD Touch Screen Digitizer Assembly, showing the full display and notch.
3. Konfiguracja i instalacja
The display assembly is provided without a front frame. Professional installation is strongly recommended due to the delicate nature of the components.
3.1 Testowanie przed instalacją
Before proceeding with full installation, it is crucial to test the new display assembly. This step ensures the component is fully functional and prevents potential issues after assembly.
- Odłącz zasilanie: Ensure the device is completely powered off and the battery is disconnected before handling any internal components.
- Podłącz kable elastyczne: Carefully connect the display's flex cables to the corresponding connectors on the device's motherboard. Do not apply excessive force.
- Temporary Power On: Reconnect the battery and temporarily power on the device.
- Funkcjonalność testu: Check the display for any abnormalities such as dead pixels, lines, color distortions, or flickering. Test the touch screen responsiveness across the entire surface.
- Wyłączone: If the display functions correctly, power off the device and disconnect the battery before proceeding with the full installation. If issues are observed, do not proceed with installation and contact support.

Image 3.1: Close-up of the display's flex cables, which connect to the motherboard for testing and installation.

Obraz 3.2: Tył view of the display assembly, highlighting the delicate flex cable connections.
4. Obsługa (po instalacji)
Once the display assembly is fully installed, the device should operate as normal. The LCD provides visual output, and the digitizer enables touch input.
4.1 Pierwsze włączenie zasilania
After completing the installation, power on your device. The screen should display the boot-up sequence clearly. Verify that all touch functions are working correctly by navigating through menus and typing.
4.2 Funkcjonalność ekranu dotykowego
Test the touch screen by opening an application that allows drawing or precise touch input. Ensure there are no 'dead spots' or areas where touch input is unresponsive or inaccurate.
5. Konserwacja
To ensure the longevity and optimal performance of your new display, follow these general maintenance guidelines:
- Czyszczenie: Użyj miękkiej, niepozostawiającej włókien ściereczki, lekkoampDelikatnie przetrzyj ekran wodą lub specjalnym środkiem do czyszczenia ekranów. Unikaj stosowania silnych środków chemicznych i materiałów ściernych.
- Ochrona: Rozważ użycie folii ochronnej i etui ochronnego, aby zabezpieczyć ekran przed zarysowaniami i uderzeniami.
- Unikaj presji: Nie należy wywierać zbyt dużego nacisku na ekran, gdyż może to spowodować uszkodzenie panelu LCD lub digitizera.
- Temperatura: Avoid exposing the device to extreme temperatures, which can affect screen performance and lifespan.
6. Rozwiązywanie Problemów
Jeżeli po instalacji wystąpią problemy, należy rozważyć wykonanie następujących czynności rozwiązywania problemów:
- Brak wyświetlania lub wyświetlanie nieprawidłowe:
- Sprawdź, czy wszystkie kable elastyczne są solidnie podłączone do płyty głównej.
- Sprawdź, czy na kablach elastycznych lub złączach nie ma widocznych uszkodzeń.
- Re-perform the pre-installation test if possible.
- Niereagujący ekran dotykowy:
- Verify the touch screen flex cable is properly seated.
- Uruchom ponownie urządzenie.
- Ensure there is no debris or liquid between the screen and your finger/stylus.
- Flickering or Discolored Screen:
- Sprawdź, czy połączenia nie są luźne.
- Ensure the display is not under physical stress from the device's frame.
If these steps do not resolve the issue, it is recommended to seek assistance from a qualified technician.
7. Specyfikacje
| Typ przedmiotu | LCD Touch Screen Digitizer Assembly |
| Typ wyświetlacza | LCD |
| Rozmiar ekranu | 6.7 cali (17 cm) |
| Rezolucja | 720 x 1600 pikseli |
| Kolor | Czarny |
| Wymiary produktu | Wymiary 16.26 x 73.66 x 0.76 cm |
| Waga przedmiotu | 110 gramów |
| Numer modelu | for Samsung Galaxy A07 4G SM-A075F |
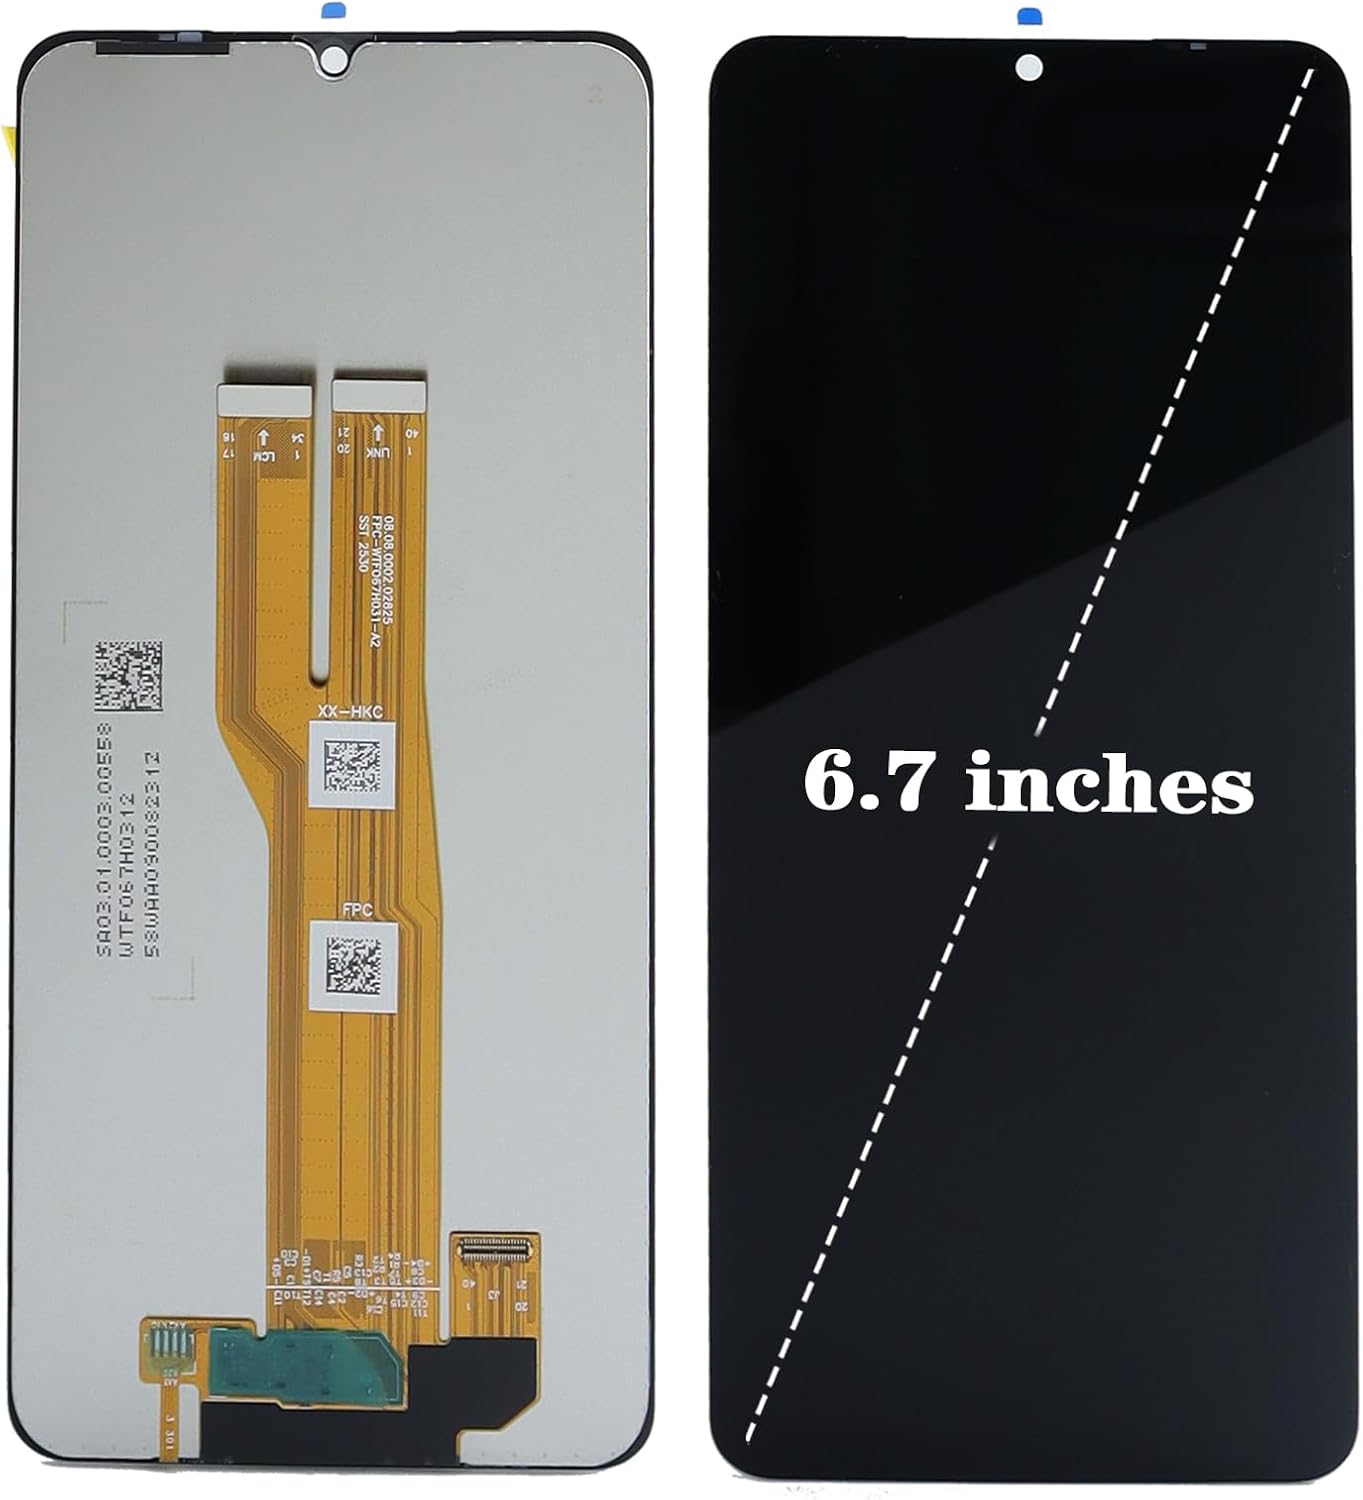
Image 7.1: The display assembly, illustrating its 6.7-inch diagonal screen size.
8. Gwarancja i wsparcie
Specific warranty terms for this product are provided by the seller or manufacturer at the time of purchase. Please refer to your purchase documentation or contact the seller directly for detailed warranty information.
For technical support or assistance with installation, please contact the retailer or manufacturer from whom you purchased this product. Ensure you have your purchase details and product model number readily available.