
1. Introduction
This instruction manual provides comprehensive guidance for the safe and effective use of your Elna eXplore 130 Mechanical Sewing Machine. Please read this manual thoroughly before operating the machine to ensure proper setup, operation, and maintenance. Retain this manual for future reference.
2. Important Safety Instructions
When using an electrical appliance, basic safety precautions should always be followed, including the following:
- Read all instructions before using this sewing machine.
- Keep fingers away from all moving parts. Special care is required around the sewing machine needle.
- Always use the proper needle plate. The wrong plate can cause the needle to break.
- Do not use bent needles.
- Turn the sewing machine off when making any adjustments in the needle area, such as threading the needle, changing the needle, threading the bobbin, or changing the presser foot.
- Always unplug the sewing machine from the electrical outlet when removing covers, lubricating, or when making any other user servicing adjustments mentioned in the instruction manual.
- Never drop or insert any object into any opening.
- Do not use outdoors.
- Do not operate where aerosol (spray) products are being used or where oxygen is being administered.
- To disconnect, turn all controls to the off position, then remove the plug from the outlet.
- Do not unplug by pulling on the cord. To unplug, grasp the plug, not the cord.
3. Product Overview
The Elna eXplore 130 is a mechanical sewing machine designed for various sewing tasks, offering a selection of utility, stretch, and decorative stitches. It features a lightweight and portable design.
Key Features:
- 23 Built-in utility, stretch, and decorative stitches.
- One four-step buttonhole.
- Front Loading Vertical Oscillating Bobbin system.
- Free-arm sewing capability by removing the front accessory tray.
- Maximum stitch width: 5mm.
- Maximum stitch length: 4mm.
- Maximum sewing speed: 800 stitches per minute (SPM).
- LED lighting for improved visibility.
- Convenient dial system for stitch pattern, length, and width selection.
Included Components:
The following accessories are included with your Elna eXplore 130 sewing machine:
- Presser Feet: Standard Foot A, Zipper Foot E, Blind Hem Foot G, Buttonhole Foot.
- Darning plate.
- Bobbins (x3).
- Seam Ripper.
- Needle Set.
- Screwdriver.
- Felt.
- Foot Controller.
- Instruction Manual (this document).
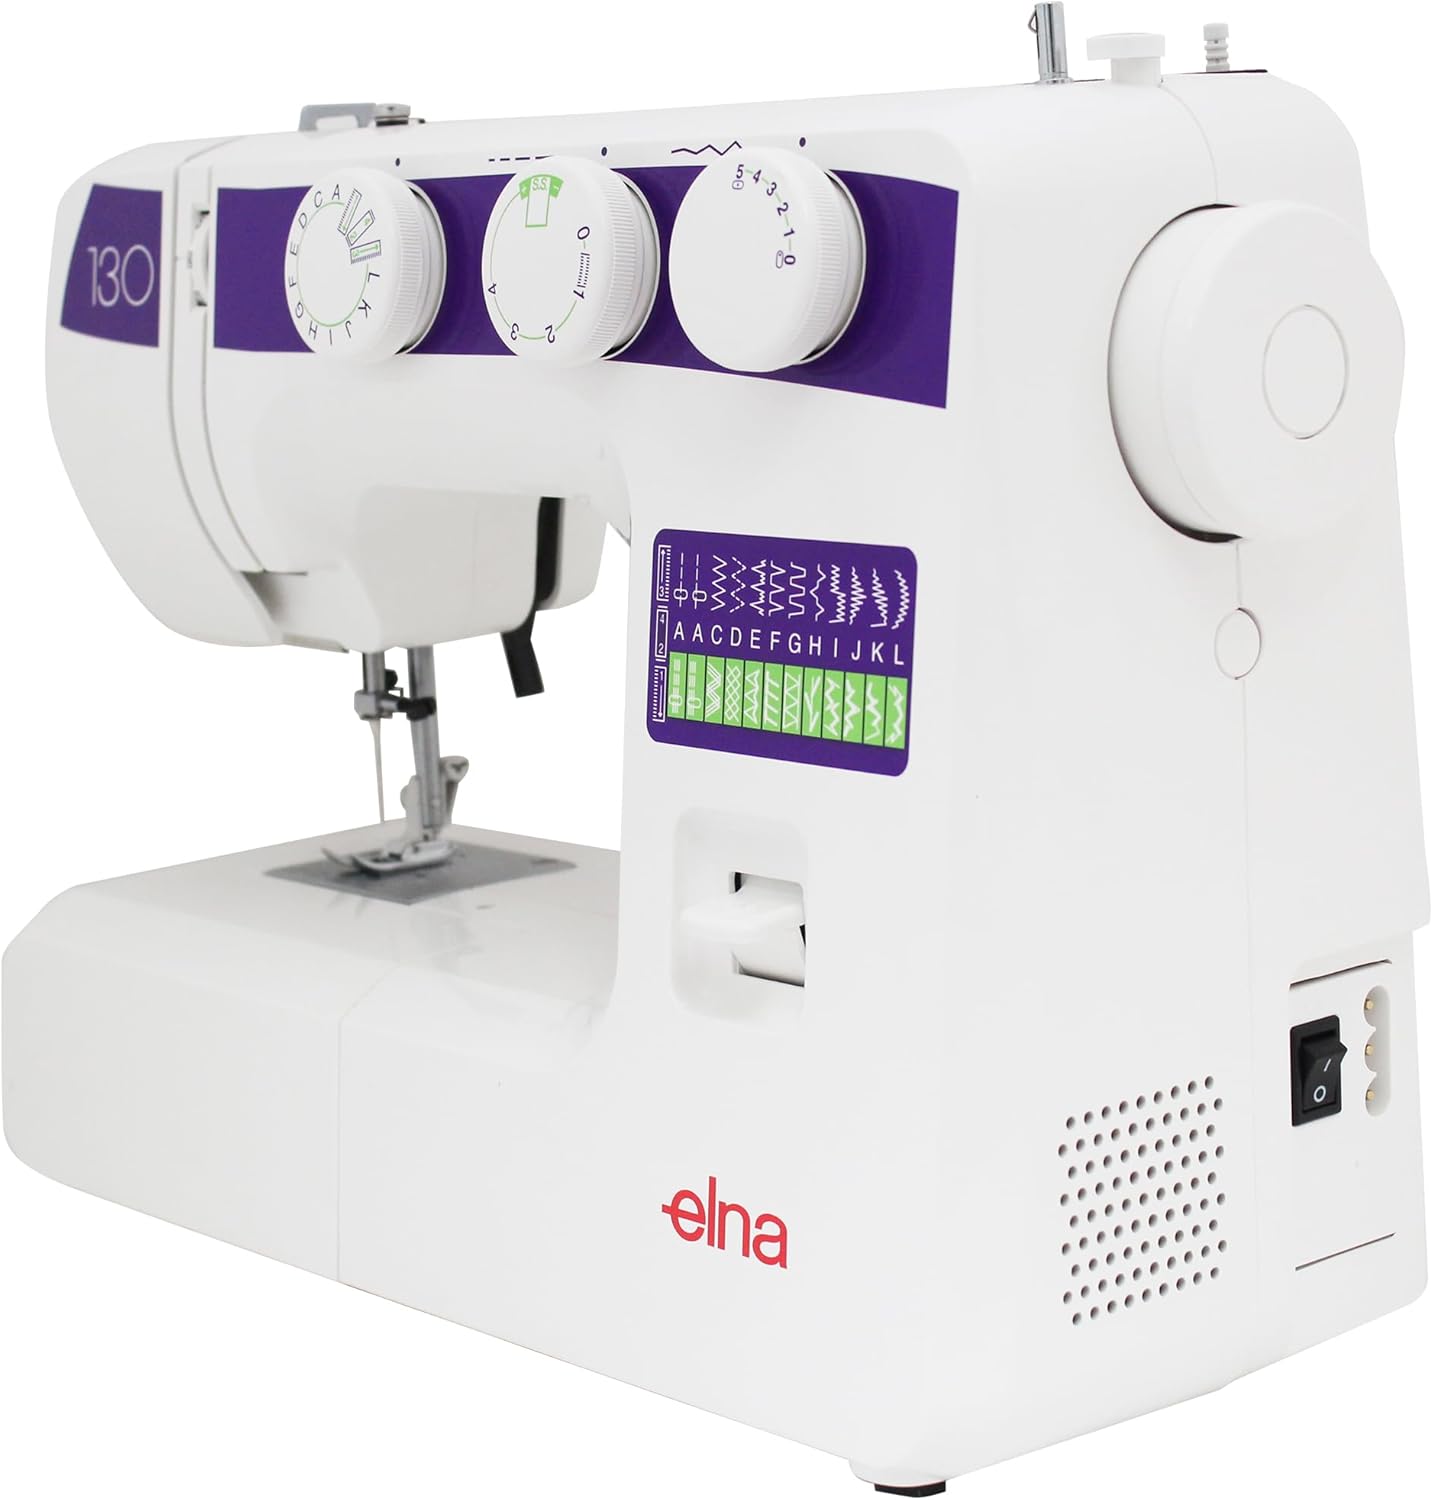
Machine Views:




4. Setup
4.1 Unpacking and Placement
- Carefully remove the machine from its packaging.
- Place the machine on a stable, flat surface.
- Ensure adequate lighting and space for comfortable operation.
4.2 Power Connection
- Connect the foot controller plug to the machine's power socket.
- Insert the power cord plug into a suitable electrical outlet.
- Ensure the power switch on the machine is in the "OFF" position before connecting.
4.3 Winding the Bobbin
- Place an empty bobbin onto the bobbin winder spindle.
- Guide the thread from the spool pin through the upper thread guide and around the bobbin winding tension disc.
- Wrap the thread a few times around the bobbin.
- Push the bobbin winder spindle to the right.
- Gently press the foot controller to start winding. Stop when the bobbin is full.
- Cut the thread and push the bobbin winder spindle back to the left.
4.4 Inserting the Bobbin
- Open the bobbin cover plate located on the free arm.
- Insert the wound bobbin into the bobbin case, ensuring the thread unwinds in the correct direction (usually counter-clockwise).
- Pull the thread through the tension spring and into the bobbin case slot.
- Close the bobbin cover plate.
4.5 Threading the Upper Thread
- Raise the presser foot lifter.
- Place a spool of thread on the spool pin.
- Guide the thread through the upper thread guide.
- Follow the numbered threading path down through the tension discs and up to the take-up lever.
- Thread the take-up lever from right to left.
- Continue guiding the thread down through the remaining guides to the needle.
- Thread the needle from front to back.
- Pull about 6 inches of thread through the needle eye.
5. Operating Instructions
5.1 Stitch Selection
- Turn the Stitch Pattern Dial (leftmost dial) to select the desired stitch. Refer to the stitch pattern guide on the machine for available options.
- Adjust the Stitch Length Dial (middle dial) to set the desired stitch length (0-4mm). For stretch stitches, use the preset length indicated by the green mark.
- Adjust the Stitch Width Dial (rightmost dial) to set the desired stitch width (0-5mm).
5.2 Basic Sewing
- Place the fabric under the presser foot.
- Lower the presser foot.
- Turn the handwheel towards you to bring the needle down into the fabric, then up again, pulling the bobbin thread through the needle plate hole.
- Pull both upper and bobbin threads to the back under the presser foot.
- Gently press the foot controller to begin sewing. Guide the fabric smoothly.
- To secure a seam, press the reverse lever for a few stitches at the beginning and end of your seam.
- When finished, raise the needle to its highest position, lift the presser foot, and pull the fabric away from the machine. Cut the threads using the thread cutter.
5.3 Using the Free Arm
To use the free arm for sewing tubular items like sleeves, cuffs, or trouser hems, simply slide off the accessory storage tray located at the front of the machine. This exposes the narrow free arm.
5.4 Four-Step Buttonhole
The Elna eXplore 130 features a four-step buttonhole function.
- Attach the Buttonhole Foot.
- Mark the buttonhole position on your fabric.
- Set the Stitch Pattern Dial to the first buttonhole step (indicated by a square symbol).
- Sew the first side of the buttonhole.
- Adjust the Stitch Pattern Dial to the second step for the bar tack.
- Adjust to the third step for the second side, and the fourth step for the final bar tack.
- Carefully cut open the buttonhole using a seam ripper.
6. Maintenance
Regular maintenance ensures the longevity and optimal performance of your sewing machine.
6.1 Cleaning the Machine
- Always unplug the machine before cleaning.
- Remove the needle, presser foot, and needle plate.
- Use the provided brush to remove lint and dust from the bobbin case area and feed dogs.
- Wipe the exterior of the machine with a soft, dry cloth. Do not use liquid cleaners.
6.2 Changing the Needle
- Raise the needle to its highest position.
- Loosen the needle clamp screw.
- Remove the old needle.
- Insert a new needle with the flat side facing the back, pushing it up as far as it will go.
- Tighten the needle clamp screw securely.
- Change needles regularly (after 8-10 hours of sewing) or if it becomes bent or dull.
7. Troubleshooting
This section addresses common issues you might encounter. For problems not listed here, please contact customer support.
| Problem | Possible Cause | Solution |
|---|---|---|
| Skipped Stitches | Incorrect needle size/type, bent needle, improper threading. | Change needle, re-thread machine, ensure correct needle for fabric. |
| Thread Breaking (Upper) | Incorrect upper tension, improperly threaded, poor quality thread, bent needle. | Adjust tension, re-thread, use quality thread, change needle. |
| Thread Breaking (Bobbin) | Improperly wound bobbin, incorrect bobbin insertion, lint in bobbin case. | Rewind bobbin, re-insert bobbin correctly, clean bobbin case. |
| Fabric Not Feeding | Presser foot not lowered, feed dogs lowered, lint under needle plate. | Lower presser foot, raise feed dogs, clean under needle plate. |
| Machine Not Starting | Power cord not connected, power switch off, foot controller issue. | Check power connections, turn on switch, inspect foot controller. |
8. Specifications
| Feature | Detail |
|---|---|
| Brand | Elna |
| Model Number | EL130 |
| Type | Mechanical Sewing Machine |
| Stitch Count | 23 Built-in stitches |
| Buttonhole Type | Four-step |
| Bobbin Type | Front Loading Vertical Oscillating |
| Maximum Stitch Width | 5 mm |
| Maximum Stitch Length | 4 mm |
| Maximum Sewing Speed | 800 SPM |
| Lighting | LED |
| Power Source | Electric |
| Product Dimensions (D x W x H) | 6"D x 15.3"W x 11.6"H |
| Item Weight | 13 pounds |
| Material | Metal, Plastic |
| UPC | 732212411939 |
9. Warranty and Support
For information regarding your product's warranty, please refer to the warranty card included with your purchase or visit the official Elna website.
If you require technical assistance, have questions about operation, or need to order replacement parts, please contact Elna customer support.
- Elna Official Website: www.elna.com
- Elna USA Store on Amazon: Visit the Elna Store


