TP-Link XX530v
Instrukcja obsługi routera bezprzewodowego TP-Link XX530v AX3000 Wi-Fi 6 XPON
Model: XX530v
1. Wprowadzenie
This manual provides detailed instructions for setting up, operating, and maintaining your TP-Link XX530v AX3000 Wi-Fi 6 XPON Wireless Router. Please read this guide thoroughly to ensure proper installation and optimal performance of your device.
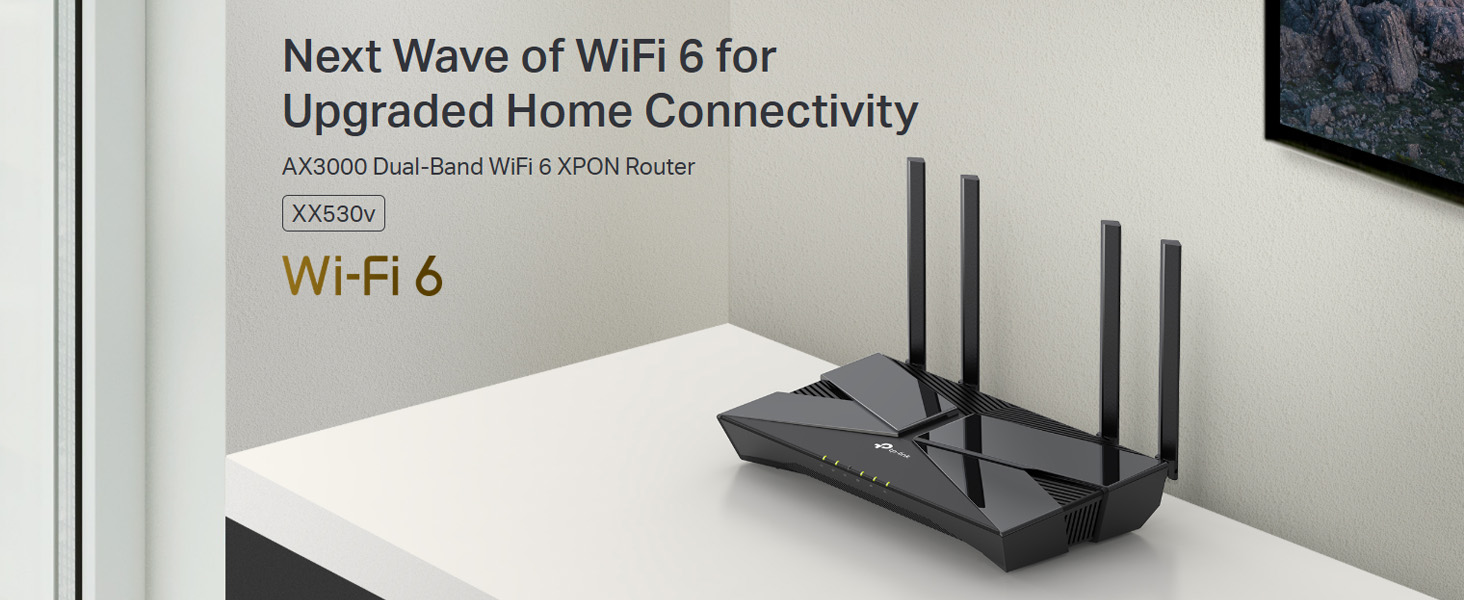
Image 1.1: The TP-Link XX530v AX3000 Wi-Fi 6 XPON Router, designed for enhanced home connectivity.
2. Zawartość opakowania
Sprawdź, czy w przesyłce znajdują się następujące elementy:
- TP-Link XX530v AX3000 Wi-Fi 6 XPON Router
- Kabel Ethernet RJ45
- Zasilacz
- Szybki przewodnik instalacji
3. Koniec sprzętuview
Familiarize yourself with the physical components of your router.
3.1 Panel przedni

Obraz 3.1: Przód view of the router, showing the LED indicators for power, internet, Wi-Fi, and LAN activity.
The front panel features LED indicators that display the router's status:
- Dioda LED zasilania: Wskazuje stan zasilania.
- Dioda internetowa: Wskazuje stan połączenia internetowego.
- Dioda Wi-Fi: Oznacza aktywność sieci bezprzewodowej.
- Diody LED sieci LAN: Wskazuje aktywność na portach sieci LAN.
3.2 Panel tylny

Obraz 3.2: Tył view of the router, highlighting the various ports and buttons for connectivity and control.
The rear panel includes various ports and buttons:
- Przycisk włączania/wyłączania zasilania: Aby włączyć lub wyłączyć router.
- Port zasilania: Podłączany do dostarczonego zasilacza.
- Port USB: Do podłączania urządzeń pamięci masowej USB lub kluczy 3G/4G.
- Porty LAN (1-4): Gigabit Ethernet ports for wired connections. One port also functions as a WAN port.
- Fiber Port (SC/APC): For connecting to the fiber optic network.
- VoIP Port: For connecting an analog phone for VoIP calls.
- Przycisk WPS/Reset: Press briefly for WPS, press and hold for factory reset.
4. Przewodnik konfiguracji
Follow these steps for initial setup of your TP-Link XX530v router.
4.1 Połączenie sprzętowe
- Wyłączone: Ensure your existing modem (if any) and the router are powered off.
- Podłącz kabel światłowodowy: Insert the SC/APC fiber optic cable from your Internet Service Provider (ISP) into the Fiber Port on the router. Ensure the connection is secure.
- Podłącz zasilacz: Connect the provided power adapter to the router's Power Port and plug it into a power outlet.
- Włączanie: Press the Power On/Off button to turn on the router. Wait for the Power and Internet LEDs to stabilize.
- (Opcjonalnie) Połączenie przewodowe: For initial configuration, connect your computer to one of the router's LAN ports using an Ethernet cable.
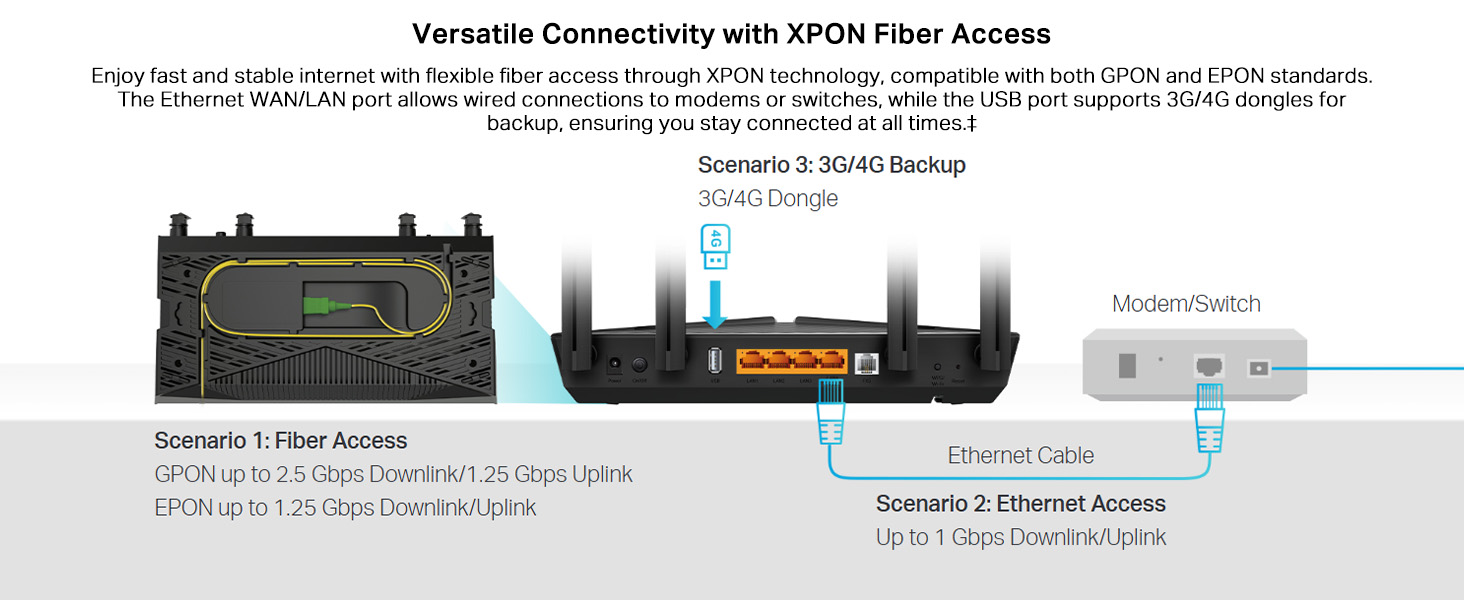
Image 4.1: Illustration of various connectivity options including fiber access, Ethernet access, and 3G/4G backup via the USB port.
4.2 Internet Configuration
The router supports both GPON and EPON standards for fiber access. Your ISP will provide the necessary connection details.
- Dostęp do strony zarządzania routerem: Otwórz web browser and enter the default access address (usually http://tplinkmodem.net or http://192.168.1.1).
- Login: Enter the username and password (default is usually 'admin' for both, or as specified on the router label).
- Uruchom szybką konfigurację: Follow the on-screen instructions of the Quick Setup Wizard to configure your internet connection. This typically involves selecting your connection type (e.g., PPPoE, Dynamic IP, Static IP) and entering ISP-provided details like username, password, and VLAN ID if required.
- Sprawdź połączenie: Once configured, check the Internet LED on the front panel. A solid green light indicates a successful internet connection.
4.3 Wi-Fi Network Setup
Your router comes with a default Wi-Fi network name (SSID) and password printed on the label at the bottom of the device. You can customize these settings.
- Access Wireless Settings: In the router's management page, navigate to the Wireless section.
- Zmień SSID: Modify the default Wi-Fi network names for both 2.4GHz and 5GHz bands to something memorable.
- Ustaw hasło: Create a strong, unique password for your Wi-Fi networks. WPA2/WPA3 Personal is recommended for security.
- Zapisz ustawienia: Apply the changes. Your devices will need to reconnect using the new Wi-Fi name and password.
5. Instrukcja obsługi
5.1 Dual-Band Wi-Fi 6
The XX530v supports Wi-Fi 6 (802.11ax) technology, offering faster speeds and improved efficiency across both 2.4GHz and 5GHz bands.
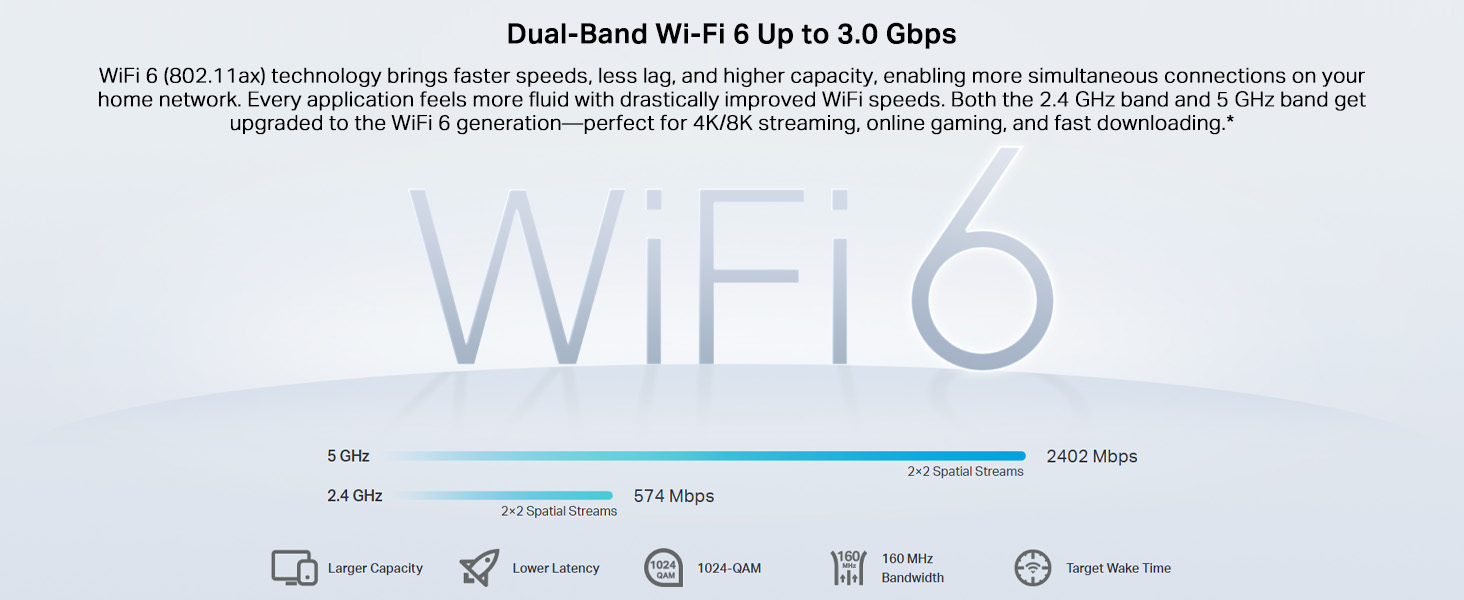
Image 5.1: Visual representation of the dual-band Wi-Fi 6 capabilities, showing 2.4 GHz and 5 GHz speeds.
- Pasmo 2.4 GHz: Provides wider coverage and is suitable for general internet use and older devices.
- Pasmo 5 GHz: Offers higher speeds and lower latency, ideal for streaming 4K/8K video, online gaming, and bandwidth-intensive tasks.
5.2 OFDMA and MU-MIMO
These technologies enhance network capacity and efficiency, allowing the router to communicate with multiple devices simultaneously.
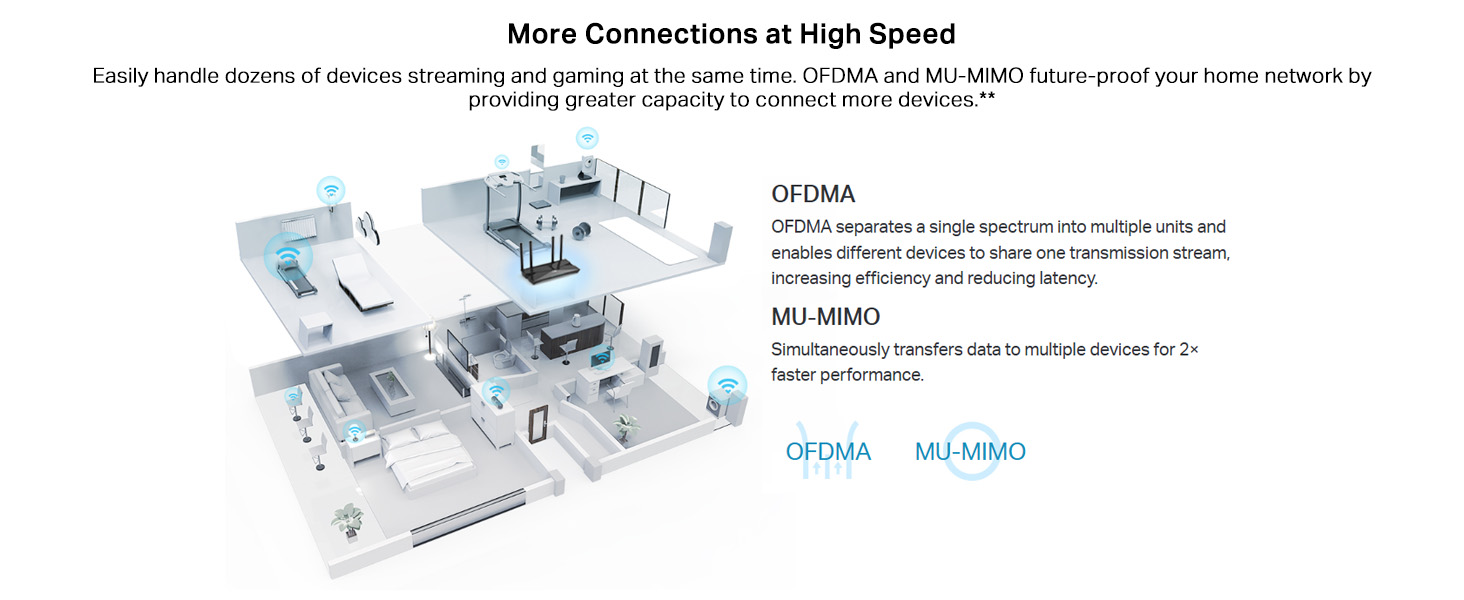
Image 5.2: An illustration detailing how OFDMA and MU-MIMO improve network efficiency and allow simultaneous data transmission to multiple devices.
- OFDMA: Divides a single channel into smaller sub-channels, enabling multiple devices to transmit data concurrently.
- Metoda MU-MIMO: Allows the router to send and receive data from several devices at the same time, improving overall throughput.
5.3 VoIP Calls
The XX530v integrates a high-performance phone system, supporting multiple VoIP accounts and various call features.
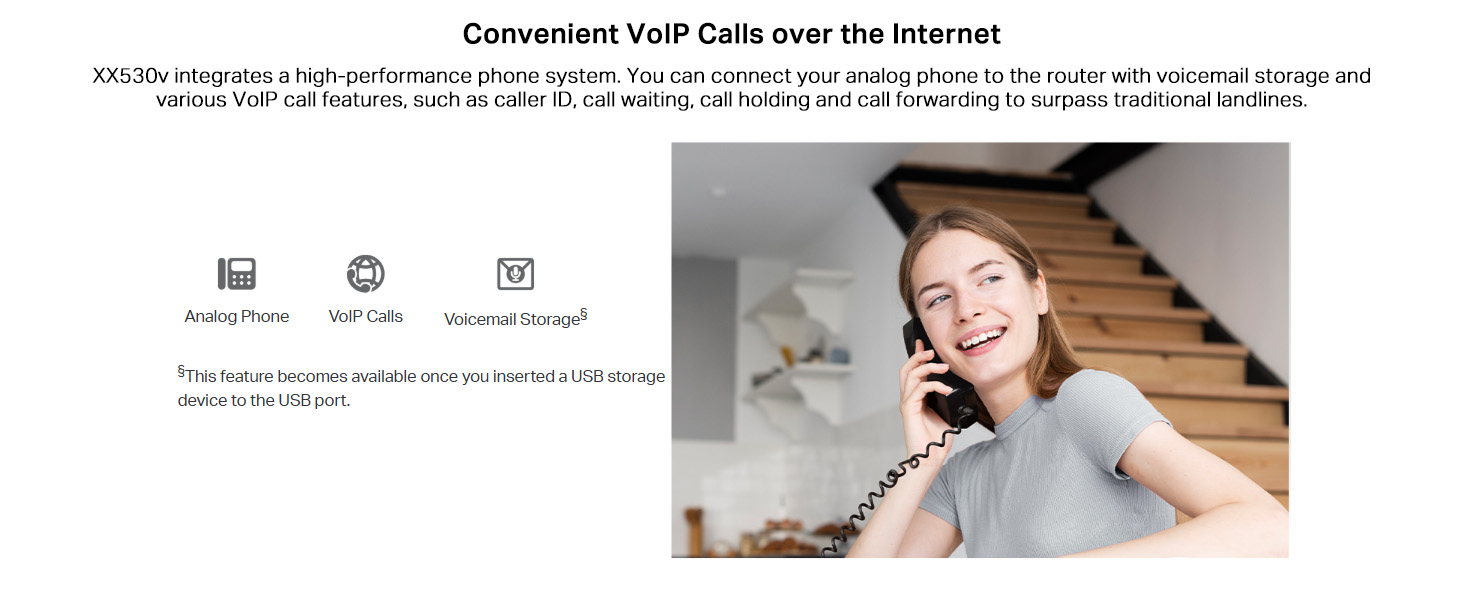
Image 5.3: A user making a call with an analog phone connected to the router's VoIP port, demonstrating the VoIP functionality.
To use VoIP:
- Connect an analog phone to the router's VoIP port.
- Configure your VoIP account settings (provided by your ISP) in the router's management interface under the VoIP section.
- Voicemail storage is available when a USB storage device is inserted into the USB port.
5.4 Gigabit Wired Connections and Media Sharing
The router features Gigabit Ethernet ports for high-speed wired connections and a USB port for media sharing.
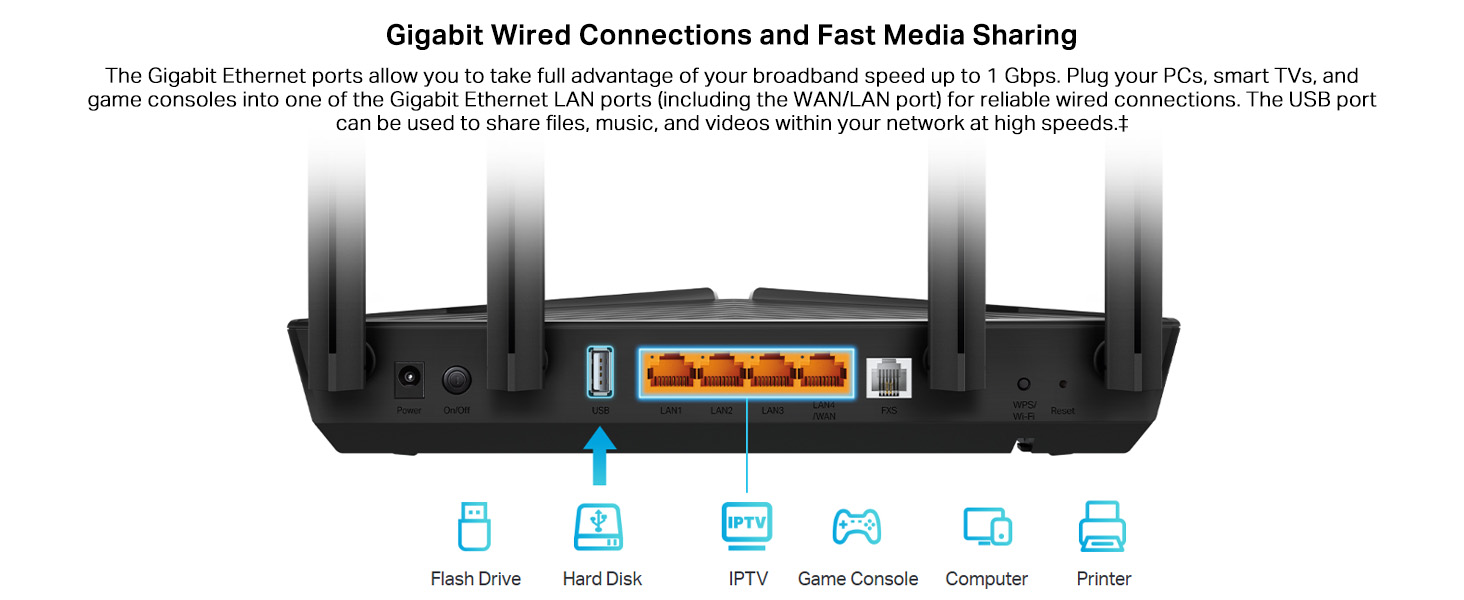
Image 5.4: Illustration of various devices like flash drives, hard disks, IPTV boxes, game consoles, computers, and printers connected to the router's Gigabit LAN and USB ports.
- Connect PCs, smart TVs, game consoles, and other wired devices to the Gigabit LAN ports for reliable, high-speed internet access.
- Plug a USB storage device into the USB port to share files, music, and videos across your network.
6. Zaawansowane funkcje
6.1 Zgodność z EasyMesh
The XX530v supports EasyMesh, allowing you to create a unified mesh Wi-Fi network for seamless whole-home coverage.
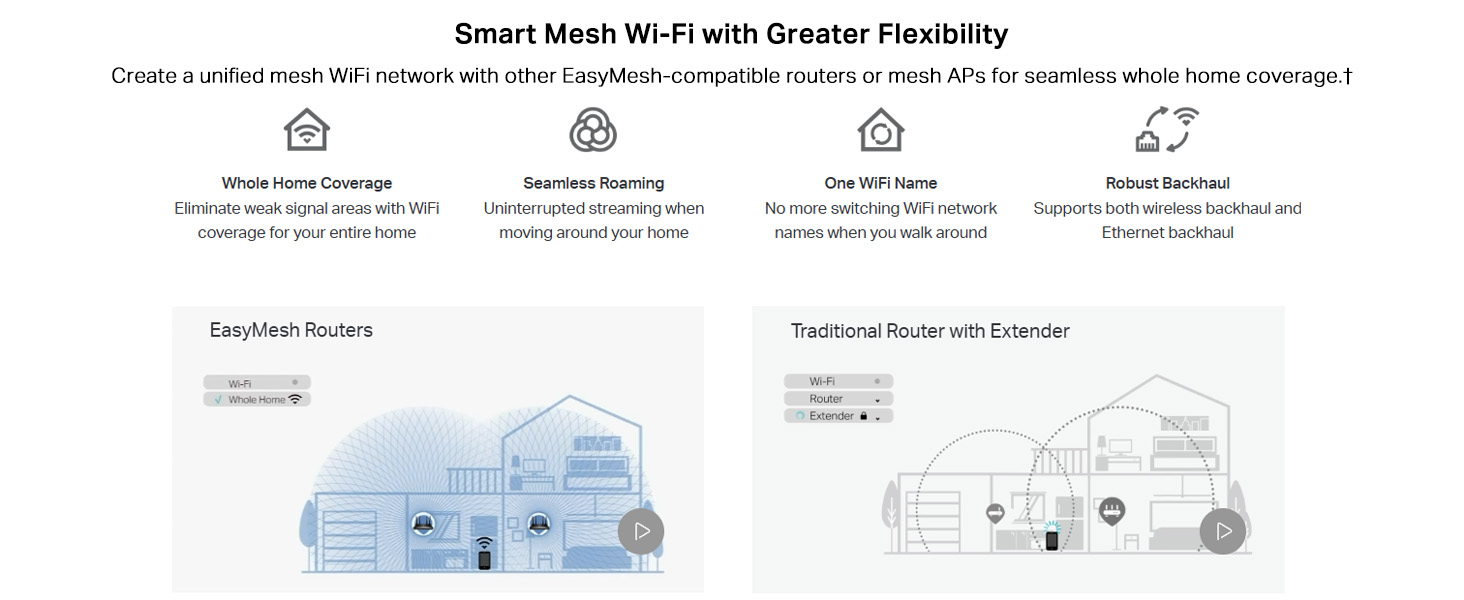
Image 6.1: A visual comparison demonstrating the benefits of an EasyMesh system for whole-home coverage and seamless roaming, contrasted with a traditional router and extender setup.
Benefits of EasyMesh:
- Ubezpieczenie całego domu: Eliminates weak signal areas.
- Bezproblemowy roaming: Uninterrupted streaming as you move around your home.
- Jedna nazwa Wi-Fi: No need to switch network names.
- Robust Backhaul: Supports both wireless and Ethernet backhaul.
6.2 Ochrona sieci
The router includes features to enhance your network security.

Image 6.2: Icons and descriptions for WPA3 Security, Parental Controls, and Multi-SSID features, highlighting robust network protection.
- Bezpieczeństwo WPA3: Provides higher password safety and enhanced protection against attacks.
- Kontrola rodzicielska: Allows you to block inappropriate content and restrict online time for specific devices.
- Wiele SSID: Create separate Wi-Fi networks for guests or different purposes, keeping your main network secure.
6.3 Zdalne zarządzanie
The XX530v supports various protocols for remote management, beneficial for both users and Internet Service Providers.
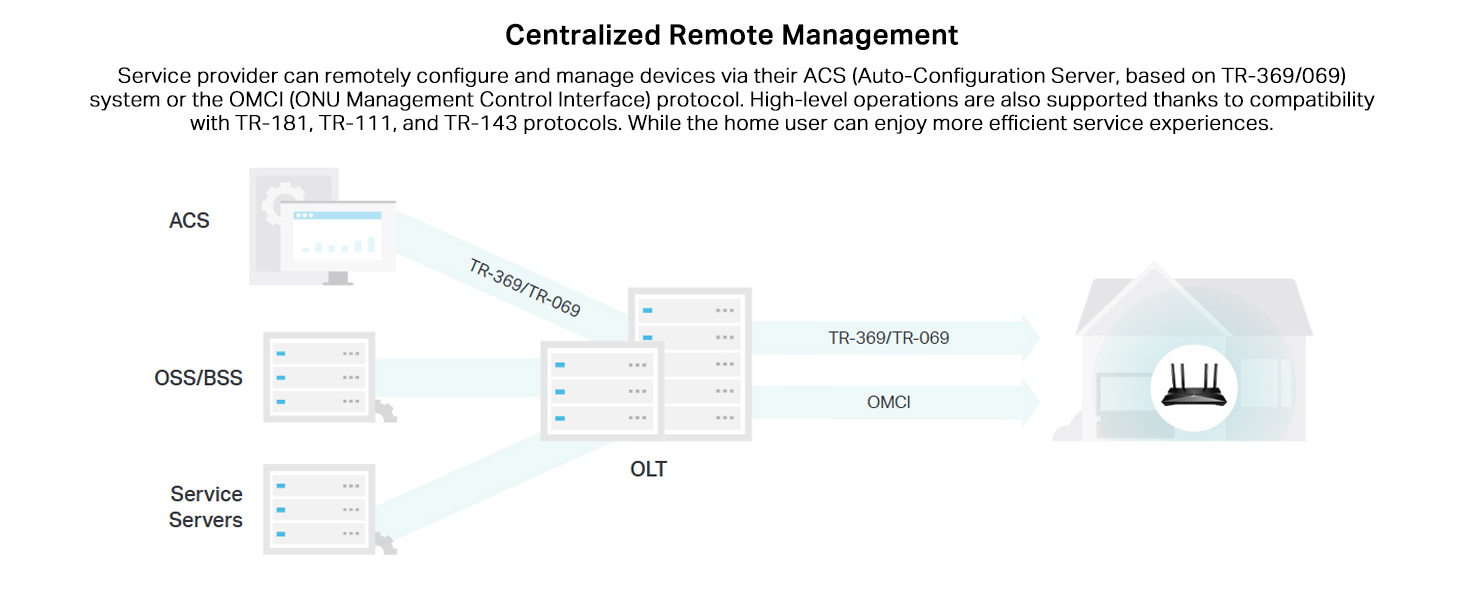
Image 6.3: A diagram showing how service providers can remotely configure and manage devices using an ACS (Auto-Configuration Server) via TR-369/TR-069 and OMCI protocols.
The router supports TAUC (TP-Link Aginet Unified Cloud, based on TR-369) along with OMCI, TR-069, TR-098, TR-181, TR-111, and TR-143 protocols for comprehensive remote management.
7. Konserwacja
7.1 aktualizacji oprogramowania sprzętowego
Regularnie sprawdzaj dostępność aktualizacji oprogramowania sprzętowego i instaluj je, aby zapewnić sobie optymalną wydajność, bezpieczeństwo i dostęp do nowych funkcji.
- Odwiedź oficjalną stronę TP-Link webStrona (www.tp-link.com) and navigate to the support section for your model (XX530v).
- Pobierz najnowsze oprogramowanie układowe file.
- Access the router's management page and go to System Tools > Firmware Upgrade.
- Prześlij pobrane oprogramowanie sprzętowe file and follow the instructions to complete the upgrade. Do not power off the router during the upgrade process.
7.2 Umiejscowienie routera
For optimal Wi-Fi coverage, place the router in a central location, away from obstructions and devices that emit strong electromagnetic interference (e.g., microwaves, cordless phones).

Image 7.1: The router positioned on a table, illustrating suitable placement for effective Wi-Fi signal distribution.
7.3 Czyszczenie
Use a soft, dry cloth to clean the router. Avoid using liquid cleaners or abrasive materials.
8. Rozwiązywanie Problemów
W tej sekcji omówiono typowe problemy, na które możesz natrafić.
8.1 Brak dostępu do Internetu
- Sprawdź kable: Ensure all cables are securely connected, especially the fiber optic cable and Ethernet cables.
- Wskaźniki LED: Verify that the Power and Internet LEDs are solid green. If the Internet LED is off or red, there might be an issue with your ISP connection.
- Ustawienia dostawcy usług internetowych: Confirm that your internet connection settings (e.g., PPPoE username/password, VLAN ID) are correctly entered in the router's management page.
- Ponowne uruchomienie: Power cycle the router (and your modem, if applicable) by unplugging it for 30 seconds and then plugging it back in.
8.2 Problemy z sygnałem Wi-Fi
- Umiejscowienie routera: Przenieś router w bardziej centralne miejsce, z dala od przeszkód i źródeł zakłóceń.
- Zakłócenia kanału: In the router's wireless settings, try changing the Wi-Fi channel for both 2.4GHz and 5GHz bands to a less congested one.
- EasyMesh: If you have a large home, consider adding EasyMesh-compatible devices to extend coverage.
8.3 Forgotten Login Password
If you forget the login password for the router's management page, you can perform a factory reset.
- With the router powered on, press and hold the WPS/Reset button on the rear panel for approximately 10 seconds until all LEDs flash.
- The router will restart with factory default settings. You can then log in using the default username and password (usually 'admin' for both).
- Note: A factory reset will erase all your custom settings, requiring you to reconfigure your internet and Wi-Fi settings.
9. Specyfikacje
| Funkcja | Szczegół |
|---|---|
| Model | XX530v |
| Wi-Fi standard | Wi-Fi 6 (802.11ax) |
| Prędkości Wi-Fi | AX3000 (2.4GHz: 574 Mbps, 5GHz: 2402 Mbps) |
| Anteny | 4 Fixed High-Gain Antennas |
| Porty Ethernet | 1x GbE WAN/LAN Port, 3x GbE LAN Ports |
| Port światłowodowy | 1x SC/APC Fiber Port (XPON: GPON/EPON compatible) |
| Port VoIP | 1x VoIP Port |
| Port USB | 1x USB Port (for storage/3G/4G dongle) |
| Wymiary (dł. x szer. x wys.) | Wymiary 13.5 x 26 x 4.9 cm |
| Waga | 510 gramów |
| Zgodność z systemem operacyjnym | Microsoft Windows, MAC OS, NetWare, UNIX, Linux |
| Cechy specjalne | Beamforming, OFDMA, MU-MIMO, Parental Control, Remote Access, VoIP Calls, QoS, EasyMesh Compatible, WPA3 Encryption |
10. Gwarancja i wsparcie
10.1 Informacje o gwarancji
Your TP-Link XX530v router comes with a limited warranty. Please refer to the warranty card included in your package or visit the official TP-Link webAby zapoznać się ze szczegółowymi warunkami gwarancji obowiązującymi w Twoim regionie, odwiedź naszą witrynę.
10.2 Wsparcie techniczne
For technical assistance, product registration, or to download the latest firmware and drivers, please visit the TP-Link support webstrona:
- Webstrona: www.tp-link.com/support
- Aginet App: For easy setup and management, download the Aginet app. Download Aginet App
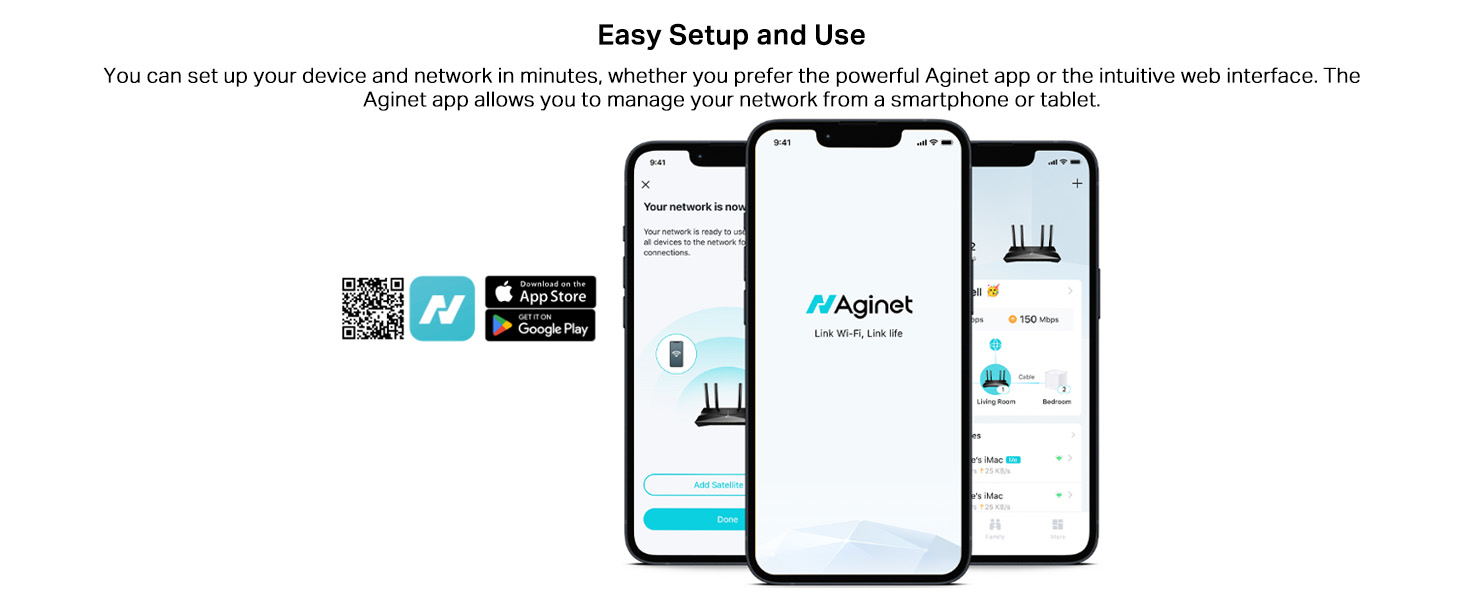
Image 10.1: The Aginet app interface, demonstrating its use for easy setup and network management from a smartphone or tablet.
You may also contact TP-Link customer support via the contact information provided on the support webstronie lub w dokumentacji produktu.
Ask a question about this manual
Ask about setup, troubleshooting, compatibility, parts, safety, or missing instructions. Manuals+ will review the question and use this page’s manual context to help answer it.