1. Wprowadzenie
This manual provides detailed instructions for the installation, operation, and maintenance of your Walfront 50A Shunt Battery Monitor. This device is designed to accurately measure and display various battery parameters, including voltage, current, capacity, and power, for a wide range of battery types in applications such as RVs, boats, cars, motorcycles, and golf carts.

Figure 1: Complete Walfront 50A Shunt Battery Monitor Kit, including the display unit, sampler, and connecting cables.
2. Koniec produktuview
2.1 Główne cechy
- Przyjazny dla użytkownika interfejs: Features a clear 1.8-inch display with larger text and responsive silicone keys for easy operation.
- Łatwa instalacja: Designed for versatile embedding with multiple bracket options, including a handlebar bracket, ensuring stable mounting.
- Wielofunkcyjny wyświetlacz: Provides real-time data on power, voltage, current, remaining capacity, discharge status, estimated time, and capacity percentage.
- Łączność Bluetooth: Allows remote monitoring and settings adjustment via a mobile app within a 10-meter unobstructed range.
- Szeroka kompatybilność baterii: Suitable for various battery types including lead-acid, LiFePO4, lithium-ion, and Ni-MH batteries.
2.2 Składniki
The Walfront 50A Shunt Battery Monitor package includes the following components:
- Display Unit (1.8-inch screen)
- Sampler (50A Shunt)
- 3-Meter Communication Cable
- 1-Meter Positive Pole Cable
- Uchwyt mocujący na kierownicę
- Instrukcja obsługi
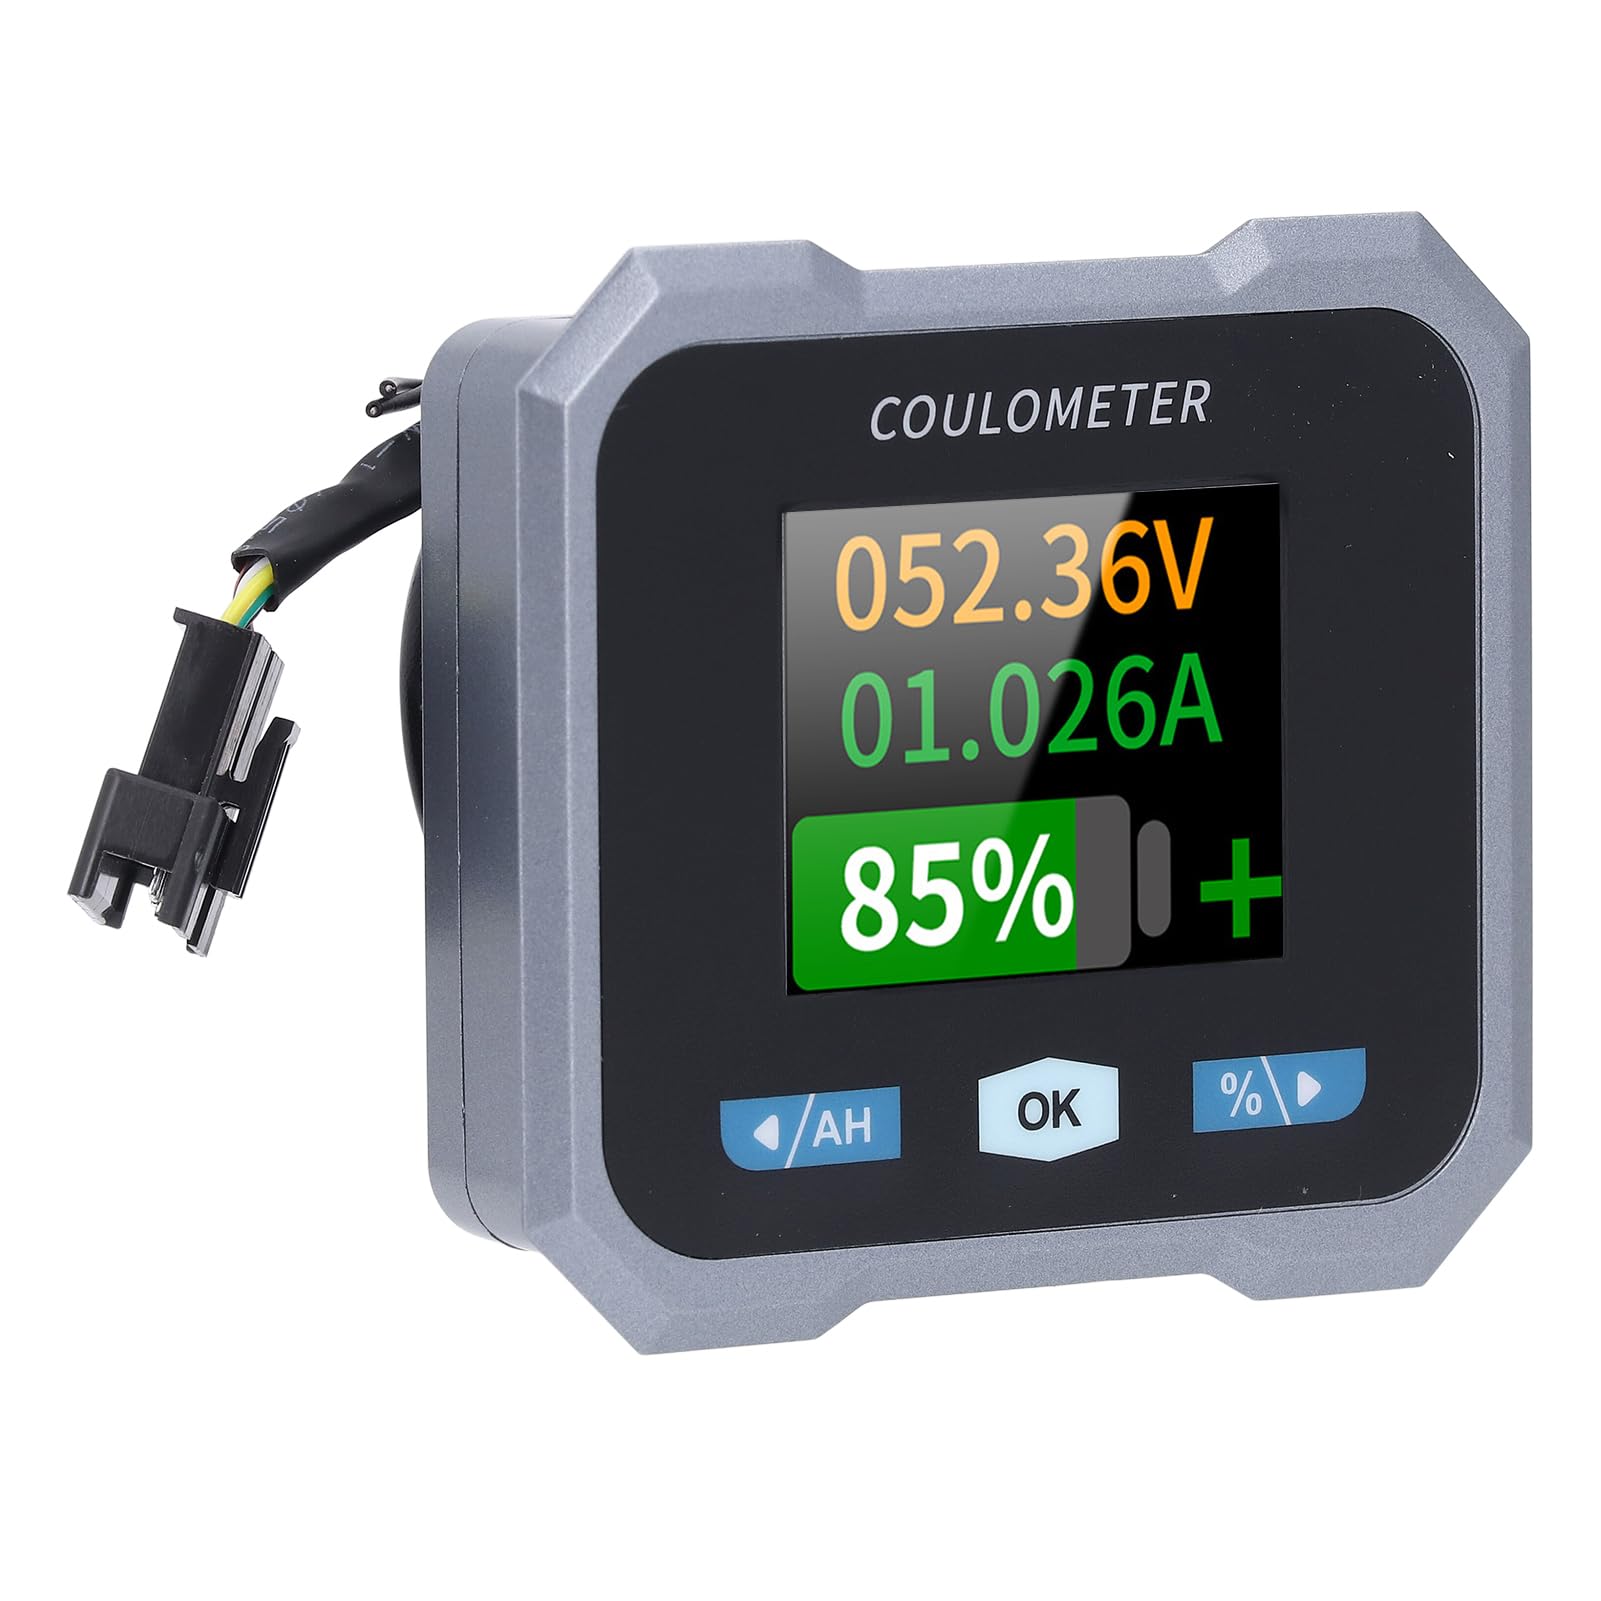
Figure 2: Individual components of the Walfront 50A Shunt Battery Monitor kit.
3. Konfiguracja i instalacja
3.1 Środki ostrożności
- Ensure the power is disconnected from the battery before installation.
- Należy nosić odpowiedni sprzęt ochronny, w tym ochronę oczu.
- Verify correct polarity when connecting wires to prevent damage to the device or battery.
3.2 Montaż jednostki wyświetlającej
The display unit can be embedded or mounted using the provided handlebar bracket.
- Montaż na kierownicy: Attach the handlebar bracket to your desired location. Secure the display unit into the bracket. The bracket features mechanical locking knobs and thickened anti-slip washers for a secure, non-destructive installation.
- Embedded Mounting: For custom installations, ensure the cutout dimensions match the display unit's specifications (refer to Section 6. Specifications for dimensions).

Figure 3: Display unit mounted on a handlebar, showing clear visibility.

Figure 4: Illustration of the handlebar bracket installation process, highlighting locking knobs and anti-slip washers.
3.3 Wiring the Sampler and Display
Sampler is the current sensing component and must be installed in series with the negative terminal of the battery. The display unit connects to the sampler via the provided communication cable.
- Połącz Sample: Connect the negative terminal of your battery to the 'B-' terminal on the sampler. Connect the load's negative terminal to the 'P-' terminal on the sample.
- Connect Positive Power: Use the 1-meter positive pole cable to connect the 'V+' terminal on the sampler to the positive terminal of your battery. This provides power to the sampler and display.
- Podłącz kabel komunikacyjny: Plug one end of the 3-meter communication cable into the sampler and the other end into the display unit.
- Sprawdź połączenia: Double-check all connections for tightness and correct polarity before restoring power to the battery.

Figure 5: The compact size of the sampler, designed for easy installation even in small battery compartments.
4. Instrukcja obsługi
4.1 Interfejs wyświetlacza
The 1.8-inch display provides a clear view of various battery parameters. The interface can be viewed manually or set to auto-rotate.
- Strona podręcznika View: Press the left and right arrow keys (labeled '/AH' and '%/>') to manually switch between different display interfaces and view content such as voltage, current, remaining capacity, power, and estimated time.
- Auto Page Rotation: Access the settings interface to enable the auto-rotate function. When active, the monitor will sequentially switch and display different interfaces in a cycle.
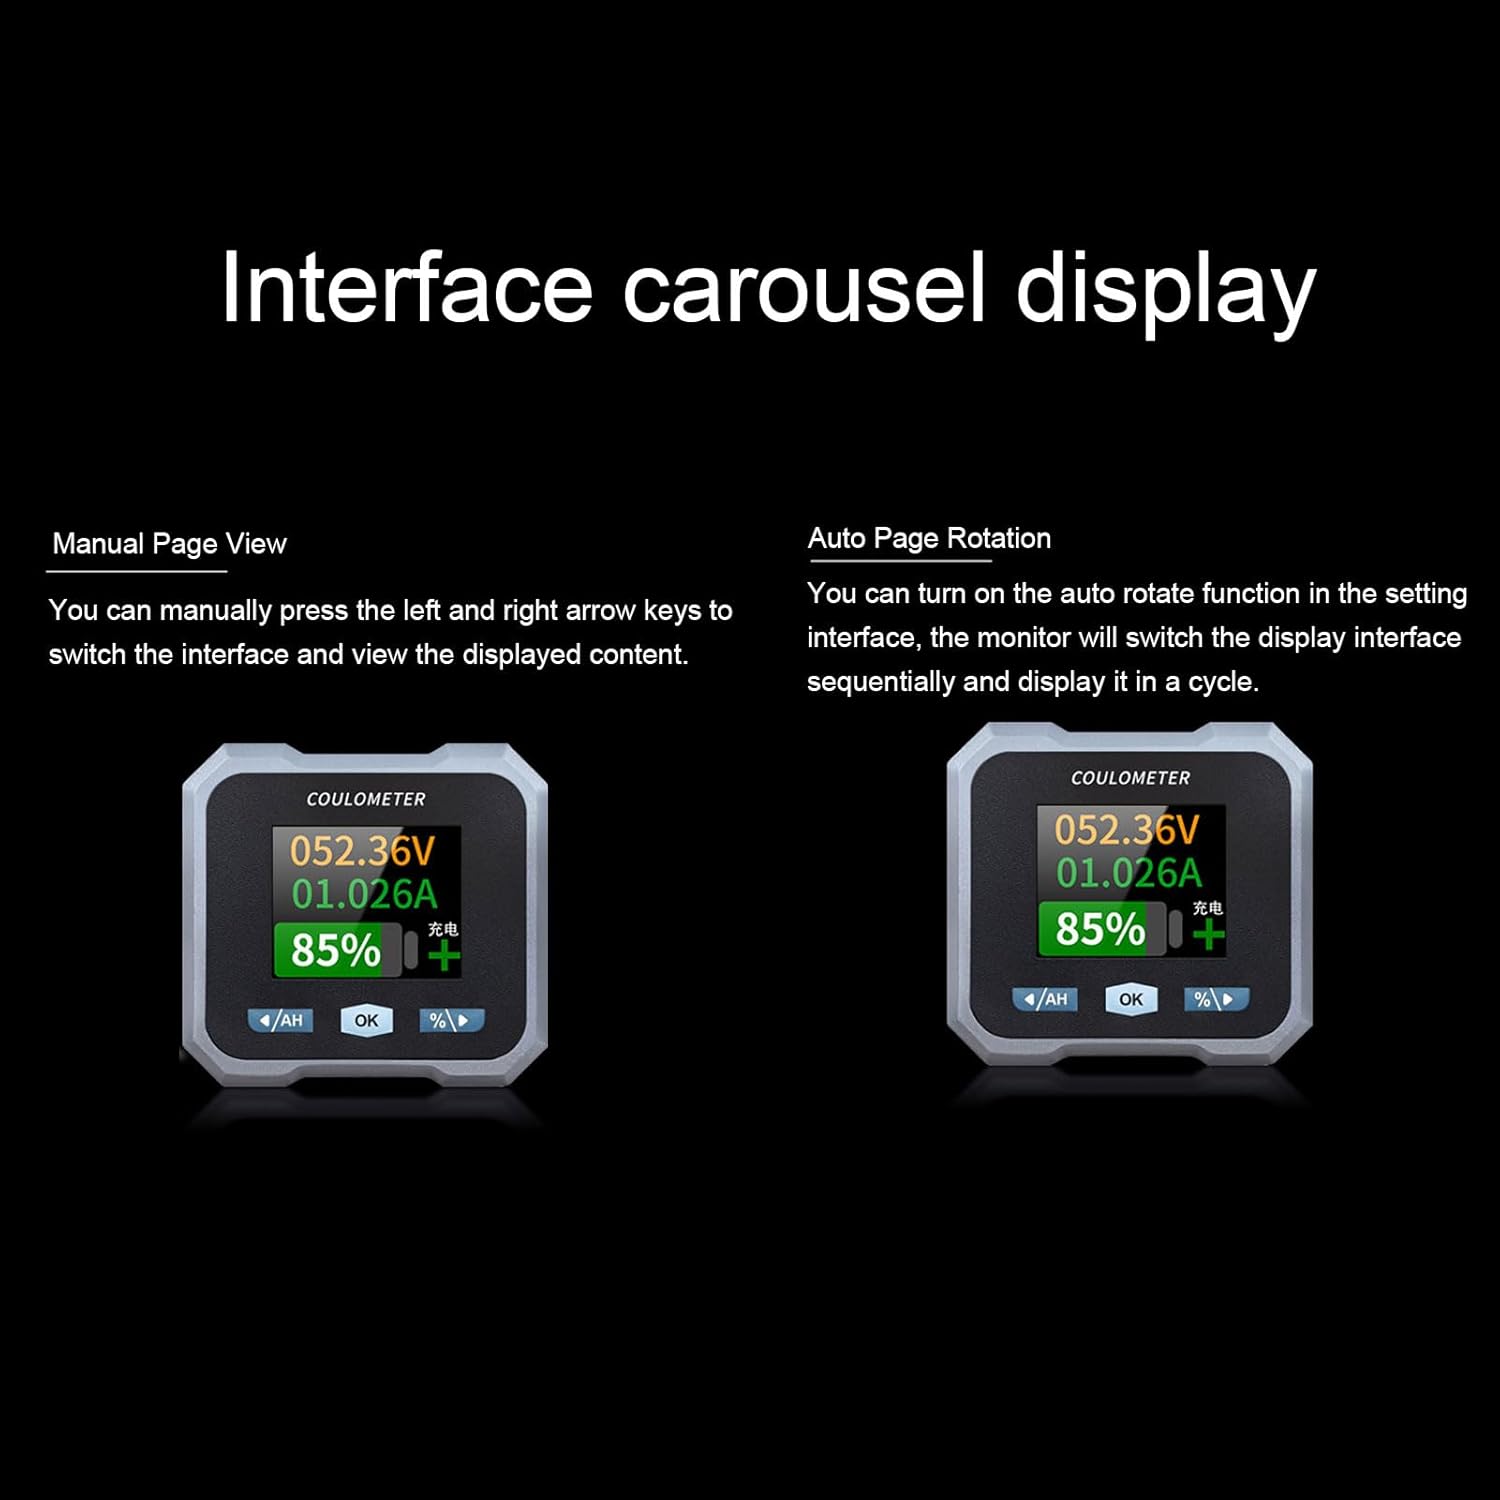
Figure 6: Interface carousel display options, showing manual page view and auto page rotation.

Figure 7: The multifunctional display showing voltage, current, estimated charge/discharge time, percentage of capacity, remaining capacity, and power.
4.2 Funkcje przycisków
- '/AH' Button (Left Arrow): Navigates left through display screens or decreases values in settings.
- Przycisk „OK”: Potwierdza wybór lub otwiera menu ustawień.
- '%/>' Button (Right Arrow): Navigates right through display screens or increases values in settings.
4.3 Łączność Bluetooth
The monitor supports Bluetooth connectivity for remote monitoring and control via a mobile application.
- Pobierz aplikację: Szukaj the official Walfront battery monitor app on your smartphone's app store.
- Paruj urządzenie: Enable Bluetooth on your smartphone and open the app. Follow the in-app instructions to search for and pair with your battery monitor.
- Zdalne monitorowanie: Po połączeniu możesz view real-time data, adjust settings, and monitor functions remotely within a 10-meter unobstructed range.
4.4 Konfiguracja typu baterii
The monitor is compatible with various battery types. Ensure the correct battery type is configured in the settings for accurate readings.
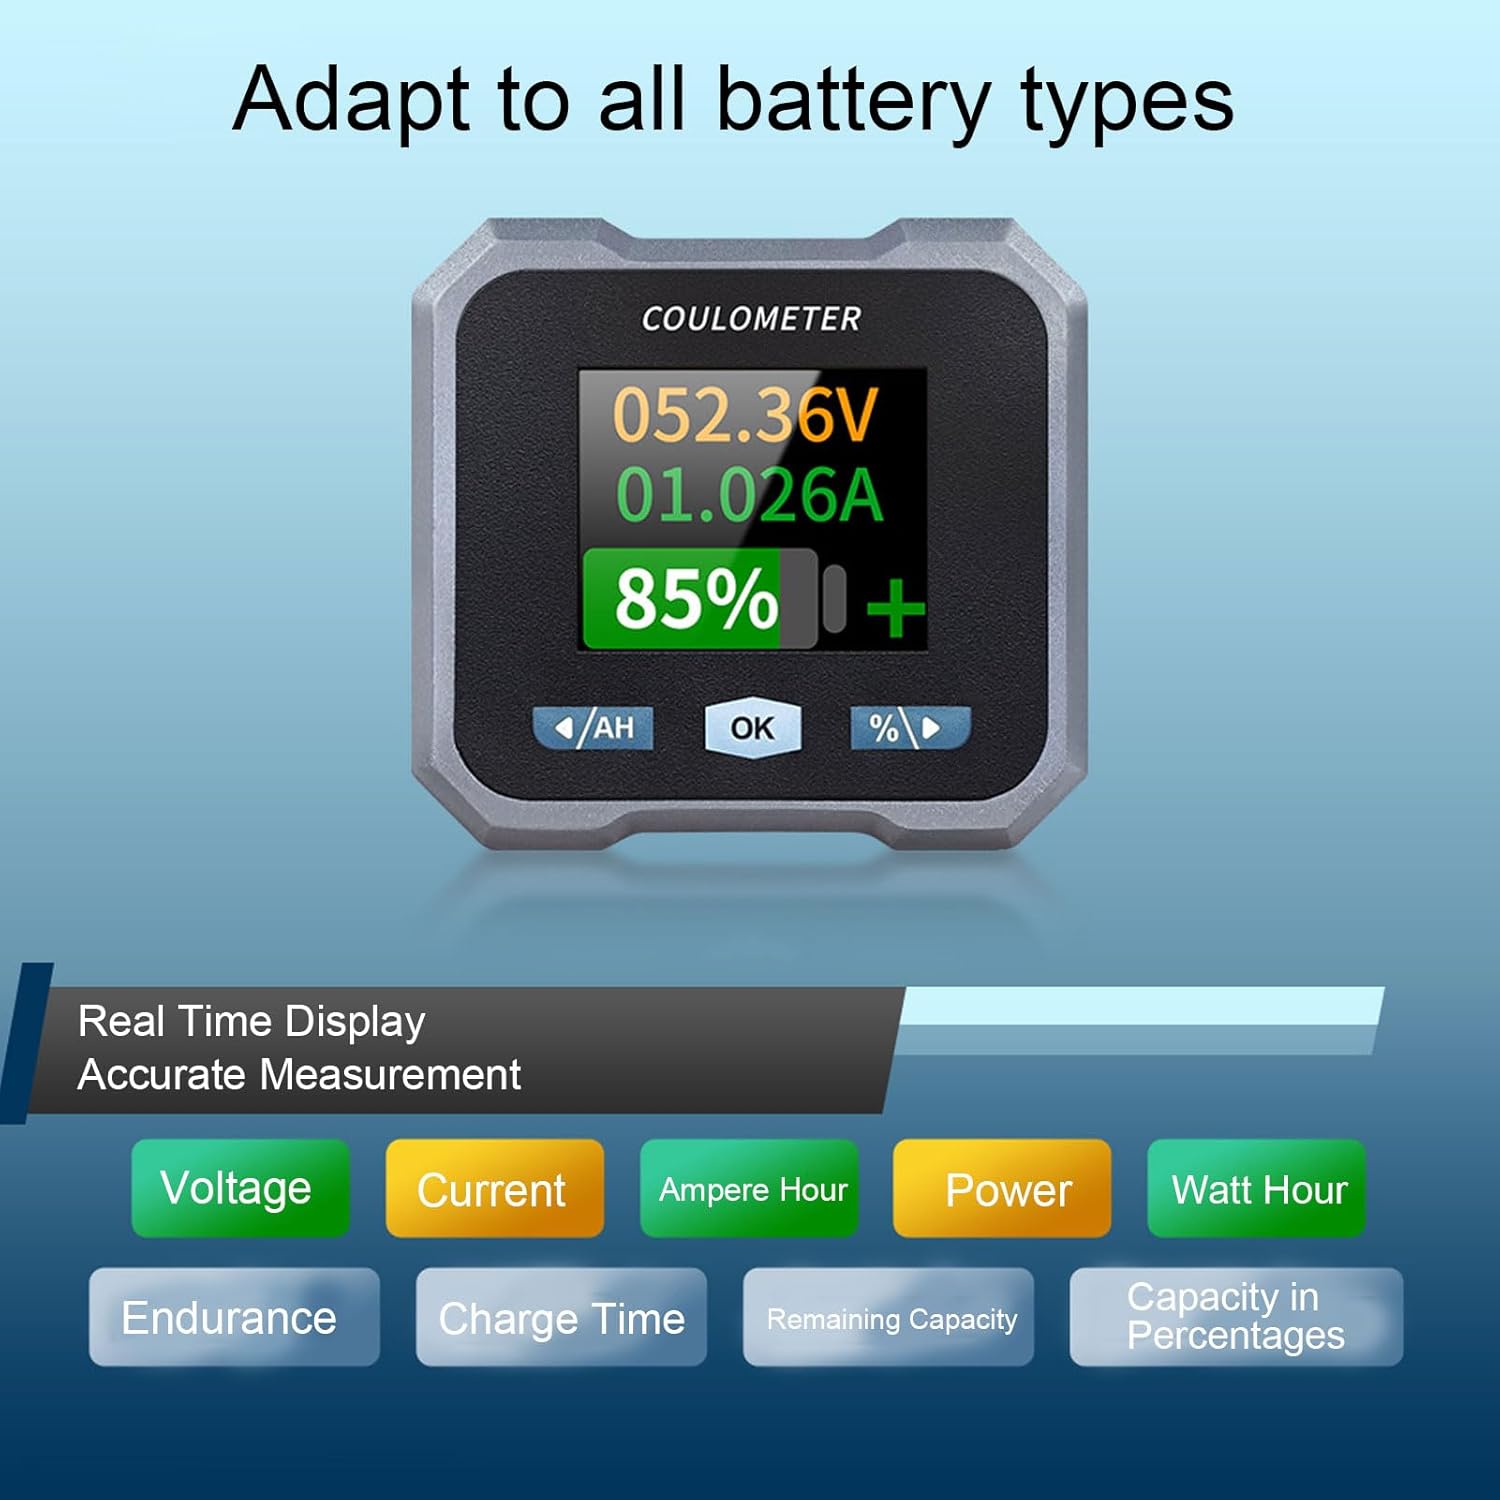
Figure 8: Display indicating real-time measurements and highlighting compatibility with various battery types.
5. Konserwacja
To ensure the longevity and accurate performance of your Walfront 50A Shunt Battery Monitor, follow these general maintenance guidelines:
- Czyszczenie: Gently wipe the display screen and unit housing with a soft, dry cloth. Avoid using abrasive cleaners or solvents.
- Znajomości: Okresowo sprawdzaj wszystkie połączenia przewodów, aby mieć pewność, że są solidne i nie są skorodowane.
- Ochrona środowiska: While designed for various environments, avoid prolonged exposure to extreme temperatures, direct sunlight, or excessive moisture.
- Aktualizacje oprogramowania układowego: Check the Walfront official webodwiedź tę witrynę lub aplikację, aby uzyskać dostęp do aktualizacji oprogramowania sprzętowego i uzyskać dostęp do nowych funkcji oraz optymalnej wydajności.
6. Rozwiązywanie Problemów
If you encounter issues with your battery monitor, refer to the following common troubleshooting steps:
- Brak wyświetlacza/zasilania:
- Check all power connections, especially the positive pole cable to the battery and the communication cable to the sample.
- Upewnij się, że pojemność bateriitage mieści się w zakresie roboczym (10-100 V).
- Niedokładne odczyty:
- Sprawdź, czy sampler is correctly installed in series with the negative battery terminal.
- Confirm that the battery type and capacity settings in the monitor match your actual battery.
- Ensure all connections are tight and free of corrosion, which can affect current sensing.
- Problemy z łącznością Bluetooth:
- Ensure the monitor is powered on and within the 10-meter unobstructed range of your smartphone.
- Restart the mobile app and your smartphone's Bluetooth.
- If pairing fails, try unpairing and re-pairing the device in your phone's Bluetooth settings.
- Screen Auto-Off During Use:
- The screen automatically turns off after 20 seconds during charging. During discharge, it turns off if the current is below 15mA for 20 seconds. This is normal behavior to conserve power.
- Naciśnij dowolny przycisk, aby ponownie aktywować ekran.
If problems persist, contact Walfront customer support for further assistance.
7. Specyfikacje
| Parametr | Wartość |
|---|---|
| Model | WALFRONTpo13qkgbfh |
| Tworzywo | ABS, Stainless Steel, Silicone |
| Rozmiar ekranu | Approx. 1.8 inches / 4.57 cm |
| SampMetoda Ling | Bocznica |
| Tomtage Zakres testowy | Approx. 10-100V |
| Tomtage Rozdzielczość | Około. 0.01V |
| Zakres pomiaru prądu | Approx. 0-50A |
| Aktualna rozdzielczość | Około. 0.001A |
| Capacity Display Range | Approx. 0%-100% |
| Zakres pomiaru mocy | Approx. 0-5KW |
| Rozdzielczość zasilania | Około. 0.01 W. |
| Ah Measurement Range | Approx. 0-9999AH |
| Capacity Resolution | Approx. 0.1AH |
| Odległość komunikacji Bluetooth | Approx. 10m / 32.81ft (unobstructed) |
| Tomtage Dokładność | ±1%+2 cyfry |
| Dokładność bieżąca | ±2% +0.002 A |
| Display Power Consumption | Około. 0.75 W. |
| Czas wyłączenia ekranu | 20 seconds auto off during charging; screen on when I≥15mA, off when I<15mA for 20s |
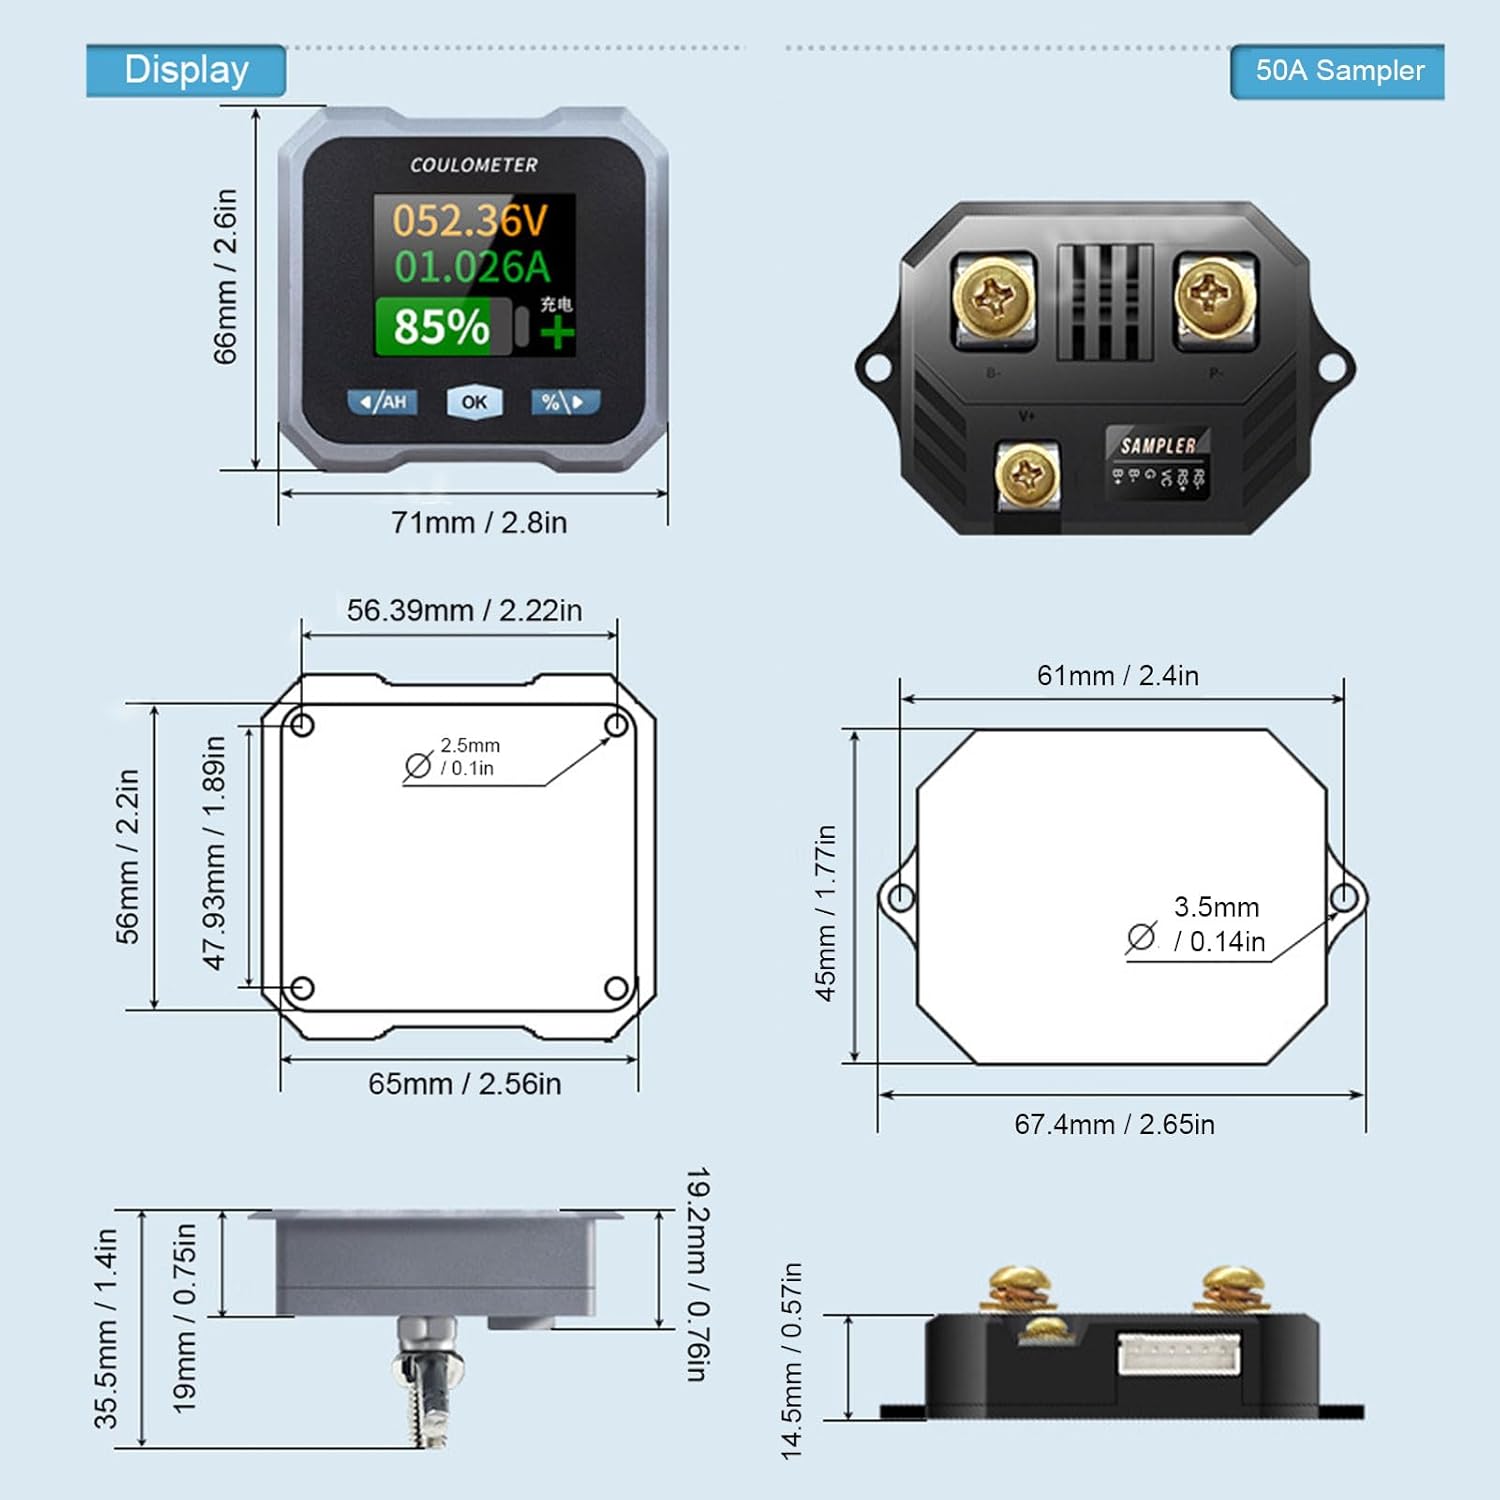
Figure 9: Detailed dimensions for both the display unit and the 50A sample.
8. Gwarancja i wsparcie
For warranty information and technical support, please refer to the documentation provided with your purchase or visit the official Walfront webZachowaj paragon jako dowód zakupu na wypadek ewentualnych roszczeń gwarancyjnych.