Wstęp
This manual provides instructions for the ZPSHYD Handheld Vacuum, Model JJ-107. This versatile 3-in-1 device functions as a vacuum cleaner, an air duster, and an inflator/vacuum sealer. Please read this manual thoroughly before operating the device to ensure safe and efficient use.
Instrukcje bezpieczeństwa
- Przed użyciem urządzenia należy przeczytać całą instrukcję.
- Do not immerse the device, charging cable, or plug in water or other liquids.
- Nie należy odkurzać łatwopalnych lub wybuchowych cieczy, gorącego popiołu ani ostrych przedmiotów.
- Przechowywać urządzenie w miejscu niedostępnym dla dzieci.
- Należy używać wyłącznie kabla ładującego dostarczonego przez producenta.
- Do not operate the device if the charging cable or plug is damaged.
- Ensure the HEPA filter is properly installed before each use to prevent damage to the motor.
- Avoid blocking the air inlet or outlet during operation.
- Przechowuj urządzenie w suchym miejscu, gdy nie jest używane.
Produkt ponadview
Familiarize yourself with the components of your ZPSHYD Handheld Vacuum.

Rysunek 1: Main components of the ZPSHYD Handheld Vacuum.

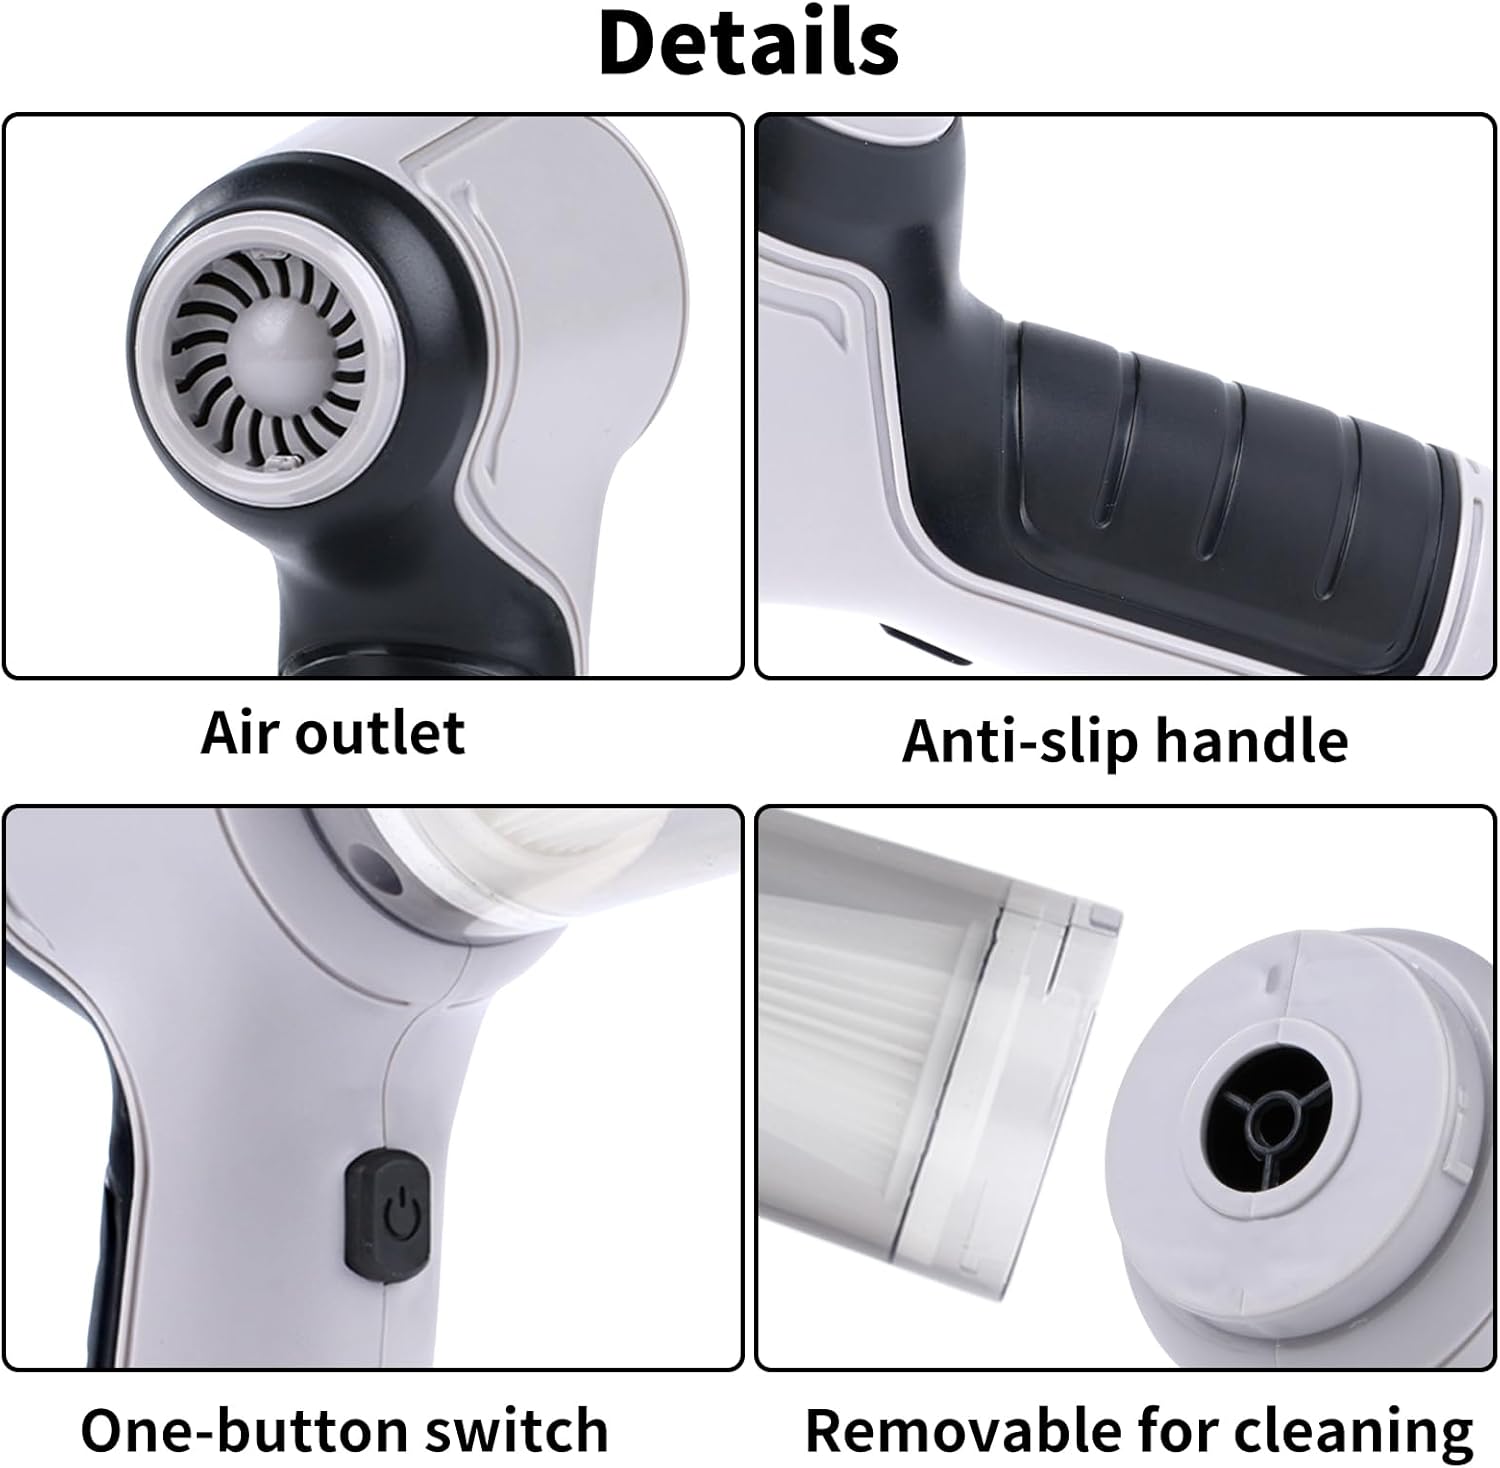
Rysunek 2: Szczegółowy view of key features including air outlet, handle, switch, and removable dustbin.
Zawartość zestawu:
- 1 x Handheld Vacuum Cleaner Unit
- 1 x Dust Collector Cover
- 1 x Filtr HEPA
- 2 x Inflation Nozzles (various sizes)
- 2 x Suction Nozzles (one with removable brush)
- 1 x kabel ładujący USB
Organizować coś
1. Ładowanie urządzenia
Before first use, fully charge the vacuum cleaner. Connect the provided USB charging cable to the charging port on the device and plug the other end into a compatible USB power adapter (not included) or a USB port. The indicator light will show charging status (refer to device for specific light behavior, typically red for charging, green for full).
2. Mocowanie akcesoriów
Depending on the desired function, select the appropriate nozzle and firmly attach it to the device's inlet (for vacuuming) or outlet (for blowing/inflating).
Instrukcja obsługi
1. Funkcja odkurzania
- Ensure the dust collection bin and HEPA filter are securely in place.
- Attach the desired suction nozzle to the vacuum inlet. For car interiors or tight spaces, use the narrow nozzle. For surfaces requiring agitation, use the brush nozzle.
- Press the power button (one-button switch) to turn on the vacuum.
- Skieruj dyszę w stronę czyszczonego obszaru.
- Po wyczyszczeniu naciśnij ponownie przycisk zasilania, aby wyłączyć urządzenie.

Rysunek 3: Using the vacuum for car interior cleaning.
Rysunek 4: Demonstrating strong suction power for various debris.
2. Air Duster Function
- Attach a suitable nozzle to the air outlet of the device.
- Naciśnij przycisk zasilania, aby włączyć funkcję dmuchawy.
- Use the directed airflow to remove dust from keyboards, electronics, or other delicate surfaces.
- Naciśnij przycisk zasilania, aby wyłączyć.

Rysunek 5: Using the air duster for keyboard cleaning.
3. Inflator Function
- Select the appropriate inflation nozzle and attach it firmly to the air outlet.
- Insert the nozzle into the inflation valve of the item (e.g., swimming ring, small inflatable).
- Naciśnij przycisk zasilania, aby rozpocząć pompowanie.
- Monitor the inflation and turn off the device once the item is adequately inflated.

Rysunek 6: Inflating a swimming ring with the device.
4. Vacuum Sealer Function
- Attach the vacuum sealing nozzle to the air outlet.
- Place the nozzle over the air valve of a compatible vacuum storage bag.
- Press the power button to start extracting air from the bag.
- Turn off the device once the desired vacuum level is achieved.

Rysunek 7: Using the device for vacuum sealing.
Konserwacja
1. Emptying the Dust Collection Bin
The transparent dust collection bin allows for easy monitoring of its fill level. When full, detach the bin from the main unit and empty its contents into a waste receptacle. Reattach the bin securely.
2. Czyszczenie filtra HEPA
The HEPA filter should be cleaned regularly to maintain optimal suction power. Remove the filter from the dust collection bin. Tap it gently to dislodge dust or rinse it under running water. Ensure the filter is completely dry before reinserting it into the device. Do not use the vacuum without a dry filter.
3. Ogólne czyszczenie
Przetrzyj zewnętrzną część odkurzacza miękką szmatką.amp Ściereczką. Nie używaj silnych środków chemicznych ani ściernych środków czyszczących. Przed czyszczeniem upewnij się, że urządzenie jest wyłączone i odłączone od zasilania.
Rozwiązywanie problemów
| Problem | Możliwa przyczyna | Rozwiązanie |
|---|---|---|
| Urządzenie się nie włącza | Bateria jest rozładowana | Całkowicie naładuj urządzenie. |
| Przycisk zasilania nie został prawidłowo wciśnięty | Ensure a firm press on the power button. | |
| Słaba siła ssania | Dust collection bin is full | Opróżnij pojemnik na kurz. |
| Filtr HEPA jest zatkany | Wyczyść lub wymień filtr HEPA. | |
| Nozzle attachment is loose or blocked | Check and secure the nozzle; clear any blockages. | |
| Urządzenie się nie ładuje | USB cable or power adapter faulty | Wypróbuj inny kabel USB lub zasilacz. |
| Port ładowania jest brudny lub uszkodzony | Clean the charging port carefully or contact support. |
Specyfikacje
Rysunek 8: Wymiary produktu i najważniejsze specyfikacje.
- Marka: ZPSHYD
- Numer modelu: JJ-107
- Źródło zasilania: Zasilanie bateryjne (litowo-jonowe)
- Tomtage: 5 Volts (Rated voltage: 7.4V from image)
- Cotage: 50 watów
- Moc ssania: 6000 Pa
- Typ filtra: Filtr HEPA
- Pojemność pojemnika na kurz: 0.4 litrów
- Waga przedmiotu: 1.1 funtów
- Wymiary przedmiotu (dł. x szer. x wys.): 8.6" x 6.3" x 2.6" (21 cm x 16 cm x 6.6 cm)
- Technologia łączności: USB
- Cechy szczególne: Cordless, 3-in-1 (Vacuum, Blower, Inflator/Vacuum Sealer)
- Zalecane zastosowanie: Car, Home
Gwarancja i wsparcie
For warranty information, product registration, or customer support, please refer to the documentation included with your purchase or contact ZPSHYD customer service directly through their official website or the retailer where the product was purchased. Please have your model number (JJ-107) and purchase date available when contacting support.