1. Wprowadzenie
Thank you for choosing the Dexter 800AG2-125.5AB1 Angle Grinder. This manual provides essential information for the safe and efficient operation, maintenance, and troubleshooting of your new tool. Please read this manual thoroughly before first use and keep it for future reference.
This angle grinder is designed for cutting and grinding metal and various coatings. Its 800W motor delivers 11,500 RPM, accommodating 4.1/2" / 5" (115/125mm) discs. The tool features a 3-meter power cord for extended reach and an ergonomic grip for comfortable handling.
2. Instrukcje bezpieczeństwa
Podczas obsługi elektronarzędzi należy zawsze przestrzegać podstawowych zasad bezpieczeństwa, aby zminimalizować ryzyko pożaru, porażenia prądem elektrycznym i obrażeń ciała.
- Noś odpowiedni sprzęt ochrony osobistej (PPE): Always wear safety glasses, hearing protection, and gloves. A dust mask is recommended for dusty operations.
- Zabezpiecz obrabiany przedmiot: Zawsze clamp lub zabezpieczyć obrabiany przedmiot, aby zapobiec jego przemieszczaniu się podczas pracy.
- Maintain a clean work area: Cluttered areas invite accidents. Ensure your workspace is well-lit.
- Unikaj niebezpiecznych środowisk: Do not use power tools in damp or wet locations, or expose them to rain. Keep the work area well-ventilated.
- Trzymaj dzieci i osoby postronne z dala: All visitors should be kept a safe distance from the work area.
- Przechowuj bezczynne narzędzia: When not in use, tools should be stored in a dry, high, or locked-up place, out of reach of children.
- Nie używaj narzędzia na siłę: It will do the job better and more safely at the rate for which it was designed.
- Użyj właściwego narzędzia: Do not force a small tool or attachment to do the job of a heavy-duty tool.
- Sprawdź, czy nie ma uszkodzonych części: Before using the tool, check for any damaged parts. A guard or other part that is damaged should be properly repaired or replaced by an authorized service center.
- Odłącz zasilanie: Always disconnect the tool from the power source before making any adjustments, changing accessories, or storing the tool.
- Użyj dodatkowego uchwytu: Always operate the angle grinder with the auxiliary handle securely attached for maximum control.
3. Koniec produktuview
Familiarize yourself with the components of your Dexter Angle Grinder.

Rysunek 1: Ogólnie view of the Dexter Angle Grinder, highlighting its powerful motor suitable for heavy-duty tasks.

Rysunek 2: Detail of the power switch, indicating the tool's robust power for demanding work.

Rysunek 3: View of the disc mounting area, designed for simple and quick disc changes.

Rysunek 4: Close-up of the spindle lock button, essential for secure disc changes.

Rysunek 5: The ergonomic handle design, ensuring light and comfortable use.
Zawartość zestawu:
- 1 x Dexter 5" Angle Grinder
- 1 x Klucz
- 1 x Uchwyt pomocniczy
- 1 x Disc Guard 115mm
- 1 x Disc Guard 125mm
4. Konfiguracja
4.1 Attaching the Disc Guard
- Upewnij się, że młynek jest odłączony od źródła zasilania.
- Select the appropriate disc guard (115mm or 125mm) for your chosen disc size.
- Position the disc guard over the spindle housing, ensuring it aligns with the mounting points.
- Secure the guard firmly using the provided screws or clamping mechanism. Ensure it is oriented to provide maximum protection during operation.
4.2 Montaż uchwytu dodatkowego
The auxiliary handle can be attached in three different positions (left, right, or top) to suit your working preference and ensure optimal control.
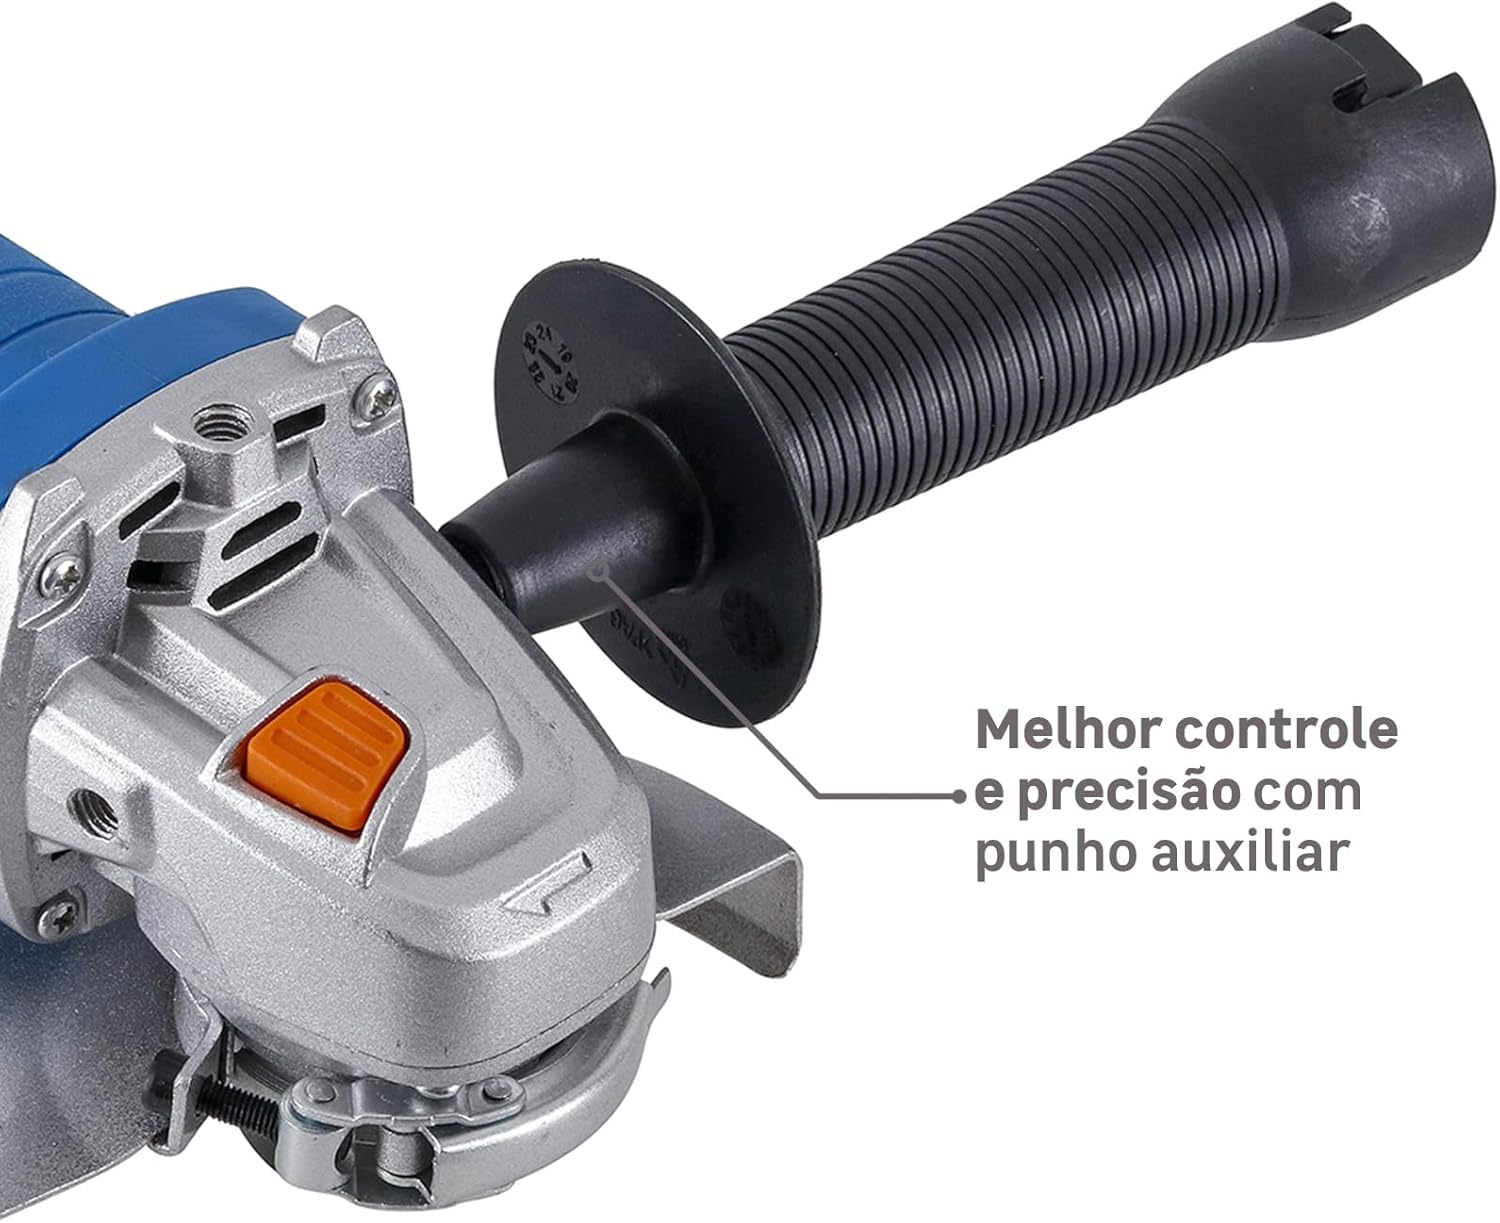
Rysunek 6: Angle grinder with auxiliary handle attached, providing enhanced control and precision.
- Identify the threaded holes on the grinder's gear housing.
- Screw the auxiliary handle clockwise into the desired position until it is securely tightened.
4.3 Montaż tarczy szlifierskiej/tnącej
- Upewnij się, że młynek jest odłączony od zasilania.
- Press and hold the spindle lock button (Figure 4) to prevent the spindle from rotating.
- Załóż kołnierz wewnętrzny na wrzeciono.
- Umieść tarczę szlifierską lub tnącą na wewnętrznym kołnierzu, upewniając się, że leży płasko.
- Screw the outer flange onto the spindle, hand-tightening it.
- Use the provided wrench to firmly tighten the outer flange, ensuring the disc is securely mounted. Release the spindle lock button.
5. Instrukcja obsługi
5.1 Włączanie/wyłączanie
- To turn on the grinder, slide the power switch (Figure 2) forward.
- To turn off the grinder, slide the power switch backward to the 'OFF' position.
5.2 Techniki szlifowania i cięcia
Always hold the grinder firmly with both hands, using the main handle and the auxiliary handle.

Rysunek 7: Angle grinder in use, demonstrating its effectiveness for cutting metal profiles and coatings.

Rysunek 8: Angle grinder being used for sanding a wooden surface, showcasinze względu na swoją wszechstronność.
- Do mielenia: Trzymaj szlifierkę pod kątem około 15-30 stopni do obrabianego przedmiotu. Stosuj umiarkowany nacisk i przesuwaj narzędzie równomiernie po powierzchni.
- For Cutting: Hold the grinder perpendicular to the workpiece. Allow the disc to cut through the material without forcing it. Ensure the workpiece is stable and supported.
- Unikaj przeciążenia: Do not apply excessive pressure, as this can reduce disc life and motor efficiency.
- Allow the tool to reach full speed: Before making contact with the workpiece, allow the disc to reach its full operating speed.
6. Konserwacja
Regularna konserwacja gwarantuje długowieczność i bezpieczną pracę szlifierki kątowej.
- Czyszczenie: Regularly clean the ventilation openings to prevent dust buildup, which can cause overheating. Use a soft brush or compressed air.
- Szczotki węglowe: This tool uses a brushed motor. Carbon brushes are wear parts and should be checked periodically. If they are worn down, they must be replaced by qualified personnel.
- Przewód zasilający: Inspect the power cord for any damage before each use. Do not use the tool if the cord is damaged.
- Wymiana dysku: Replace worn or damaged discs immediately. Always use discs rated for the grinder's speed and application.
- Składowanie: Przechowuj narzędzie w suchym i bezpiecznym miejscu, poza zasięgiem dzieci.
7. Rozwiązywanie Problemów
| Problem | Możliwa przyczyna | Rozwiązanie |
|---|---|---|
| Szlifierka nie uruchamia się. | Brak zasilania. Wadliwy wyłącznik zasilania. Zużyte szczotki węglowe. | Sprawdź gniazdko elektryczne i przewód. Skontaktuj się z centrum serwisowym. Have brushes replaced by qualified personnel. |
| Nadmierne wibracje. | Disc improperly mounted. Damaged or unbalanced disc. | Re-mount disc securely. Wymień płytę. |
| Przegrzanie. | Zablokowane otwory wentylacyjne. Przeciążenie narzędzia. | Wyczyść otwory wentylacyjne. Reduce pressure and allow tool to cool. |
| Sparks excessively. | Zużyte szczotki węglowe. | Have brushes replaced by qualified personnel. |
8. Specyfikacje
| Funkcja | Specyfikacja |
|---|---|
| Model | 800AG2-125.5AB1 |
| Marka | Dexter |
| Źródło zasilania | Elektryczny przewodowy |
| Tomtage | 220 V |
| Moc | 800 W |
| Maksymalna prędkość obrotowa | 11,500 obr./min. |
| Typ silnika | Silnik szczotkowy |
| Kontrola prędkości | NIE |
| Disc Diameter (mm) | 125 mm |
| Disc Diameter (inches) | 5 cali |
| Disc Included | NIE |
| Waga produktu | 1.77 kilogramów |
| Blokada wrzeciona | Tak |
| Gwint wrzeciona | M14 |
| Zalecane zastosowanie | Cutting and grinding metal and coatings |
| Intensywność użytkowania | Moderate use up to 5 hours/day |
9. Gwarancja i wsparcie
For warranty information, technical support, or service inquiries, please refer to the warranty card included with your product or contact your local Dexter authorized service center. Keep your purchase receipt as proof of purchase.