Wstęp
This manual provides detailed instructions for the safe and effective use of your ONNAIS Large Biometric Gun Safe, Model KKNGS009. This safe is designed to secure firearms and valuables using advanced biometric fingerprint technology, a programmable keypad, and traditional key access. It features an internal light for visibility and an emergency power supply for reliable operation.
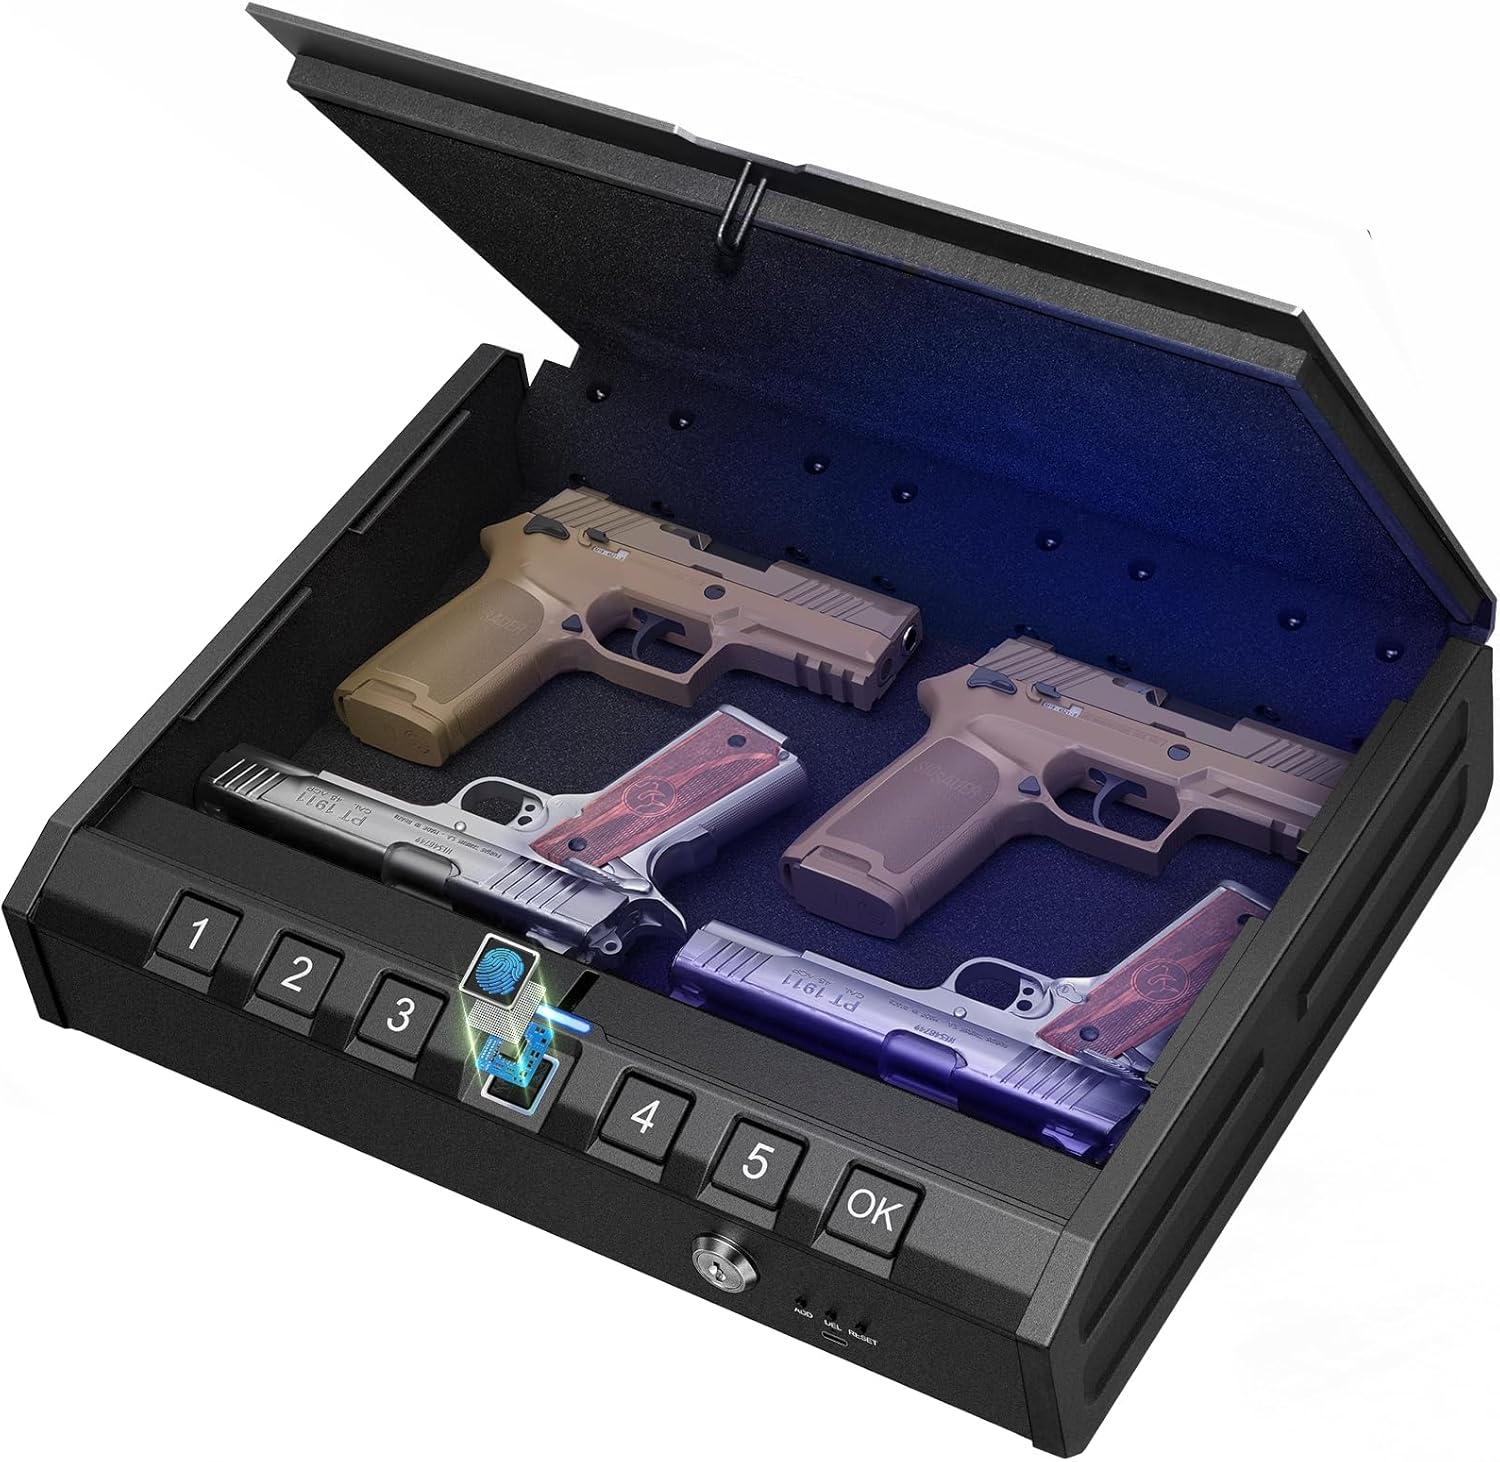
Image: ONNAIS Large Biometric Gun Safe with interior storage.
Zawartość opakowania
Sprawdź, czy w przesyłce znajdują się wszystkie elementy wymienione poniżej:
- ONNAIS Large Biometric Gun Safe
- Kabel zabezpieczający
- Klucze mechaniczne (2)
- Instrukcja obsługi
- Śruby montażowe (4)
- USB-C Emergency Power Cable

Image: All components included in the ONNAIS safe package.
Organizować coś
1. Instalacja baterii
- Locate the battery compartment on the front panel of the safe.
- Otwórz pokrywę komory.
- Insert 4 AA batteries (not included) according to the polarity indicators.
- Dokładnie zamknij pokrywę komory baterii.
2. Initial Unlock
Upon first use, the safe must be opened using the mechanical key.
- Insert one of the provided mechanical keys into the keyhole on the front panel.
- Aby otworzyć sejf, przekręć klucz zgodnie z ruchem wskazówek zegara.
- Lift the lid to open the safe.

Image: Manual key access for initial safe opening.
3. Setting a Passcode
The safe must be open to set or change the passcode.
- Locate the 'SET' button inside the safe, usually near the battery compartment.
- Press the 'SET' button once. The keypad will illuminate.
- Enter a 6-digit passcode using the number buttons (1-5).
- Naciśnij przycisk „OK”, aby potwierdzić.
- Re-enter the same 6-digit passcode.
- Press the 'OK' button again to finalize. A confirmation sound or light will indicate success.

Image: Keypad for setting and entering passcodes.
4. Rejestrowanie odcisków palców
The safe must be open to register new fingerprints.
- Locate the 'SET' button inside the safe.
- Press the 'SET' button twice. The fingerprint scanner will illuminate.
- Place your finger firmly on the fingerprint scanner. Lift and repeat 5 times, slightly adjusting the finger position each time to capture different angles.
- A confirmation sound or light will indicate successful registration.

Image: Fingerprint scanner for biometric access.
Instrukcja obsługi
1. Otwieranie za pomocą odcisku palca
- Przyłóż zarejestrowany palec mocno do skanera linii papilarnych.
- The safe will unlock with a confirmation sound and the lid will open automatically.
2. Opening with Passcode
- Enter your 6-digit passcode using the number buttons.
- Press the 'OK' button. The safe will unlock with a confirmation sound and the lid will open automatically.
3. Opening with Mechanical Key
This method is used for initial setup or in case of battery failure.
- Insert the mechanical key into the keyhole.
- Aby otworzyć sejf, przekręć klucz zgodnie z ruchem wskazówek zegara.
- Podnieś pokrywę, aby otworzyć.
4. Zasilanie awaryjne
If the batteries are completely drained, the safe can be temporarily powered using a USB-C cable.
- Connect a USB-C cable (provided) to the emergency power port on the front panel.
- Connect the other end of the USB-C cable to a power source (e.g., power bank, USB wall adapter).
- Once powered, use your registered fingerprint or passcode to open the safe.
- Replace the internal AA batteries as soon as possible.

Image: Emergency USB-C power port for external power supply.
Funkcje bezpieczeństwa
1. Security Cable
The included security cable allows you to tether the safe to a fixed object, preventing unauthorized removal.
- Unscrew the end of the security cable.
- Thread the cable around a secure, immovable object (e.g., bed frame, car seat anchor).
- Screw the end of the cable back into the designated port on the safe.

Image: Security cable attached to the safe and a fixed object.
2. Opcje montażu
The safe can be permanently mounted to a surface using the provided screws.
- Choose a suitable mounting location (e.g., inside a cabinet, to a wall).
- Mark the drill points using the pre-drilled holes on the bottom of the safe as a template.
- Wywierć otwory pilotujące w powierzchni montażowej.
- Secure the safe using the provided mounting screws.

Image: Mounting holes and screws for permanent installation.
Konserwacja
- Wymiana baterii: Replace all 4 AA batteries when the low battery indicator illuminates (usually a red light on the display).
- Czyszczenie: Przetrzyj zewnętrzną część miękką, suchą ściereczką. Unikaj środków czyszczących o działaniu ściernym i rozpuszczalników.
- Kontrola wilgotności: Place a desiccant packet (e.g., silica gel) inside the safe to absorb moisture and protect contents.
Rozwiązywanie problemów
- Safe Not Opening with Fingerprint/Passcode: Check battery level. If low, replace batteries or use emergency power. Ensure correct finger placement or passcode entry.
- Zapomniany kod dostępu: Use the mechanical key to open the safe, then reset the passcode following the setup instructions.
- Odcisk palca nie został rozpoznany: Re-register your fingerprint, ensuring proper placement and multiple scans. Ensure your finger is clean and dry.
- Brak zasilania: Replace batteries. If still no power, use the emergency USB-C power supply.
Specyfikacje
| Marka | ONNAIS |
| Numer modelu | KKNGS009 |
| Wymiary produktu | 3.15" gł. x 11.81" szer. x 15.35" wys. |
| Typ zamka | Electronic Combination Lock, Biometric Fingerprint, Mechanical Key |
| Tworzywo | Stal stopowa |
| Waga przedmiotu | 9.81 funta |
| Źródło zasilania | 4 AA Batteries (not included), USB-C Emergency Power |
| Cechy specjalne | Anti-Theft, Internal Light, Child-Safe Design |
Gwarancja i wsparcie
For warranty information, technical support, or any questions regarding your ONNAIS Large Biometric Gun Safe, please refer to the contact information provided on the product packaging or the official ONNAIS webstrona. Zachowaj dowód zakupu na potrzeby roszczeń gwarancyjnych.