1. Wprowadzenie i koniecview
This manual provides essential instructions for the safe and efficient use of your Maxcom MM135L Basic Mobile Phone. The MM135L is designed for straightforward communication, featuring a user-friendly interface, large keys, and a 1.77-inch screen. It supports 2G networks and includes dual SIM capability, an SOS button for emergencies, and convenient USB-C charging. Please read this manual thoroughly before operating the device.
2. Zawartość opakowania
Sprawdź, czy w opakowaniu znajdują się wszystkie elementy:
- Maxcom MM135L Mobile Phone
- Battery (Lithium-Ion, 600 mAh)
- Kabel USB
- Wysuwacz tacy na kartę SIM
- Instrukcja obsługi (ten dokument)
3. Układ urządzenia
Familiarize yourself with the physical components of your Maxcom MM135L phone.
Rysunek 3.1: Tył view of the Maxcom MM135L phone, showing the blue textured back cover, Maxcom logo, and speaker grille at the top.

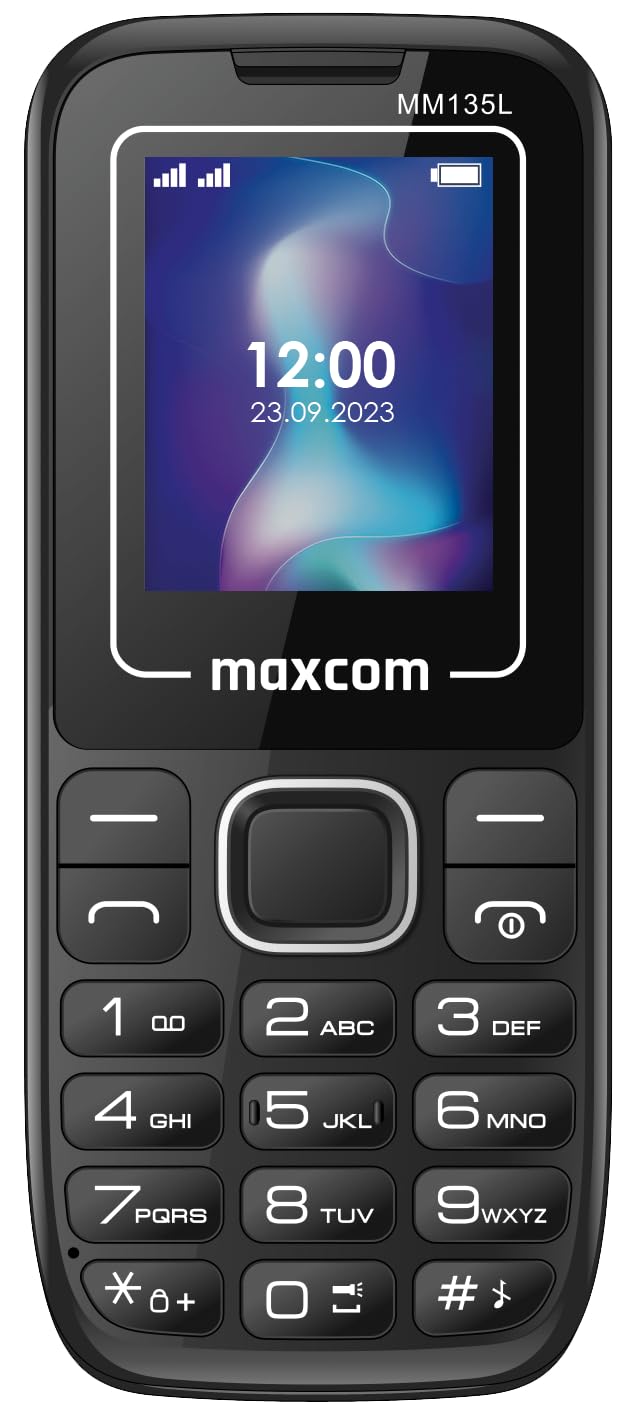
Rycina 3.2: Przód view of the Maxcom MM135L phone, displaying the screen, large numeric keypad, and call/end buttons.

Figure 3.3: Bottom edge of the phone, featuring the USB-C charging port and a 3.5mm headphone jack.

Figure 3.4: Top edge of the phone, highlighting the integrated flashlight.
Kluczowe komponenty:
- Ekran wyświetlacza: 1.77-inch LCD for clear text and call information.
- Klawiatura numeryczna: Large, tactile buttons for easy dialing and texting.
- Przyciski połączenia/zakończenia: Dedykowane przyciski do zarządzania połączeniami.
- Klawisze nawigacyjne: Do nawigacji po menu.
- Przycisk SOS: Located on the rear for emergency calls (refer to Figure 3.1).
- Flesz: Integrated at the top of the device (refer to Figure 3.4).
- Port USB-C: For charging the device (refer to Figure 3.3).
- Gniazdo słuchawkowe: 3.5mm port for audio accessories (refer to Figure 3.3).
4. Konfiguracja
4.1 Instalacja baterii
- Ostrożnie zdejmij tylną obudowę telefonu.
- Dopasuj styki baterii do zacisków wewnątrz komory baterii.
- Delikatnie dociśnij baterię na miejsce.
- Załóż tylną pokrywę i upewnij się, że jest dobrze zamocowana.
4.2 Instalacja karty SIM
The Maxcom MM135L supports dual SIM cards.
- With the phone powered off and the back cover removed, locate the SIM card slots.
- Insert your SIM card(s) into the designated slot(s) with the gold contacts facing down, following the orientation indicated on the phone.
- Sprawdź, czy karta(y) SIM jest(są) dokładnie włożona.
- Replace the back cover and battery.
4.3 Ładowanie telefonu
The phone uses a USB-C port for charging.
- Connect the USB-C cable to the charging port at the bottom of the phone (refer to Figure 3.3).
- Podłącz drugi koniec kabla USB do kompatybilnego zasilacza USB lub portu USB komputera.
- Wskaźnik baterii na ekranie pokaże stan ładowania.
- Odłącz ładowarkę po pełnym naładowaniu akumulatora.
Notatka: For optimal battery life, fully charge the phone before first use.
5. Instrukcja obsługi
5.1 Włączanie/wyłączanie zasilania
- Włączanie: Naciśnij i przytrzymaj Call/Power przycisk, aż ekran się zaświeci.
- Aby wyłączyć: Naciśnij i przytrzymaj Koniec/Moc button until the power off options appear, then confirm.
5.2 Wykonywanie i odbieranie połączeń
- Zadzwonić: Wprowadź numer telefonu za pomocą klawiatury i naciśnij Dzwonić przycisk.
- Aby odebrać połączenie: Naciśnij Dzwonić przycisk, gdy dzwoni telefon.
- Aby zakończyć połączenie: Naciśnij Koniec przycisk.
5.3 Wysyłanie i odbieranie wiadomości
- Navigate to the "Messages" menu using the navigation keys.
- Select "Create New Message" to compose an SMS.
- Wprowadź numer odbiorcy i swoją wiadomość, a następnie wyślij.
- Received messages will appear in the "Inbox".
5.4 Using the SOS Button
The SOS button is located on the rear of the phone. It is designed for emergency situations.
- Aktywować: Press and hold the SOS button for several seconds.
- The phone will automatically sound an alarm and send emergency SMS messages to pre-set contacts.
- It will then automatically call the saved emergency contacts in a loop until a call is answered.
- Sprawdź, czy kontakty alarmowe są prawidłowo skonfigurowane w ustawieniach telefonu.
5.5 Funkcja latarki
The built-in flashlight can be activated for convenience.
- Refer to the phone's specific settings or a dedicated side button for flashlight activation. Typically, a long press on a designated key or a side switch controls it.
6. Konserwacja
- Czyszczenie: Do czyszczenia powierzchni telefonu używaj miękkiej, suchej ściereczki. Unikaj płynnych środków czyszczących.
- Pielęgnacja baterii: Do not expose the battery to extreme temperatures. Avoid fully discharging the battery frequently.
- Składowanie: Jeśli telefon nie będzie używany przez dłuższy czas, należy go przechowywać w chłodnym i suchym miejscu.
- Wodoodporność: Ten telefon nie jest wodoodporny. Unikaj kontaktu z płynami.
7. Rozwiązywanie Problemów
| Problem | Możliwe rozwiązanie |
|---|---|
| Telefon się nie włącza. | Upewnij się, że akumulator jest prawidłowo zainstalowany i naładowany. Podłącz ładowarkę i spróbuj ponownie. |
| Nie można wykonywać ani odbierać połączeń. | Check if the SIM card is properly inserted and activated. Verify network signal strength. Contact your service provider if issues persist. |
| Akumulator się nie ładuje. | Ensure the USB-C cable and charger are securely connected and functional. Try a different charging cable or adapter. |
| Przycisk SOS nie działa. | Verify that emergency contacts are saved in the phone's settings. Ensure the phone has network coverage. |
| Słaba jakość połączeń. | Move to an area with better network reception. Check the speaker and microphone for obstructions. |
8. Specyfikacje
| Funkcja | Szczegół |
|---|---|
| Nazwa modelu | MM135L |
| Rozmiar ekranu | 1.77 cali |
| Typ wyświetlacza | LCD |
| Rezolucja | 128x160 |
| Technologia komórkowa | 2G |
| Obsługa karty SIM | Podwójna karta SIM |
| Typ baterii | Litowo-jonowy |
| Pojemność baterii | 600 mAh |
| Port ładowania | USB-C |
| Wymiary (dł. x szer. x wys.) | Wymiary 7 x 14 x 3.5 cm |
| Waga | 60 gramów |
| Cechy specjalne | SOS Button, Flashlight, Expandable Memory, Fast Charging Support |
9. Gwarancja i wsparcie
For warranty information, technical support, or service inquiries, please refer to the warranty card included with your product or contact Maxcom customer service directly. Keep your proof of purchase for warranty claims.