1. Wprowadzenie
This manual provides detailed instructions for the installation, operation, and maintenance of your Elprico H310 LGA 1151 Micro ATX DDR4 Motherboard. Please read this manual thoroughly before proceeding with installation to ensure proper setup and optimal performance.
2. Informacje dotyczące bezpieczeństwa
- Przed instalacją lub demontażem jakichkolwiek podzespołów należy zawsze odłączyć zasilacz od gniazdka ściennego.
- Załóż opaskę antystatyczną na nadgarstek, aby zapobiec uszkodzeniu podzespołów na skutek wyładowań elektrostatycznych (ESD).
- Przenoś elementy trzymając je za krawędzie, aby uniknąć dotykania delikatnych części.
- Aby zapobiec przegrzaniu, zadbaj o odpowiednią wentylację obudowy komputera.
- Chroń płytę główną przed wilgocią i ekstremalnymi temperaturami.
3. Koniec produktuview
The Elprico H310 LGA 1151 Micro ATX DDR4 Motherboard is designed for desktop computers, supporting Intel 8th and 9th Generation Core processors. It features a stable power supply, high-speed H310 chipset, and rich expansion ports for versatile computing tasks.
Główne cechy:
- Szeroka kompatybilność z procesorami: Supports LGA 1151 socket for Intel 8th and 9th Generation Core processors.
- Dual-Channel DDR4 Memory: Two DDR4 DIMM slots supporting up to 32GB of RAM with effective frequencies of 1066/1333/1600 MHz.
- Stabilne zasilanie: Features a three-phase power design with all solid-state capacitors and 24+8 pin power connectors for reliable operation.
- Szybki chipset: Utilizes the Intel H310 chipset for stable and reliable performance.
- Zintegrowana grafika: Equipped with an integrated graphics processor and multiple display outputs (DVI, HDMI compatible, VGA).
- Bogate porty rozszerzeń: Includes SATA 6Gb/s ports, NVME M.2 slot, PCIe X16 slot, PCIe X1 slot, USB 3.0/2.0, PS/2, RJ45 1000Mbps, and audio ports.
Układ płyty głównej:
Below are images illustrating the various components and ports on the motherboard.

Rysunek 3.1: Widok z góry na dół view of the motherboard, showing the LGA 1151 CPU socket and the Intel H310 chipset area.
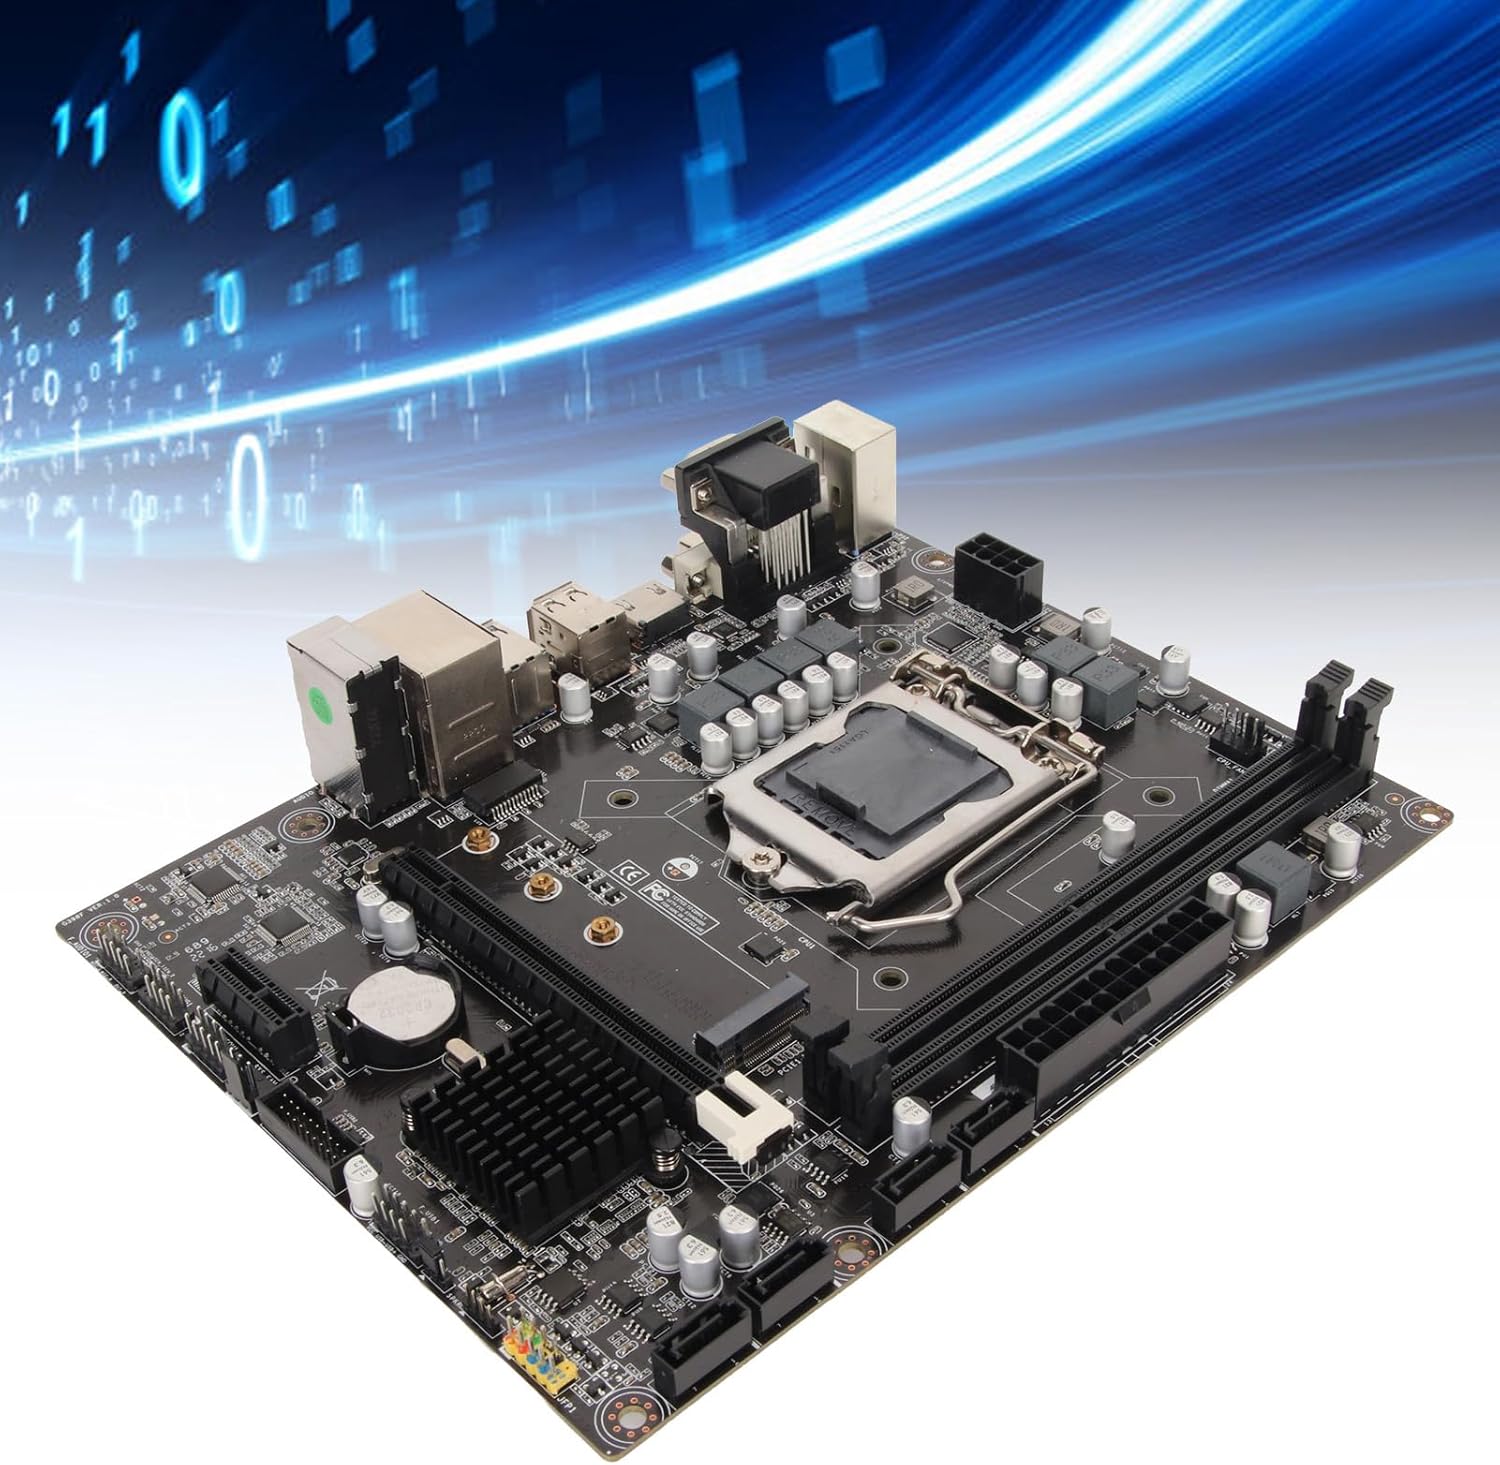
Figure 3.2: Component diagram highlighting the CPU socket, DDR4 memory slots, H310 chipset, and SATA 3.0 (6Gb/s) ports.
Rysunek 3.3: Szczegółowy view of the rear I/O panel, featuring DVI, HDMI, VGA, USB 2.0/3.0, LAN, and audio jacks.
4. Przewodnik instalacji (konfiguracja)
Aby zainstalować płytę główną i jej podzespoły, należy postępować zgodnie z poniższymi krokami.
4.1 Instalacja procesora
- Znajdź gniazdo procesora LGA 1151 na płycie głównej.
- Delikatnie naciśnij dźwignię obciążenia i pociągnij ją na bok, aby otworzyć pokrywę gniazda procesora.
- Dopasuj trójkątny znak na procesorze Intel LGA 1151 do odpowiadającego mu znaku na gnieździe.
- Ostrożnie umieść procesor w gnieździe, nie używając siły.
- Zamknij pokrywę gniazda i wciśnij dźwignię obciążenia z powrotem na miejsce, aż usłyszysz kliknięcie.

Figure 4.1: CPU socket area, showing the mechanism for processor installation.
4.2 Instalacja pamięci RAM
- Znajdź dwa gniazda DIMM DDR4.
- Otwórz zatrzaski na obu końcach gniazda pamięci.
- Dopasuj wycięcie na module pamięci DDR4 do wypustki w gnieździe DIMM.
- Wsuń moduł pamięci mocno do gniazda, aż zatrzaski zatrzasną się na miejscu.
4.3 Instalacja pamięci masowej
The motherboard supports both SATA and NVMe M.2 storage devices.
Dyski SATA:
- Podłącz jeden koniec kabla danych SATA do portu SATA 6 Gb/s na płycie głównej.
- Podłącz drugi koniec kabla danych SATA do dysku twardego/SSD SATA.
- Podłącz kabel zasilający SATA do zasilacza i dysku twardego/SSD SATA.
Dysk SSD NVMe M.2:
- Znajdź gniazdo M.2 na płycie głównej.
- Odkręć śrubę dystansową M.2.
- Włóż dysk SSD NVMe M.2 do gniazda pod kątem 30 stopni.
- Gently push down the SSD and secure it with the M.2 standoff screw.
4.4 Instalacja karty rozszerzeń (PCIe)
- Locate the PCIe X16 or PCIe X1 slots.
- Zdejmij odpowiednią osłonę gniazda rozszerzeń z obudowy komputera.
- Align your expansion card (e.g., graphics card) with the chosen PCIe slot.
- Dociśnij mocno, aż karta zostanie całkowicie osadzona w gnieździe.
- Przymocuj kartę do obudowy za pomocą śrubki.
4.5 Połączenia zasilania
- Podłącz 24-pinowe złącze zasilania ATX zasilacza do głównego 24-pinowego gniazda zasilania na płycie głównej.
- Podłącz 8-pinowe złącze zasilania ATX 12V zasilacza do 8-pinowego gniazda zasilania w pobliżu procesora.
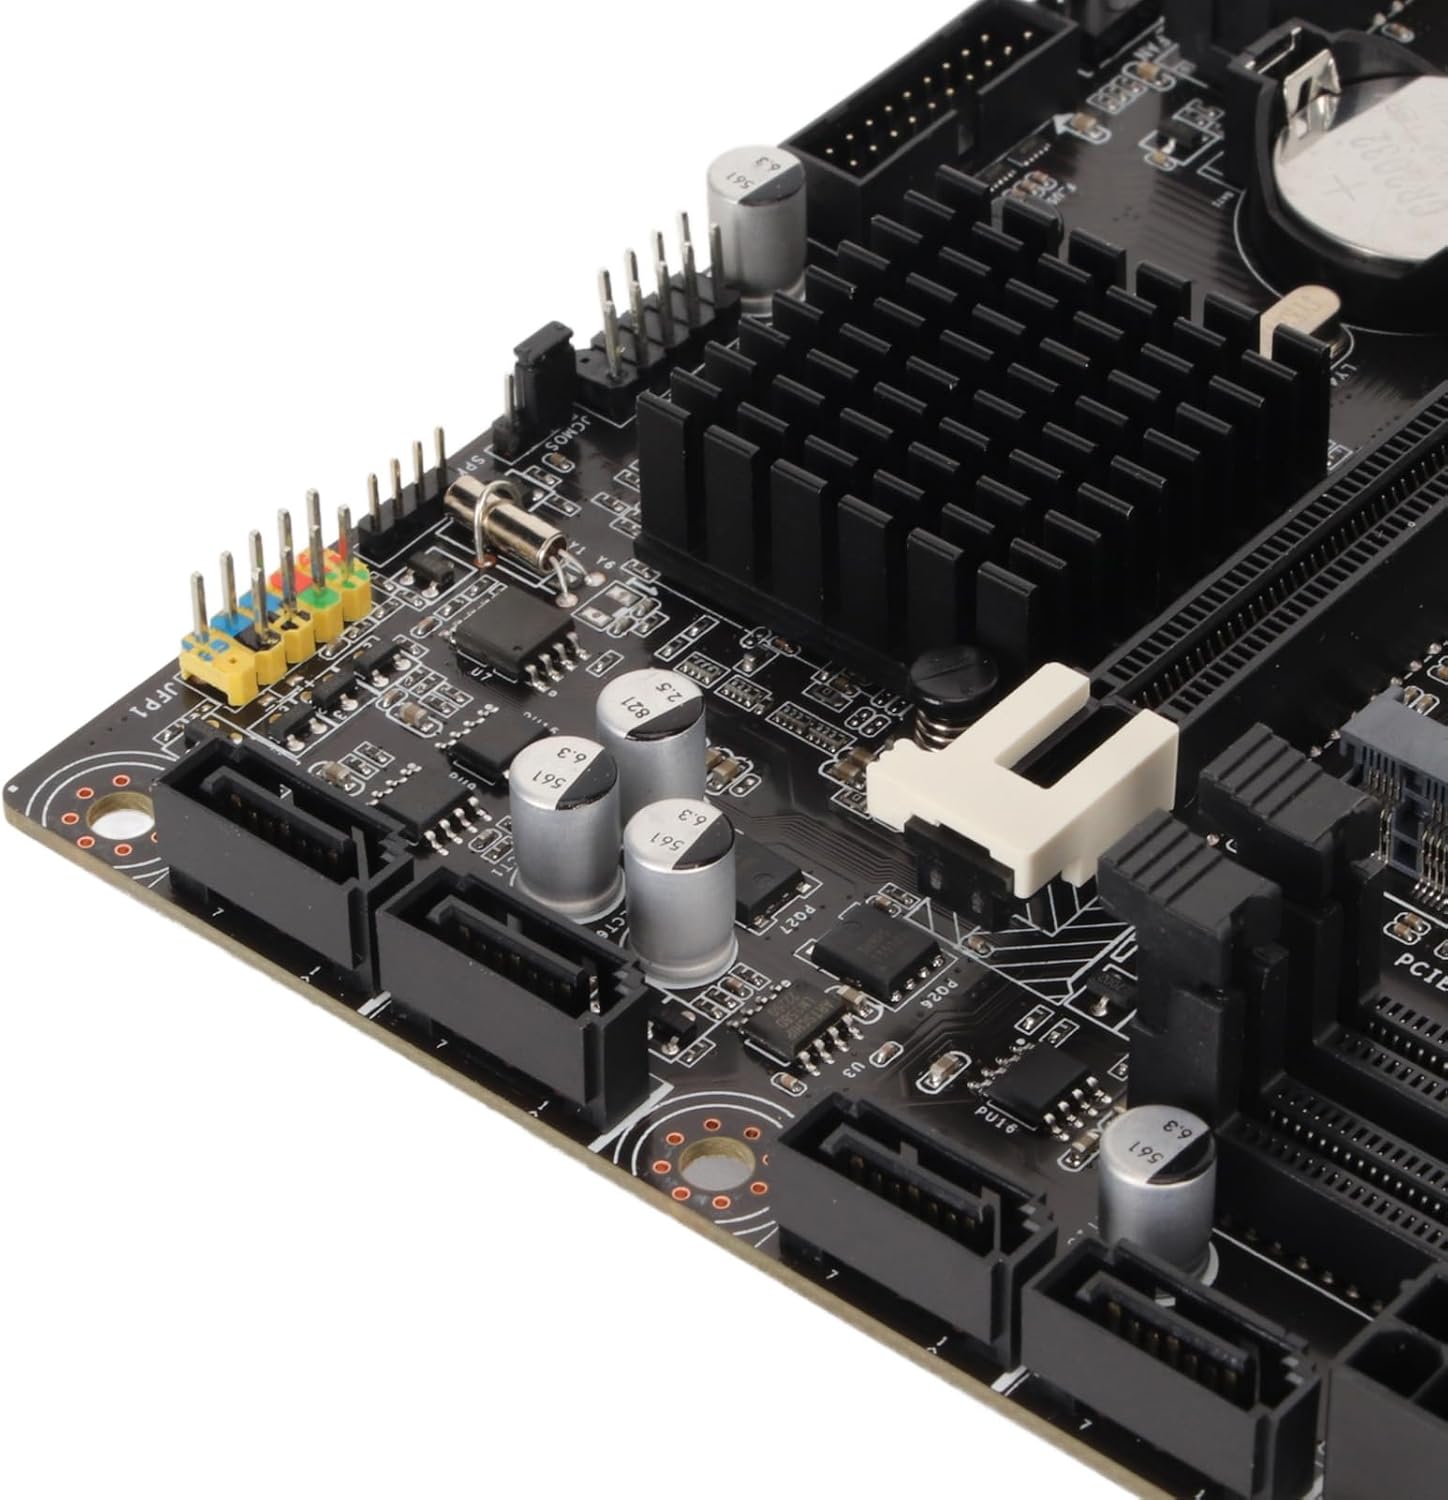
4.6 Połączenia na panelu przednim
Connect the cables from your PC case's front panel (USB, audio, power button, reset button, LED indicators) to the corresponding headers on the motherboard. Refer to the motherboard diagram for exact header locations.
4.7 Mounting the Motherboard
- Install standoffs in your PC case according to the Micro ATX form factor.
- Carefully place the motherboard onto the standoffs, ensuring the rear I/O ports align with the case's I/O shield.
- Przymocuj płytę główną za pomocą śrub.

Rysunek 4.2: Ogólne view of the motherboard, illustrating its Micro ATX form factor and component placement.
5. Instrukcja obsługi
5.1 Pierwsze uruchomienie
After completing all hardware installations, connect your monitor, keyboard, and mouse. Power on your system. The system should display the BIOS/UEFI splash screen.
5.2 Konfiguracja BIOS/UEFI
Aby wejść do narzędzia konfiguracji BIOS/UEFI, naciśnij przycisk USUNĄĆ or F2 key repeatedly during the initial boot sequence. Here you can configure boot order, system time, and other advanced settings.
5.3 Instalacja sterownika
After installing your operating system, install the necessary drivers for the chipset, integrated graphics, LAN, and audio. These drivers are typically provided on a support CD or can be downloaded from the manufacturer's webstrona.
6. Konserwacja
6.1 Czyszczenie
Regularly clean your PC case and motherboard to prevent dust buildup, which can lead to overheating. Use compressed air to remove dust from fans, heatsinks, and other components. Ensure the system is powered off and unplugged before cleaning.
6.2 Aktualizacje BIOS-u
Okresowo sprawdzaj producenta website for BIOS/UEFI updates. Updates can improve system stability, add support for new hardware, or fix bugs. Follow the provided instructions carefully when updating the BIOS to avoid system damage.
7. Rozwiązywanie Problemów
7.1 Typowe problemy
- Brak zasilania: Check all power connections (24-pin, 8-pin CPU, GPU, SATA) and ensure the power supply is switched on.
- Brak wyświetlacza: Verify monitor connection, ensure graphics card (if dedicated) is properly seated and powered, and try reseating RAM modules.
- Niestabilność/awarie systemu: Check CPU and GPU temperatures, ensure RAM is correctly installed, and verify driver versions.
- Nie znaleziono urządzenia rozruchowego: Check SATA/M.2 connections, verify boot order in BIOS/UEFI, and ensure the operating system is properly installed on the drive.
7.2 Kody błędów
If your motherboard has a diagnostic LED display or emits beep codes, consult the motherboard's specific documentation (if available) for the meaning of these codes. Common beep codes often indicate issues with RAM, CPU, or graphics.
8. Specyfikacje
| Funkcja | Specyfikacja |
|---|---|
| Marka | Elprico |
| Nazwa modelu | Elpricop91byt60k7 |
| Gniazdo procesora | LGA 1151 |
| Kompatybilne procesory | Intel 8th Generation, 9th Generation Core Processors |
| Typ chipsetu | Intel H310 |
| Technologia pamięci RAM | DDR4 |
| Gniazda pamięci | 2 (Dual-Channel) |
| Maximum RAM Size | 32 GB |
| Prędkość zegara pamięci | 1600 MHz (efektywna) |
| Kompatybilne urządzenia | Komputer stacjonarny |
| Łączna liczba portów USB | 14 (Various types, including USB 3.0/2.0) |
| Współczynnik kształtu | Micro ATX (Approx. 21.5 x 17 cm / 8.5 x 6.7 inches) |
| Zintegrowana bateria | CR2032 (240 mAh) |
9. Gwarancja i wsparcie
9.1 Gwarancja producenta
Ten produkt jest dostarczany z 1 rok gwarancji na wady fabryczne. Please retain your proof of purchase for warranty claims. For specific terms and conditions, refer to the warranty information provided at the time of purchase or contact the seller.
9.2 Wsparcie techniczne
For technical assistance, troubleshooting, or further inquiries, please contact your retailer or the manufacturer's support channels. Information regarding spare parts availability and software updates is currently unavailable.