1. Wprowadzenie
Thank you for choosing the Lightinginside Smart Plug. This device allows you to control your home electronics and appliances remotely via an app, voice commands, and set up automated schedules. This manual provides detailed instructions for setting up, operating, and troubleshooting your smart plugs to ensure a seamless smart home experience.
2. Informacje dotyczące bezpieczeństwa
Please read all safety instructions before using the device. Failure to follow these instructions may result in electric shock, fire, or other hazards.
- The smart plug is designed for indoor use only.
- Nie narażaj urządzenia na działanie wody i wilgoci.
- Nie rozmontowuj i nie modyfikuj urządzenia.
- Ensure the connected appliance's power consumption does not exceed the smart plug's maximum load (10A 1200W).
- The smart plug features multiple safety protections including fireproof resistance, overload protection, surge protection, short circuit protection, grounded protection, thunder protection, and over-voltagochrona.
- The product is ETL and FCC certified, ensuring compliance with safety standards.
3. Koniec produktuview
The Lightinginside Smart Plug is a compact and versatile device designed to make your ordinary electronic devices smart. It connects to your home's 2.4GHz Wi-Fi network, enabling remote control and automation.

Image: Four Lightinginside Smart Plugs with their retail packaging, illustrating the product's compact design and the quantity included in the pack.
Główne cechy:
- Łatwa konfiguracja: No hub required, connects directly to 2.4GHz Wi-Fi.
- Zdalne sterowanie aplikacją: Control devices from anywhere using the Smart Life App.
- Sterowanie głosowe: Kompatybilny z Alexą i Asystentem Google, co umożliwia obsługę bez użycia rąk.
- Minutnik i harmonogram: Create custom schedules to automate power on/off times.
- Kontrola grupy: Możesz sterować wieloma inteligentnymi wtyczkami jednocześnie, grupując je w aplikacji.
- Projekt bezpieczeństwa: Built with fireproof PC + ABS material and multiple safety protections.

Image: A detailed diagram of the smart plug, highlighting its dimensions (50mm / 1.97in diameter, 28mm / 1.10in depth), ETL and FCC certifications, and icons representing features like 10A 1200W Max Load, Overload Protection, Flame Retardant, APP Remote Control, Voice Control, Group Control, Timer, and 2.4G Wi-Fi compatibility.
4. Przewodnik konfiguracji
Follow these steps to set up your Lightinginside Smart Plug:
- Pobierz aplikację Smart Life: Szukaj "Smart Life" in your smartphone's app store (iOS or Android) and download the application.
- Zarejestruj się/Zaloguj: Otwórz aplikację Smart Life i zarejestruj nowe konto lub zaloguj się, jeśli już je posiadasz.
- Podłącz inteligentną wtyczkę: Insert the smart plug into a standard wall outlet. The indicator light on the plug should start blinking rapidly. If it's not blinking, press and hold the power button on the side of the plug for 5-10 seconds until it starts blinking rapidly.
- Dodaj urządzenie w aplikacji: In the Smart Life App, tap the "+" icon in the top right corner to add a device. Select "Electrical Outlet" or "Socket (Wi-Fi)" from the device list.
- Połącz się z Wi-Fi: Confirm that the indicator light on the smart plug is blinking rapidly. Enter your 2.4GHz Wi-Fi network password. Notatka: The smart plug only supports 2.4GHz Wi-Fi networks. If your router broadcasts both 2.4GHz and 5GHz networks with the same SSID, you may need to temporarily disable the 5GHz band during setup or ensure your phone is connected to the 2.4GHz band.
- Łączenie w pary: The app will begin connecting to the smart plug. Once connected, you can rename the device for easier identification (e.g., "Living Room Lamp,,,Ekspres do kawy").
- Pełna konfiguracja: Your smart plug is now ready for use. You can control it directly from the Smart Life App.
5. Działanie
5.1 Zdalne sterowanie aplikacją
Control your smart plug from anywhere with an internet connection using the Smart Life App. This feature provides convenience and enhanced home security.

Image: A man outdoors, smiling and looking at his smartphone, with a thought bubble showing a coffee maker plugged into a smart outlet, indicating remote control functionality. The text "Turn on the coffee maker" is displayed, demonstrating the ease of app control.

Image: A woman smiling while looking at her smartphone, with a dog drinking from a pet water fountain in the foreground. This illustrates the convenience of using the app to remotely control various household devices, including pet care items.
5.2 Sterowanie głosowe
Integrate your smart plug with Amazon Alexa or Google Assistant for hands-free control. Follow the instructions within the Smart Life App to link your account with your preferred voice assistant.
- Once linked, you can use commands like:
- „Alexa, włącz salon”amp."
- „Hej Google, wyłącz ekspres do kawy”.

Image: A woman comfortably reading in bed, with an Amazon Echo device visible on her bedside table. This scene highlights the convenience of using voice commands to control smart devices, such as a lamp connected to a smart plug, without needing to physically interact with them.

Image: A family enjoying time together in a living room, with an Amazon Echo device prominently placed on a coffee table. This depicts how voice control seamlessly integrates into daily family life, allowing for easy management of smart home devices.
5.3 Timer i harmonogram
Automate your devices by setting custom timers and schedules. This can help reduce energy consumption and add convenience to your daily routine.
- Harmonogram: Set specific times for devices to turn on or off (e.g., lights on at dusk, coffee maker on at 7:00 AM).
- Regulator czasowy: Set a countdown timer for a device to turn off after a certain period (e.g., turn off phone charger after 2 hours).
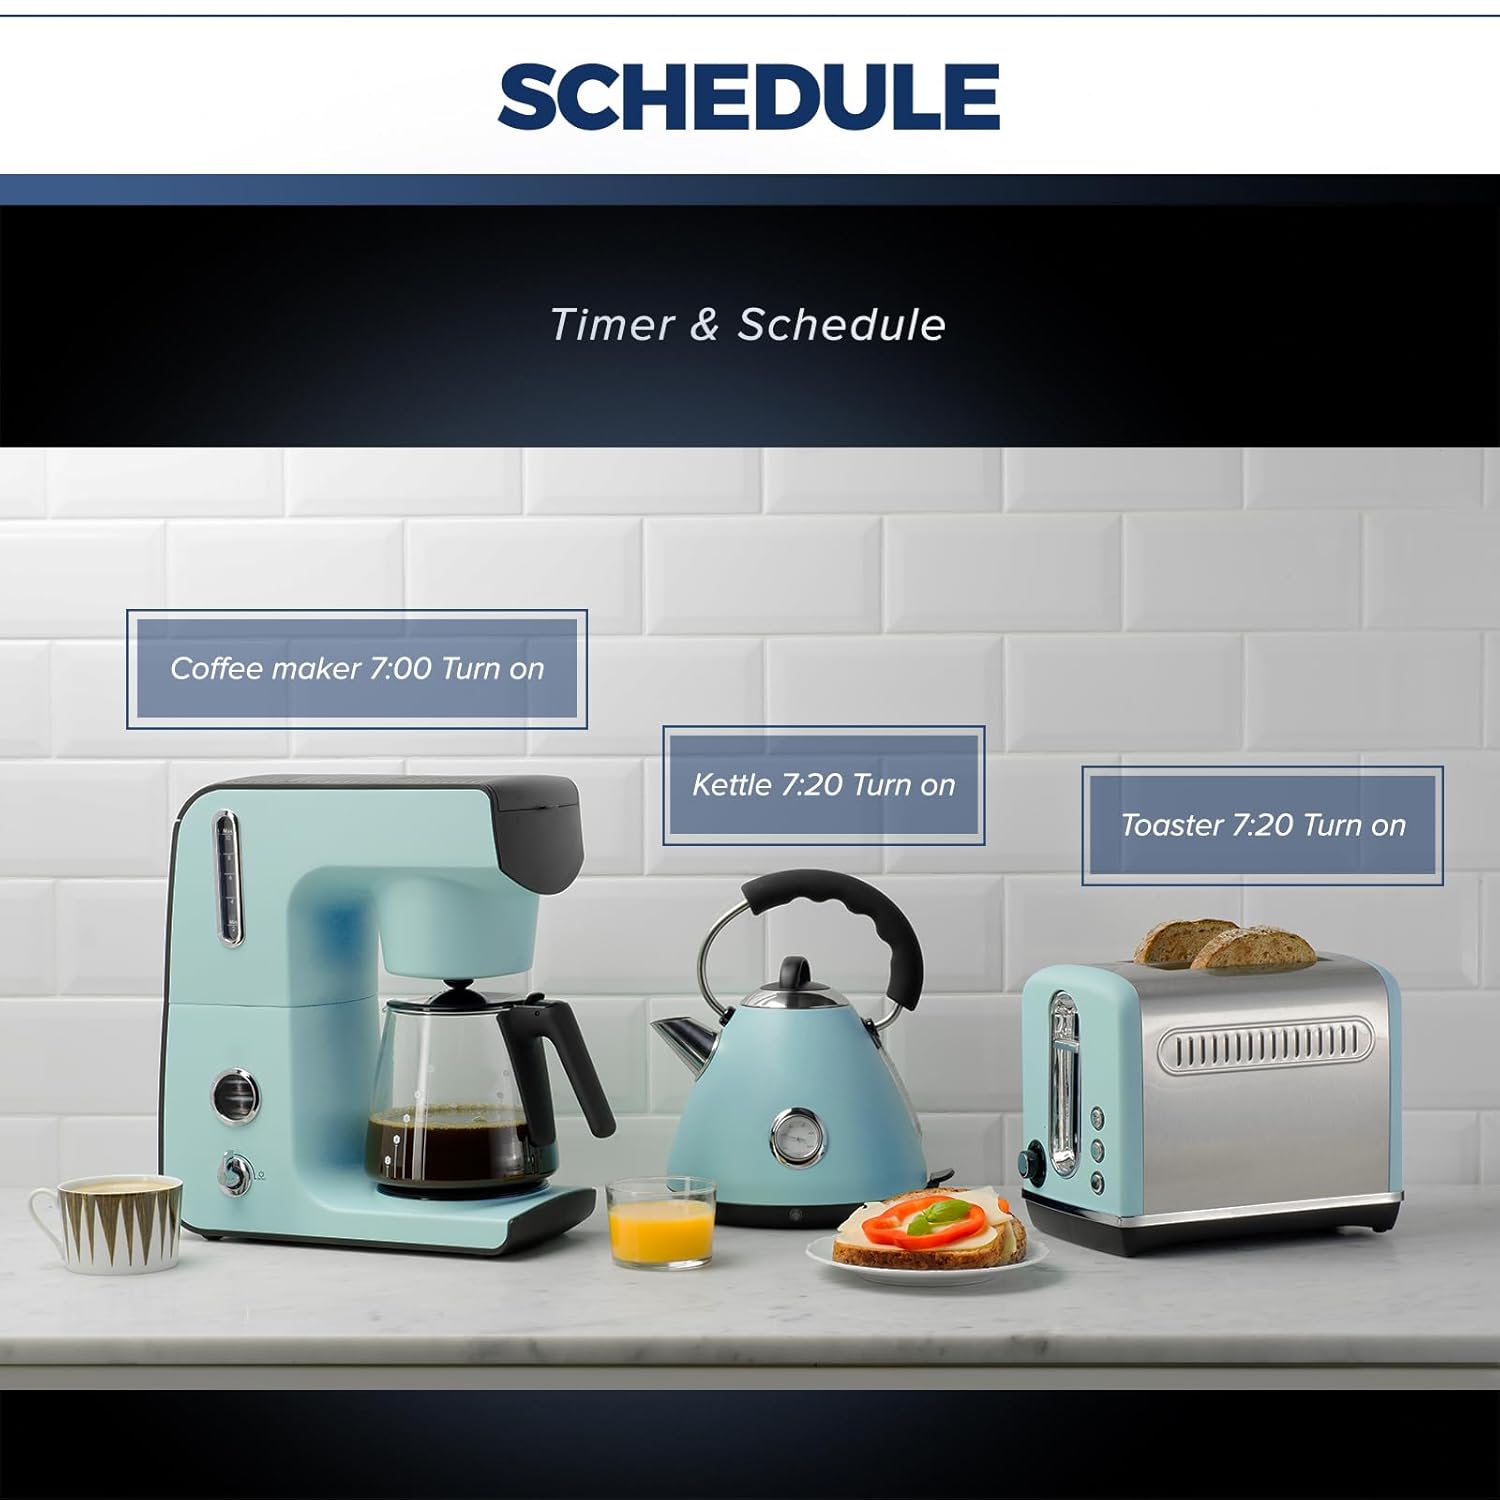
Image: A kitchen counter featuring a coffee maker, an electric kettle, and a toaster. Digital labels indicate scheduled turn-on times for each appliance: "Coffee maker 7:00 Turn on," "Kettle 7:20 Turn on," and "Toaster 7:20 Turn on," demonstrating the scheduling capabilities of the smart plug.

Image: A man sleeping peacefully in bed, with a bedside lamp connected to a smart plug. Clocks indicate "18:00 PM Light ON" and "22:00 AM Light OFF," while a smartphone screen displays the Smart Life app's schedule interface, illustrating how timers and schedules can automate lighting for convenience and energy saving.
5.4 Kontrola grupowa
For enhanced convenience, you can group multiple smart plugs together in the Smart Life App. This allows you to control several devices with a single command.
- Example: Create a "Living Room" group to turn all lights and fans in that area on or off simultaneously.

Image: An architectural rendering of a multi-room house interior, visually segmented into areas like "Bathroom Group," "Bedroom 1 Group," "Kitchen Group," and "Bedroom 2 Group." A smartphone screen in the foreground displays the Smart Life app interface, showing these groups, illustrating the ability to control multiple smart plugs simultaneously by organizing them into logical groups.
6. Konserwacja
The Lightinginside Smart Plug requires minimal maintenance. Follow these guidelines to ensure optimal performance and longevity:
- Utrzymuj urządzenie w czystości, wycierając je miękką, suchą ściereczką.
- Unikaj stosowania silnych środków chemicznych i ściernych środków czyszczących.
- Ensure the plug is not exposed to extreme temperatures or humidity.
- Periodically check for firmware updates within the Smart Life App to ensure you have the latest features and security enhancements.
7. Rozwiązywanie Problemów
If you encounter issues with your smart plug, refer to the following common problems and solutions:
| Problem | Możliwa przyczyna | Rozwiązanie |
|---|---|---|
| Wtyczka inteligentna nie łączy się z siecią Wi-Fi. | Incorrect Wi-Fi band (not 2.4GHz), incorrect password, weak signal, router settings. | Ensure your Wi-Fi is 2.4GHz. Check Wi-Fi password. Move the plug closer to the router. Temporarily disable 5GHz band on your router during setup if they share the same SSID. |
| Urządzenie jest offline w aplikacji. | Wi-Fi disconnected, power outage, plug unplugged. | Check your Wi-Fi connection. Ensure the smart plug is powered on and plugged in securely. Re-add the device if necessary. |
| Sterowanie głosowe nie działa. | Incorrect linking with voice assistant, device name not recognized, internet issue. | Verify the Smart Life account is correctly linked to Alexa/Google Assistant. Try renaming the device to something simpler. Check your internet connection. |
| Plug not responding. | Przeciążenie, błąd wewnętrzny. | Unplug the device, wait 10 seconds, and plug it back in. Ensure the connected appliance does not exceed the maximum load. |
8. Specyfikacje
Detailed technical specifications for the Lightinginside Smart Plug (Model LID03):
- Numer modelu: LID03
- Marka: Lightinginside
- Tworzywo: Plastic (PC + ABS)
- Typ złącza: Włączać do kontaktu
- No. of Wires: 3
- Format wtyczki: Typ B
- Maksymalne obciążenie: 10A / 1200W
- Wi-Fi standard: 2.4 GHz Wi-Fi only
- Certyfikaty: ETL, FCC
- Wymiary opakowania: 4.61 x 4.61 x 2.24 cala
- Waga przedmiotu: 9.14 uncji
- Data pierwszej dostępności: 18 lipca 2023 r.
9. Gwarancja i wsparcie
For warranty information and customer support, please refer to the product packaging or contact Lightinginside directly through their official website or the retailer where the product was purchased. Keep your purchase receipt as proof of purchase for any warranty claims.
For technical assistance or further inquiries, please visit the Lightinginside store page on Amazon or contact their customer service.
Lightinginside Store: https://www.amazon.com/stores/Lightinginside/page/7FD1C966-52B6-411E-A14C-C3B64DA22A46