1. Wprowadzenie
This manual provides comprehensive instructions for the installation, operation, and maintenance of your AVLT Single 17"-57" Super Ultrawide Monitor Arm, Model AVLT-DM64-1. Please read this manual thoroughly before assembly and use to ensure proper function and safety.
The AVLT monitor arm is designed to enhance your workspace ergonomics by providing flexible positioning for large and ultrawide monitors, freeing up valuable desk space. It features a robust gas spring mechanism for smooth height adjustments and integrated USB-C and USB-A ports for convenient connectivity.
2. Funkcje produktu
- Wide Screen Compatibility: Supports single flat, curved, or ultrawide monitors from 17" to 57" in size.
- Wysoka waga: Designed to hold monitors weighing up to 59.5 lbs (27 kg).
- Zgodność ze standardem VESA: Compatible with VESA mounting patterns 75x75mm, 100x100mm, 200x100mm, and 200x200mm.
- Konstrukcja oszczędzająca miejsce: Heavy-duty metal base occupies only 4.7" x 4.7" (120mm x 120mm) of desk surface.
- Elastyczne opcje montażu: Includes both top-mount C-clamp and grommet mount options.
- Regulowana wysokość: Premium gas spring arm allows height adjustment from 12.8" to 25.8" (325mm to 655mm).
- Full Motion Adjustments: Offers +60°/-20° monitor tilt, 360° rotation, and 180° swivel for optimal viewkąty.
- Cockpit Mode Support: Compatible with monitors like the Samsung Odyssey ARK 55 for both Landscape and Cockpit modes.
- Zintegrowane porty USB: Features built-in USB-C and USB-A ports for convenient data transfer and charging.
- Zarządzanie kablami: Sleek cable management covers keep cords organized and out of sight.
3. Zawartość opakowania
Przed przystąpieniem do instalacji należy sprawdzić, czy wszystkie komponenty są obecne:
- Monitor Arm Assembly (Upper and Lower Arms)
- Desk Base with Integrated USB Hub
- C-Clamp Sprzęt montażowy
- Sprzęt montażowy przelotki
- VESA Plate with Adapters (75x75mm, 100x100mm, 200x100mm, 200x200mm)
- USB-C Extension Cable (31.5" / 80cm)
- USB 3.0 Type A Extension Cable (70" / 178cm)
- Pokrywy do zarządzania kablami
- Allen Keys for Adjustments
- Instrukcja obsługi
4. Konfiguracja i instalacja
Follow these steps carefully to install your monitor arm. Two installation methods are provided: C-Clamp i przelotka.
4.1. Wybierz metodę montażu
The monitor arm offers two installation options: C-Clamp for desk edges or Grommet for desks with existing holes or where drilling is preferred.

Figure 4.1: C-Clamp and Grommet Installation Options
4.2. C-Clamp Instalacja
- Dołącz C-klamp components to the base unit.
- Position the base unit on the edge of your desk.
- Dokręć C-clamp screws firmly to secure the base to the desk. Ensure the desk thickness is between 0.39"-1.8" (10-45mm).

Figure 4.2: C-Clamp Szczegół
4.3. Montaż przelotki
- Attach the grommet mounting hardware to the base unit.
- Insert the grommet bolt through the desk hole. Ensure the desk thickness is between 0.39"-1.6" (10-40mm) and the grommet hole diameter is 0.39"-2.3" (10-60mm).
- Secure the base from underneath the desk by tightening the nut.

Figure 4.3: Grommet Detail
4.4. Attach Monitor Arm to Base
- Slide the lower arm onto the pole of the installed base.
- Slide the upper arm onto the lower arm.
- Use the provided Allen keys to tighten any set screws to secure the arm sections.
4.5. Zamontuj płytkę VESA do monitora
- Select the appropriate VESA screws (M4, M5, M6, M8) and spacers for your monitor.
- Attach the VESA plate to the back of your monitor. Ensure it is securely fastened.

Figure 4.4: VESA Plate Attachment
4.6. Mount Monitor to Arm
- Carefully lift the monitor with the attached VESA plate.
- Slide the VESA plate onto the mounting head of the monitor arm.
- Ensure the monitor is securely seated on the arm.

Figure 4.5: Monitor Mounted on Arm
4.7. Zarządzanie kablami
- Route your monitor cables through the integrated cable management covers on the arm.
- Secure the covers with the provided screws to maintain a clean and organized appearance.

Rysunek 4.6: Zarządzanie kablami
4.8. Official Product Video: Setup Overview
Wideo 4.1: W tym filmie znajdziesz krótki przeglądview of the setup process for the AVLT Single 57-inch Heavy Duty Monitor Arm, including top mount and USB A/C port features.
5. Instrukcja obsługi
The AVLT monitor arm offers a wide range of adjustments to customize your viewzdobywania doświadczenia.
5.1. Regulacja wysokości
The gas spring mechanism allows for effortless height adjustment. Gently push or pull the monitor to your desired height between 12.8" and 25.8".
5.2. Tilt, Swivel, and Rotation
- Przechylenie: Adjust the monitor tilt by +60°/-20° to reduce glare and optimize viewkąt.
- Obracać: Swivel the monitor 180° horizontally to share your screen or change your viewpozycja.
- Obrót: Obróć monitor o 360°, aby ustawić go w orientacji poziomej lub pionowej.
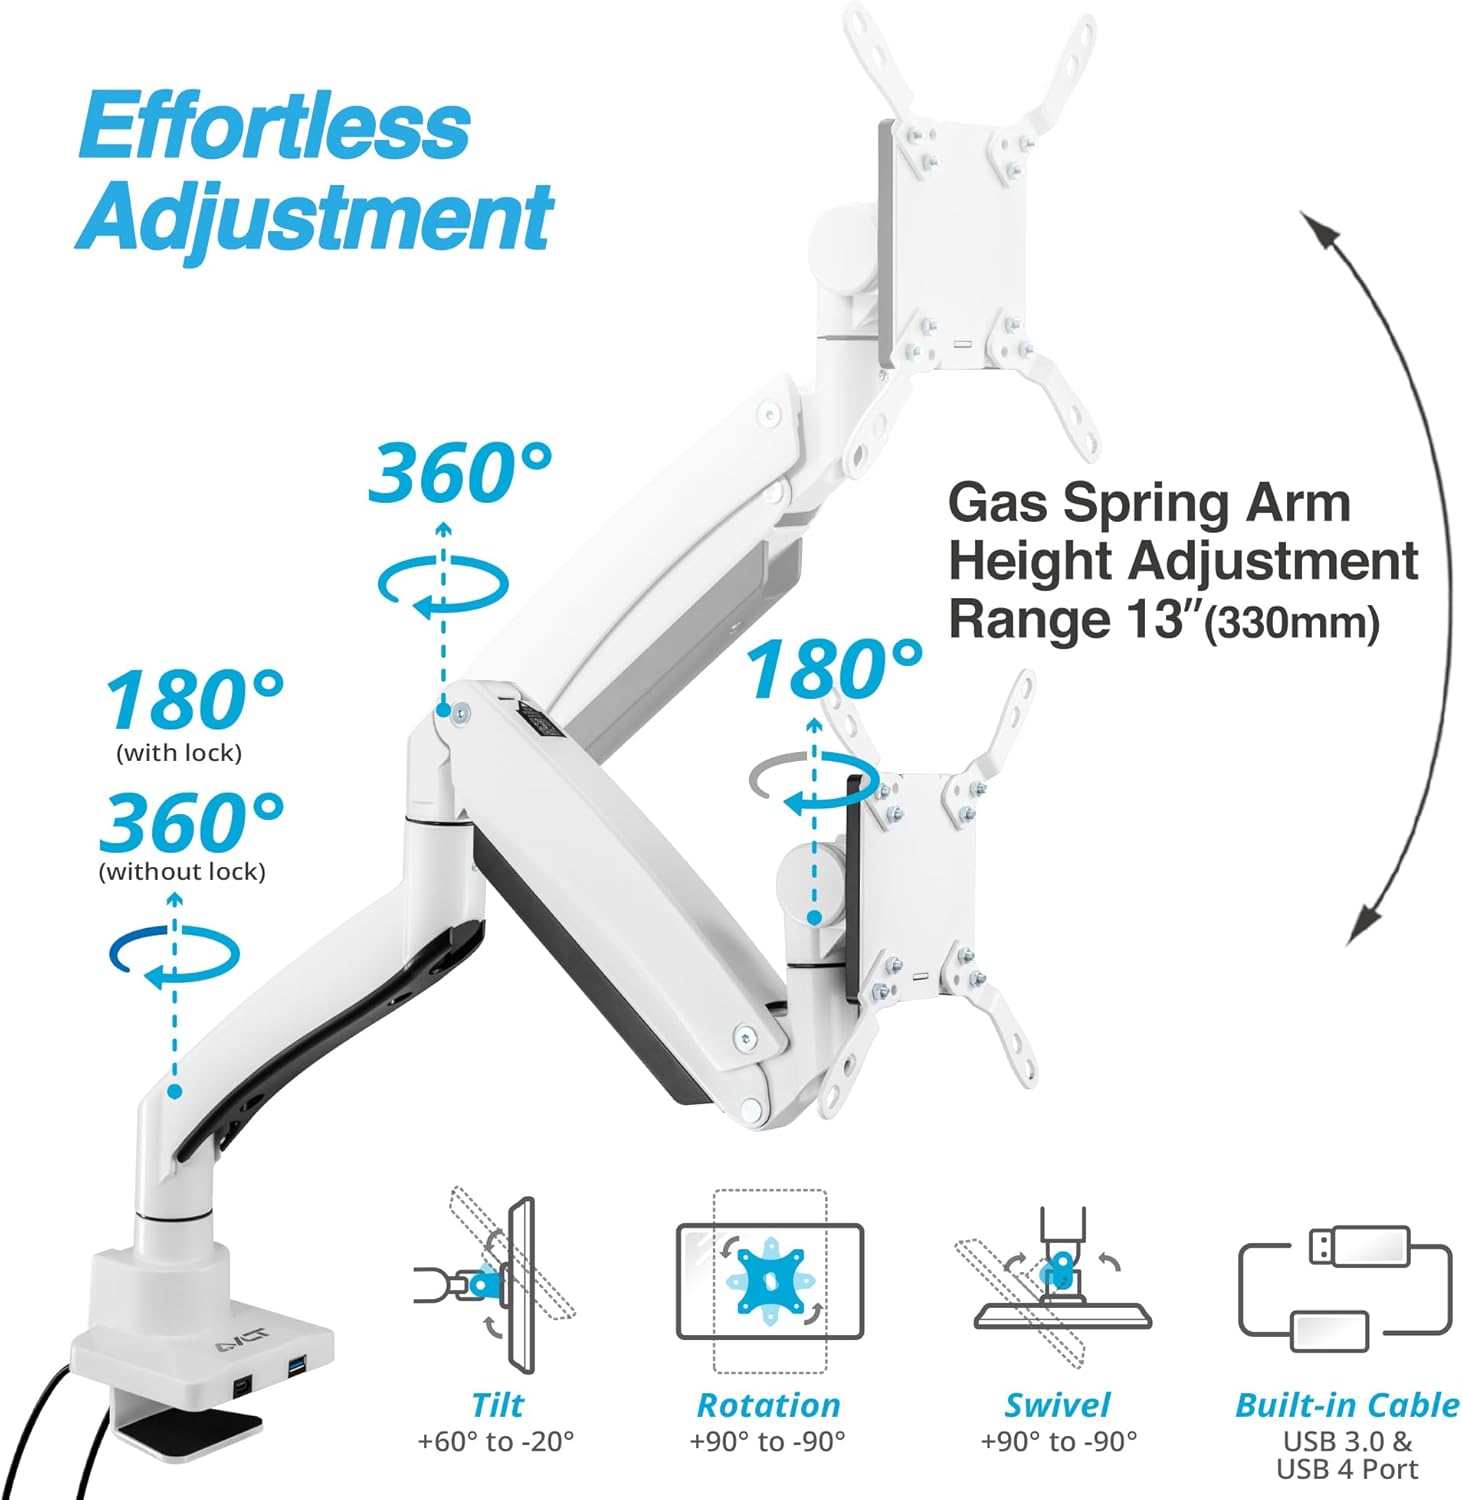
Figure 5.1: Effortless Adjustment Capabilities
5.3. Cockpit Mode Support
For compatible monitors like the Samsung Odyssey ARK 55, the arm supports both Landscape and Cockpit modes. The lower arm features a rotation lock design to prevent damage to the back wall when rotating to 180°.

Figure 5.2: Cockpit Mode Functionality
6. Wykorzystanie portów USB
The integrated USB-C and USB-A ports in the base provide convenient connectivity for your devices.
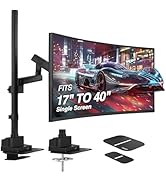
Figure 6.1: USB-C & USB-A Base Ports
6.1. Tryb wideo
Connect the USB-C extension cable to a Laptop USB-C Port (USB4 or above) to support USB-C/HDMI/DisplayPort monitors. Note: Monitor may not display correctly if you connect another cable exceeding 47.2" (120cm).

Figure 6.2: Video Mode Setup
6.2. Tryb przesyłania danych
Connect the USB-C extension cable to a Laptop USB-C Port (USB4 or above) to support data transfer speeds up to 40Gbps. Note: Data transfer speeds may be slow if you connect another cable exceeding 47.2" (120cm).

Figure 6.3: Data Transfer Mode
6.3. Tryb ładowania
Connect the USB-C extension cable to a USB-C PD Charger to support PD Charging up to 100W. Note: PD Charging may not charge quickly if you connect another cable exceeding 47.2" (120cm).

Figure 6.4: Charging Mode
7. Konserwacja
Regularna konserwacja zapewnia długowieczność i optymalną wydajność ramienia monitora.
- Czyszczenie: Wipe the arm and base with a soft, dry cloth. Avoid abrasive cleaners or solvents.
- Regulacja napięcia: Periodically check the gas spring tension. If the monitor sags or rises too easily, adjust the tension screw on the arm using the provided Allen key. Turn clockwise to increase tension for heavier monitors, counter-clockwise to decrease tension for lighter monitors.
- Dokręcenie śrub: Ensure all screws, especially those securing the base and VESA plate, remain tight. Re-tighten if necessary.

Figure 7.1: Tension Adjustment Point
8. Rozwiązywanie Problemów
- Monitor opada/nie utrzymuje się w górze: The gas spring tension may be too low for your monitor's weight. Increase tension by turning the adjustment screw clockwise.
- Monitor Rises Too Easily/Doesn't Stay Down: The gas spring tension may be too high. Decrease tension by turning the adjustment screw counter-clockwise.
- Monitor chwieje się: Ensure all mounting screws (base, arm joints, VESA plate) are securely tightened. Check if the desk surface is stable.
- Porty USB nie działają: Verify that the USB extension cables are correctly connected from the monitor arm base to your computer. Ensure your computer's USB ports are active.
- Monitor Rotation is Too Loose/Tight: Adjust the screws on the rotation mechanism of the VESA head to achieve desired resistance.
9. Specyfikacje
| Marka | AVLT |
| Numer modelu | AVLT-DM64-1 |
| Kompatybilność z rozmiarem ekranu | od 17" do 57" |
| Nośność | Do 59.5 funtów (27 kg) |
| Zgodność ze standardem VESA | 75x75mm, 100x100mm, 200x100mm, 200x200mm |
| Zakres regulacji wysokości | 12.8" do 25.8" (325 mm do 655 mm) |
| Kąt nachylenia | +60°/-20° |
| Kąt obrotu | 180° |
| Obrót | 360° |
| Grubość biurka (C-Clamp) | 0.39" do 1.8" (10 mm do 45 mm) |
| Grubość biurka (przelotka) | 0.39" do 1.6" (10 mm do 40 mm) |
| Średnica otworu przelotki | 0.39" do 2.3" (10 mm do 60 mm) |
| Tworzywo | Metal |
| Waga przedmiotu | 15.32 funta |
10. Gwarancja i wsparcie
For warranty information, technical support, or any inquiries regarding your AVLT monitor arm, please contact AVLT customer service through the official AVLT website or your retailer's support channels. Keep your purchase receipt for warranty claims.