1. Wprowadzenie
Thank you for choosing the Deerma F327W Ultrasonic Air Humidifier. This manual provides essential information for the safe and efficient operation, maintenance, and troubleshooting of your device. Please read it thoroughly before use and retain it for future reference.
2. Instrukcje bezpieczeństwa
- Always place the humidifier on a firm, flat, and waterproof surface.
- Do not place the humidifier near heat sources, direct sunlight, or in areas with high humidity.
- Ensure the power cord is not damaged and is plugged into a suitable electrical outlet.
- Nie zanurzaj podstawy w wodzie ani innych płynach.
- Przed napełnianiem, czyszczeniem lub przenoszeniem nawilżacza należy go odłączyć od zasilania.
- Do not add essential oils directly into the water tank. Use the designated aroma box if available.
- Przechowywać w miejscu niedostępnym dla dzieci i zwierząt domowych.
- Używaj wyłącznie czystej, chłodnej wody z kranu. Zalecana jest woda destylowana lub demineralizowana, aby zapobiec osadzaniu się minerałów.
- Nie blokuj wylotu mgły.
3. Koniec produktuview
The Deerma F327W is an ultrasonic humidifier designed to add moisture to the air, improving air quality and comfort. It features a transparent water tank, a digital display, and an aroma diffusion function.

Rysunek 3.1: Nadview of the Deerma F327W Ultrasonic Air Humidifier. This image shows the complete unit, highlighting its transparent water tank and sleek design.

Rysunek 3.2: Digital Display. This image illustrates the digital screen on the humidifier, which shows real-time humidity levels and operational settings.
4. Konfiguracja
- Rozpakować: Ostrożnie usuń wszystkie materiały opakowaniowe i sprawdź, czy wszystkie elementy są obecne.
- Umieszczenie: Nawilżacz należy ustawić na płaskiej, stabilnej i wodoodpornej powierzchni, w odległości co najmniej 15 cm (6 cali) od ścian i mebli.
- Napełnij zbiornik na wodę:
- Wyjmij zbiornik na wodę z podstawy.
- Odkręć korek zbiornika na wodę.
- Napełnij zbiornik czystą, chłodną wodą z kranu. Nie przekraczaj linii maksymalnego napełnienia.
- Dokładnie zakręć nakrętkę.
- Umieść napełniony zbiornik na wodę z powrotem na podstawie, upewniając się, że jest prawidłowo osadzony.
- Podłącz zasilanie: Plug the power cord into a standard electrical outlet. The humidifier will enter standby mode.
5. Instrukcja obsługi
Once set up, operate your Deerma F327W humidifier using the control panel.
- Włączanie/wyłączanie: Press the power button to turn the humidifier on or off. The digital display will illuminate when on.
- Regulacja poziomu mgły: Press the mist level button to cycle through different mist output settings (e.g., Low, Medium, High). The selected level will be indicated on the display.
- Ustawienie wilgotności: Use the humidity setting button to set your desired humidity level. The humidifier will automatically maintain this level, turning on and off as needed.
- Dyfuzja aromatu:
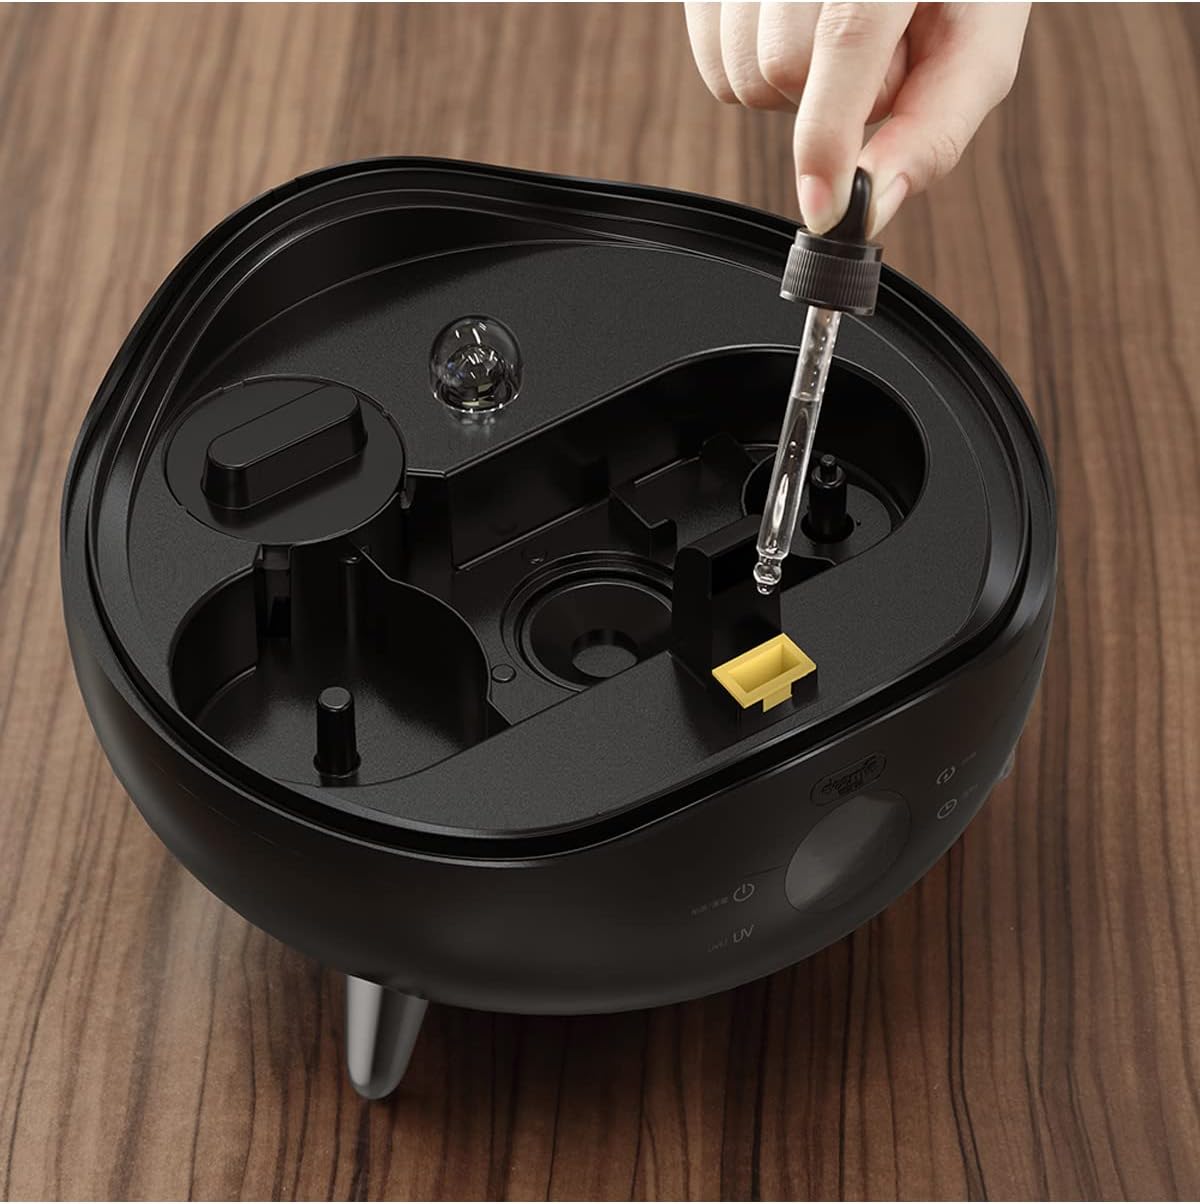
Rysunek 5.1: Adding Essential Oil. This image shows a hand using a dropper to add essential oil into the designated aroma compartment on the humidifier's base, separate from the main water tank.
- Locate the aroma box, typically a small tray or compartment on the base unit.
- Add a few drops of water-soluble essential oil onto the aroma pad or directly into the compartment.
- Do not add oil directly into the water tank.
- Fruit/Scent Tray:

Rysunek 5.2: Humidifier with Fruit. This image displays the humidifier operating with slices of fruit placed inside the transparent water tank, indicating a feature for natural scent diffusion or visual appeal.
- The transparent tank allows for the addition of certain fruits or natural elements for a subtle scent or visual effect.
- Ensure any added items are clean and will not obstruct the mist output or internal components.
6. Konserwacja i czyszczenie
Regularne czyszczenie jest kluczowe dla optymalnej wydajności i higieny.
- Codzienna konserwacja:
- Odłącz nawilżacz od zasilania.
- Wylej pozostałą wodę ze zbiornika i podstawy.
- Wypłucz zbiornik na wodę świeżą wodą.
- Wipe the base unit with a clean, damp płótno.
- Weekly Cleaning (Descaling):
- Odłącz nawilżacz od zasilania i wylej całą wodę.
- Pour 1 cup of white vinegar into the water tank and base. Let it sit for 30 minutes to an hour to loosen mineral deposits.
- Use a soft brush or cloth to gently scrub away any mineral buildup on the ultrasonic nebulizer and inside the tank.
- Dokładnie wypłucz wszystkie elementy czystą wodą, aż zapach octu zniknie.
- Wysuszyć wszystkie części przed ponownym złożeniem.
- Składowanie: If storing for an extended period, ensure the humidifier is clean and completely dry. Store in a cool, dry place.
7. Rozwiązywanie Problemów
- Brak wytwarzania mgły:
- Sprawdź, czy zbiornik na wodę jest pusty. W razie potrzeby uzupełnij.
- Ensure the water tank is correctly seated on the base.
- Clean the ultrasonic nebulizer for mineral buildup.
- Sprawdź, czy przewód zasilający jest prawidłowo podłączony.
- Nietypowy zapach:
- Dokładnie wyczyść zbiornik na wodę i podstawę.
- Wymieniaj wodę codziennie.
- Stosuj wodę destylowaną lub demineralizowaną.
- Nadmierny hałas:
- Upewnij się, że nawilżacz znajduje się na płaskiej i stabilnej powierzchni.
- Sprawdź, czy w zbiorniku na wodę lub jego podstawie nie znajdują się żadne obce przedmioty.
- Wyciek wody:
- Sprawdź, czy korek zbiornika na wodę jest mocno dokręcony.
- Nie przepełniaj zbiornika na wodę.
- Sprawdź, czy zbiornik na wodę nie jest pęknięty lub uszkodzony.
8. Specyfikacje
- Numer modelu: F327
- Marka: Deerma
- Tryb pracy: Ultradźwiękowy
- Pojemność: 5 litrów
- Tworzywo: Ceramic (referring to internal components or nebulizer)
- Tomtage: 120 wolty
- Wymiary produktu: 18f. x 18an. x 30al. centimeters (approximately 18cm x 18cm x 30cm)
9. Gwarancja i wsparcie
For warranty information or technical support, please refer to the documentation provided at the point of purchase or contact Deerma customer service. Keep your purchase receipt as proof of purchase.