1. Wprowadzenie
Dziękujemy za zakupasing the Goliath Smart Light Alarm Clock AV-SBEL03. This device combines a light alarm clock with an FM radio, natural sounds, and smart app control to enhance your waking and sleeping experience. It features a realistic sunrise and sunset simulation, multiple alarm settings, and a convenient USB charging port. Please read this manual carefully to ensure proper setup and operation.

Obraz 1.1: Przód view of the Goliath Smart Light Alarm Clock displaying the time.
2. Informacje dotyczące bezpieczeństwa
- Urządzenie przeznaczone jest wyłącznie do użytku wewnątrz pomieszczeń.
- Nie wystawiaj urządzenia na działanie wody, wilgoci ani ekstremalnych temperatur.
- Use only the provided power adapter or a compatible USB power source.
- Trzymaj urządzenie z dala od źródeł ciepła i bezpośredniego światła słonecznego.
- Nie próbuj samodzielnie demontować ani naprawiać urządzenia. Skontaktuj się z wykwalifikowanym personelem serwisowym.
- Czyść urządzenie miękką, suchą ściereczką. Nie używaj środków czyszczących o właściwościach ściernych.
3. Zawartość opakowania
Proszę sprawdzić, czy w paczce znajdują się następujące elementy:
- Goliath Smart Light Alarm Clock AV-SBEL03
- Kabel zasilający USB
- Zasilacz (jeśli jest dołączony)
- Instrukcja obsługi (ten dokument)
4. Koniec produktuview
Familiarize yourself with the various parts and controls of your Smart Light Alarm Clock.

Image 4.1: Rear and top view of the alarm clock with labeled components.
- Snooze / Reset Button: Activates snooze function or resets settings.
- Sunrise Button: Controls sunrise simulation.
- Alarm Buttons 1 & 2: Set and activate Alarm 1 and Alarm 2.
- Głośnik: Outputs audio for FM radio and natural sounds.
- Port zasilania: Łączy się z zasilaczem.
- Port USB: Do ładowania urządzeń zewnętrznych.
- Przycisk ustawień: Dostęp do ustawień ogólnych.
- Dusk/Sunset Button: Controls sunset simulation.
- Radio / Volume Buttons: Controls FM radio and adjusts volume.
5. Konfiguracja
5.1. Podłączenie zasilania
- Connect the USB power cable to the Power Supply Port on the back of the alarm clock.
- Podłącz drugi koniec kabla USB do dostarczonego zasilacza.
- Podłącz zasilacz do standardowego gniazdka ściennego. Wyświetlacz zaświeci się, wskazując, że urządzenie jest włączone.
5.2. Instalacja aplikacji
The Goliath Smart Light Alarm Clock can be controlled via the Smart-Life or TuyaSmart app.
- Download the "Smart-Life" or "TuyaSmart" app from your smartphone's app store (iOS App Store or Google Play Store).
- Zarejestruj się, aby założyć konto lub zaloguj się, jeśli już je posiadasz.
5.3. Połączenie WiFi
To enable smart features, connect the alarm clock to your 2.4 GHz Wi-Fi network.
- Upewnij się, że smartfon jest podłączony do sieci Wi-Fi 2.4 GHz.
- Open the Smart-Life or TuyaSmart app.
- Follow the in-app instructions to add a new device. Select the appropriate device type (e.g., "Light Alarm Clock" or "Lighting").
- The app will guide you through the pairing process, which may involve putting the alarm clock into pairing mode (refer to app instructions or device manual for specific button presses).
- Once connected, you can control the alarm clock via the app.

Image 5.1: The alarm clock connected to a Wi-Fi network and controlled via an app.
6. Instrukcja obsługi
6.1. Ustawianie czasu
The time can be set manually using the device buttons or automatically via the app after Wi-Fi connection.
- Ustawienie ręczne: Press and hold the Settings button. Use the volume buttons to adjust hours and minutes. Press Settings again to confirm.
- Ustawienie aplikacji: Once connected to the app, the time will synchronize automatically or can be set within the app interface.
6.2. Sunrise and Sunset Simulation
The alarm clock simulates natural light cycles to aid in waking and sleeping.

Image 6.1: Visual representation of sunrise and sunset light simulations.
- Symulacja wschodu słońca: Press the Sunrise button to activate. The light will gradually increase in brightness over a set period (e.g., 30 minutes) before your alarm time, mimicking a natural sunrise. Adjust intensity and duration via the app.
- Symulacja zachodu słońca: Press the Dusk/Sunset button to activate. The light will gradually dim over a set period, helping you relax and fall asleep. Adjust intensity and duration via the app.
6.3. Ustawienia alarmu
The device supports up to 4 alarm times via the app, or 2 directly on the device.
- Setting Alarms (Device): Press and hold Alarm Button 1 or 2. Use the volume buttons to set the alarm time. Press the Alarm button again to select alarm sound (FM radio or natural sound) and light intensity.
- Setting Alarms (App): Open the app, navigate to the alarm settings, and set up to 4 alarms with customizable times, sounds, light intensity, and sunrise simulation duration.
- Funkcja drzemki: When an alarm sounds, press the Snooze/Reset button to temporarily silence it for a few minutes.
- Wyłączanie alarmu: To turn off a sounding alarm, press the corresponding Alarm button. To disable an alarm completely, use the app or cycle through the alarm settings on the device until it is off.
6.4. Obsługa radia FM
Słuchaj swoich ulubionych stacji radiowych FM.
- Press the Radio button to turn on the FM radio.
- Press the Radio button again to scan for stations.
- Use the volume buttons to adjust the frequency or select a preset station.
- Press and hold the Radio button to turn off the FM radio.
6.5. Natural Sounds
Choose from a selection of natural sounds for waking or sleeping.
- Access natural sound settings via the Settings button or the app.
- Cycle through available sounds using the volume buttons.
- Dostosuj głośność za pomocą przycisków głośności.
6.6. Funkcja ładowania USB
The integrated USB port allows you to charge other devices.

Image 6.2: A smartphone charging via the alarm clock's USB port.
Connect your smartphone, tablet, or other USB-powered device to the USB port on the back of the alarm clock to charge it.
6.7. App Control (Smart-Life / TuyaSmart)
The app provides advanced control and customization options.
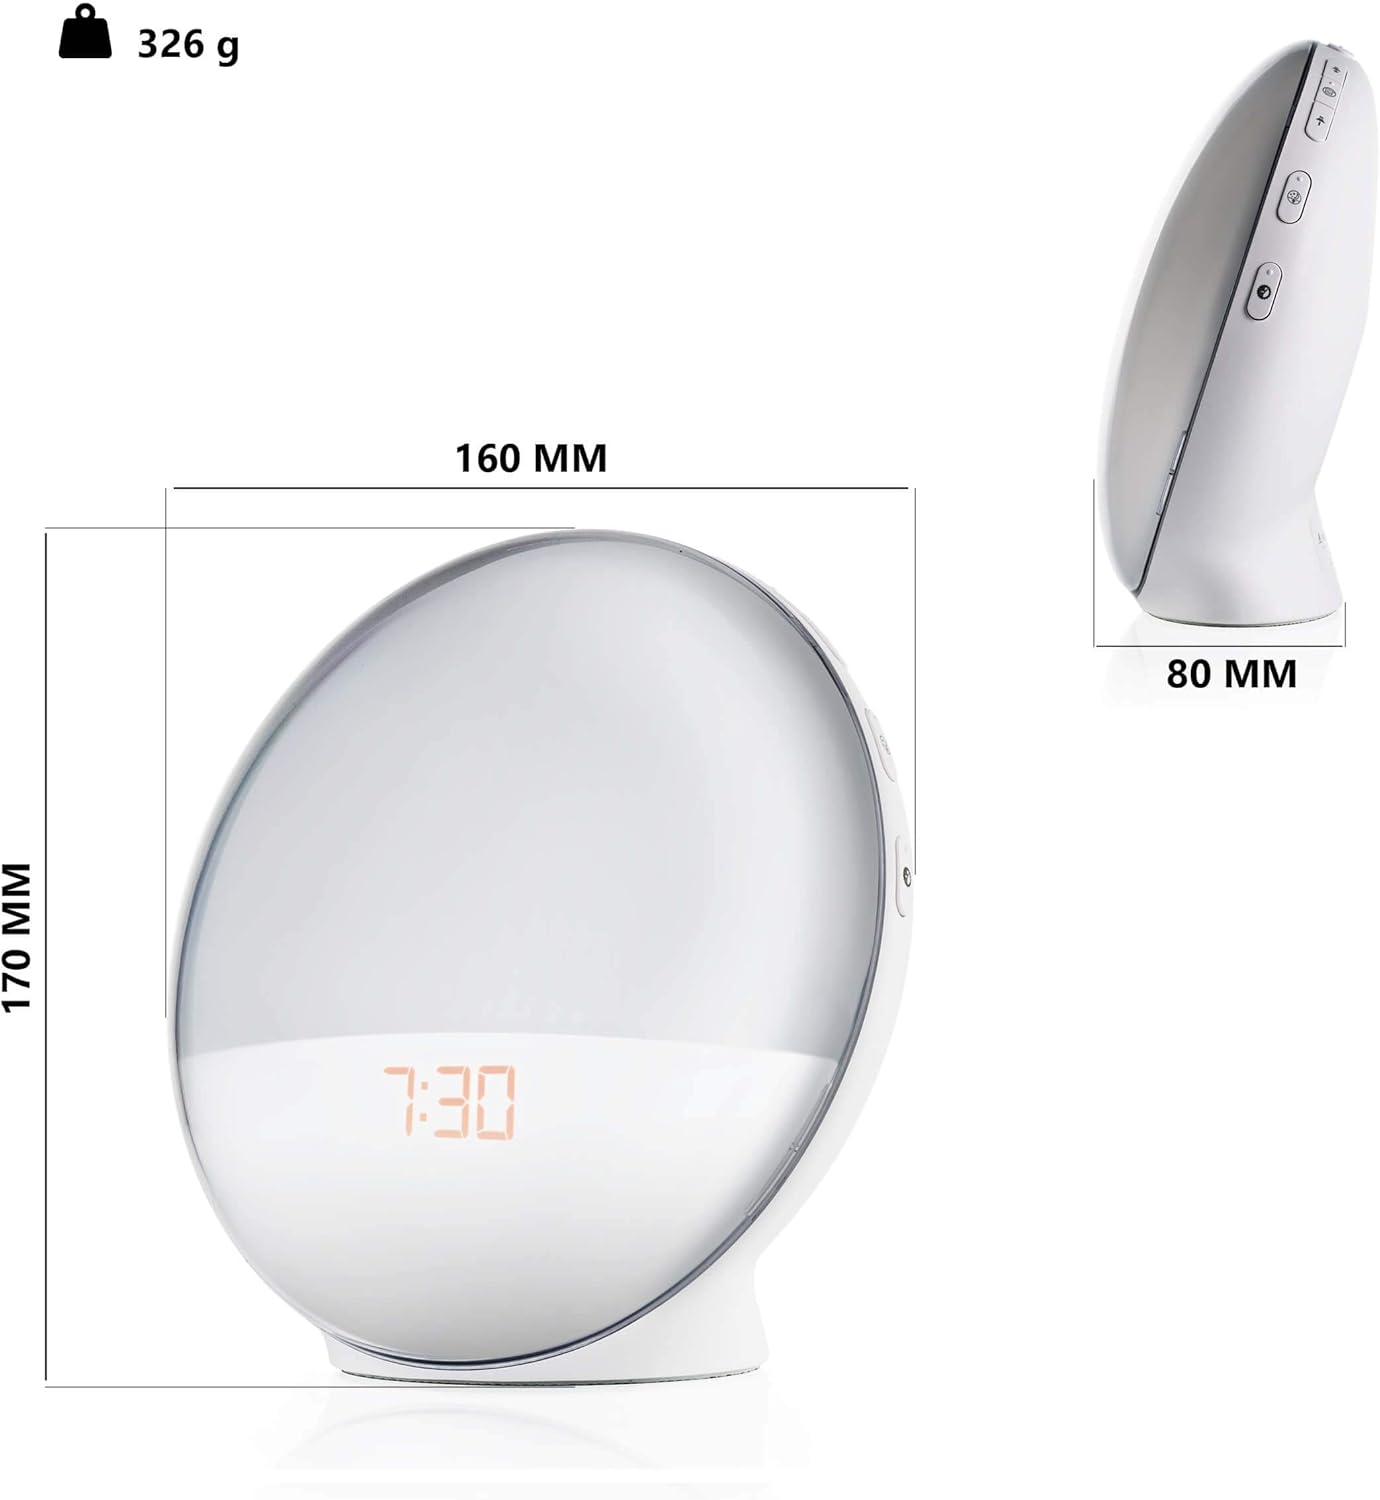
Image 6.3: Smartphone screen showing the app interface for the Smart Light Alarm Clock.
- Zdalne sterowanie: Adjust settings, alarms, light, and sound from anywhere with an internet connection.
- Personalizacja: Set specific light colors (if supported by the device), adjust brightness levels, and fine-tune alarm parameters.
- Harmonogram: Create detailed schedules for alarms, sunrise/sunset simulations, and light modes.
- Sterowanie głosowe: Integrate with voice assistants (e.g., Google Assistant) for hands-free control (requires compatible smart home hub).
7. Konserwacja
- Czyszczenie: Wipe the device with a soft, dry, lint-free cloth. Do not use liquid cleaners, aerosols, or solvents.
- Składowanie: Jeśli urządzenie będzie przechowywane przez dłuższy czas, należy odłączyć je od źródła zasilania i przechowywać w chłodnym, suchym miejscu.
8. Rozwiązywanie Problemów
- Urządzenie się nie włącza: Upewnij się, że zasilacz jest prawidłowo podłączony do urządzenia i do działającego gniazdka elektrycznego.
- Problemy z połączeniem Wi-Fi:
- Upewnij się, że Twoja sieć Wi-Fi obsługuje częstotliwość 2.4 GHz. Urządzenie nie obsługuje sieci 5 GHz.
- Sprawdź swoje hasło do Wi-Fi.
- Zbliż urządzenie do routera Wi-Fi.
- Restart your router and the alarm clock.
- Follow the app's troubleshooting steps carefully.
- Alarm not sounding/light not activating:
- Verify that the alarm is enabled and set to the correct time in the app or on the device.
- Check the volume level for alarm sounds.
- Ensure the light intensity is not set to zero.
- Odbiór radia FM jest słaby: Extend the antenna (if applicable) and try repositioning the device for better signal.
- Ładowanie przez USB nie działa: Ensure the alarm clock is powered on and the connected device's charging cable is functional.
9. Specyfikacje
| Numer modelu | AV-SBEL03 |
| Wymiary produktu | 16 x 0.03 x 17 cm (approx. 8D x 17B x 8H cm) |
| Waga przedmiotu | 326 gram |
| Materiał bazowy | Plastikowy |
| Lamp Typ | PROWADZONY |
| Typ przełącznika | Naciśnij przycisk |
| Kolor | Biały |
| Źródło zasilania | USB (via power adapter) |
| Łączność | Wi-Fi (2.4 GHz) |
10. Gwarancja i wsparcie
For warranty information and customer support, please refer to the documentation provided with your purchase or contact Goliath customer service through their official webZachowaj dowód zakupu na wypadek roszczeń gwarancyjnych.