
Wstęp
This manual provides essential instructions for the safe and effective use of the GÜDE 55369 GHF 800 Manual Tile Cutter. Please read these instructions carefully before assembly, operation, or maintenance. Keep this manual for future reference.
Instrukcje bezpieczeństwa
Always prioritize safety when operating any tools. Failure to follow these instructions may result in injury or damage to the tool.
- Należy nosić odpowiedni sprzęt ochrony osobistej (PPE), w tym okulary ochronne i rękawice.
- Ensure the work surface is stable, level, and clean.
- Trzymaj dzieci i osoby postronne z dala od obszaru roboczego.
- Inspect the tile cutter for any damage before each use. Do not use if damaged.
- Handle tiles carefully; edges can be sharp after cutting.
- Do not force the cutting wheel. Apply steady, even pressure.
- Ensure the tile is properly secured on the anti-slip support before cutting.
Komponenty ponadview
Familiarize yourself with the parts of your GÜDE GHF 800 Manual Tile Cutter.

- Uchwyt tnący: Ergonomiczna konstrukcja zapewniająca wygodną obsługę.
- Koło tnące: Hardened tungsten carbide wheel for precise scoring.
- Guide Rail: Provides a stable path for the cutting head.
- Płyta bazowa: Stable aluminum base for secure tile placement.
- Anti-slip Support: Ensures the tile remains stationary during cutting.
- Adjustable Stop/Angle Guide: For precise measurement and angled cuts.
- Fold-out Tile Supports: Extendable supports on both sides for larger tiles.
Organizować coś
Before using the tile cutter, ensure it is properly set up.
- Rozpakowywanie: Ostrożnie wyjmij wszystkie elementy z opakowania. Sprawdź, czy nie uległy uszkodzeniu podczas transportu.
- Umieszczenie: Place the tile cutter on a stable, flat, and clean work surface. Ensure there is enough space around the cutter for safe operation and tile handling.
- Extend Tile Supports: For larger tiles, unfold the side tile supports (30 cm each) to provide additional stability.

Rysunek 2: Fold-out tile support. This image shows one of the side supports extended, providing additional surface area for larger tiles. - Regulowany ogranicznik: Position the adjustable stop according to the desired tile dimension. Secure it firmly.
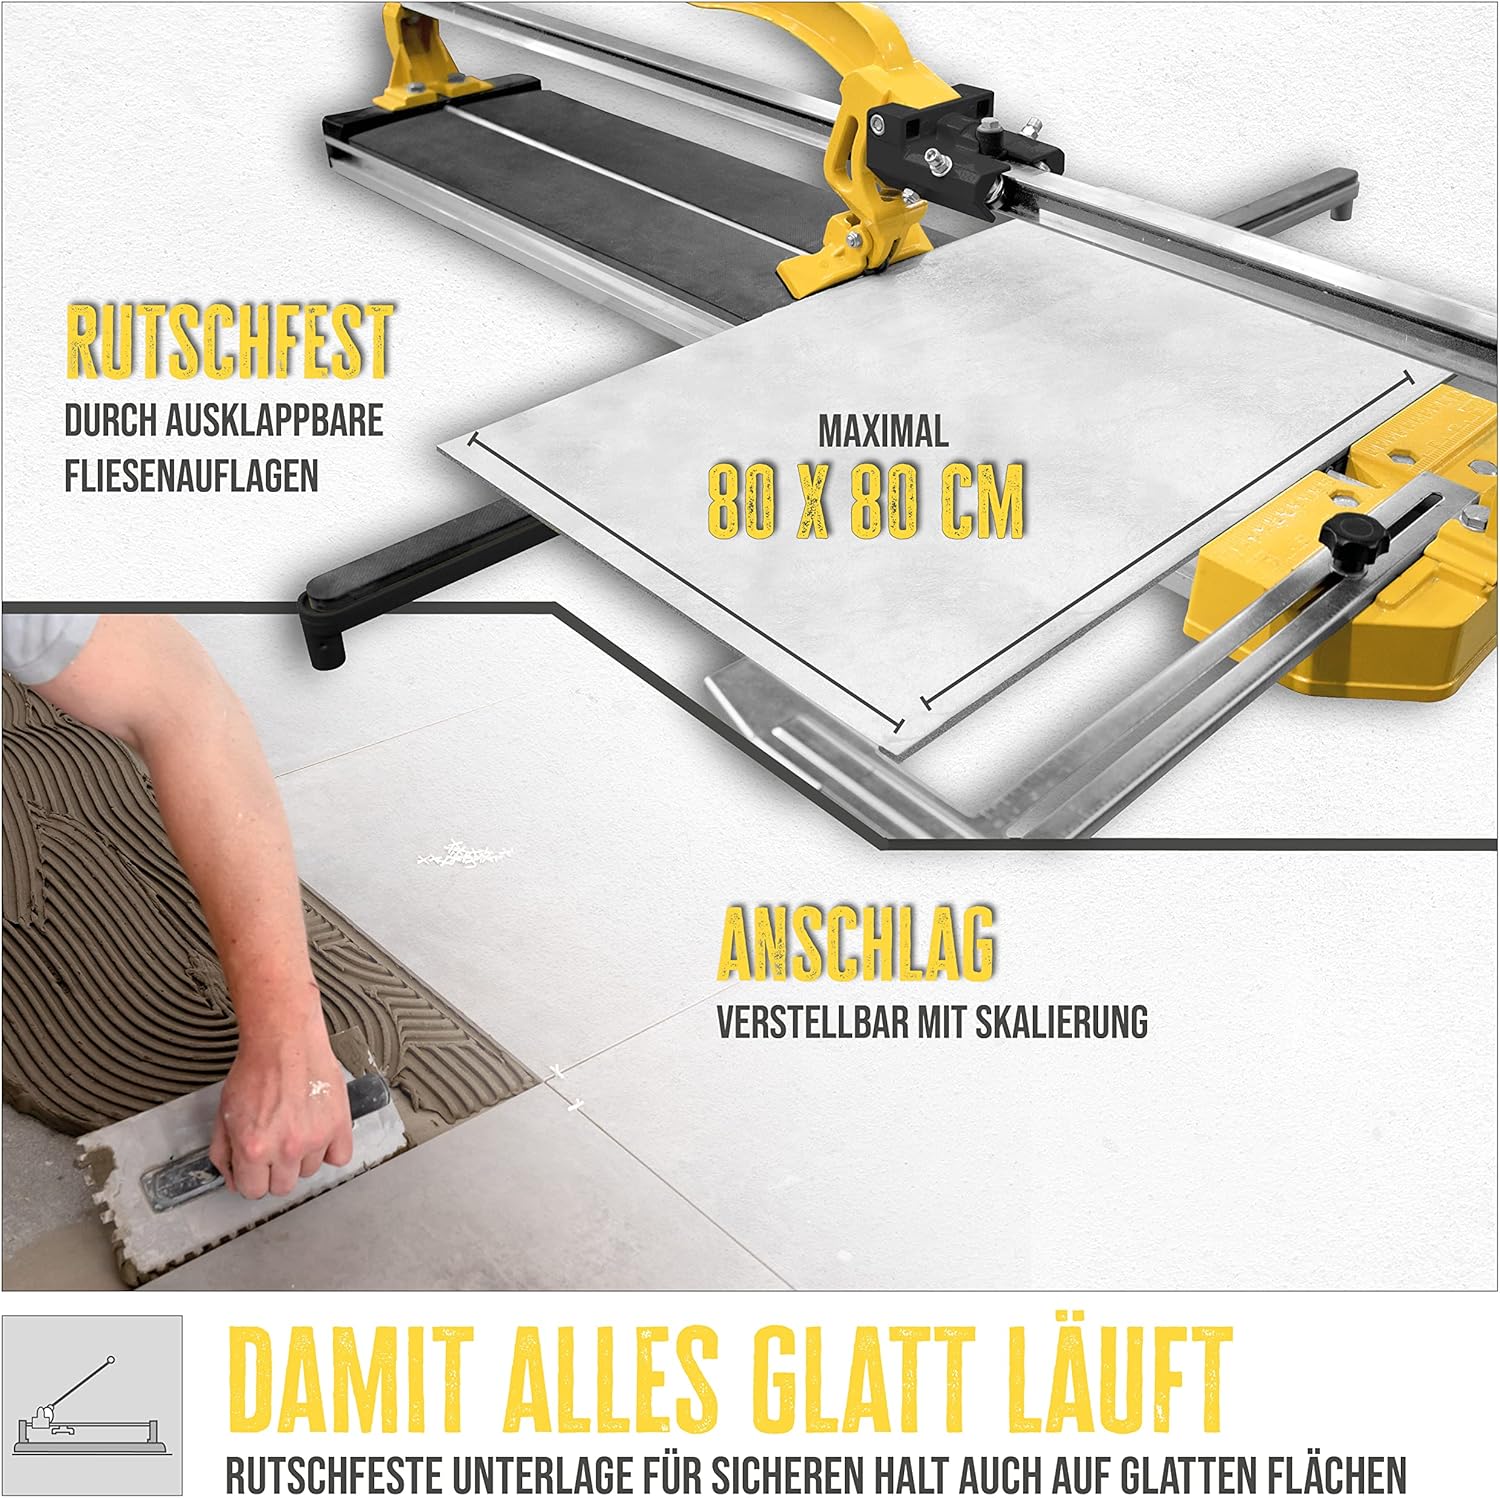
Rysunek 3: Tile placement and adjustable stop. This image illustrates a tile positioned on the cutter, with the adjustable stop set for a precise cut, indicating a maximum tile size of 80x80 cm.
Działanie
Follow these steps for effective and safe tile cutting.
- Przygotuj kafelek: Clean the tile surface. Mark the desired cut line clearly with a pencil or marker.
- Pozycja kafelka: Place the tile on the base plate, aligning the marked cut line with the cutting wheel's path. Ensure the tile rests firmly against the anti-slip support and the adjustable stop.

Rysunek 4: Tile positioning for a straight cut. This image shows a tile correctly placed on the cutter, ready for the scoring process. - Oceń kafelek:
- Position the cutting wheel at the edge of the tile furthest from you.
- Apply firm, consistent downward pressure on the cutting handle.
- Push the cutting handle smoothly and steadily across the tile towards you in a single, continuous motion. Do not make multiple passes. A distinct scoring sound should be heard.

Rysunek 5: Scoring the tile. This image focuses on the cutting wheel as it scores a line across the tile surface. - Rozbij płytkę:
- Once the tile is scored, position the breaking foot (part of the cutting head) directly over the scored line, near the edge of the tile closest to you.
- Apply quick, firm downward pressure on the cutting handle. The tile should snap cleanly along the scored line.
- For diagonal cuts, use the angle guide and ensure the tile is securely placed.

Rysunek 6: Performing a diagonal cut. This image demonstrates the tile cutter being used to make an angled cut on a tile. - Wykończeniowy: Carefully remove the cut tile pieces. Edges may be sharp and may require light sanding or filing for a smooth finish.
Konserwacja
Regular maintenance ensures the longevity and performance of your tile cutter.
- Czyszczenie: After each use, clean the base plate, guide rails, and cutting head to remove tile dust and debris. Use a dry cloth or brush.
- Smarowanie: Periodically apply a light lubricant to the guide rails and the cutting wheel axle to ensure smooth operation.
- Koło tnące: The tungsten carbide cutting wheel is durable but will eventually wear out. Replace the cutting wheel when cuts become inconsistent or require excessive force.

Rysunek 7: Hardened cutting wheel and ergonomic handle. This image provides a detailed view of the durable cutting wheel and the comfortable grip of the handle. - Składowanie: Przechowuj przecinarkę do glazury w suchym i czystym miejscu, z dala od bezpośredniego światła słonecznego i ekstremalnych temperatur.
Rozwiązywanie problemów
W tej sekcji znajdziesz informacje o typowych problemach i ich rozwiązaniach.
| Problem | Możliwa przyczyna | Rozwiązanie |
|---|---|---|
| Nierówne lub postrzępione cięcia |
|
|
| Tile does not break cleanly |
|
|
| Cutting head sticks or moves roughly |
|
|
Specyfikacje
| Funkcja | Szczegół |
|---|---|
| Numer modelu | 55369 |
| Maksymalna długość cięcia | 800 mm (80 cm) |
| Maximum Tile Dimensions | 800 x 800 mm (for diagonal cuts) |
| Maximum Tile Thickness | 12 mm |
| Średnica koła tnącego | 22 mm |
| Materiał tarczy tnącej | Węglik wolframu |
| Base Plate Material | Aluminium |
| Wymiary produktu (dł. x szer. x wys.) | Wymiary 105.4 x 86 x 39 cm |
| Waga przedmiotu | 7.4 kilograma |
| Materiał uchwytu | Polipropylen |
| Zalecana powierzchnia | Ceramic, Porcelain |
| Źródło zasilania | Ręczne |
Gwarancja i wsparcie
Aby uzyskać informacje dotyczące gwarancji lub pomocy technicznej, zapoznaj się z oficjalną instrukcją producenta webOdwiedź stronę internetową lub skontaktuj się bezpośrednio z działem obsługi klienta. Zachowaj paragon jako dowód zakupu.
Manufacturer: GÜDE GmbH & Co.KG
Contact information can typically be found on the product packaging or the official GÜDE webstrona.