PIX-LINK LV-WR07
Instrukcja obsługi routera bezprzewodowego PIX-LINK LV-WR07
Model: LV-WR07
1. Wprowadzenie
Thank you for choosing the PIX-LINK LV-WR07 Wireless Router. This device is designed to provide a high-speed wireless network connection for your home or small office. With 300Mbps wireless speed and two external antennas, it ensures stable and wide-ranging Wi-Fi coverage. This manual will guide you through the setup, operation, and maintenance of your new router.

Image 1.1: The PIX-LINK LV-WR07 Wireless Router, showcasindzięki kompaktowej konstrukcji i dwóm zewnętrznym antenom.
2. Funkcje produktu
- Szybka łączność bezprzewodowa: Up to 300Mbps data transmission rate, ideal for smooth HD streaming, online gaming, and fast web przeglądanie.
- Rozszerzony zasięg: Equipped with two external antennas to ensure a strong and stable Wi-Fi signal across your space.
- Wiele portów: Features 5 LAN ports for reliable wired connections to devices like desktop computers, smart TVs, and gaming consoles.
- Funkcjonalność WPS: Supports Wi-Fi Protected Setup (WPS) for easy and secure wireless connection setup.
- Szeroka kompatybilność: Connects seamlessly with various devices including gaming consoles, tablets, and smart televisions.

Image 2.1: Illustration of the router's network coverage and compatibility with various devices, including laptops, smartphones, and PCs.
3. Zawartość opakowania
Sprawdź, czy w przesyłce znajdują się wszystkie elementy:
- PIX-LINK LV-WR07 Wireless Router
- Zasilacz
- Kabel Ethernet
- Krótki przewodnik instalacji (niniejszy podręcznik)
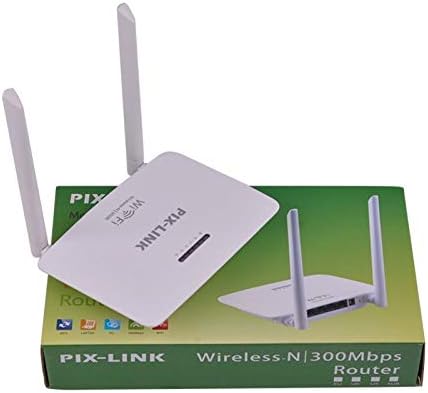
Image 3.1: The PIX-LINK LV-WR07 Wireless Router shown with its retail packaging, indicating the product as it appears in the box.

Image 3.2: The essential accessories included with the router: the power adapter for electrical connection and an Ethernet cable for wired network setup.
4. Przewodnik konfiguracji
4.1 Połączenie sprzętowe
- Włączanie: Connect the power adapter to the router's power port and then plug the adapter into a standard electrical outlet. The power indicator light on the router should illuminate.
- Połącz się z Internetem Źródło: Connect one end of the provided Ethernet cable to your modem's LAN port or your internet service provider's (ISP) Ethernet wall jack. Connect the other end of the Ethernet cable to the WAN port (usually labeled differently or colored) on your PIX-LINK LV-WR07 router.
- Podłącz swoje urządzenie:
- Połączenie przewodowe: For initial setup or stable connection, connect your computer to one of the router's LAN ports (usually yellow) using another Ethernet cable.
- Połączenie bezprzewodowe: Locate the default Wi-Fi network name (SSID) and password printed on a label on the bottom or back of your router. Connect your wireless device (laptop, smartphone, tablet) to this network.
4.2 Konfiguracja początkowa (Web Berło)
After connecting the hardware, you can configure your router via a web przeglądarka.
- Dostęp do ustawień routera: Otwórz web browser (e.g., Chrome, Firefox, Edge) on a device connected to the router. In the address bar, type the default IP address (e.g.,
192.168.1.1or192.168.0.1) and press Enter. This IP address is usually found on the router's label. - Login: A login window will appear. Enter the default username and password (commonly
admindla obu lub zgodnie ze specyfikacją na etykiecie routera). - Uruchom kreatora konfiguracji: Most routers have a Quick Setup Wizard. Follow the on-screen instructions to configure your internet connection type (e.g., DHCP, Static IP, PPPoE) and set up your new Wi-Fi network name (SSID) and a strong password.
- Zapisz ustawienia: After configuring, save your settings and restart the router if prompted.
5. Obsługa routera
5.1 Podłączanie urządzeń do sieci Wi-Fi
To connect a device to your Wi-Fi network:
- Na swoim urządzeniu przejdź do ustawień Wi-Fi.
- Wybierz nazwę swojej sieci Wi-Fi (SSID) z listy.
- Enter the Wi-Fi password you set during configuration.
- Twoje urządzenie powinno być teraz połączone z internetem.
5.2 Korzystanie z funkcji WPS (Wi-Fi Protected Setup)
WPS allows you to connect devices to your Wi-Fi network without entering the password manually.
- Press the WPS button on your router (usually located on the back or side, labeled 'WPS'). The WPS LED indicator will start blinking.
- Within two minutes, activate WPS on your client device (e.g., a wireless adapter, smartphone, or printer). Refer to your device's manual for specific instructions on activating WPS.
- The device will automatically connect to your Wi-Fi network.
5.3 Wired Connections (LAN Ports)
The router provides multiple LAN ports for wired connections, offering stable and fast connectivity for devices like desktop computers, gaming consoles, and smart TVs.
- Simply connect an Ethernet cable from the device's Ethernet port to any available LAN port on the router.
- The corresponding LAN indicator light on the router should illuminate, indicating a successful connection.
6. Konserwacja
- Optymalne rozmieszczenie: Place the router in a central location, away from obstructions (thick walls, metal objects) and interference sources (microwaves, cordless phones) to maximize Wi-Fi coverage.
- Zachowaj czystosc: Regularly clean the router's exterior with a soft, dry cloth. Ensure ventilation holes are not blocked to prevent overheating.
- Aktualizacje oprogramowania układowego: Okresowo sprawdzaj oficjalne informacje PIX-LINK website for firmware updates. Updating firmware can improve performance, add new features, and fix bugs. Follow the instructions provided on the webwitrynę ostrożnie.
- Okresowe ponowne uruchamianie: Ponowne uruchomienie routera co kilka tygodni może pomóc wyczyścić jego pamięć i rozwiązać drobne problemy sieciowe, poprawiając ogólną wydajność.
7. Rozwiązywanie Problemów
7.1 Brak połączenia internetowego
- Check if the power adapter is securely connected and the router is powered on.
- Ensure the Ethernet cable from your modem/ISP is securely connected to the router's WAN port.
- Restart your modem and then your router. Wait a few minutes for them to fully boot up.
- Sprawdź ustawienia typu połączenia internetowego w routerze web interface (e.g., DHCP, Static IP, PPPoE).
- Skontaktuj się ze swoim dostawcą usług internetowych (ISP), aby potwierdzić, że nie ma żadnych usług.tagw Twojej okolicy.
7.2 Slow Wi-Fi Speed or Intermittent Connection
- Przenieś router w bardziej centralne miejsce, z dala od przeszkód i zakłóceń.
- Upewnij się, że oprogramowanie sprzętowe routera jest aktualne.
- Reduce the number of devices connected to the network, especially those performing high-bandwidth activities.
- Spróbuj zmienić kanał Wi-Fi w ustawieniach routera, aby uniknąć zakłóceń z sąsiednich sieci.
7.3 Brak dostępu do routera Web Interfejs
- Ensure your device is connected to the router (either via Ethernet cable or Wi-Fi).
- Verify that you are typing the correct IP address (e.g.,
192.168.1.1) in the browser's address bar. - Wyczyść pamięć podręczną i pliki cookie przeglądarki lub spróbuj innej web przeglądarka.
- If you forgot the login credentials, you may need to perform a factory reset (see section 7.4).
7.4 How to Perform a Factory Reset
A factory reset will restore the router to its default settings, including the default Wi-Fi name and password, and login credentials.
- With the router powered on, locate the Reset button (often a small pinhole) on the back or bottom of the router.
- Use a paperclip or a thin object to press and hold the Reset button for about 5-10 seconds until the router's lights flash or change behavior.
- Release the button and wait for the router to restart. You will then need to reconfigure it using the initial setup steps.
8. Specyfikacje techniczne
| Funkcja | Opis |
|---|---|
| Marka | PIX-LINK |
| Model | LV-WR07 |
| Prędkość bezprzewodowa | 300 megabitów na sekundę (Mb/s) |
| Anteny | 2 anteny zewnętrzne |
| Liczba portów | 5 (1 WAN, 4 LAN) |
| Technologia łączności | Wi-Fi, sieć lokalna |
| Cechy specjalne | WPS (chroniona konfiguracja Wi-Fi) |
| Kompatybilne urządzenia | Gaming Consoles, Tablets, Smart Televisions |
9. Informacje o gwarancji
PIX-LINK products are designed for reliability and performance. For specific warranty terms and conditions, please refer to the warranty card included with your product or visit the official PIX-LINK webZachowaj paragon jako dowód zakupu na wypadek reklamacji.
10. Obsługa klienta
If you encounter any issues that are not covered in this manual or require further assistance, please contact PIX-LINK customer support. You can usually find contact information (phone number, email, or support portal) on the official PIX-LINK webmiejscu lub na opakowaniu produktu.
Before contacting support, please have the following information ready:
- Product Model: LV-WR07
- Serial Number (found on the product label)
- Szczegółowy opis napotkanego problemu
- Steps you have already taken to troubleshoot