1. Wprowadzenie i wytyczne bezpieczeństwa
Dziękujemy za zakupasing the Himoto ZMOTOZ3 1/10 Scale Brushed Electric RC Buggy. This manual provides essential information for the safe operation, maintenance, and troubleshooting of your new RC vehicle. Please read this manual thoroughly before operating the buggy to ensure proper function and to prevent damage or injury.
1.1 Ogólne środki ostrożności
- Always operate the RC buggy in open areas, away from people, pets, and obstacles.
- Never operate near public roads, water, or in crowded environments.
- Keep hands, hair, and loose clothing away from moving parts such as wheels and gears.
- Do not touch the motor or electronic speed controller (ESC) immediately after use, as they may be hot.
- Ensure the battery is fully charged and securely installed before operation.
- Zawsze wyłączaj pojazd i nadajnik, gdy ich nie używasz.
- W przypadku użytkowników poniżej 14 roku życia zaleca się nadzór osoby dorosłej.
2. Koniec produktuview
The Himoto ZMOTOZ3 is a high-performance 1/10 scale 4WD off-road electric buggy designed for exciting remote-controlled action. It features a durable chassis, a powerful brushed motor, and a responsive 2.4 GHz radio system.
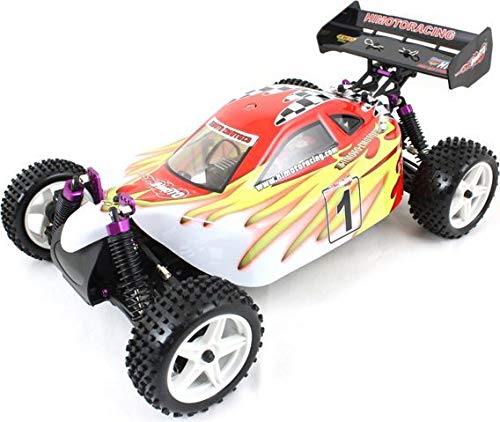
Image 1: Himoto ZMOTOZ3 1/10 Scale Brushed Electric RC Buggy. This image shows the complete buggy from a slightly elevated front-side angle, highlighting its off-road tires, suspension, and body shell design.
2.1 Kluczowe komponenty
- RC-540 Brushed Electric Motor: Provides reliable power for off-road performance.
- 2.4 GHz Radio System: Ensures interference-free control with extended range.
- Elektroniczny regulator prędkości (ESC): Manages motor speed and direction.
- Serwo sterujące: Controls the front wheel steering.
- 7.2V Ni-MH Battery Compartment: Designed for a 2000 mAh Ni-MH battery (battery and charger sold separately).
- 4-Wheel Drive (4WD) System: Enhances traction and handling on various terrains.
3. Konfiguracja
Before operating your Himoto ZMOTOZ3 buggy, follow these setup steps carefully.
3.1 Battery Charging (Ni-MH)
The Himoto ZMOTOZ3 requires a 7.2V 2000mAh Ni-MH battery and a compatible charger (not included). Always use a charger specifically designed for Ni-MH batteries.
- Connect the Ni-MH battery to your compatible Ni-MH charger.
- Podłącz ładowarkę do gniazdka elektrycznego.
- Monitor the charging process and disconnect the battery once fully charged according to your charger's instructions. Overcharging can damage the battery.
- Allow the battery to cool before installation or use.
3.2 Instalacja baterii nadajnika
The 2.4 GHz transmitter requires AA batteries (not included).
- Otwórz pokrywę komory baterii z tyłu nadajnika.
- Insert the required number of AA batteries, ensuring correct polarity (+/-).
- Dokładnie zamknij pokrywę komory baterii.
3.3 Przygotowanie pojazdu
- Remove the body clips and carefully lift the body shell off the chassis.
- Place the fully charged 7.2V Ni-MH battery into the battery compartment on the chassis. Secure it with the provided battery strap or clips.
- Connect the battery connector to the ESC connector. Ensure a firm connection.
- Carefully re-attach the body shell and secure it with the body clips.
4. Instrukcja obsługi
Once the setup is complete, you are ready to operate your Himoto ZMOTOZ3 buggy.
4.1 Sekwencja włączania
- Turn on the transmitter first. The indicator light should illuminate.
- Turn on the power switch on the vehicle's ESC. The vehicle's electronics will initialize, and the steering servo may twitch.
- If the vehicle and transmitter do not link automatically, refer to the transmitter's specific binding instructions (usually involves holding a button on the receiver while powering on the vehicle).
4.2 Podstawowe sterowanie
- Spust przepustnicy: Pull the trigger to move forward. Push the trigger forward to brake, then push again for reverse.
- Kierownica: Turn the wheel left to steer left, and right to steer right.
- Wykończenie kierownicy: Adjust this dial on the transmitter to ensure the wheels are straight when the steering wheel is centered.
- Trym przepustnicy: Adjust this dial to ensure the vehicle remains stationary when the throttle trigger is in the neutral position.
4.3 Wskazówki dotyczące jazdy
- Zacznij powoli, aby przyzwyczaić się do sterowania.
- Avoid driving in wet conditions, deep puddles, or extremely dusty environments to protect electronics.
- Do not continuously run the motor at full throttle for extended periods, as this can cause overheating.
- When the vehicle's speed noticeably decreases, it indicates the battery is low. Stop operation and recharge the battery.
4.4 Sekwencja wyłączania zasilania
- Turn off the power switch on the vehicle's ESC.
- Wyłącz nadajnik.
- Disconnect the battery from the ESC and remove it from the vehicle.
5. Konserwacja
Regular maintenance will extend the life and performance of your Himoto ZMOTOZ3 buggy.
5.1 Po każdym biegu
- Clean the vehicle: Use a soft brush or compressed air to remove dirt, dust, and debris from the chassis, suspension, and motor area.
- Inspect for damage: Check for loose screws, bent suspension components, cracked body parts, or damaged tires.
- Check wheel nuts: Ensure all wheel nuts are tight.
5.2 Konserwacja okresowa
- Lubricate moving parts: Apply a small amount of RC-specific lubricant to universal joints, dog bones, and gear teeth as needed. Avoid over-lubrication.
- Inspect gears: Check the motor pinion and spur gear for wear or damage. Replace if necessary.
- Battery care: Store Ni-MH batteries in a cool, dry place. Do not store fully charged or completely discharged for long periods.
6. Rozwiązywanie Problemów
This section addresses common issues you might encounter with your Himoto ZMOTOZ3 buggy.
| Problem | Możliwa przyczyna | Rozwiązanie |
|---|---|---|
| Pojazd nie odpowiada na nadajnik. | Low battery in vehicle or transmitter; vehicle/transmitter not powered on; not bound. | Charge/replace batteries; ensure both are powered on; re-bind transmitter and receiver. |
| Vehicle runs slowly or has reduced power. | Low vehicle battery; motor/ESC overheating; drivetrain binding. | Recharge vehicle battery; allow components to cool; check for debris in gears or bearings. |
| Układ kierowniczy jest niestabilny i nie reaguje na ruchy kierownicy. | Loose servo horn; damaged servo; low transmitter battery. | Check servo horn screw; inspect servo for damage; replace transmitter batteries. |
| Silnik działa, ale koła się nie obracają. | Stripped spur gear or pinion gear; broken drivetrain component (e.g., dog bone). | Inspect and replace damaged gears or drivetrain parts. |
7. Specyfikacje
- Numer modelu: Cześć3101
- Skala: 1/10
- Układ napędowy: Napęd na 4 koła (4WD)
- Silnik: RC-540 Brushed Electric Motor
- System radiowy: 2.4 GHz
- Zalecany akumulator: 7.2V 2000mAh Ni-MH (not included)
- Zalecany wiek: 0 - 10 years (as per manufacturer's recommendation, adult supervision advised for younger users)
8. Gwarancja i wsparcie
For warranty information and technical support, please refer to the documentation provided at the point of purchase or contact your retailer directly. Himoto products are designed for performance and durability, but proper care and maintenance are crucial for longevity.
Proszę zachować dowód zakupu na wypadek ewentualnych roszczeń gwarancyjnych.