
1. Wprowadzenie
Dziękujemy za zakupasing the Lexon LR98R1 Onoff LCD Alarm Clock. This manual provides detailed instructions for the proper setup, operation, and maintenance of your device. Please read this manual thoroughly before use and retain it for future reference.
The Lexon Onoff alarm clock features a unique design where flipping the clock activates or deactivates the alarm. It includes an LCD display with a blue electroluminescent backlight for clear visibility.
2. Informacje dotyczące bezpieczeństwa
- Nie wystawiaj urządzenia na działanie ekstremalnych temperatur, bezpośredniego światła słonecznego i wysokiej wilgotności.
- Unikaj upuszczania urządzenia i narażania go na silne uderzenia.
- Do not attempt to disassemble or modify the alarm clock. This will void the warranty.
- Trzymaj urządzenie z dala od wody i innych płynów.
- Zużytych baterii należy pozbywać się w sposób odpowiedzialny, zgodnie z lokalnymi przepisami.
- Należy używać wyłącznie baterii określonego typu (2 x AAA).
3. Zawartość opakowania
Sprawdź, czy w przesyłce znajdują się wszystkie elementy:
- Lexon LR98R1 Onoff LCD Alarm Clock
- Instrukcja obsługi (ten dokument)
Uwaga: baterie AAA nie są dołączone do zestawu i należy je zakupić osobno.
4. Koniec produktuview
Familiarize yourself with the components of your Lexon Onoff alarm clock.
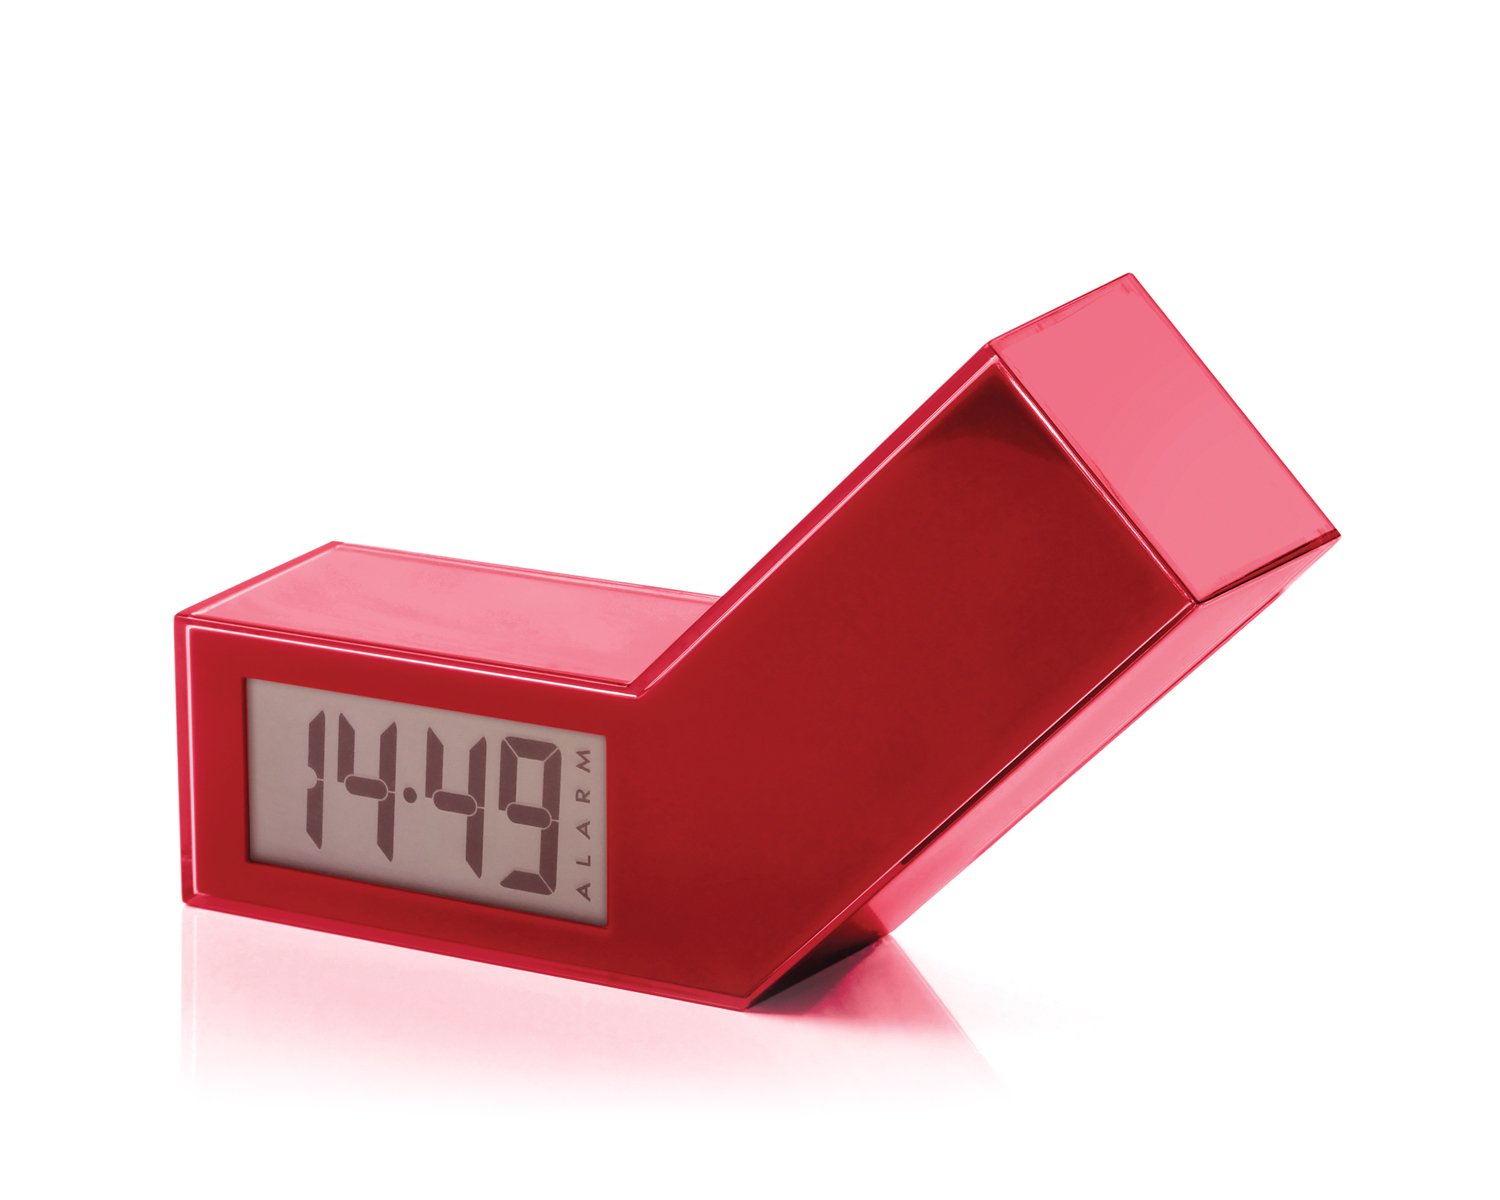
Rycina 1: Przód view of the Lexon LR98R1 Onoff LCD Alarm Clock. The image displays the alarm clock in its red casing, with the LCD screen visible. The side labeled 'ON' is facing upwards, indicating the alarm is active. The clock has a minimalist rectangular design.
While specific button labels are not visible in the provided image, typical alarm clock controls are usually located on the back or sides. These generally include:
- Przycisk ustawiania czasu: To adjust the current time.
- Przycisk ustawiania alarmu: To adjust the alarm time.
- Hour/Minute Adjustment Buttons: To change hour and minute values.
- Przycisk drzemki/światła: To temporarily silence the alarm or activate the backlight.
- Komora baterii: Located on the back or bottom.
5. Konfiguracja
5.1 Instalacja baterii
- Znajdź pokrywę komory baterii z tyłu lub na spodzie budzika.
- Aby otworzyć komorę, przesuń lub podnieś pokrywę.
- Włóż dwie (2) baterie AAA, zwracając uwagę na prawidłową biegunowość (+ i -), zgodnie ze wskazaniami wewnątrz komory.
- Dokładnie załóż pokrywę komory baterii.
Note: Batteries are not included. Please use new AAA alkaline batteries for optimal performance.
5.2 Pierwsze włączenie zasilania
Once batteries are installed, the LCD display should illuminate, and the clock will typically start at a default time (e.g., 12:00 AM). You will then need to set the current time and alarm.
6. Instrukcja obsługi
6.1 Ustawianie aktualnego czasu
- Naciśnij i przytrzymaj USTAWIENIE CZASU button (or similar, refer to device markings) until the hour digits begin to flash.
- Użyj GODZINA I CHWILA adjustment buttons to set the correct hour and minute.
- Naciskać USTAWIENIE CZASU ponownie, aby potwierdzić i wyjść z trybu ustawiania czasu.
6.2 Ustawianie czasu alarmu
- Naciśnij i przytrzymaj ZESTAW ALARMU button (or similar) until the alarm hour digits begin to flash.
- Użyj GODZINA I CHWILA przyciski regulacyjne umożliwiające ustawienie żądanej godziny alarmu.
- Naciskać ZESTAW ALARMU again to confirm and exit alarm setting mode.
6.3 Activating/Deactivating the Alarm (Onoff Feature)
The Lexon Onoff alarm clock features a unique flip mechanism:
- Do AKTYWOWAĆ the alarm, place the clock with the side labeled "ON" facing upwards. An alarm icon should appear on the LCD display.
- Do DEZAKTYWOWAĆ the alarm, flip the clock so the side labeled "WYŁĄCZONY" is facing upwards. The alarm icon should disappear from the display.
6.4 Silencing the Alarm / Snooze Function
- Gdy zabrzmi alarm, naciśnij SNOOZE / LIGHT button (usually a large button on top) to temporarily silence the alarm. The alarm will sound again after a few minutes (typically 5-10 minutes).
- To completely turn off the alarm for the day, flip the clock to the "WYŁĄCZONY"pozycja.
6.5 Podświetlenie wyświetlacza
Naciśnij SNOOZE / LIGHT button to activate the blue electroluminescent backlight for a few seconds, allowing you to view czas w warunkach słabego oświetlenia.
7. Konserwacja
7.1 Czyszczenie
Wipe the surface of the alarm clock with a soft, dry cloth. Do not use abrasive cleaners, solvents, or chemical sprays, as these may damage the finish or electronic components.
7.2 Wymiana baterii
When the display dims or the alarm function becomes unreliable, it is time to replace the batteries. Follow the battery installation steps in Section 5.1. Always replace both AAA batteries at the same time.
8. Rozwiązywanie Problemów
| Problem | Możliwa przyczyna | Rozwiązanie |
|---|---|---|
| Wyświetlacz jest pusty lub przyciemniony. | Baterie są rozładowane lub nieprawidłowo zainstalowane. | Wymień baterie na nowe baterie AAA, zwracając uwagę na prawidłową biegunowość. |
| Alarm nie włącza się. | Alarm is not activated (clock is in "OFF" position) or alarm time is not set. | Flip the clock to the "ON" position. Verify the alarm time is set correctly (Section 6.2). Ensure batteries are not low. |
| Czas jest nieprawidłowy. | Time was not set correctly or batteries were removed/replaced. | Reset the current time (Section 6.1). |
| Podświetlenie nie działa. | Niski poziom baterii. | Wymień baterie. |
9. Specyfikacje
| Numer modelu | LR98R1 |
| Marka | Lexon |
| Typ wyświetlacza | LCD with Blue Electroluminescent Backlight |
| Źródło zasilania | Baterie 2 x AAA (brak w zestawie) |
| Tworzywo | ABS / Injected Polycarbonate |
| Wymiary (dł. x szer. x wys.) | 13.5 x 3.5 x 8 cm (około 5.3 x 1.4 x 3.1 cala) |
| Typ ruchu | Kwarc |
| Cechy specjalne | Onoff flip alarm activation/deactivation, Snooze function |
10. Gwarancja i wsparcie
The Lexon LR98R1 Onoff LCD Alarm Clock comes with a 2-letnia gwarancja producenta od daty zakupu. Niniejsza gwarancja obejmuje wady materiałowe i wykonawcze przy normalnym użytkowaniu.
Gwarancja nie obejmuje:
- Uszkodzeń spowodowanych wypadkiem, nadużyciem, niewłaściwym użytkowaniem, powodzią, pożarem, trzęsieniem ziemi lub innymi przyczynami zewnętrznymi.
- Uszkodzenia powstałe w wyniku użytkowania produktu niezgodnie z przeznaczeniem lub przeznaczeniem opisanym w niniejszej instrukcji.
- Damage caused by service performed by anyone who is not an authorized representative of Lexon.
- Products or parts that have been modified to alter functionality or capability without the written permission of Lexon.
For warranty claims or technical support, please contact Lexon customer service through their official website or your retailer. Please have your proof of purchase and model number (LR98R1) ready.