Wstęp
Dziękujemy za zakupasing the Lorus Clocks LCD Bedside Alarm Clock LHL027S. This digital alarm clock features an LCD display, a color-changing bezel, an ascending beep alarm, snooze function, and a calendar display. This manual provides detailed instructions for setup, operation, and maintenance to ensure optimal performance of your device.
Produkt ponadview i funkcje
The Lorus LHL027S is designed for convenience and functionality, offering several key features:
- Wyświetlacz LCD: Clear digital time and date display.
- Color-Changing Bezel: The light surrounding the face changes color when the alarm sounds. Seven selectable light colors are available, including red, green, and blue.
- Rosnący sygnał dźwiękowy: Alarm sound gradually increases in volume.
- Funkcja automatycznego zatrzymania: Alarm automatically stops after a set duration.
- Funkcja drzemki: Tymczasowo wycisza alarm na krótki okres.
- Wyświetlanie kalendarza: Pokazuje aktualną datę.
- Zasilany bateryjnie: Działa na 3 baterie AA (brak w zestawie).
- Kompaktowa konstrukcja: Dimensions of approximately 9 x 10.1 x 8.2 cm (3.98"W x 3.23"H).

Przód view of the Lorus LHL027S alarm clock displaying time and date with a green backlight.
Organizować coś
1. Instalacja baterii
- Znajdź komorę baterii z tyłu zegara.
- Otwórz pokrywę komory baterii.
- Insert three (3) AA batteries, ensuring correct polarity (+ and -) as indicated inside the compartment. Uwaga: Baterie nie są dołączone.
- Dokładnie zamknij pokrywę komory baterii.

Tył view of the Lorus LHL027S alarm clock, highlighting the battery compartment and control buttons for setup.
2. Ustawianie czasu i daty
Refer to the control buttons on the back of the clock (SET, +, -).
- Naciśnij i przytrzymaj USTAWIĆ Naciskaj przycisk, aż wyświetlacz czasu zacznie migać.
- Użyj + or - przyciski do regulacji godziny.
- Naciskać USTAWIĆ ponownie, aby przejść do minut, a następnie użyj + or - dostosować.
- Kontynuuj naciskanie USTAWIĆ aby przełączać się między ustawieniami roku, miesiąca i dnia, dostosowując każde z nich + or -.
- Naciskać USTAWIĆ one last time to confirm all settings and exit the setting mode.
3. Ustawianie alarmu
- W trybie wyświetlania czasu normalnego naciśnij USTAWIĆ button once briefly to enter alarm setting mode. The alarm time will flash.
- Użyj + or - przyciski do ustawienia godziny alarmu.
- Naciskać USTAWIĆ again to move to alarm minutes, then use + or - dostosować.
- Naciskać USTAWIĆ ostatni raz, aby potwierdzić godzinę alarmu.
- Aby aktywować/dezaktywować alarm, naciśnij przycisk USTAWIĆ button briefly when the alarm time is displayed, or use a dedicated alarm ON/OFF button if present. An alarm icon will appear on the display when activated.
4. Selecting Bezel Color
The clock features a color-changing bezel. To select a static color or cycle through colors:
- Zlokalizuj WYBIERZ KOLOR przycisk z tyłu zegara.
- Naciśnij WYBIERZ KOLOR button repeatedly to cycle through the seven available colors (red, green, blue, etc.) or to set it to a color-changing mode.
- Release the button when your desired color or mode is displayed.

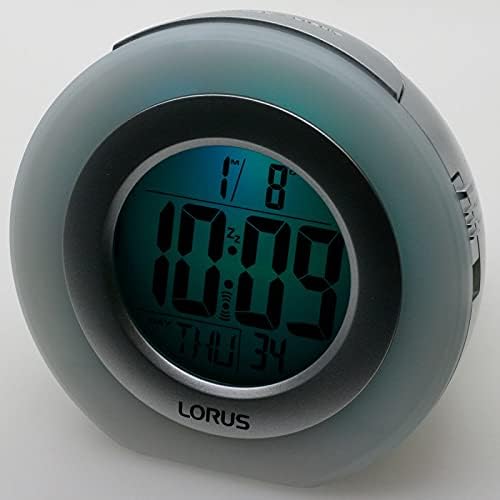
The clock displaying time with a green bezel light (left) and a blue bezel light (right).
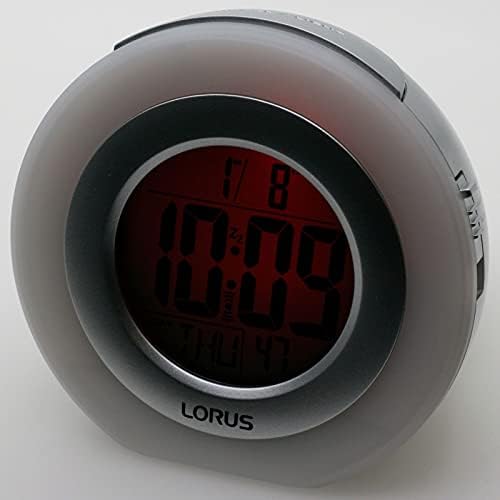

The clock displaying time with a red bezel light (left) and a darker blue bezel light (right).

The clock displaying time with a purple bezel light.
Instrukcja obsługi
1. Wyświetlanie czasu i daty
The current time and date are continuously displayed on the LCD screen. The format typically includes hour, minute, day of the week, and date.
2. Funkcja alarmu
- When the alarm sounds, the bezel light will change colors.
- To silence the alarm temporarily, press the SNOOZE / LIGHT button located on the top of the clock. The alarm will sound again after approximately 5-10 minutes (duration may vary).
- Aby całkowicie wyłączyć alarm, naciśnij dowolny inny przycisk (np. USTAWIĆ, +, -, or the dedicated alarm ON/OFF button if present). The alarm will reset for the next day.
- The alarm features an auto-stop function, meaning it will cease sounding after a certain period if not manually turned off or snoozed.
3. Backlight / Snooze Button
Press the large button on the top of the clock (labeled SNOOZE/LIGHT) to temporarily illuminate the display or activate the snooze function when the alarm is sounding.
Konserwacja
1. Wymiana baterii
When the display dims or the clock functions become erratic, it is time to replace the batteries. Follow the battery installation steps outlined in the "Setup" section. Always replace all three AA batteries at the same time with new ones.
2. Czyszczenie
To clean the clock, use a soft, dry cloth. Do not use abrasive cleaners, solvents, or chemical sprays, as these can damage the casing or display. Avoid getting moisture into any openings.
3. Przechowywanie
If the clock will not be used for an extended period, remove the batteries to prevent leakage and potential damage to the device.
Rozwiązywanie problemów
- Wyświetlacz jest pusty lub przyciemniony:
Check if batteries are installed correctly. Replace with fresh AA batteries. Ensure battery compartment cover is securely closed.
- Alarm nie włącza się:
Verify that the alarm is activated (alarm icon visible on display). Ensure the alarm time is set correctly. Check battery level.
- Nieprawidłowa godzina lub data:
Follow the "Setting Time and Date" instructions to reset the time and date. If the issue persists after battery replacement, perform a reset.
- Przyciski nie reagują:
Try removing and reinserting the batteries. If a NASTAWIĆ button (often a small recessed button requiring a pin) is present on the back, press it once to reset the unit to factory defaults. You will need to re-enter time and alarm settings.
Specyfikacje
| Marka | Lorus |
| Numer modelu | LHL027S |
| Typ wyświetlacza | Cyfrowy LCD |
| Źródło zasilania | Zasilany bateryjnie (3 baterie AA, brak w zestawie) |
| Cechy specjalne | Alarm, Snooze, Calendar, Color-Changing Bezel Light |
| Wymiary produktu | 3.98"W x 3.23"H (approximately 9 x 10.1 x 8.2 cm) |
| Tworzywo | Plastic (Acrylonitrile Butadiene Styrene frame) |
| Waga przedmiotu | 7.7 uncji |
| Zastosowanie wewnątrz/na zewnątrz | Wnętrz |
Gwarancja i wsparcie
This Lorus Clocks product is covered by a manufacturer's warranty. Please refer to the warranty information provided with your purchase for specific terms and conditions. For technical support or service inquiries, please contact your retailer or the official Lorus customer service channels. Specific contact details are typically found on the product packaging or the manufacturer's official webstrona.