1. Wprowadzenie
The Hormann CTR1D Code Keypad is a fixed comfort accessory designed for outdoor use, providing secure access control. This device features one relay for a single function, such as operating a garage door or gate. It includes a flip-up protective cover for durability and operates on a 24 V AC/DC connection voltage. This manual provides essential information for the safe installation, operation, and maintenance of your CTR1D Code Keypad.
2. Instrukcje bezpieczeństwa
Please read these safety instructions carefully before installation and operation to prevent personal injury or damage to the product.
- Bezpieczeństwo elektryczne: Installation and wiring must be performed by a qualified electrician in accordance with local electrical codes and regulations. Ensure the power supply is disconnected before any installation or maintenance work.
- Zastosowanie na zewnątrz: The keypad is designed for outdoor use. Ensure all connections are properly sealed to prevent water ingress.
- Tomtage: The device requires a 24 V AC/DC power supply. Do not connect to higher voltagt.j.
- Dzieci: Keep children away from the keypad during operation and installation. Do not allow children to play with the device.
- Przeznaczenie: Use the keypad only for its intended purpose as an access control device for garage doors or gates.
3. Zawartość opakowania
Sprawdź, czy w opakowaniu znajdują się wszystkie komponenty:
- Hormann CTR1D Code Keypad (1 unit)
- Jednostka sterująca przekaźnikiem
- Elementy montażowe (śruby, kotwy)
- Instrukcja obsługi (ten dokument)
4. Koniec produktuview
Familiarize yourself with the main components of the Hormann CTR1D Code Keypad.

Figure 4.1: Keypad with Protective Cover Open
This image shows the keypad with its protective cover lifted, revealing the numeric buttons (0-9), directional arrows, and a STOP button. The Hormann logo is visible at the bottom.

Figure 4.2: Keypad with Protective Cover Closed
This image displays the keypad in its closed state, highlighting its compact and weather-resistant design. The Hormann logo is visible at the bottom.

Figure 4.3: Relay Control Unit
This image shows the separate relay control unit, a grey rectangular box with several cable glands for secure wiring connections. The Hormann logo is also present on this unit.
5. Konfiguracja i instalacja
Proper installation is crucial for the reliable operation of your code keypad. Ensure all safety instructions are followed.
5.1 Mounting the Keypad and Control Unit
- Wybierz lokacje: Select a suitable outdoor location for the keypad, ensuring it is easily accessible but protected from direct impact. The control unit should be mounted securely indoors or in a protected outdoor enclosure.
- Zaznacz punkty wiercenia: Use the keypad and control unit as templates to mark the drilling points for mounting screws.
- Wiercenie otworów: Drill holes at the marked points and insert appropriate wall anchors if necessary.
- Secure Units: Mount the keypad and control unit firmly using the provided screws.
5.2 Podłączenie elektryczne
The CTR1D Code Keypad requires a 24 V AC/DC power supply. A power supply cable is not included. The connection to your garage door operator or gate system is made via the relay control unit.
- Power Supply (24 V AC/DC): Connect the 24 V AC/DC power supply to the designated terminals on the relay control unit. Refer to the wiring diagram provided with your specific garage door operator for exact terminal identification.
- Keypad to Control Unit: Connect the keypad to the relay control unit using the appropriate cable. Ensure correct polarity if specified.
- Impulse Connection (Relay Output): The relay output from the control unit connects to the impulse input of your garage door operator. For Hormann Supramatic 3 operators, connect the impulse terminals on the relay control unit (typically the extreme right terminals) to terminals 20 and 21 on the Supramatic 3 motor.
- Common Ground/Power for Supramatic 3: For Supramatic 3 operators, connect the power supply terminals (24V DC/AC) on the relay control unit to terminals 20 and 5 on the Supramatic 3 motor.
- Bezpieczne połączenia: Ensure all cable glands are tightened to maintain weather resistance.
Notatka: The specific wiring terminals may vary depending on your garage door operator model. Always consult the instruction manual of your garage door operator for precise wiring diagrams. If you are unsure, consult a qualified technician.
6. Instrukcja obsługi
This section describes how to program and use your Hormann CTR1D Code Keypad.
6.1 Programowanie kodów dostępu
The keypad allows you to set up one or more access codes to activate the relay function. Refer to the specific programming instructions provided with the keypad for detailed steps. Generally, the process involves:
- Wejdź w tryb programowania: This usually involves pressing a specific key combination or a dedicated programming button on the control unit.
- Wprowadź kod główny: If applicable, enter the existing master code.
- Set New Code: Input your desired access code (typically 4-6 digits).
- Confirm Code: Re-enter the new code to confirm.
- Wyjście z trybu programowania: Save the changes and exit programming mode.
Ważny: Keep your access codes confidential. Change codes periodically for enhanced security.
6.2 Korzystanie z klawiatury
To operate your garage door or gate:
- Lift the protective cover.
- Enter your programmed access code using the numeric buttons.
- Press the designated activation button (e.g., an arrow key or a specific function key) to send the impulse to the connected device.
- The relay will activate for a short duration, triggering the connected device (e.g., opening/closing the garage door).
- Close the protective cover after use.
The "STOP" button can be used to halt an ongoing operation if supported by the connected device.
7. Konserwacja
The Hormann CTR1D Code Keypad is designed for low maintenance. Follow these guidelines to ensure its longevity:
- Czyszczenie: Okresowo czyść powierzchnię klawiatury miękką,amp ściereczką. Nie używaj środków czyszczących o właściwościach ściernych ani rozpuszczalników, ponieważ mogą one uszkodzić plastik.
- Pokrowiec ochronny: Ensure the flip-up protective cover is always closed when not in use to protect the keypad from weather elements and dirt.
- Inspekcje: Periodically check the wiring connections for any signs of wear or damage. Ensure all screws are tight.
8. Rozwiązywanie Problemów
If you encounter issues with your CTR1D Code Keypad, refer to the following common problems and solutions:
| Problem | Możliwa przyczyna | Rozwiązanie |
|---|---|---|
| Klawiatura nie odpowiada. | Brak zasilania, nieprawidłowe okablowanie, uszkodzone urządzenie. | Check 24 V AC/DC power connection to the control unit. Verify all wiring connections are secure and correct. If issues persist, contact support. |
| Garage door/gate does not open/close. | Incorrect access code; incorrect impulse wiring; issue with garage door operator. | Ensure the correct access code is entered. Verify the impulse connection between the control unit and the garage door operator (e.g., terminals 20 and 21 for Supramatic 3). Check the garage door operator's functionality independently. |
| Keypad programming fails. | Incorrect programming steps; existing master code issue. | Review the programming instructions carefully. Ensure you are in the correct programming mode. If a master code is required, ensure it is entered correctly. |
| No backlight on keypad. | The CTR1D model does not feature keypad backlighting. | This is not a malfunction. The Hormann CTR1D model does not include an illuminated keypad. |
9. Specyfikacje
Technical details for the Hormann CTR1D Code Keypad:
- Model: CTR1D
- Numer części: 436355
- Funkcjonować: 1 Relay for 1 function
- Zasilanie: 24 V AC/DC (power supply cable not included)
- Dimensions (Keypad): Około 8 x 8 x 1.5 cm (3.15 x 3.15 x 0.59 cala)
- Waga: Około 349.27 gramów (0.77 funta)
- Tworzywo: Plastikowy
- Kolor: Multicolore (Multicolor - though images show grey)
- Środowisko operacyjne: Do użytku na zewnątrz
- Producent: Hormanna
- Kraj pochodzenia: Niemcy
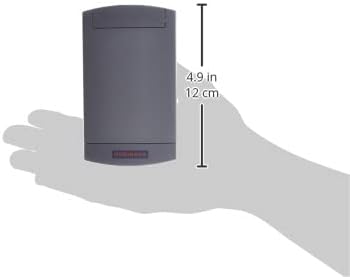
Figure 9.1: Keypad Dimensions
This image illustrates the approximate dimensions of the keypad, showing a length of 4.9 inches (12 cm).
10. Gwarancja i wsparcie
For warranty information and technical support, please refer to the official Hormann website or contact your authorized Hormann dealer. Keep your purchase receipt as proof of purchase.
Producent: Hormanna
Numer modelu: 436355