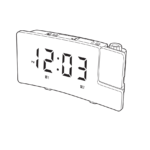
OnLyee CR01001F Projection Alarm Clock

Alarm Clock with Time Projection
- CREATE YOUR PERFECT SLEEP ENVIRONMENT
LOCATION OF CONTROLS

- SET TIME BUTTON
- HOUR BUTTON
- MINUTE BUTTON
- DIMMER/DST BUTTON
- SNOOZE/OK BUTTON
- ALARM 1
- ALARM 2
- ALARM ON/PAUSE
- PROJECTION ON/FLIP/OFF
- VOLUME+ BUTTON
- VOLUME- BUTTON
- AM INDICATOR
- PM INDICATOR
- ALARM 1 INDICATOR
- ALARM 2 INDICATOR
- DST INDICATOR
- FOCUS RING
- BATTERY COMPARTMENT
- USB PORT
- DC JACK
- SPEAKER
- HOLDER ( x 2pcs)
- PROJECTION DIMMER
POWERING ON
- Install 2pcs 1.5V “AAA” size batteries to the proper terminals in the battery compartment to memorize the time/alarm setting in case of a power outage.
- Note: Without AC power in, batteries don’t support the time display, but an alarm will still go off.
- Connect the adapter line to the DC jack, then plug it into a 100~240V AC wall power outlet.

TIME SETTING
- 1. Press
 the button once, display
  starts flashing.
 - 2. Press
 the button to set the hour. press
  the button to set the minute.
 - Press
 the button to save time or wait for another 10 seconds to confirm automatically.
 - To change the 12H/24H time format Hold press
 to change the 12H/24H time format.
ALARM SETTING
- Press
 the button, the alarm indicator
  will light up, the
  display starts flickering.
 - Press
 the button to set the hour, and press
  the button to set the minute.
 - Press
 the button or
  button to save alarm time or just wait for another 10 seconds to confirm automatically.
 - Press
 or
or  button to adjust the alarm volume.
 - Press
 the button to save the volume setting.
Turn off Alarm
When an alarm goes off:
- Press
 the button to temporarily turn off the alarm for 9 minutes. The alarm will ring every next 9 minutes.
 - Press
 the button or
  button to turn off the alarm for 24 hours. The alarm indicator
  is still on, which means the alarm is still activated and will ring after 24 hours.
 - When an alarm is off, press
 the button to activate the alarm, the setting will be the same as last time.
 - Cancel Alarm
- Hold the
 button until the alarm indicator
  disappears from the display, the alarm will never go off.
 - Setting ALARM 2 is the same as ALARM 1.
PROJECTION MODE
- Press the projection mode
 button to turn on the projection.
 - Press
 the button once again to flip the projection reversely when the time is projected backward.
 - Press
 once again to turn off the projection.
Note:
- The best projection distance is 1.5 to 3.0 meters (4.92 to 9.84 feet).
- A projector is a common LED light. So the projector is not visible in a bright environment.
Rotate the focus ring ![]() to adjust the clarity of the projection image.
to adjust the clarity of the projection image.
Note: if the projection is fuzzy, please rotate the focus ring (17) to adjust the angle for a clear image.
PROJECTION DIMMER
- press
 the button to adjust the brightness of the projection for your preference.
DIMMER & DST
- Repeat
 the button to adjust the brightness of the display for your preference.
 - Hold the
 press button to switch the DST function.
USB CHARGING
- Our projection clock has a USB Charger Port, which can charge both your phone and tablet at the same time.
- The maximum charge current is 1 Ampere.

- Contact our experts support@onlyee.com
- http://www.onlyee.com
Documents / Resources
 | OnLyee CR01001F Projection Alarm Clock [pdf] User Guide CR01001F Projection Alarm Clock, CR01001F, Projection Alarm Clock, Alarm Clock, Clock |


