Patiowell 383A-WT-2
Patiowell 4' x 6' Outdoor Storage Shed Instruction Manual
Model: 383A-WT-2
1. Introduksjon
This manual provides detailed instructions for the assembly, operation, and maintenance of your Patiowell 4' x 6' Outdoor Storage Shed. Please read all instructions carefully before beginning assembly and retain this manual for future reference.
Nøkkelfunksjoner:
- Durable resin panel construction for longevity and weather resistance.
- Stable floor base for enhanced stability.
- Spacious 6 ft. x 4 ft. interior offering ample lagringskapasitet.
- Simplified assembly process with minimal screws.
- Lockable door for security and weather-resistant peak roof.
- Integrated window for natural light and effective ventilation.

Bilde: Utvendig view of the Patiowell 4' x 6' Outdoor Storage Shed, showcasing its design and capacity for storing various outdoor tools and equipment.
2. Oppsett og montering
Before starting assembly, ensure you have all components and tools listed in the packaging. A level surface is crucial for proper installation. Two people are recommended for assembly.
2.1. Montering overview Video
Watch this official assembly video for a visual guide to the installation process.
Video: Detailed assembly instructions for the Patiowell 6x4 Resin Shed, demonstrating each step from unboxing to final setup.
2.2. Floor Assembly
- Unpack all floor panels (A1, A2) and identify the connecting points.
- Align and interlock the floor panels according to the diagram. Ensure a snug fit.
- Secure the connected floor panels using SC5x14 screws at the designated points.
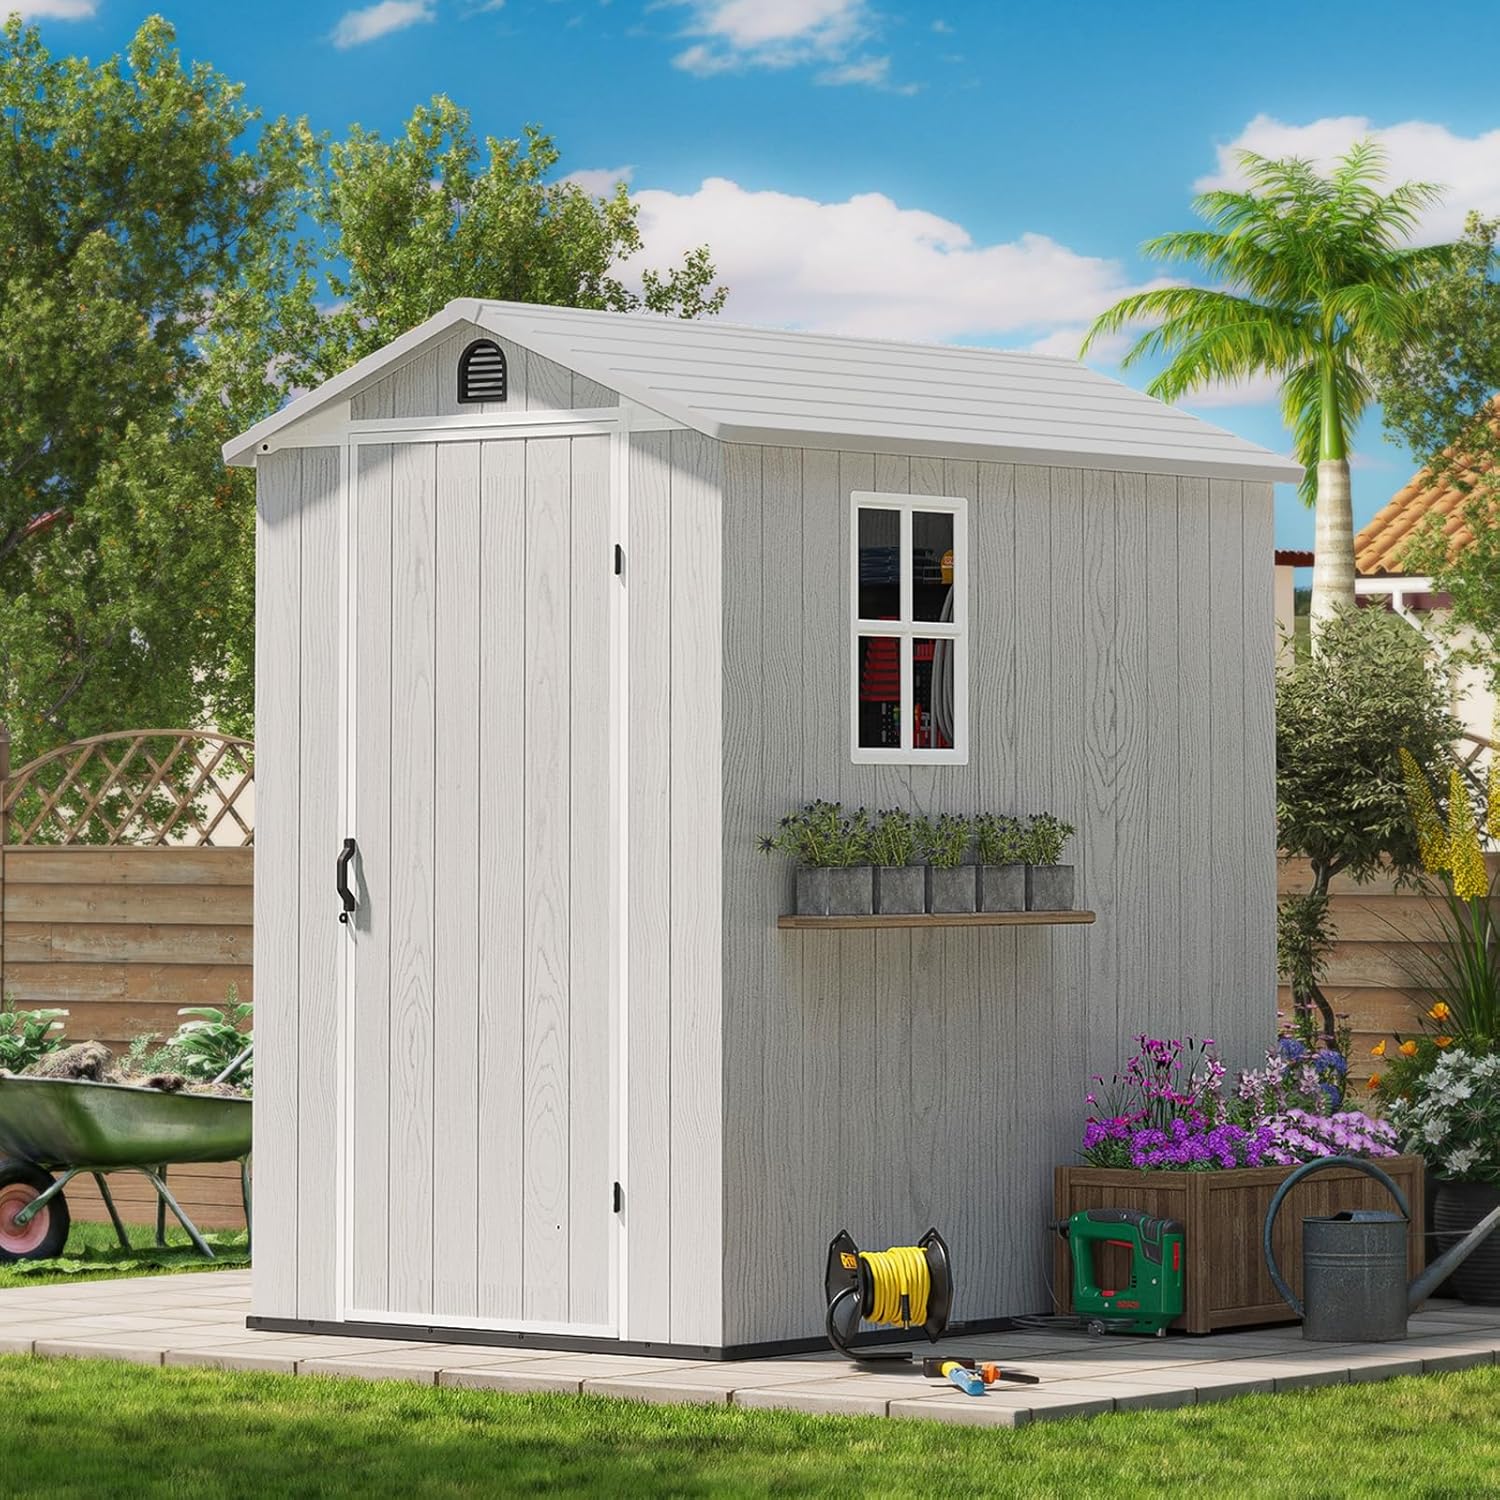
Image: Illustration of floor panels A1 and A2 being interlocked to form the shed's base, indicating screw points.
2.3. Veggmontering
- Attach window frame (W1) to wall panel (B3) and secure with window pane (W2).
- Insert wall panels (B1, B2, B3, B4, B5) into the grooves of the assembled floor base.
- Ensure all wall panels are correctly oriented and interlocked.
- Secure wall panels to the floor and to each other using SC5x14 screws where indicated.

Image: Diagram showing the sequential connection of wall panels to form the shed structure.
2.4. Takmontering
- Assemble the roof panels (C1, C2, C3, C4, C5, C6, C7) by interlocking them and securing with SC5x14 screws.
- Attach the roof support beams (E1, E2, E3) by connecting them and securing with SC5x12 and SC5x14 screws.
- Carefully lift and place the assembled roof onto the wall structure.
- Secure the roof to the wall panels using SC5x14 and SC5x30 screws at all connection points.

Image: Close-up of the shed's roof, highlighting the ventilation and weather-resistant design.
2.5. Dørmontering
- Assemble the door panel (D1) with its frame components (D1-1, D1-2, D1-4).
- Attach the hinges (D1-1-2) to the door panel using SC4x30 screws.
- Mount the door handle (D1-3) to the door panel using SC5x30 screws.
- Install the assembled door onto the shed frame, ensuring proper alignment and smooth operation.
- Secure the door to the shed frame using SC4x30 screws for the hinges and SC5x30 for the latch mechanism.
2.6. Final Securing
- Ensure all panels are securely fastened and all screws are tightened.
- Attach any remaining trim pieces (F1, F2, F3, F4, F5, F6) to the roof edges and corners using SC5x30 screws.
- Verify that the shed is stable and all moving parts (door, window) operate correctly.

Image: Simplified assembly diagram illustrating the plug-in structure and reduced screw count for easier installation.
3. Bruksanvisning
3.1. Dørbetjening
The shed features a single hinged door. To open, simply pull the handle. To close, push the door firmly until it latches. For added security, a padlock (not included) can be used with the integrated lockable door mechanism.
3.2. Window Functionality
The integrated window allows natural light into the shed. It is a fixed window designed to provide illumination without compromising structural integrity or weather resistance.
3.3. Ventilasjon
The shed is equipped with a built-in vent near the roof peak to facilitate air circulation and reduce condensation inside. Ensure the vent remains unobstructed for optimal performance.
4. Vedlikehold
Regular maintenance will extend the life and appearance of your Patiowell storage shed.
- Rengjøring: Rengjør skuret med jevne mellomrom med mild såpe og vann. Unngå slipende rengjøringsmidler eller sterke kjemikalier som kan skade harpiksmaterialet.
- Undersøkelse: Annually inspect all screws, bolts, and panel connections to ensure they remain tight. Re-tighten as necessary.
- Drenering: Ensure the area around the shed is clear of debris to allow for proper water drainage and prevent moisture buildup.
- Snøbelastning: In areas with heavy snowfall, regularly remove accumulated snow from the roof to prevent excessive weight and potential damage. The roof has a weight capacity of 440 lbs.
- UV-beskyttelse: The shed material includes ultraviolet light protection, but prolonged exposure to extreme sunlight may still cause some fading over many years.
5. Feilsøking
- Døren lukkes ikke ordentlig:
- Check if the shed is on a level surface. Uneven ground can cause door misalignment. Inspect hinges for any damage or loose screws.
- Water leakage inside the shed:
- Ensure all roof panels are correctly overlapped and secured. Check for any gaps in wall or roof connections and apply a silicone sealant if needed (not included). Verify that the shed is installed on a proper foundation that allows for drainage away from the base.
- Panels are difficult to connect during assembly:
- Ensure panels are correctly aligned and oriented. Sometimes a rubber mallet can assist in gently tapping panels into place. Do not use excessive force.
6. Spesifikasjoner
| Trekk | Detalj |
|---|---|
| Merke | Patiowell |
| Modellnummer | 383A-WT-2 |
| Farge | Lys grå |
| Materiale | Plastic, Resin (Alloy Steel frame) |
| Produktdimensjoner (D x B x H) | 72 cm D x 45.3 cm B x 76.8 cm H (ca. 4 x 6 m) |
| Varevekt | 118 pund |
| Dørbredde | 45.3 tommer |
| Dørhøyde | 76.8 tommer |
| Takets vektkapasitet | 440 pund |
| Vannmotstandsnivå | Vannbestandig |
| Beskyttelse mot ultrafiolett lys | Ja |
| Nødvendig montering | Ja |
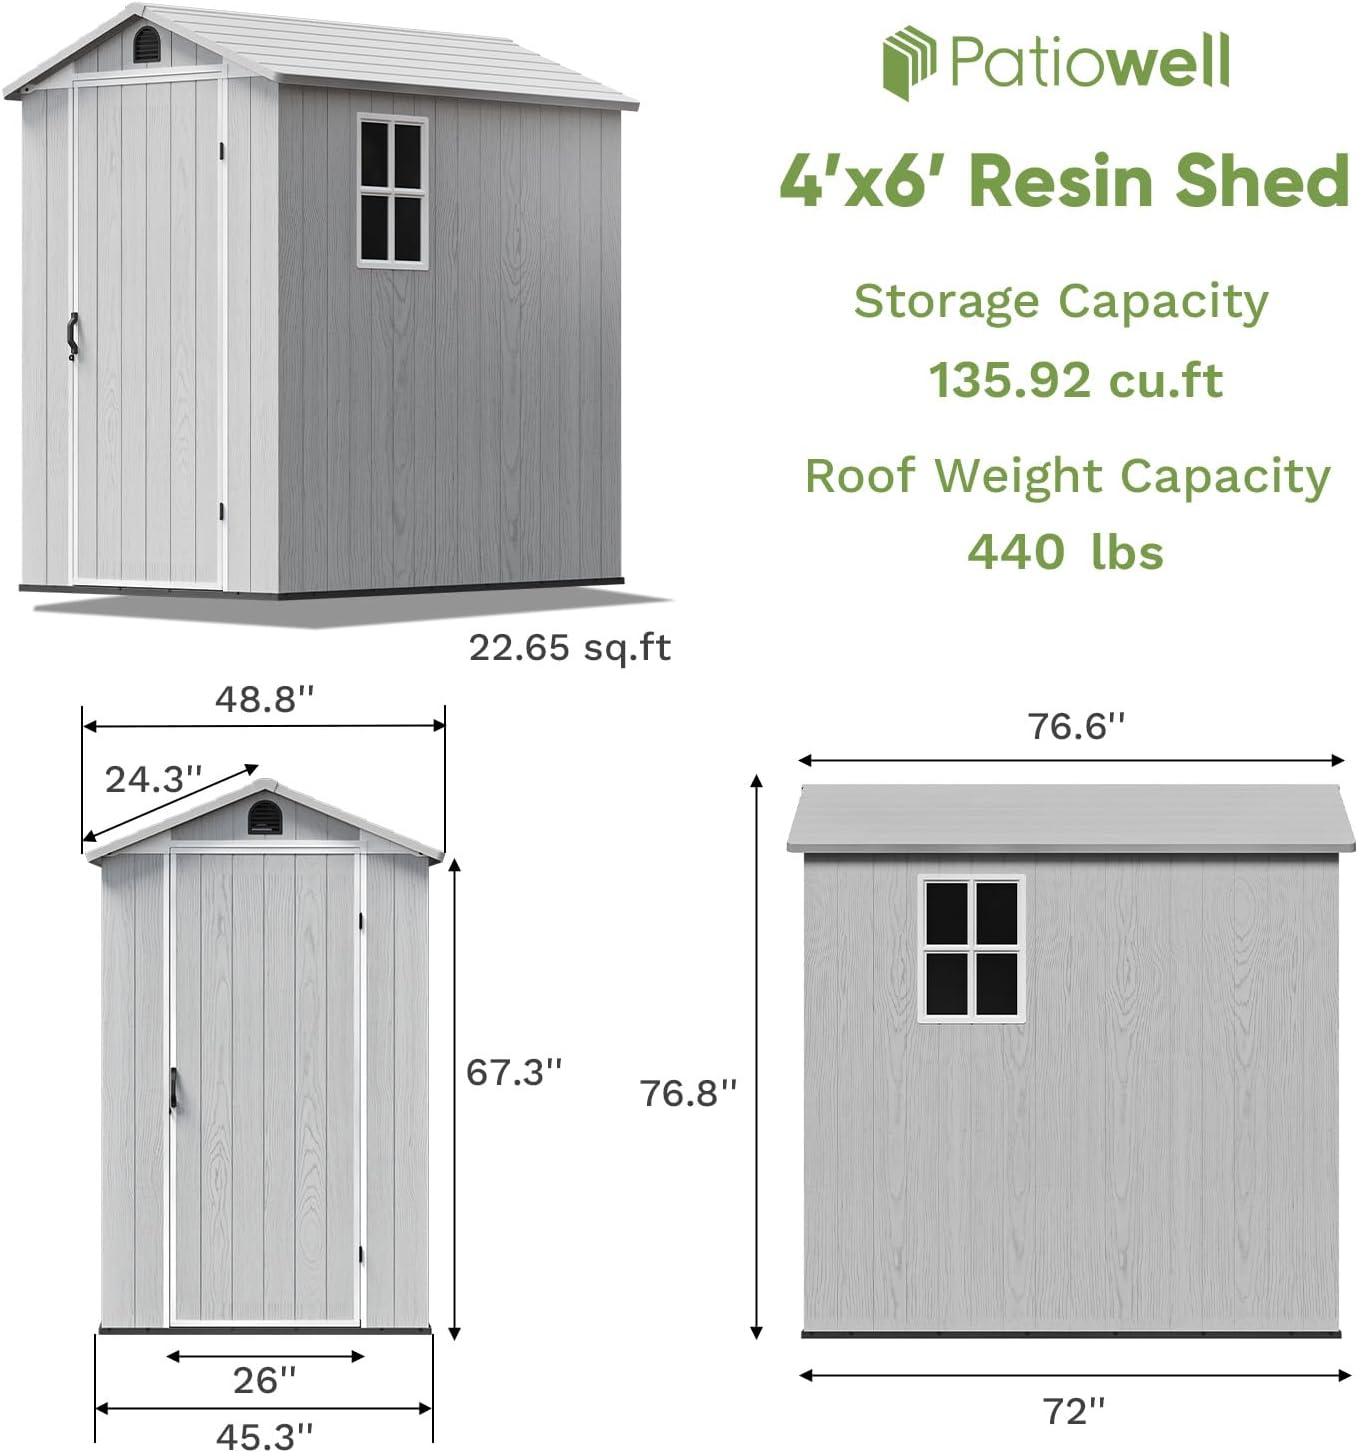
Image: Diagram illustrating the key dimensions and storage capacity of the Patiowell 4' x 6' Resin Shed.
7. Garanti og støtte
Patiowell products are designed for durability and quality. All products are inspected before shipment. If you encounter any quality problems or require assistance, please contact Patiowell customer service.
- Kundeservice: Patiowell provides professional customer service with replies guaranteed within 24 hours.
- Returnerer: Dette produktet er kvalifisert for enkel retur innen 30 dager.
- Lokale forskrifter: Please check your local Homeowners Association (HOA) policy to ensure that the shed can be built in your area.
For further assistance, please refer to the contact information provided with your purchase or visit the official Patiowell store online.