PANORAMA CS12 Channel Strip Controller
![]()
![]()
![]()
PANORAMA CS12 Channel Strip Controller
for
OWNER’S MANUAL
FIRMWARE UPDATE INSTRUCTIONS
If the Keyboard Setup Assistant message appears after plugging in Panorama CS12, simply close the window. The message does not reappear.

We recommend that you update to the latest firmware immediately, so lets get started.
Firmware update
- Make sure Panorama CS12 is connected to your computer via USB.
- With CS12 switched off, press and hold [Markers]+[
 ] while switching the unit on. The display should read ‘FW update mode’.
 - Locate the file ‘Panorama_CS12_Firmware.dmg’ in the package that this guide came with, and double click to open.
- Launch the nkupdate application. Once launched, it should look like the image.
- Follow the nkupdate on-screen instructions to load and update the firmware. Note: the firmware file should be selectable after clicking the [Load File] button and is named PanoramaCS12_FW_vxxxxx.bin or higher. See image for location.
- If the ‘Load File’ button is grayed out, close the updater app and open it again.
- Once the update process is complete, switch Panorama CS12 off and on again.

That’s it, Panorama CS12 is ready so lets move on to install the software.
INSTALLATION
What is ControlCore?
ControlCore is a simple app that manages plugin mapping files and other important data for Panorama CS12.
ControlCore also includes the Steinberg control surface file that enables the hardware to communicate directly with the DAW, using the Steinberg API. For more information about the ControlCore system, see the “Panorama CS12 System Overview” in the printed quick start guide.
Note: Throughout the guide we talk about Cubase for simplicity but all functionality applies equally to Nuendo.
Setup
Here are the steps you need to complete, to get Cubase up and running with Panorama CS12:
- Make sure Cubase 13.0.51 or 14.0.10 (or higher) is already installed on your computer.
- Run the ControlCore_Installer_OSX.dmg installer, included in the downloaded package.
- Make sure Nektar Mapfiles, Nektar ControlCore and Nektar Steinberg Control are all ticked to be installed.
- Follow the on screen instructions and complete installation.
- Connect CS12 to your computer via USB and make sure it‘s switched on.
- Click “Open System Settings” when the MacOS message “ControlCore would like to receive keystrokes from any application” appears. Don’t see this?
- In the “Input Monitoring” window, enable ControlCore, Cubase and Nektarine.
- Launch Cubase and load an existing project or create a new one.
Note, CS12 does not connect to Cubase until a project is loaded.

If Panorama CS12 does not connected to Cubase, go to this page for troubleshooting.
GETTING STARTED
Panorama CS12 should now be ready to go but let’s complete a system check.
- Locate the power button on the rear of Panorama CS12 and switch the unit off and on again
- In the display’s top right corner you see two icons, one for ControlCore connectivity and the other for power.
If both are green, Panorama CS12 will connect to Cubase within 30 seconds. - If one or both are gray, and the connection to Cubase is not established, go to this Troubleshooting page.
In Cubase load an existing project or create a new one. Then select a track hosting insert plugins.
The printed Quick Start guide includes an overview of the hardware which you can also find on the next page.
Use the overview to familiarize yourself with Panorama CS12. It explains the broad strokes of how to operate it.
First steps
Panorama CS12 is able to control every aspect of the currently selected Cubase channel strip, including plugins.
Tracks or channels can be selected directly from Panorama CS12 but lets start by selecting channels using the mouse.
- Click on a track or channel in Cubase, to select it. You’ll see Panorama CS12’s display update to show the plugin list, detailing the plugins loaded in the channel’s first 8 plugin slots.
- To control a plugin, you need to select a plugin slot on Panorama CS12. Press one of the illuminated plugin slot buttons numbered 1-8 on the panel (11 in the printed functional overview).
- The display now shows the currently assigned plugin parameters and their values. The rotary controls (12) are illuminated to correspond with the display. Move controls to adjust plugin parameters.
- Press another illuminated plugin slot button on Panorama CS12 to control the plugin hosted in that slot. The plugin list appears briefly.
- Use the top button labeled [9-16 ] to open the plugin list if you need more time to view the plugins hosted on current channel. The button also toggles plugins slots 1-8 and 9-16, if there are more than 8 plugins on the channel.
- Select another channel in Cubase and repeat the process to control that channel’s plugins.
The getting started steps may be enough for you to start exploring your new Panorama CS12 with Cubase. Feel free to do so. The product is intended to compliment your existing workflow and enhance it in key areas where tactile control helps creativity and productivity. Use this document for reference as needs arise or jump in and learn all the power user features. Either way, we hope Panorama CS12 finds a permanent place in your setup. 
- 100mm motorized fader, controls current mixer channel and any other channel parameter using [Select].
- Mixer channel controls include 6 segment VU meter, 1 x 360 pot for pan control, buttons for channel Arm, Solo and Mute.
- Select button. When illuminated blue, click on a parameter in your plugin or DAW, and control using the fader or 360 pot (Pan) control. Hold [Shift] and press [Select] to select the master output channel for control by the motorized fader (1).
- TFT display shows plugin control assignments and values in the main area of the display with the top line showing any parameters currently controlled, including the motorized fader assignment.
- Four display buttons control plugin parameters according to the display label immediately above.
- Zoom encoder controls horizontal zoom. Hold [Shift] and move Zoom to control vertical zoom.
- Tempo controls the DAWs tempo by default with an additional 6 selectable options including Playhead (Jog), Scrub, Nudge, Cycle, Vertical Zoom and Clip Gain. Hold [Shift] and move [Tempo] to select from the display list.
- Data/Menu opens the plugin page menu list when moved. Most plugins only have one main page but larger plugins can have multiple. Hold [Shift] and press this encoder (it’s a button too) to activate the plugin learn menu.
- Seventeen transport and navigation buttons as indicated by the icons. To access functions silk screened below the buttons, hold [Shift] and press the function needed. See page 25 for complete overview.
- Markers button. When active (illuminated) the buttons labeled M1 – M10 above, are used for marker selection.
- Channel strip select buttons determine how the 12 pots, 4 display buttons and 4 RGB buttons are assigned. From the bottom, Channel assigns the DAWs channel features (if applicable) and Sends control sends. The following 8 buttons select plugin slots 1-8 as labeled. The last button toggle plugin slots 1-8 and 9-16, when it’s illuminated. The button also opens the plugin overview page at any time.
- The 12 rotary controls are 360 or endless pots. Each pot is illuminated by an RGB LED with the color matching the parameter value indicator in the display. Customize colors by holding [Shift], move a pot for selection, then move the Data/Menu control (8).
- Four RGB buttons for plugin control. Customize colors by holding [Shift], press a button for selection, then move the Data/Menu control (8). Combined with the 4 display buttons (5), Panorama CS12 can control up to 8 switch parameters per control page.
- Power supply socket for 5 v DC , center positive barrel connector.
- Power on/off switch.
- USB-C connector. Connect the included USB cable to CS12, with the other end connected to a USB A socket on your computer. You can also use a cable with USB-C connectors on both ends (optional, not included). Compatible with USB 2 and 3, as well as USB C.
- 1/4” TRS jack socket for connecting up to 2 foot switches (using a Y-splitter cable configuration TRS to 2xTS 1/4” jacks, not included).
- Kensington lock point (Kensington lock not included).

DISPLAY OVERVIEW
What the display shows you
Three display designs cover the Cubase feedback needed to operate Panorama CS12.
1. Control display
The main control display shows the assignments of the controls assigned to plugin parameters and channel menus.
- The current parameter line is at the top. It displays the last controlled parameter and its value to the right.
- The main body area of the display show the 12 rotary assignments. The parameter name is below and the value above a value bar, colored the same as the corresponding rotary control,
- The name of the currently selected track.
- Up to 4 labels, 1 for each of the display buttons located below the display. In the example, a button parameter, identifiable by its on/off status bar, is assigned to the first display button.
- Toggle the encoder button [DATA/MENU] to alternately display the assignments to the 4 LED buttons (13) and the track name.
2. Plugin slot list
The list shows the plugins loaded in the current channels plugin slots. To control a plugin in the list, press the corresponding plugin slot button.
If there are 9 or more plugins on the channel, the top plugin slot buttons labeled [9-16] is illuminated. Press the button to toggle plugin banks 1-8 and 9-16.
The current parameter line remains at the top to show parameter feedback from the motorized fader and other sources. 3. Menu options
When the [DATA/MENU] encoder is used to offer selection options, this is the list that appears.
For example, when controlling a plugin with a lot of parameters, additional pages are listed when moving the [DATA/ MENU] encoder.
To select, simply rest on the selection or press the [DATA/ MENU encoder (it’s a button too).
MIXER CHANNEL CONTROLS
The mixer channel controls are assigned to the main mixer parameters.
- Fader
The 100mm long-throw motorized fader is assigned by default to control the selected Cubase mixer channel’s volume. With a control resolution of 10 bit, the fader is capable of detailed control. Select a channel and the fader jumps to that channel’s volume position. Fine Control: The fader can control parameters at 14 bit resolution. Hold the Fine (magnifier) button while moving the fader. To reposition the fader without affecting the parameter, hold [Fine]+[Mute] and move the fader.
For more information, see the section Fine – High Resolution Control on page 20.
Master Volume: Press [Shift]+[Select] to control Cubase’s Master Volume. Repeat to toggle fader modes: Selected Channel/Master.
Setting volume to 0 db: Hold [Shift]+[touch the fader] Temporarily disable fader motor: Hold [Select]+[touch the fader]. Touch the fader again to re-enable. - Meter
The 6 segment stereo meter shows the channel level from -60db to clipping. If a mono channel is selected, only the left column is used. From -60db, the first 4 green segment gradually increases in illumination until -9db. The 5th yellow and 6th red segments gradually increase in illumination from -9db to 0 db. - Pan
The rotary pot controls Pan. The pots RGB LED color is set by the channel strip color in Cubase. To change it in Cubase, open the Mixer and at the bottom of the channel, click on the arrow icon to the right. Next select a new color from the pallet. The Cubase channel color also illuminates the Channel and Sends buttons. - Arm / Monitor button
[Arm] is red if the current track is enabled for record. Press [Arm] to enable/disable Arm. Press [Shift]+[Arm] to activate Monitor on the current track.
- Solo button
Activate (green)/deactivate (white) solo on the current channel. Press [Shift]+[Solo] to disable solo on all channels. - Mute button
Activate (orange)/deactivate (white) channel mute. Press [Shift]+[Mute] to disable mute on all muted channels. - Select button:
See next page.
CONTROLLING THE SELECTED PARAMETER
Controlling the selected parameter is a significant, yet easy to use feature. Most mixer, track or channel parameters can be controlled by either the fader or the pan control, including channel volume, levels, MIDI inserts, modulators, instrument and insert plugin parameters. Better still, parameters can be selected for control across tracks. The only exception is instrument parameters which can only be controlled if the instrument is hosted on the selected track.
- First enable the [Select] button. Its illuminated blue when active.
- Next click on a parameter in Cubases UI, such any channel level fader or a plugin parameter.
- Move either the fader or the pan pot to control the selected parameter.
- Click on another parameter for control, it’s that easy.
Note: Send and pan parameters are not immediately selected when clicked. To select send or pan parameters for control you need to adjust the value a little with the mouse.
Fader vs Pan pot
The fader and pan controls both adjust the same parameter.
The faders 10 bit resolution gives detailed control over parameters with the added benefit that the fader moves reassuringly to the value position of the selected parameter.
The rotary pan control adjusts the selected parameter at 7 bit and therefore covers the value range in one rotation. You can activate Fine control (Magnifier button) to control at up to 14 bit if fine grained adjustments are needed.
The choice of control depends on your preference and the result you are looking for.
With [Select] enabled, the fader is particularly useful to write LFO style automation that can be looped while you experiment with note combinations. The select feature can become a part of your creative toolbox with quick results that can be difficult or impossible to achieve using an instruments standard modulation options.
CHANNEL & SENDS
The Channel and Sends buttons (1&2) covers additional Cubase Channel Strip functions. The Cubase channel color illuminates controls including the Channel and Sends buttons.
1. Channel
The Channel mode contains options to control Quick Controls and the mixer Channel Strip.
Press [Channel] to select.
Cubase Channel Strip Modules
When the Channel mode is active, the plugin slot buttons 1-6 are illuminated in the colors of the
Cubase channel strip modules. Any button that’s fully illuminated indicates that the module is active.
A module is not active when it’s button is dimly lit.  Note: It’s not curently possible to activate modules from Panorama CS12. If an inactive module is selected, the control page is blank.
- Pressing any of the buttons will enable control of the module, if the module is enabled.
- If the page selected is blank, the module is off, activate the module in Cubase.
- Each module can be bypassed by pressing [Shift]+[module buttons 1-6].
- All modules can be bypassed by pressing [Shift]+[9-16].
- Pages can be customized including the blank pages 7 and 8 using the Cubase MIDI Remote Mapping Assistant.
- Press the top [9-16] button to exit channel strip control and revert to plugin slot select.
 Quick Controls
Quick Controls: Selecting [Q Ctrls] enables control of 8 Quick Control parameters. By default,
Quick Controls are set to “Track and Plug-in Window Focus” which means:
- If the Project window has focus, CS12 controls the quick controls of the selected track.
- If the plug-in window has focus, CS12 controls the quick controls of the active plug-in window.
- If Lock is active, focus is ignored. To change the Lock state from Panorama CS12 press the display button named “Lock“.
If you already have Quick Controls set up, you should be able to control them immidiately.
Tip: Track Quick Controls can be used as a customizable control menu. Assign any track parameters to each of the 8 track QC’s such as Modulator, MIDI inserts or other parameters you’d like instant access to.
Start by removing all exsiting QC’s and then activate the QC Learn. Select each QC slot and move the parameter you want to assign.
2. Sends
The sends menu uses the 12 rotary controls to control sends. You’ll need to first set up the sends in Cubase, before you can control them. With at least one or more sends created on the selected channel you can do the following:
- Select the [Level] menu to adjust the send level for each send on the selected channel.
- The [Pre/Post] menu enables routing to be set to either Pre-fader or Post-fader, for each send.
- To mute all sends, press [Shift]+[Sends].
- To mute one send, hold [Shift] and move the send pot counter-clockwise. To unmute, hold [Shift] and turn the pot clockwise.
TIP: If you need fine grained control over send levels, activate [Magnifier – Fine].
Changing the channel strip color in Cubase
The color of all RGB illuminated channel controls can be set in Cubase.
The channel color affect the illumination of the pan control, the Sends/Channel buttons as well as Channel Quickcontrols and Sends.
- In Cubase, locate the channel name at the bottom of the MixConsole or Channel Inspector panel.
- Move the mouse to the right of the channel name and click on the arrow icon.
- Select a color from the pallet.
PLUGIN CONTROL
Panorama CS12 is capable of extensive audio fx plugin control. Pre-mapped plugins give you the best immediate experience and since all of Cubase’s own audio fx are pre-mapped, start by loading a few in a channel strip.
The display plugin list updates as plugins are loaded. Press the top button [9-16] at any time, to view the plugin list. Plugin slot selection
The 8 buttons 1-8/9-16 are used to select the channels audio fx plugin slots.
- If a plugin is present in the slot, the button is illuminated.
- The color of the slot indicates type of plugin as a visual clue.
- Press [9-16] to view the plugin list at any time.
- [9-16] is illuminated if there are more than 8 plugins loaded on the current channel. Press it to toggle slots 1-8 and 9-15 (Cubase has 15 insert slots, not 16).
- Press any of the illuminated slot buttons to control the hosted plugin. The selected slot’s button is white.
 The display shows the parameter assigned to each of the 12 rotary controls.
A value indicator is colored to match the rotary control with the parameter name below and value above. At the top of the display, the current parameter line shows the last controlled parameter. In this case the compressors Threshold parameter.
Bypass plugin slots
Plugin slots can be bypassed directly from Panorama CS12. Once bypassed, the plugin slot’s LED is dim and the plugin slot display list shows the slot’s background in gray. Just as it appears in Cubase.
- To bypass one plugin slot, press [Shift]+[Plugin slot button 1-8].
- To bypass all plugin slots on the current channel, press [Shift]+[button 9-16].
- Repeat to disable bypass again.
Display buttons and page navigation
The display buttons are either used for page navigation or parameter control.
If a button has an on/off indicator, it’s a parameter button. If it does not, it’s used for page navigation which means you can freely press the button without risking affecting plugin settings. In our example, buttons 1 and 3 control parameters and button 4 [Side Chain] toggles control pages. The 4 LED buttons below the 12 pots can also be used for parameter control. If a button is illuminated, it’s controlling a parameter.
To view the assigned parameter names, press the [DATA/MENU] encoder. Menu pages
Audio effects can often be controlled using 1 main page with additional sub pages accessible via the display buttons, as already covered. Plugins with 50+ parameters typically require more pages and the menu page is how we can navigate them.
The Cubase dynamics plugin Multipressor is a good example of how page navigation works.
- With Multipressor selected for control, move the [DATA/MENU] encoder to display the page list on the right. There are 5 pages.
- Select a page by resting the select brackets. The page is selected and the control display appears showing parameter assignments, ready for control.
- A page can also be selected by pressing the [DATA/MENU] encoder. If only a single page is present, it’s necessary to use that method or press another plugin slot button.
 The Multipressor mapping is designed so you actually don’t need to select pages using the Menu. The band 1-4 pages are using the display buttons for navigation of each band. The Global page is the top page and can therefore always be selected by pressing the plugin slot button.
Unmapped plugins
Plugins that are not pre-mapped are assigned to controls in the order the parameters are presented by the plugin. There are 2 pages, Page A and B, ready for simple customization using the Panorama CS12 parameter learn options. See Customize Plugin Mapping on the next page.
MANAGING PLUGIN WINDOWS
Panorama CS12 is designed to control Cubase parameters and plugins without focus. Once you get used to how it all works, you may not need to look at the UI most of the time but it can also be comforting to see the changes happening in realtime.
Here is a list of short-cut commands designed for window recall and cleanup. It’s worth getting familiar with these commands to speed up the workflow and keep Cubase Windows tidy.
| PLUGIN WINDOW SHORTCUTS | DESCRIPTION |
| [ | Open/close the plugin window in the selected plugin slot. |
| [SHIFT]+[ | Close all open plugin windows. Cannot be undone. |
| [SHIFT]+[ | Open/close the current Channel Strip window. |
| [ | Open/close the plugin hosted in the plugin slot. |
| [ | Open/close the MixConsole window. MixConsole 2-4 windows cannot be opened remotely. |
CUSTOMIZE PLUGIN MAPPING
Plugin mapping can be customized either by making simple assignment changes or with a complete navigation structure and customized parameter names.
There are no less than 3 options you can use to customize plugin mapping:
- Quick-learn
- Learn menu
- Nektarine graphical map editor
You can use any combination of the 3 options such as for example starting by assigning parameters to controls using one of the learn options, then use Nektarine to create the navigation structure. Once a map files is saved, it can be used both in Nektarine and directly in Cubase.
Quick-learn
Of the 3 options, Quick-learn is the simplest.
- Make sure the plugin you want to map is selected on CS12 and it’s UI is visible in Cubase.
- Hold [Shift] while moving a parameter in the plugin UI with the mouse.
- Move or press a control to assign the moved parameter. The control’s LED and display element updates accordingly and you can release [Shift].
- Repeat steps 2 and 3 to learn more parameters to controls.
The control’s color can also be adjusted using this approach:
- Hold [Shift] and move/press the control to select it.
- Move the [DATA/MENU] encoder to select color.
- Repeat the process if needed and release [Shift] when done.
You can also change the color of the plugin which illuminates the plugin slot button. Hold the [Plugin slot] button that corresponds with the Cubase insert slot hosting the plugin and move the [DATA/MENU] encoder.
Important: Learned parameters are remembered for as long as ControlCore is running. To revert the unsaved changes, go to Applications/Nektar/ControlCore and click stop, then start ControlCore again. To store changes permanently, save the map file in Panorama CS12s Learn Mode.
Learn Mode
If you are planning to learn more parameters, it may be easier to use the Learn Mode.
Press [SHIFT]+[DATA/MENU] (i.e. the encoder switch) to activate Learn Mode.
With Learn mode active, the process of learning parameters is the same as Quick-learn, except you don’t need to hold the [Shift] button. Instead:
- Move a parameter in the plugin UI.
- Move/press a control to assign the parameter.
For more options, move the [DATA/MENU] encoder and the below menu options appear. For each option you need to move the [DATA/MENU] encoder to view the learn menu.
Clear One: Clears an assignment from a control. Since you can learn a control to a new parameter, you only need this option if you don’t want a parameter assigned to the control. 
- Select Clear One, using the [DATA/MENU] encoder and press the [DATA/MENU] encoder to confirm.
- Next move/press the control to clear it’s assignment.
Clear All: Clears all assignments on a page, including any page navigation. Use this option only if you want a single page map.
Setting the plugin color: The plugin color illuminates the plugin slot button as well as all the controls, except when controls are individually set.
- To set the plugin color hold the [Plugin slot button] and move the [DATA/MENU] encoder.
Set Control Color: This option sets the color for each control, overriding the plugin color.
- Press the display button labeled ‘Set Color’ to activate.
- Move/press the controls to change their color.
- To disable ‘Set Color’, move the [DATA/MENU] encoder and deactivate the button.
Save plugin map: Press the 4th display button labeled Save.
The plugin map is instantly saved to the user directory /Documents/Nektar/Nektarine/Mapping Files.
Exit: To exit either press the 3rd display button labeled Exit or at any time, press [Shift]+[DATA/MENU] to deactivate the learn menu.
Using the Nektarine software, (included as a separate download in your Nektar account), you’ll be able to:
- Create, delete and name pages.
- Create sub pages that can be selected from a display button.
- Rename parameters.
- Map parameters using drag and drop.
- Clear/delete parameters from a map page.
- Map parameters using learn mode working with Panorama CS12 as explained on the previous page.
To do all this, Nektarine needs to host the plugin you want to map but once you save a map file, it’s immediately available for use in Cubase. You can run Nektarine as an AU plugin in Cubase or run the standalone version separately.
Nektarine installation and setup
If you haven’t installed Nektarine yet, start by downloading the package from your Nektar account and complete the installation process as detailed in the on-line Nektarine user guide.
Once installation and scanning of plugins has completed, you can move on to load and map plugins.
Loading a plugin in Nektarine
With Nektarine running, you have a couple of options to load a plugin:
- Use the browser to select or search for a plugin. Double-click to load it or drag and drop to the slot you want it loaded in.
- Select a plugin in the slot. This can be done both in Plugin Rack and Mix view.
Control mapping
Once you have loaded an insert plugin in a Nektarine insert slot, click the insert slot to open the plugin so you have the option to view the UI and learn parameters to controls. Next clik.on the Control page button.  Panorama CS12 can be used in Learn mode with Nektarine ([Shift]+press [Data/Menu] in combination with the Control page mapping features. To learn about the Control page, check the on-line user guide’s Control Mapping section .
Troubleshooting: Connecting Panorama CS12 to Nektarine
When you open the standalone Nektarine app or select a track hosting the plugin version, CS12 and Nektarine automatically connects. If that doesn’t happen, check the input monitoring settings in MacOS,
Nektarine recap
Nektarine is a Nektar plugin that allows extensive control of VST, VST3 and AU instrument plugins from Panorama CS12 and can be hosted on an instrument track in Cubase. Nektarine install options include AU, VST, VST3, AAX plugin and Standalone.
With Nektarine you can:
- Control instrument plugins without any parameter limits. CS12 switches seamlessly between Cubase and Nektarine control.
- Load up to 16 instrument plugins with individual key ranges for split and layering adjustable for each plugin.
- Load up to 4 insert effect plugins in each of the 16 instrument channel.
- Route any instrument slot to it’s own mixer channel in Cubase, using Nektarine 32Out,
- 4 sends per channel routed to 4 effects channels.
- Rack page showing all plugin UI’s in a single rack overview.
- Mixer page with single plugin window.
- Customize Panorama CS12 control mapping including creation of map pages and renaming parameters.
- Insert plugin maps are compatible with Nektar integration/ControlCore for Cubase.
- Instrument and insert slots can be navigated from Panorama CS12.
- Route multi-out plugins to channels in Nektarine.
- Route any channel to Group channels for internal mixing.
Navigating Nektarine from Panorama CS12
Nektarine navigation works similar to how you navigate Cubase’s channel strip from CS12. When any track hosting
Nektarine is selected in Cubase, CS12 is automatically switched to control Nektarine.
- Plugin slots on the selected Nektarine channel can be selected using the slot buttons 1-5.
- Press [9-16] to view available Nektarine channels and press the corresponding slot button to select.
- Select [Sends] to set send levels for the current 4 Nektarine channels.
- Select [Channel] to set volume and pan for the current 4 Nektarine channels.
- To control the Cubase channel strip press [Shift]+[Channel]. Repeat to toggle back to Nektarine control.
Since Nektarine uses the same map files as ControlCore it means the control experience is the same when you add an insert plugin in Nektarine vs controlling the same plugin in Cubase. Any changes made in Cubase or Nektarine affects both applications, even if the plugin map is not saved. This is true for as long as ControlCore is running.
Resetting unsaved mapping
If you have mapped parameters temporarily (or by mistake) and you’d like to revert to the saved map file, do the following:
- Go to Applications>Nektar>ControlCore>ControlCore Panel.
- Click “Stop ControlCore’, then repeat this time clicking “Start ControlCore”.
The operation clears any unsaved maps. You are read to continue working once CS12 reconnects to Cubase.
FINE – HIGH RESOLUTION CONTROL
When you control parameters with a wide value range, such as EQ frequency ranging from 20Hz to 20kHz, the traditional 7 bit control resolution is limiting. The result is steppy changes that ultimately can force you to reach for the mouse to get the accuracy needed.
The traditional 7 bit control resolution is however great when controlling a standard parameter in one rotation and there are many plugin parameters that don’t need higher resolution than that.
Fine resolution, a practical example
Using the example of EQ frequency, load Cubase’s Frequency plugin on the currently selected track.
On Panorama CS12, move one of the pots in the center row, assigned to Frequency. The pot allows you in one rotation to scroll through the whole range. Now change from 20kHz moving the pot counter clockwise.
The values change in steps of roughly 600 Hz.
- Switch the [
 ] button on and the steps are now reduced to roughly 100Hz.
Moving the control to change Frequency now is as smooth as using the mouse.
Using Fine resolution with the Fader
The faders already control parameters at 10 bit which is adequate in most situations. However there are times when you only want minute changes so Panorama CS12 gives you an option to use the fader for fine control as well.
- Hold [] and move the fader from its current position in either direction.
Because the fader now controls at a higher resolution, it makes it easier to precisely adjust channel volume within a narrow range.
- Release the fader and [ ] when done and the fader moves to it’s new position.
Fine resolution fader control can also be used for selected parameter control.
AUTOMATION OPTIONS
Panorama CS12 enables you to record automation using rotary controls and buttons, as well as of course the motorized fader. Combined with the selected parameter control option, the motorized fader is uniquely suitable for automation, not least because of it’s 10 bit default resolution.
Automation modes
Activating automation is as simple as pressing the [Auto] button. Choosing the right automation mode can however make all the difference so here is an overview of the options. Most are part of Cubase so you may already be familiar with them, but we’ve added a few additional to better take advantage of the motorized fader’s touch capabilities.
Hold [Auto] and move the [DATA/MENU] encoder to select from the pop-list. Any selection only affects the current track so you can have different automation modes throughout your project.
| AUTOMATION MODE | DESCRIPTION |
| OFF | Automation is off. |
| READ | Existing automation is played back only. |
| TOUCH | Existing automation is played back and new automation captured when a control is moved. When the control is no longer moved, previous automation is not overwritten |
| AUTO-LATCH | Similar to Touch except when the control is no longer moved, the previous automation is overwritten by the new latched value. |
| CROSS-OVER | Continues writing automation data for as long as playback lasts or Write is enabled, and keeps the last value when you release the control. When you re-touch the fader and move it towards the original value, a punch out occurs automatically as soon as you cross the original curve |
| TRIM | Adjusts existing automation data relative to the changes made with a control. |
| AUTO-TOUCH | Similar to touch, only as with Auto-Latch, automation is not captured when the fader is not touched. |
FUNCTION CONTROL
Zoom
The dedicated zoom encoder adjusts horizontal zoom. Holding [Shift] while moving zoom adjusts vertical zoom of the in-focus window.
Tempo
There are 7 control options available for the [Tempo] encoder.
Press [Shift] and move [Tempo] to scroll through the options listed in the chart below and release the encoder to select. Tempo is selected by default but your selection is remembered as part of Cubase’s preferences.
| Function | Description |
| Tempo | Adjust tempo in 1 BMP steps. Hold [Fine] to adjust in increments of 0.1 BPM steps. |
| Playhead | Moves the playhead across the timeline by the Grid Type setting. Hold [Magnifier] and move encoder to change the Grid Type. |
| Scrub | Moves the playhead to scrub audio. |
| Nudge | Nudge the current selection according to the Nudge setting. Hold [Magnifier] and move encoder to adjust the Nudge setting. |
| <Loop> | Moves the cycle loop by the Grid Type setting across the timeline. Hold [Magnifier] and move encoder to change the Grid Type. |
| Vertical Zoom | Dedicated vertical zoom control of the window in focus. |
| Clip Gain | Adjusts the audio clip gain in 1 db steps in realtime. Hold {Magnifier] to adjust in 0.1db steps. |
Channel/Track select There are 3 different ways a track or mixer channel can be selected from Panorama CS12.
- Press one of the [
 ] buttons to select the previous or next track. By association, the mixer channel routed to the track, is selected for control by Panorama CS12.
 - Press [SHIFT]+[] (one button only) to select previous or next mixer channel. This option is similar to 1) except you only navigate mixer channels witch means tracks without mixer channels are not selected (such as Folder, Chord tracks etc).
- Open the Cubase mixer. Then hold one [ ] button while moving the [DATA/MENU] encoder. In the track list or below the mixer channels you’ll see a control surface select indicator move, as you turn the [DATA/ MENU]. Release the [ ] button when the indicator is under the channel you want selected.
Navigating the timeline
Panorama CS12 has multiple options to navigate the timeline, manage the cycle loop and markers.
Starting with the basics, press [ ![]() ] or[
] or[![]() ] to move the play head.. Hold the button to move faster. The distance travelled while using the buttons depends on what Primary Time Format and which Grid Type are selected in Cubase.
] to move the play head.. Hold the button to move faster. The distance travelled while using the buttons depends on what Primary Time Format and which Grid Type are selected in Cubase.
The [DATA/MENU] encoder can also be used to scroll through the timeline. Hold either [![]() ] or [
] or [![]() ] and move the [DATA/MENU] encoder. The encoder now moves the play head according to the Grid Type selection, for every encoder tick, either forward or backwards.
] and move the [DATA/MENU] encoder. The encoder now moves the play head according to the Grid Type selection, for every encoder tick, either forward or backwards.
Loop Locators and Markers
Setting loop locators
To set the cycle/loop locators first move the play head to the position the locator should be moved to.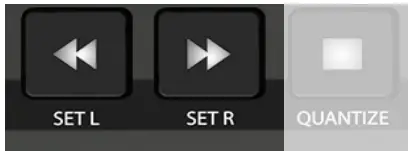
- Press [Shift]+[
 /Set L] to move the left locator to that position.
 - Repeat the process and press [Shift]+[
 /Set R] to move the right locator.
To move the play head to either the left or right locator, press the [![]() ]/[
]/[ ![]() ] buttons.
] buttons.
Moving the loop
The cycle/loop locators can be moved according to the Grid Type setting:
- Press [Shift]+[
 /Loop>] to move it forward.
 - Press [Shift]+[
 /<Loop] to move it backwards.
The [DATA/MENU] encoder can be used to move the loop longer distances. Hold [![]() /<Loop] or [
/<Loop] or [ ![]() /Loop>] to move the loop either backwards or forward according to the Grid Type setting, for every encoder tick.
/Loop>] to move the loop either backwards or forward according to the Grid Type setting, for every encoder tick.
Markers
Using markers in Cubase is another great way to navigate your project. Markers gives you instant access to key sections in your project for a more efficient workflow. When the Markers button is illuminated, the 10 buttons with labels M1 – M10 above are no longer illuminated.
This indicates they are in Marker mode.
Pressing any of buttons M1-9 now select markers in Cubase, if a marker is present. You can also hold [Markers] and move the [Data/Menu] to scroll through all markers on the current marker track.
Add, delete, goto marker
There are additional options to add, delete, goto previous marker and got next marker.
- Hold [Marker] and press [
 /Play] to add a marker at the current position.
Once markers are present in the timeline, markers 1-9 can be selected directly by pressing buttons M1-9.
For markers higher than M9:
- Press [Marker]+[] to go to the next marker
- Press [Marker]+[] to go to the previous marker.
- Press [Markers] and move the [Data/Menu] encoder to scroll through markers.
- To activate a different marker track, press [M10]
FOOT SWITCH OPTIONS
Connecting a foot switch to the rear 1/4” jack (17) enables the triggering of one of the following options:
- Play/Stop
- Play/stop return
- Record on/off
- Tap tempo
- Move loop forward
- Move loop back
- Track Arm
- Track Solo
- Track Mute
- Auto on/off
To select an option, press the foot switch and move the [DATA/MENU] encoder. Release the encoder when your selection is made.
Connecting a second foot switch
The 1/4” jack is a TRS connector type. Using a Y-splitter cable it’s possible to connect 2 foot switches, each controlling one of the options listed.
The Y-splitter cable should have a 1/4” TRS connector in one end, splitting to 2 x 1/4” TS female jacks (or whichever connector your foot switches have) at the other end.

| BUTTON | DESCRIPTION | MODIFIER |
| MARKERS | Activates the markers menu and assigns the buttons labeled M1-M9 to markers. See Markers section. | |
| PREVIOUS | Previous track. Hold button and move the Cubase control surface channel selector by moving [DATA/MENU]. | [Shift]+[ |
| NEXT | Next track. Hold button and move the Cubase control surface channel selector by moving [DATA/MENU]. | [Shift]+[ |
| PLUGIN | Open/close the plugin window in focus. | [SHIFT] + [ Hold [ |
| MIXER | Open/close the MixConsole window. | [SHIFT] + [ |
| MAGNIFIER | Enables Fine – high resolution control up to 10x (or 14 bit) depending on the parameter. | Hold [ Hold [ |
| SHIFT | Hold to activate modifier [SHIFT] functions as indicated by the silkscreen printed below the buttons. | |
| GOTO L | Go to left loop Locator. | [SHIFT]+[ [ |
| GOTO R | Go to right loop Locator. | [SHIFT]+[ [ |
| UNDO | Trigger Cubase’s undo. | [SHIFT+[UNDO] = redo. |
| METRONOME | Toggle Metronome on/off. | [Shift]+[ |
| AUTO | Activate Automation. | Hold [AUTO] and move [DATA/MENU] to select automation mode. See Automation section for details. |
| CYCLE/LOOP | Activates Cycle/Loop | [Shift]+[ |
| REWIND | Rewind | [Shift]+[ |
| FORWARD | Forward | [Shift]+[ |
| STOP | Stop | Press again to go to start. |
| PLAY | Play | [Shift]+[ [Shift]+[ |
| RECORD | Record |
ADDITIONAL SHORTCUT COMMANDS
| SHORTCUT COMBINATION | DESCRIPTION |
| [SHIFT]+[MUTE] | Set all Mute states to off. |
| [SHIFT]+[SOLO] | Set all Solo states to off. |
| [SHIFT]+[ARM] | Activates Monitor on the current track. |
| [SHIFT]+[PLUG SLOT BUTTON] | Open/close the plugin window in focus. |
| [SHIFT]+[SELECT] | Toggle fader assignment Selected Channel and Master Channel. |
| [SHIFT]+[FADER TOUCH] | Sets channel volume to 0db |
| [ | Adjust the parameter the fader controls at 14 bit fine resolution. |
| [ | Hold button combination to reposition the fader without affecting the parameter it controls. Upon release the fader moves to the set position. |
| [SHIFT]+[SLOT BUTTON] | Bypass the plugin slot. |
| [SHIFT]+[9-16] | Bypass all plugin slots. |
| [ | Open/close the plugin window without selecting the slot. |
| [SHIFT]+[ | Close all open plugin windows. |
| [SHIFT]+[ | Open/close the Channel Strip window. |
| [ | Open/close instrument plugin window if software instrument track is selected. |
| [SHIFT]+[SENDS] | Bypass all Sends on the current track. |
| [SHIFT]+[ZOOM] | Adjust vertical zoom. |
| [SHIFT]+[TEMPO] | Select any of 7 control options: Playhead (jog), Scrub, Nudge, Cycle, vertical Zoom, Clip gain and Tempo. Selection is stored until changed again. |
| [SHIFT]+[MARKERS] | Create marker at current location. To delete marker at currently location, hold [Shift] and press [Markers] twice. |
| [MARKERS]+[ | Create marker at current play head position. |
| [MARKERS]+[ | Delete marker at current play head position. |
| [MARKERS]+[ | Goto next marker. |
| [MARKERS]+[ | Goto previous marker. |
| [MARKERS]+[DATA/MENU ] | Move the ncoder to scroll through markers. |
| [SELECT]+[TOUCH FADER] | When [Select] is engaged, this shortcut enables the faders motor. The motor is reactivated when either the fader is touched or [Select] is disabled. |
| [SHIFT]+[AUTO] | Disables Automation on the current track. Press [Auto] again to re-enable. |
![]()
Documents / Resources
 | nektar PANORAMA CS12 Channel Strip Controller [pdf] Owner's Manual CS12, PANORAMA CS12 Channel Strip Controller, PANORAMA CS12, Channel Strip Controller, Strip Controller, Controller |
 | nektar PANORAMA CS12 Channel Strip Controller [pdf] Owner's Manual CS12, PANORAMA CS12 Channel Strip Controller, PANORAMA CS12, Channel Strip Controller, Strip Controller, Controller |