
Salvagwardji Importanti
Meta tuża apparat elettriku, għandhom dejjem jiġu segwiti prekawzjonijiet bażiċi ta’ sigurtà biex jitnaqqas ir-riskju ta’ nar, xokk elettriku, u/jew korriment lill-persuni, inkluż dan li ġej:
- Aqra l-istruzzjonijiet kollha qabel ma tħaddem il-blender.
- Biex tipproteġi kontra xokk elettriku, tgħaddasx il-bażi tal-mutur, il-korda, jew il-plagg fl-ilma jew f'likwidi oħra.
- Superviżjoni mill-qrib hija meħtieġa meta xi apparat jintuża minn jew ħdejn it-tfal.
- Spluggja mill-iżbokk meta ma tkunx qed tuża, qabel ma tgħaqqad jew tiżżarma l-partijiet, u qabel it-tindif.
- Evita kuntatt ma 'partijiet li jiċċaqilqu.
- Tħaddimx apparat b'korda jew plagg bil-ħsara, jew wara li l-apparat ma jkunx qed jaħdem sew jew ikun waqa' jew ġarrab xi ħsara. Ikkuntattja lis-servizz tal-konsumatur għal eżami, tiswija, jew aġġustament.
- L-użu ta 'aċċessorji mhux rakkomandati jew mibjugħa mill-manifattur jista' jikkawża nar, xokk elettriku, jew korriment.
- Tużax barra.
- Tħallix il-korda tistrieħ fuq it-tarf tal-mejda jew tal-bank, jew tmiss uċuħ sħan.
- Żomm idejk u l-utensili 'l barra mill-kontenitur waqt it-taħlit biex tevita l-possibbiltà ta' korriment serju lil persuni jew ħsara lill-blender. Barraxa tista' tintuża iżda biss meta l-blender ma jkunx qed jaħdem.
- Xfafar huma jaqtgħu. Immaniġġja b'attenzjoni.
- Dejjem ħaddem il-blender bl-għatu f'postu.
- Do not blend hot liquids in the sealed to-go cup as pressure buildup may result in injury.
- Ensure the blender jar or to-go cup is correctly locked onto the motor base before operation.
Komponenti tal-Prodott
The GDOR Professional Blender includes the following parts:
- Bażi tal-Mutur: Fiha l-mutur ta' 1300W u l-pannell tal-kontroll.
- 67 oz Glass Jar: Large capacity blending container with a 6-leaf blade assembly.
- Lid with Filler Cap: For the glass jar, allows adding ingredients during blending.
- 22 oz To-Go Cup: Personal blending cup for single servings.
- 4-Leaf Blade Assembly: Specifically designed for the to-go cup.
- Għatu tal-Ivvjaġġar: For the to-go cup, allows for portability.

Image: The GDOR Professional Blender showing the main unit, the 6-leaf blade assembly for the glass jar, and the 4-leaf blade assembly for the to-go cup.

Image: A close-up comparison of the 6-leaf blade assembly for the large glass jar and the 4-leaf blade assembly for the portable to-go cup.
Setup
Żpakkjar u Tindif Inizjali
- Neħħi bir-reqqa l-komponenti kollha mill-imballaġġ.
- Wash the glass jar, lids, and blade assemblies in warm, soapy water. Rinse thoroughly and dry. The glass jar is dishwasher safe.
- Imsaħ il-bażi tal-mutur b'adamp drapp. Tgħaddix il-bażi tal-mutur fl-ilma.
Assemblea
The blender features a safety lock design. The appliance will only power on when the jar or cup is correctly assembled and locked into the motor base.
- Poġġi l-bażi tal-mutur fuq wiċċ nadif, niexef u livellat.
- For the Glass Jar: Place the 6-leaf blade assembly onto the bottom of the glass jar. Ensure it is securely tightened. Then, place the assembled glass jar onto the motor base, aligning the arrows on the jar with the arrows on the base. Turn clockwise until it locks into place.
- For the To-Go Cup: Add ingredients to the to-go cup. Screw the 4-leaf blade assembly onto the open end of the to-go cup until secure. Invert the cup and place it onto the motor base, aligning the tabs and turning clockwise until it locks.

Image: Visual guide demonstrating the safety lock mechanism, showing the glass jar being placed and twisted onto the motor base until securely locked.
Istruzzjonijiet Operattivi
Control Panel Matulview
The GDOR Professional Blender features a touch control panel with 6 preset programs and manual controls.

Image: The blender's control panel, highlighting the 6 preset programs (Blend, Milkshake, Smoothies, Ice Crush, Sauce, Auto Clean) and the manual time adjustment feature.
- Programmi Preset: Select from Blend (90s), Milkshake (70s), Smoothies (60s), Ice Crush (40s), Sauce (32s), and Auto Clean (70s). Each program has a unique blending pattern.
- Aġġustament tal-Ħin Manwali: Use the '+' and '-' buttons to set a blending time between 10 and 90 seconds for customized recipes.
- Polz (P): Jipprovdi tifqigħat qosra ta' taħlit b'veloċità għolja għat-tqattigħ jew it-taħlit malajr.
- Ibda/Waqqaf: Initiates or pauses the selected program or manual blending.
Using the 67 oz Glass Jar
- Ensure the 6-leaf blade assembly is securely attached to the glass jar.
- Add your desired ingredients to the glass jar. Do not exceed the maximum fill line.
- Place the lid securely on the glass jar and ensure the filler cap is in place.
- Place the assembled jar onto the motor base and lock it into position.
- Ipplaggja l-blender fi żbokk tad-dawl.
- Select a preset program or set a manual time using the '+' and '-' buttons.
- Agħfas il-buttuna 'Start/Stop' biex tibda t-taħlit.
- To add ingredients during blending, remove the filler cap and carefully add items. Replace the cap immediately.
- Once blending is complete, press 'Start/Stop' and unplug the blender.
- Carefully remove the glass jar from the motor base and pour out the contents.
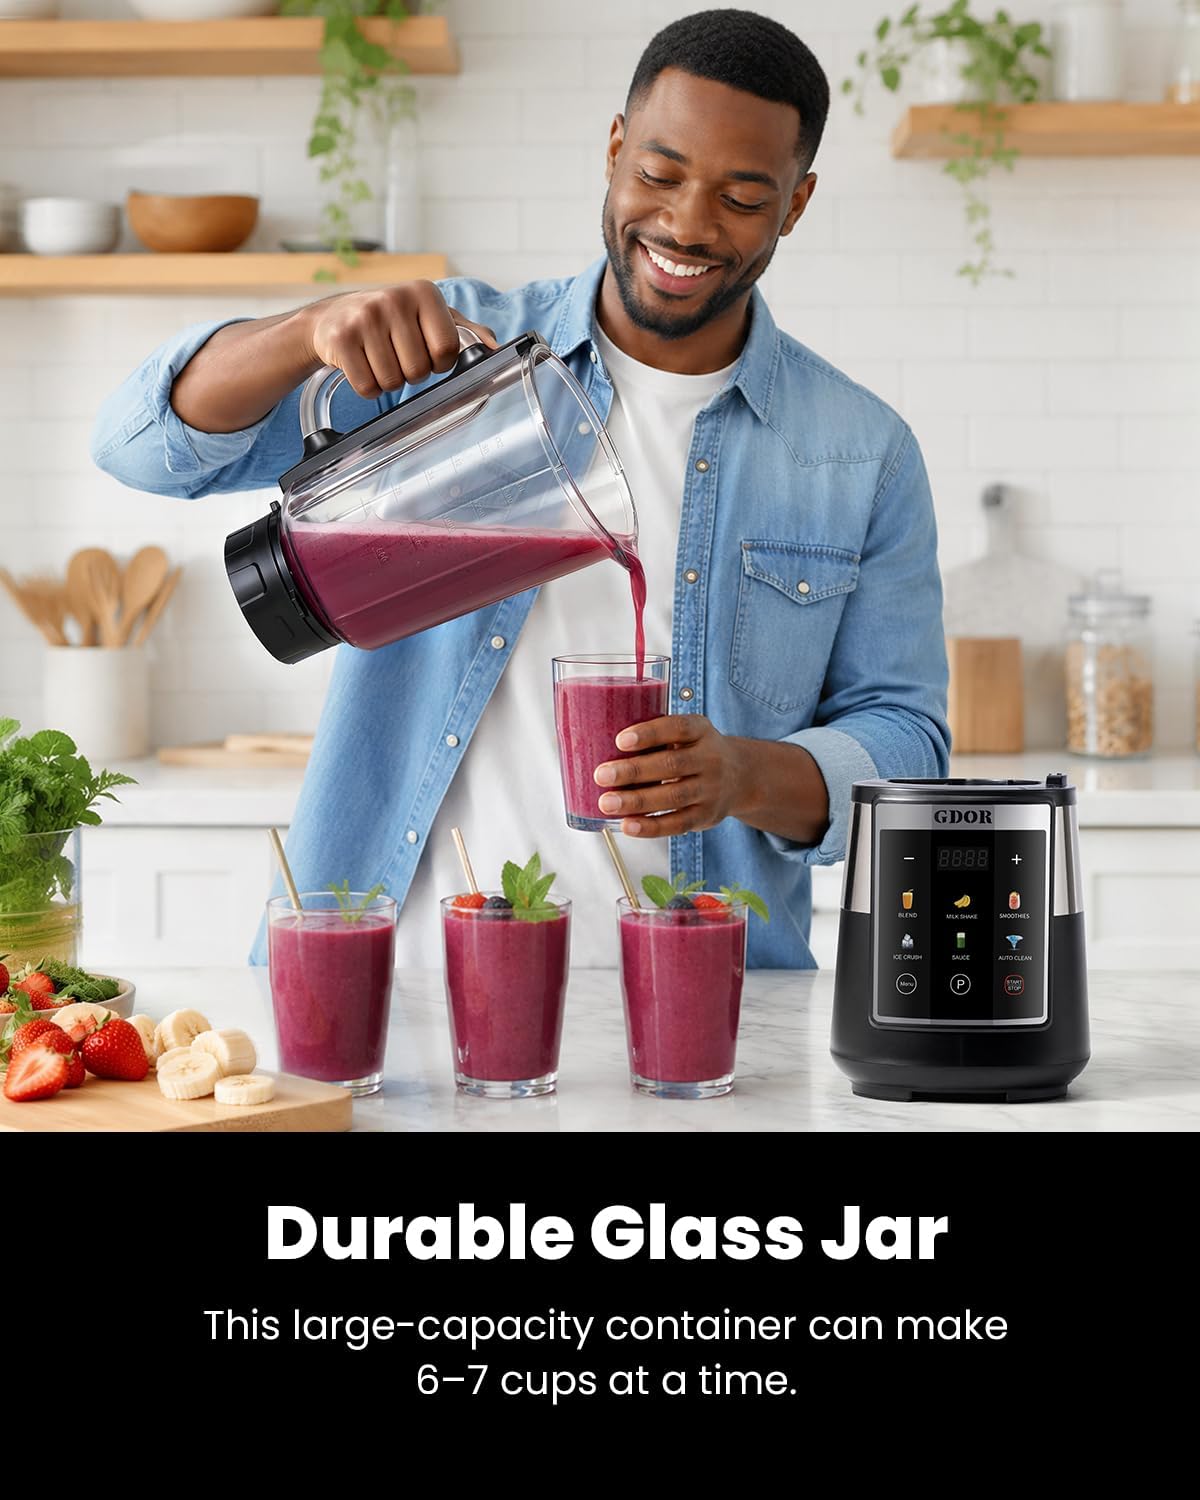
Image: A man pouring a freshly blended smoothie from the large 67 oz glass jar into serving glasses, demonstrating the blender's capacity.
Using the 22 oz To-Go Cup
- Add your desired ingredients to the 22 oz to-go cup. Do not exceed the maximum fill line.
- Screw the 4-leaf blade assembly securely onto the open end of the to-go cup.
- Invert the cup and place it onto the motor base, aligning the tabs and turning clockwise until it locks into position.
- Ipplaggja l-blender fi żbokk tad-dawl.
- Select a preset program or set a manual time. For best results with the to-go cup, consider shorter blending times or the 'Smoothies' program.
- Agħfas il-buttuna 'Start/Stop' biex tibda t-taħlit.
- Once blending is complete, press 'Start/Stop' and unplug the blender.
- Carefully remove the to-go cup from the motor base. Unscrew the blade assembly and replace it with the travel lid for on-the-go convenience.

Image: A sequence of images illustrating the 'Blend and Go' feature: blending ingredients in the to-go cup, attaching the travel lid, and carrying the cup.
Manutenzjoni u Tindif
Funzjoni Auto Clean
The blender features an 'Auto Clean' program for convenient cleaning of the glass jar and blades.
- After use, rinse the glass jar to remove large food particles.
- Fill the glass jar with 2-3 cups of warm water and add a drop of dish soap.
- Secure the lid and place the jar onto the motor base, locking it in place.
- Select the 'Auto Clean' program (70 seconds) and press 'Start/Stop'.
- Once the cycle is complete, unplug the blender, remove the jar, and rinse thoroughly.

Image: The glass jar of the GDOR blender filled with water, demonstrating the self-cleaning function in action with water swirling rapidly.
Tindif manwali
- Dejjem aqla l-blender qabel tnaddaf.
- The glass jar, lids, and to-go cup are dishwasher safe (top rack recommended).
- The blade assemblies should be hand-washed carefully with warm, soapy water. Use a brush to clean around the blades. Handle blades with extreme caution as they are sharp.
- Imsaħ il-bażi tal-mutur b'adamp cloth. Do not immerse the motor base in water or spray it with water.
- Kun żgur li l-partijiet kollha huma kompletament niexfa qabel ma taħżen.
Issolvi l-problemi
If you encounter issues with your GDOR Professional Blender, refer to the following common problems and solutions:
| Problema | Kawża Possibbli | Soluzzjoni |
|---|---|---|
| Il-blender ma jixgħelx. | Not plugged in; Jar/cup not correctly assembled; Overload protection activated. | Ensure the power cord is securely plugged in. Verify the jar or cup is locked into the motor base. If the motor stopped due to overload, unplug, remove some ingredients, and wait 15 minutes before restarting. |
| L-ingredjenti mhux qed jitħalltu bla xkiel. | Ftit wisq likwidu; Wisq ingredjenti; L-ingredjenti huma kbar jew iebsin wisq. | Add more liquid. Reduce the amount of ingredients. Cut hard ingredients into smaller pieces. Use the Pulse function to break down larger chunks. |
| Blender leaks from the bottom of the jar/cup. | Blade assembly not tightened; Seal ring missing or damaged. | Ensure the blade assembly is securely tightened onto the jar or cup. Check if the seal ring is properly seated or if it needs replacement. |
| Ħoss jew riħa mhux tas-soltu waqt it-tħaddim. | Overload; Foreign object in blades; Motor issue. | Stop the blender immediately. Unplug and check for any obstructions. If the issue persists after reducing ingredients and checking for obstructions, discontinue use and contact customer support. |
If the problem persists after attempting these solutions, please contact GDOR customer support.
Speċifikazzjonijiet
| Karatteristika | Dettall |
|---|---|
| Numru tal-Mudell | OK1575A2 |
| Brand | GDOR |
| Qawwa | 1300 Watts |
| Voltage | 120 Volts |
| Large Jar Capacity | 67 oz (Glass) |
| To-Go Cup Capacity | 22 oz (BPA-Free) |
| Materjal tax-xafra | Stainless Steel (6-leaf for jar, 4-leaf for cup) |
| Tip ta' Kontroll | Touch, Manual |
| Numru ta' Veloċitajiet | 7 |
| Karatteristiċi Speċjali | 6 Smart Programs, High Power Motor, Durable Glass Jar, Manual Time Adjustment, Self-cleaning, Portable Cup |
| Dimensjonijiet tal-Prodott (P x W x H) | 6.5" x 8.38" x 16.42" |
| Partijiet Sikuri għall-Ħasil tal-platti | Glass Jar, Lids, To-Go Cup |
Garanzija u Appoġġ
GDOR products are manufactured to high-quality standards. For information regarding warranty coverage, please refer to the warranty card included with your product or visit the official GDOR websit.
For technical assistance, troubleshooting not covered in this manual, or to inquire about replacement parts, please contact GDOR customer support through the retailer where the product was purchased or via the contact information provided on the GDOR official websit.