
1. Introduction
This manual provides instructions for the SABLUTE Wireless Trackball Mouse. This ergonomic device is designed to enhance comfort and efficiency during computer use by reducing wrist and arm movement.
The mouse features an adjustable ergonomic angle, multi-device connectivity, and customizable DPI settings. It is suitable for various operating systems including PC, Mac, and Windows.

Image: A woman using the SABLUTE Wireless Trackball Mouse at a computer desk, demonstrating its use in a typical work environment.
Important Note: If you are new to using a trackball mouse, an adaptation period of 1-2 weeks is recommended to become accustomed to its operation and fully benefit from its ergonomic design.
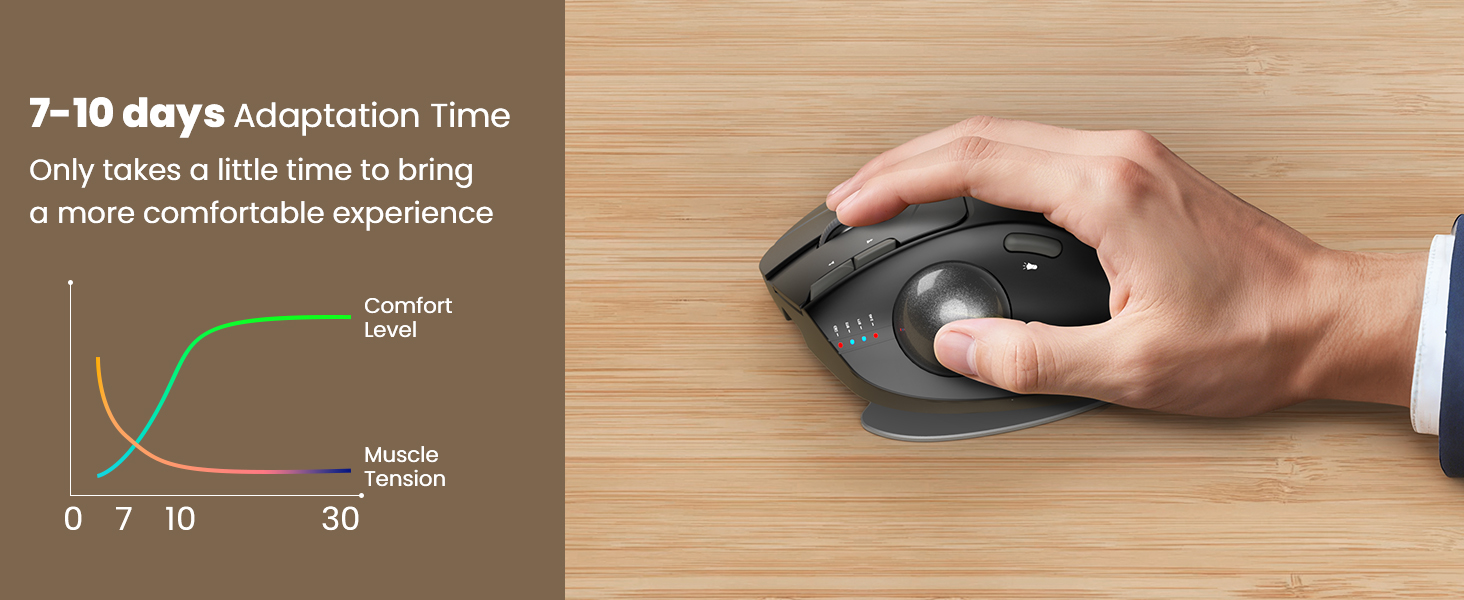
Image: A graph illustrating the adaptation period for a trackball mouse, showing increasing comfort and decreasing muscle tension over 7-10 days.
2. What's in the Box
Verify that all items are present in the package:
- SABLUTE Wireless Trackball Mouse
- Hard Travel Case
- USB Receiver
- USB-C Charging Cable
- User Manual (this document)

Image: The SABLUTE Wireless Trackball Mouse securely stored within its hard travel case, positioned next to a laptop bag.

Image: A diagram illustrating the protective features of the hard travel case, including a nylon outer layer, EVA hard shell middle layer, and soft velvet lining, offering fall protection, scratch resistance, and water resistance.
3. Product Overview
Familiarize yourself with the components and controls of your SABLUTE Wireless Trackball Mouse:

Image: A detailed diagram of the SABLUTE Wireless Trackball Mouse, highlighting its various buttons and features with numbered labels for easy identification.
- Left Button: Standard left-click function.
- Right Button: Standard right-click function.
- Scroll Wheel: For vertical scrolling. Can also be clicked for middle-click functionality.
- Low Battery/Bluetooth/2.4G Indicator: Displays connection status and battery level.
- DPI Button: Cycles through DPI sensitivity levels.
- Forward Button: Navigates forward in web browsers or file explorers.
- Back Button: Navigates backward in web browsers or file explorers.
- Power Button: Turns the mouse on or off.
- USB Receiver: Stores the 2.4GHz USB dongle.
- Switch Light Mode: Changes or turns off the ambient backlight.
- Trackball: For cursor movement.
- Light Area: Emits ambient backlight.
- Switch Mode: Button on the bottom to switch between connected devices (BT1, BT2, 2.4G).
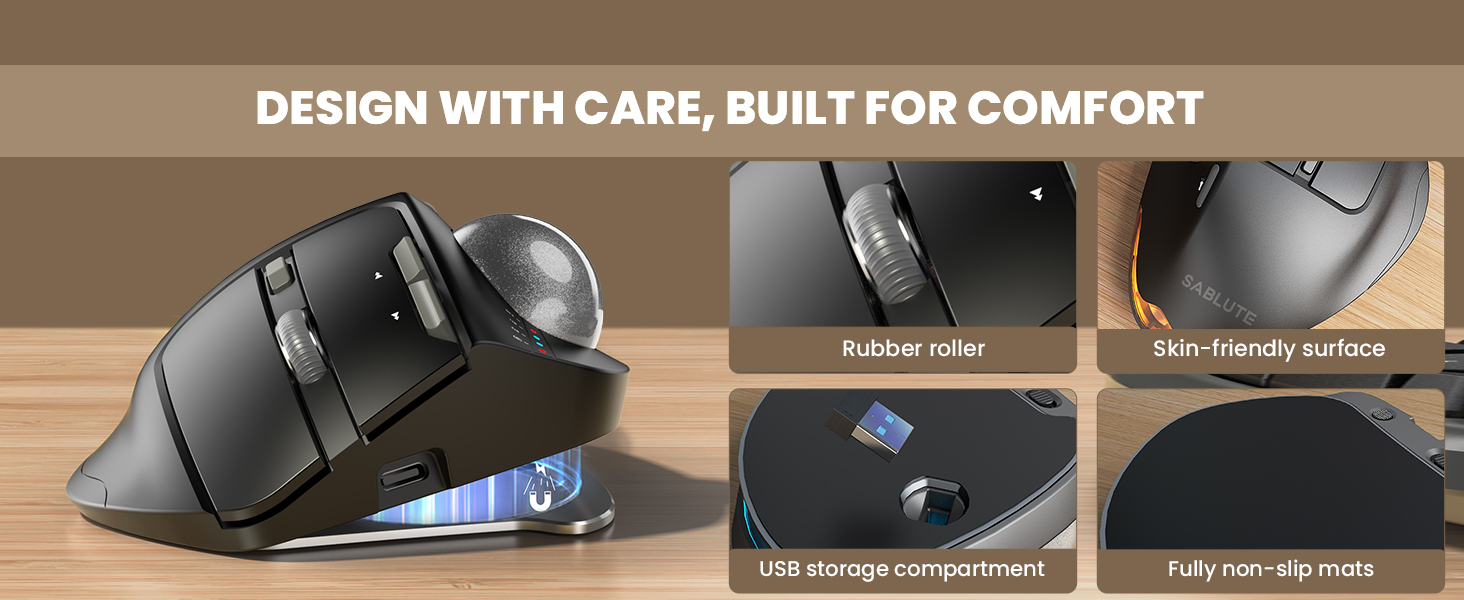
Image: Close-up views highlighting key design elements of the mouse, including the rubber scroll wheel, skin-friendly surface, USB receiver storage, and fully non-slip mats.
4. Setup
4.1 Charging the Mouse
Before first use, fully charge the mouse using the provided USB-C cable.
- Connect the USB-C cable to the charging port on the front of the mouse.
- Connect the other end of the cable to a USB power source (e.g., computer USB port, USB wall adapter).
- The indicator light will show charging status. A full charge typically takes 3-4 hours.
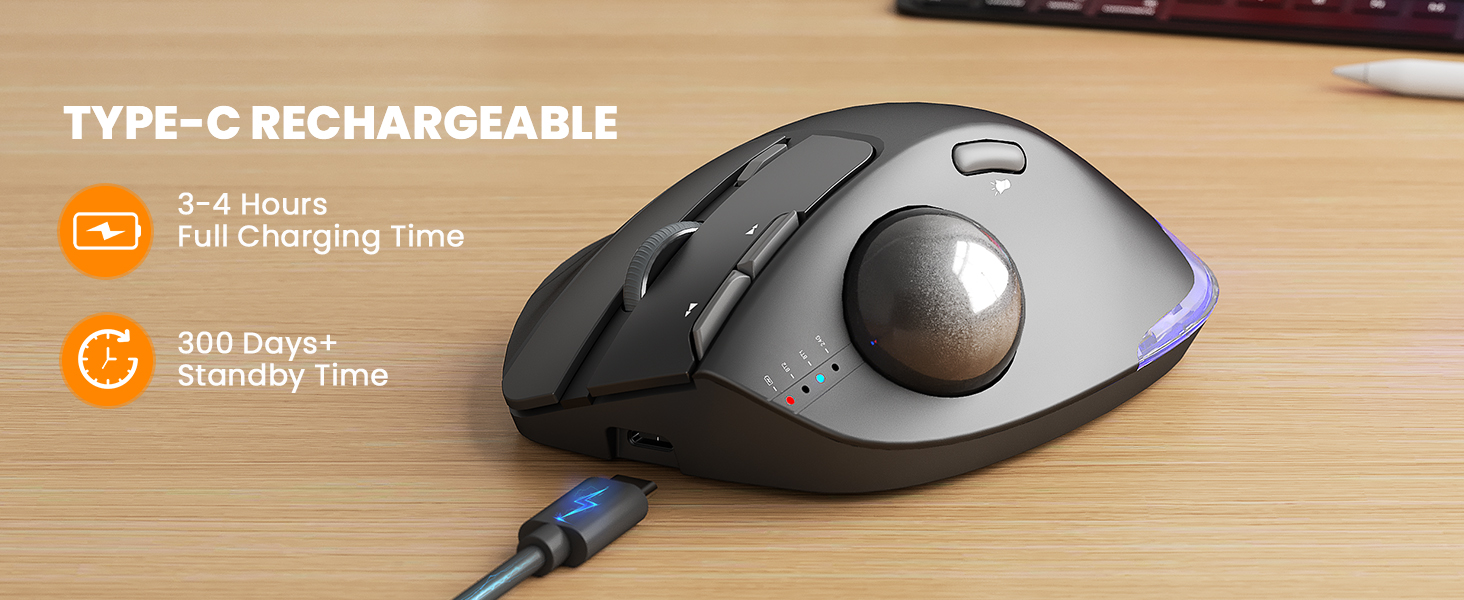
Image: The SABLUTE Wireless Trackball Mouse being charged via its USB-C port, with an indication of 3-4 hours for full charging and over 300 days of standby time.
4.2 Connecting to Devices
The mouse supports connection to up to three devices via Bluetooth (BT1, BT2) and a 2.4GHz USB receiver.

Image: The SABLUTE Wireless Trackball Mouse demonstrating multi-device connectivity, showing connections to a laptop (Bluetooth 1), an iPad (Bluetooth 2), and a desktop computer (2.4GHz USB receiver).
2.4GHz USB Receiver Connection:
- Remove the USB receiver from its storage slot on the bottom of the mouse.
- Plug the USB receiver into an available USB port on your computer.
- Turn on the mouse using the Power Button (8).
- Press the Mode Switch button (13) on the bottom of the mouse until the 2.4G indicator light (4) illuminates. The mouse should connect automatically.
Bluetooth Connection (BT1/BT2):
- Turn on the mouse using the Power Button (8).
- Press the Mode Switch button (13) on the bottom of the mouse to select either BT1 or BT2. The corresponding indicator light (4) will flash.
- On your device (PC, Mac, iPad), go to Bluetooth settings and search for new devices.
- Select "SABLUTE Trackball Mouse" from the list of available devices to pair. The indicator light will become solid once connected.
4.3 Adjusting Ergonomic Angle
The mouse features an adjustable base for 0° or 18° tilt to optimize wrist comfort.
- The base can be adjusted to provide a flat (0°) or tilted (18°) position.
- Choose the angle that feels most natural and reduces strain on your wrist and forearm. The 18° tilt is designed to match the natural drop of the wrist when seated.
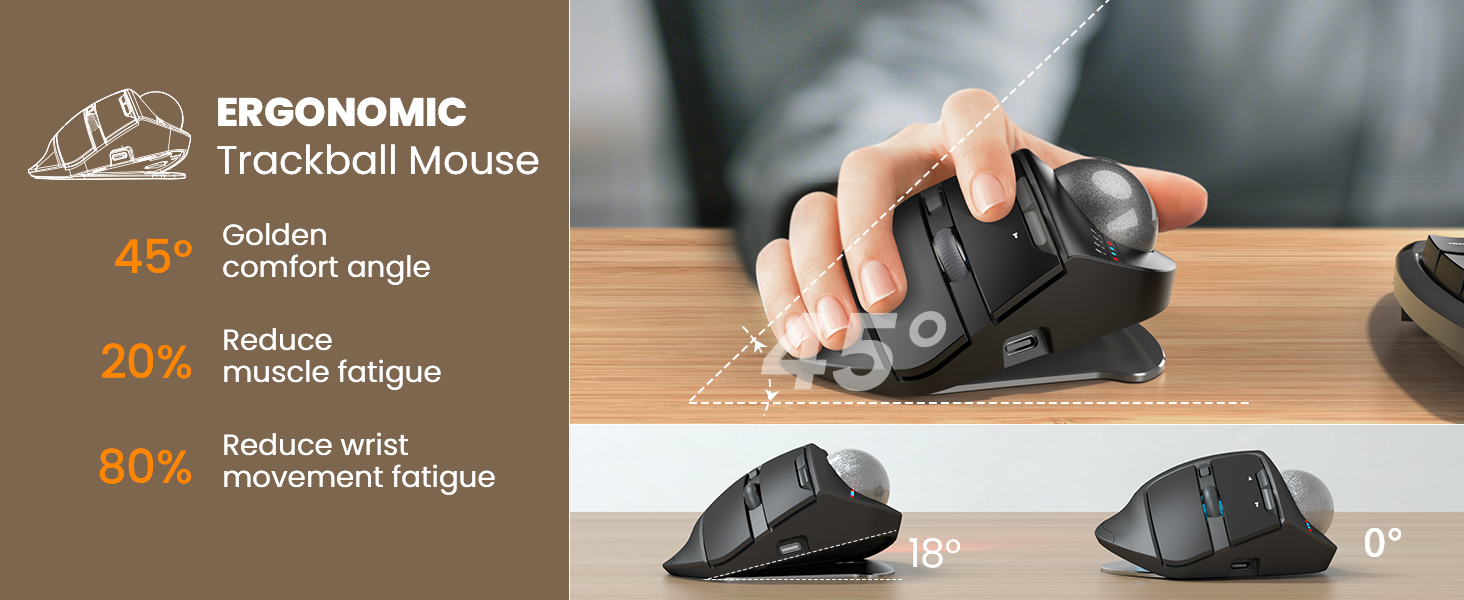
Image: The SABLUTE Wireless Trackball Mouse demonstrating its adjustable ergonomic angles, showing both the 0-degree flat position and the 18-degree tilted position for improved wrist comfort.
5. Operating the Mouse
5.1 Cursor Control with Trackball
Move the cursor by rolling the trackball with your thumb. This eliminates the need to move your entire arm, reducing fatigue and saving desk space.
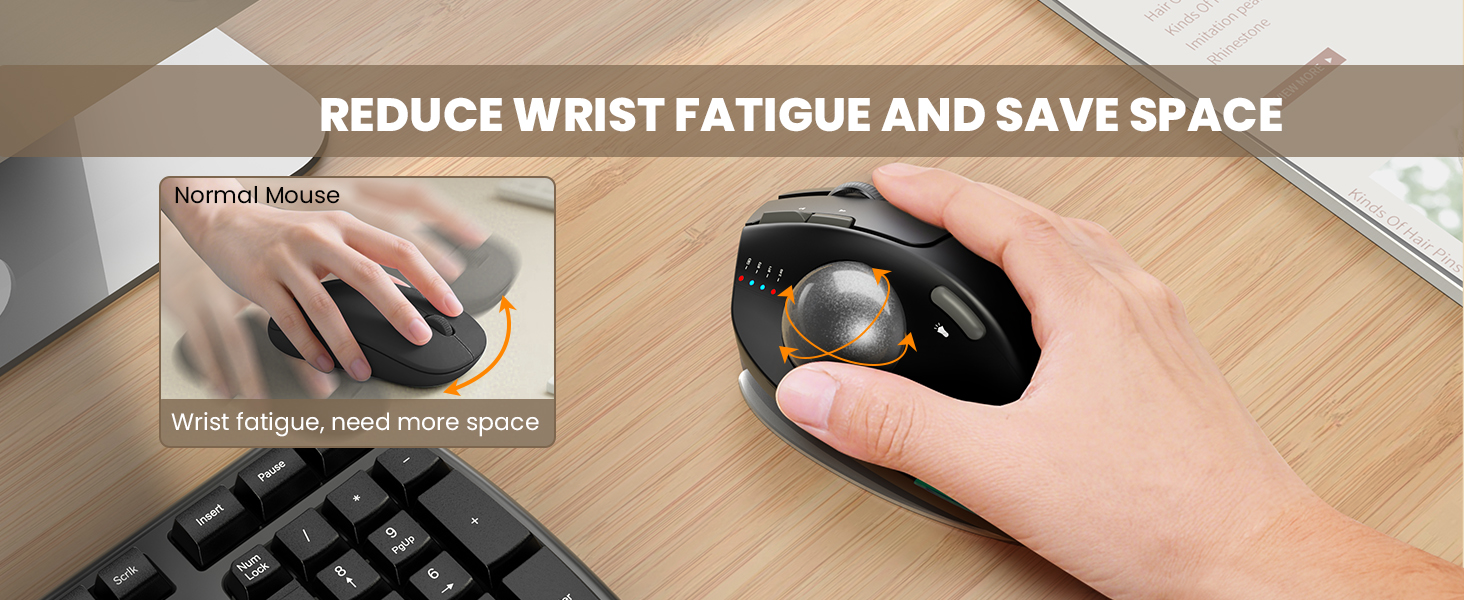
Image: A visual comparison showing how a traditional mouse requires arm movement and desk space, while the trackball mouse allows for stationary use, reducing wrist fatigue and saving space.
5.2 Switching Between Devices
To switch between connected devices (BT1, BT2, 2.4G), press the Mode Switch button (13) on the bottom of the mouse. The corresponding indicator light (4) will illuminate to show the active connection.
5.3 Adjusting DPI Sensitivity
The mouse offers 5 adjustable DPI levels (800-1200-1600-2400-4800) for precise control.
- Press the DPI Button (5) to cycle through the available sensitivity settings.
- Choose a DPI level that suits your task and screen size for optimal cursor speed and precision.
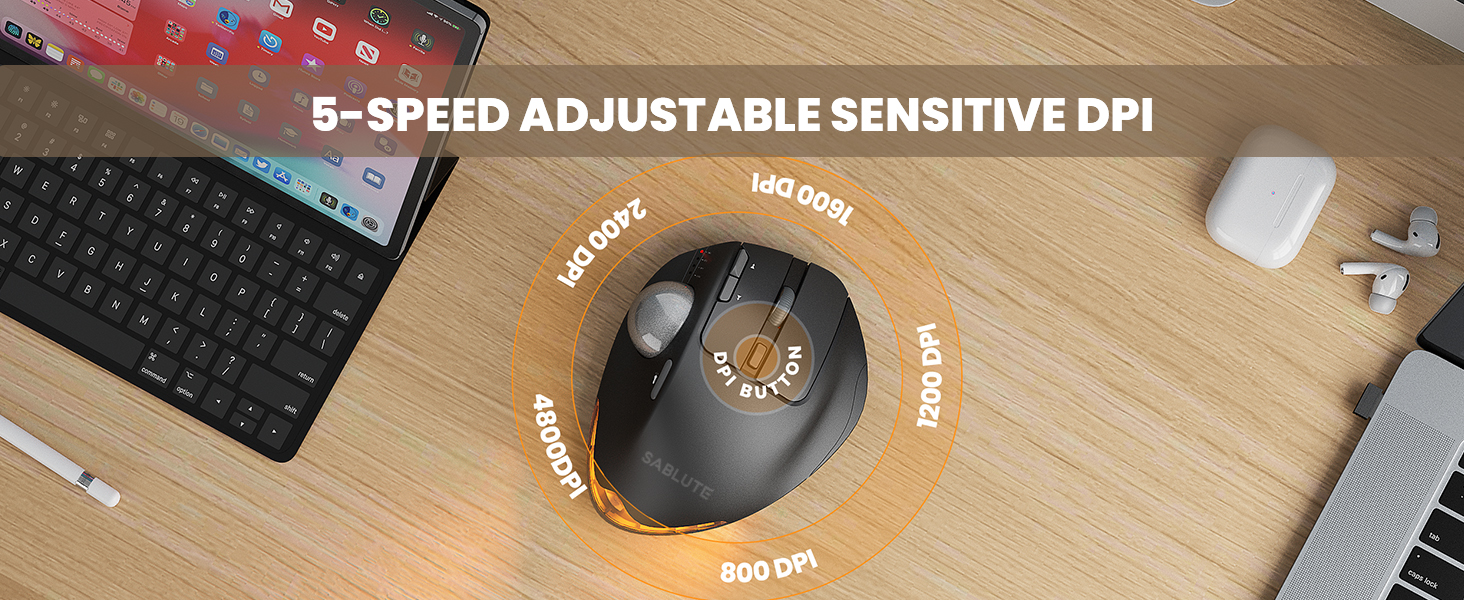
Image: A visual representation of the 5 adjustable DPI levels (800, 1200, 1600, 2400, 4800) available on the SABLUTE Wireless Trackball Mouse, indicating how to change sensitivity.
5.4 Backlight Control
The mouse features an ambient backlight with multiple breathing light modes.
- Press the Switch Light Mode button (10) to cycle through different light modes or to turn the backlight off.
- The backlight can be turned off to avoid distraction during focused work.

Image: The SABLUTE Wireless Trackball Mouse showcasing its quiet click and breathing light features, with various light colors displayed. A sleeping cat nearby emphasizes the quiet operation.
5.5 Driver Customization (Windows Only)
A driver is available for Windows users to customize mouse settings and fine-tune preferences. This driver is not compatible with Mac OS.
- Refer to the official SABLUTE website or contact customer support for driver download instructions.
- Install the driver and follow the on-screen prompts to customize button functions, DPI settings, and other features.
6. Maintenance
6.1 Cleaning the Trackball
Regular cleaning of the trackball and its socket ensures smooth and accurate cursor movement.
- Turn off the mouse using the Power Button (8).
- Gently push the trackball from the underside opening to remove it from its socket.
- Use a clean, soft, lint-free cloth to wipe the trackball and the inside of the trackball socket, removing any dust or debris.
- Carefully place the trackball back into its socket until it clicks into place.
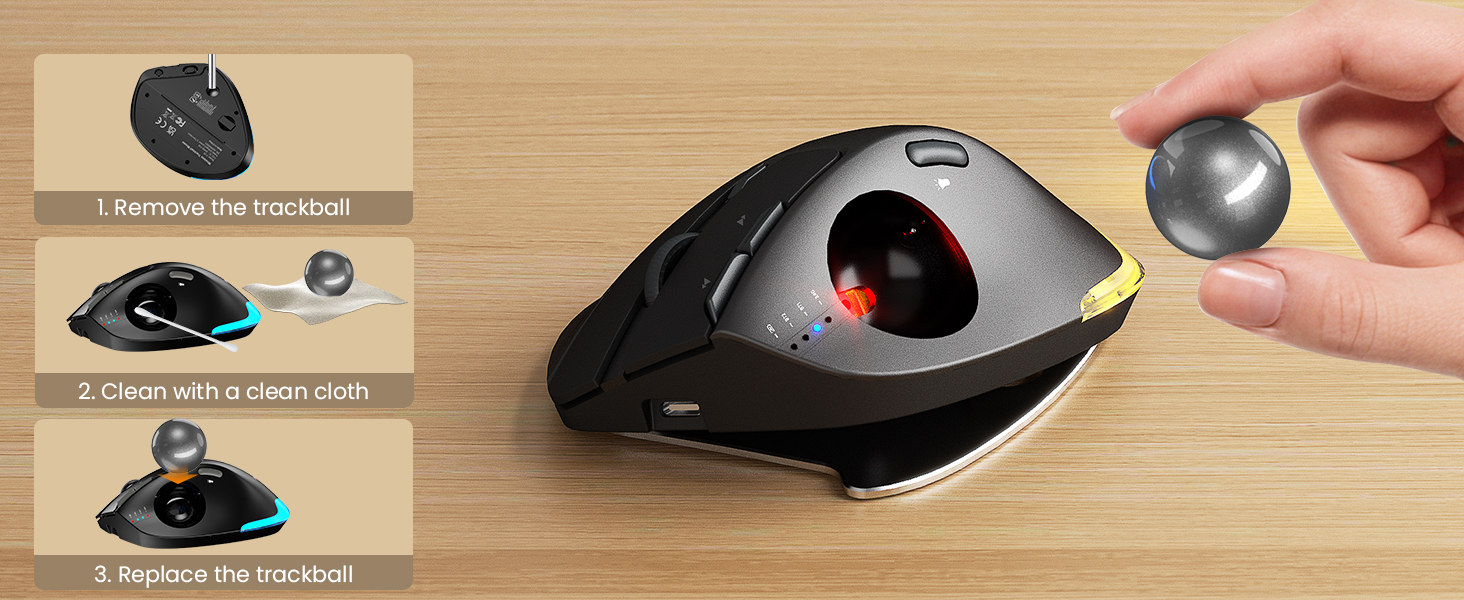
Image: A step-by-step visual guide on how to clean the trackball: 1. Remove the trackball, 2. Clean with a clean cloth, 3. Replace the trackball.
6.2 General Care
- Avoid exposing the mouse to extreme temperatures, direct sunlight, or liquids.
- Use the provided hard travel case for protection when transporting the mouse.
- Clean the exterior of the mouse with a soft, damp cloth as needed.
7. Troubleshooting
If you encounter issues with your SABLUTE Wireless Trackball Mouse, refer to the following common solutions:
| Problem | Possible Cause | Solution |
|---|---|---|
| Mouse not responding | Low battery; Mouse is off; Incorrect connection mode; USB receiver not connected; Bluetooth not paired. | Charge the mouse; Turn on the mouse; Select the correct connection mode (BT1/BT2/2.4G); Ensure USB receiver is securely plugged in; Re-pair Bluetooth. |
| Cursor movement is erratic or sticky | Trackball or socket is dirty. | Clean the trackball and its socket as described in the Maintenance section. |
| Cannot connect via Bluetooth | Mouse not in pairing mode; Device's Bluetooth is off; Interference. | Ensure mouse is in BT1/BT2 mode and indicator is flashing; Turn on Bluetooth on your device; Move closer to the device; Try re-pairing. |
| DPI setting not changing | DPI button not pressed correctly. | Press the DPI button firmly to cycle through settings. Observe the indicator lights for changes. |
| Backlight not working | Backlight is off; Low battery. | Press the Switch Light Mode button (10) to turn on or change modes; Charge the mouse. |
8. Specifications
| Feature | Detail |
|---|---|
| Model | Wireless Trackball Mouse |
| Connectivity Technology | Bluetooth (BT1, BT2), 2.4GHz USB Receiver |
| Movement Detection | Trackball |
| DPI Levels | 800 / 1200 / 1600 / 2400 / 4800 |
| Ergonomic Angle | 0° / 18° Adjustable |
| Battery Type | Built-in Rechargeable |
| Charging Port | USB-C |
| Full Charging Time | 3-4 Hours |
| Standby Time | 300+ Days |
| Item Weight | 1 pound (approx.) |
| Package Dimensions | 6.73 x 5.24 x 2.8 inches |
| Compatibility | PC, Mac, Windows (Driver for Windows only) |
| Special Features | Ergonomic Design, Portable, Soundless Clicks, Water Resistant (case), Wireless, Ambient Backlight |
9. Warranty & Support
9.1 Warranty Information
SABLUTE products are designed and manufactured to the highest quality standards. For specific warranty details regarding your Wireless Trackball Mouse, please refer to the warranty card included in your product packaging or visit the official SABLUTE website.
9.2 Customer Support
If you require further assistance, have questions, or encounter issues not covered in this manual, please contact SABLUTE customer support:
- Online Support: Visit the official SABLUTE website for FAQs, driver downloads, and contact forms.
- Email Support: Refer to your product packaging or the SABLUTE website for the customer service email address.
When contacting support, please have your product model number and purchase date available.


