Informazzjoni Importanti dwar is-Sigurtà
Please read all instructions carefully before assembly and use. Failure to follow these instructions may result in injury or product damage.
- Handle with care to avoid injury from sharp edges.
- Żgura ventilazzjoni xierqa biex tevita sħana żejda.
- Follow assembly instructions carefully to avoid injury from heavy components.
- Securely anchor the greenhouse to prevent collapse during high winds.
Prodott Overview
The Yardenaler 8x10 FT Outdoor Greenhouse Kit provides an ideal environment for plant growth. Constructed with a durable aluminum frame and 4mm thickened polycarbonate panels, it offers high light transmittance and excellent heat preservation. Features include adjustable roof vents and a lockable door for optimal air circulation and security.
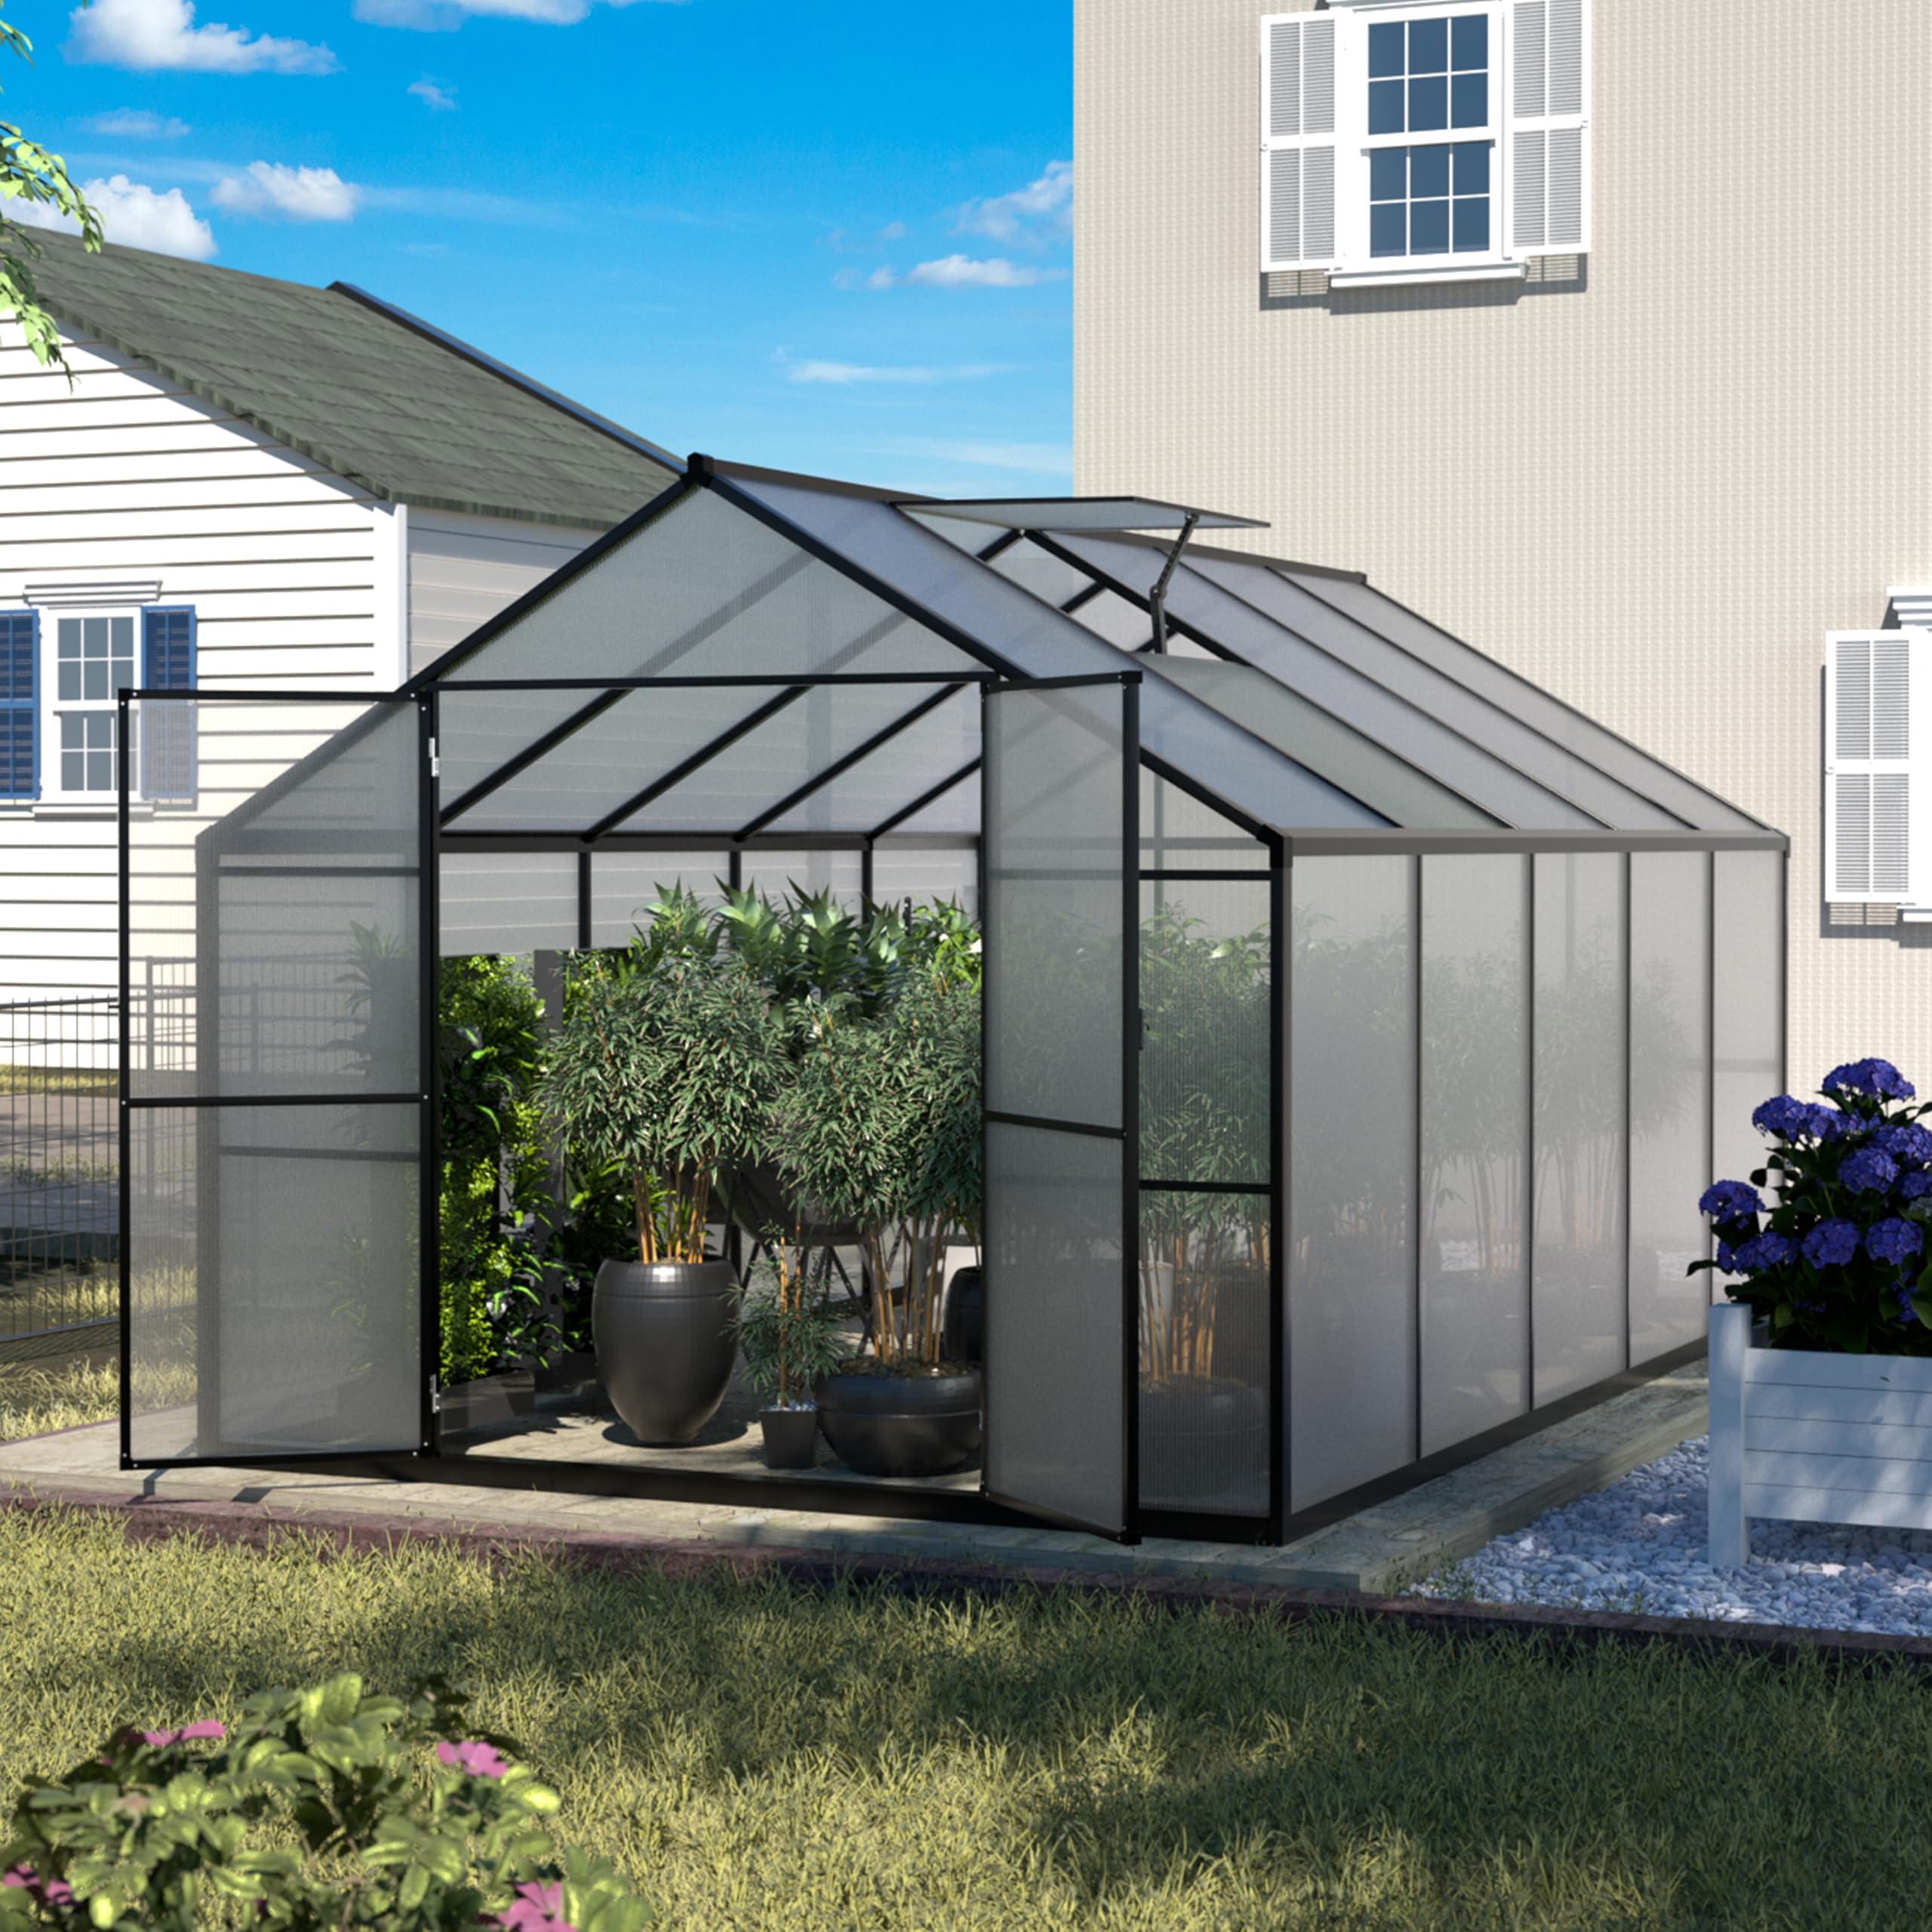
Figura 1: B'mod ġenerali view of the Yardenaler 8x10 FT Outdoor Greenhouse Kit.
Karatteristiċi ewlenin:
- 4MM Thickened Polycarbonate Panels: High light transmittance, superior heat preservation, wear-resistant, and lightweight.
- Sturdy & Strong Aluminum Frame: High-quality aluminum alloy frame combined with heavy-duty polycarbonate panels to withstand harsh weather.
- Adjustable Roof Vent: Ensures fresh air circulation and temperature control. Can be installed in any panel.
- Bieb li jissakkar: Provides security for your plants and tools.
- Roomy Interior: 8' x 10' dimensions offer ample space for plants and gardening tools.
Dimensjonijiet:
- Overall size: 97.3" W x 119" D x 90.5" H
- Door size: 49.7" W x 79.5" H
- Interior size: 92.8" W x 116.5" D

Figure 2: Detailed dimensions of the greenhouse.
Setup & Assemblea
Careful assembly is crucial for the stability and longevity of your greenhouse. Follow the steps below in sequence.
1. Ipprepara l-Bażi
Ensure the ground is level and clear of debris. Securely anchor the base frame to the ground using appropriate methods (e.g., concrete slab, base plates, or flanged feet).

Figure 3: Recommendations for increasing wind rating, including bolting down and using tie-down kits.
2. Arma l-Qafas
Connect the aluminum frame components according to the provided diagrams in your physical manual. Ensure all screws and bolts are tightened securely.
3. Install Polycarbonate Panels
Carefully slide the polycarbonate panels into the designated channels of the aluminum frame. Ensure the correct orientation of the panels for optimal light diffusion and insulation.

Figure 4: Polycarbonate panels with diffused pattern for optimal light and insulation.

Figure 5: The sliding panel assembly system for easier installation.
4. Install Doors and Vents
Attach the lockable door and adjustable roof vents. Ensure they operate smoothly and can be securely closed.

Figure 6: Adjustable roof vent for optimal ventilation.

Figure 7: Lockable door for security.
Istruzzjonijiet Operattivi
Ventilazzjoni
Utilize the adjustable roof vents to control the internal temperature and humidity. Open the vents during warmer periods to allow hot air to escape and fresh air to circulate. Close them during colder periods or when higher humidity is desired.
Operazzjoni tal-Bieb
The greenhouse features a lockable door for easy access and security. Ensure the door is properly closed and locked when not in use to protect your plants and equipment.
Manutenzjoni
Tindif
Clean the polycarbonate panels regularly with mild soap and water to maintain optimal light transmission. Avoid abrasive cleaners or tools that could scratch the panels.
Frame Inspection
Periodically inspect the aluminum frame for any signs of damage, loose bolts, or corrosion. Tighten any loose fasteners and address any damage promptly to ensure structural integrity.
Preparazzjoni tax-Xitwa
During winter months, ensure all vents and doors are securely closed to maximize heat retention. Consider additional insulation if extreme cold is expected. Regularly clear any heavy snow accumulation from the roof to prevent structural stress.
Issolvi l-problemi
Excessive Heat Inside
If the greenhouse becomes too hot, open the roof vents and door to increase airflow. Consider adding shade cloth during peak summer hours.
Panels Shifting in Wind
Ensure all panels are properly seated in their channels and all retaining clips are in place. Verify that the greenhouse base is securely anchored to the ground. Additional tie-down kits may be necessary in high-wind areas.
Tnixxija tal-Ilma
Check for any gaps between panels or where panels meet the frame. Apply silicone sealant to seal any small gaps. Ensure the rain gutters are clear of debris.
Speċifikazzjonijiet
- Ditta: Yardenaler
- Numru tal-Mudell: PG0101-23GY
- Daqs: 8x10 PIEDI
- Dimensjonijiet tal-Prodott: 119"T x 97.3"W x 90.5"Għ
- Materjal tal-qoxra: Polycarbonate (PC) - 4mm Thickened
- Materjal tal-qafas: Aluminju
- Kulur: Griż
Garanzija u Appoġġ
For warranty information or technical support, please refer to the contact details provided at your point of purchase or visit the Yardenaler official websit. Żomm l-irċevuta tax-xiri tiegħek għal kwalunkwe talba ta' garanzija.