
1. Prodott Aktarview
The GIGABYTE B850 Gaming WIFI6 motherboard is designed to support AMD AM5 Processors, including Ryzen 9000, Ryzen 8000, and Ryzen 7000 Series. It offers robust performance with an upgraded power design, high-grade storage standards, and extensive connectivity options to optimize your system's capabilities.
Il-karatteristiċi ewlenin jinkludu:
- AMD Socket AM5 for the latest Ryzen processors.
- DDR5 compatibility with 4 DIMM slots.
- Robust 6+2+2 power design.
- Fully covered MOSFET heatsinks for enhanced thermal management.
- Advanced connectivity: PCIe 5.0, three M.2 slots, and USB-C.
- Integrated WIFI6E and 1GbE LAN for high-speed networking.
- EZ-Latch features for hassle-free component installation.

Figure 1.1: GIGABYTE B850 Gaming WIFI6 Motherboard and retail packaging.
2. Gwida ta' Setup
This section provides step-by-step instructions for installing your GIGABYTE B850 Gaming WIFI6 motherboard and its components.
2.1. Lista ta' Kontroll ta' Qabel l-Installazzjoni
- Ensure your power supply is compatible and has sufficient wattage.
- Verify your CPU (AMD Ryzen 7000/8000/9000 series) and DDR5 RAM are compatible with the AM5 socket and motherboard.
- Prepare your PC case with appropriate standoffs for ATX form factor.
- Iġbor l-għodda meħtieġa: tornavit Phillips-head, ċinga tal-polz anti-statika (rakkomandat).
2.2. Installazzjoni tal-Motherboard
- Poġġi l-motherboard bir-reqqa fil-kaxxa tal-PC tiegħek, billi tallinja t-toqob tal-viti mal-istandoffs.
- Waħħal il-motherboard bil-viti. Tissikkax iżżejjed.
2.3. CPU Installation (AMD Socket AM5)
The GIGABYTE B850 Gaming WIFI6 motherboard features an AMD Socket AM5. Handle the CPU by its edges to avoid touching the pins or contacts.
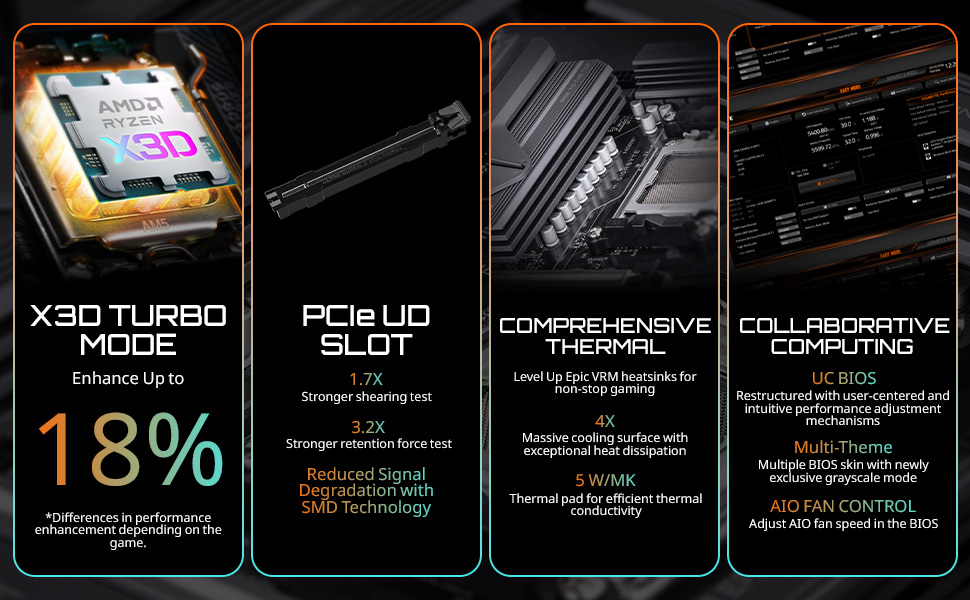
Figure 2.1: AMD Socket AM5 for Ryzen 7000/8000/9000 Series Processors.
- Lift the CPU retention lever on the socket.
- Align the triangular marker on the CPU with the corresponding marker on the socket.
- Niżżel is-CPU bil-mod fis-sokit. Tisforzahx.
- Agħlaq il-lieva taż-żamma biex twaħħal is-CPU.
- Installa l-cooler tas-CPU tiegħek skont l-istruzzjonijiet tal-manifattur tiegħu.
2.4. Installazzjoni tar-RAM (DDR5)
This motherboard supports DDR5 memory. Ensure your RAM modules are DDR5 compatible.
- Iftaħ il-klipps fuq iż-żewġt itruf tas-slots tad-DIMM.
- Align the notch on the DDR5 RAM module with the notch in the DIMM slot.
- Agħfas sew 'l isfel fuq iż-żewġt itruf tal-modulu tar-RAM sakemm il-klipps jidħlu f'posthom.
2.5. Installazzjoni tal-SSD M.2
The motherboard features three M.2 slots for high-speed NVMe SSDs, with EZ-Latch for tool-less installation.

Figure 2.2: M.2 EZ-Latch for easy SSD installation.
- Sib slott M.2 disponibbli.
- Daħħal l-M.2 SSD fl-islott f'angolu.
- Push down the M.2 SSD until it is flat, and secure it using the EZ-Latch mechanism.
2.6. Installazzjoni tal-Karta PCIe
Install your graphics card or other PCIe expansion cards into the appropriate PCIe slots. The motherboard supports PCIe 5.0.

Figure 2.3: PCIe EZ-Latch for convenient graphics card removal.
- Open the retention clip on the PCIe slot.
- Align the card with the slot and press down firmly until it is seated and the clip snaps into place.
- Waħħal il-kard mal-kaxxa b'kamin.
2.7. Konnessjonijiet tal-Enerġija
Connect the main 24-pin ATX power connector and the 8-pin CPU power connector from your power supply to the motherboard.
2.8. Il-Pannell ta' Quddiem u l-Konnessjonijiet tal-I/O
Connect your case's front panel headers (power button, reset button, USB ports, audio jacks) to the corresponding pins on the motherboard. Refer to the motherboard's silkscreen labels for correct orientation.

Figure 2.4: Rear I/O Panel with various ports including USB, LAN, Wi-Fi antenna connectors, and audio jacks.
Install the included Wi-Fi antenna to the rear I/O panel connectors for optimal wireless performance.
3. Istruzzjonijiet Operattivi
3.1. First Boot and BIOS/UEFI Access
After assembling your system, connect a monitor, keyboard, and mouse. Power on the system. To enter the BIOS/UEFI setup, repeatedly press the DEL key during startup. The BIOS/UEFI interface allows you to configure system settings, boot order, and enable features like EXPO for memory optimization.
3.2. BIOS/UEFI Update (Q-Flash Plus)
It is highly recommended to update your motherboard's BIOS/UEFI to the latest version for improved compatibility, stability, and performance, especially for DDR5 memory and new CPU releases. The GIGABYTE B850 Gaming WIFI6 features Q-Flash Plus, allowing BIOS updates without a CPU, RAM, or graphics card installed.

Figure 3.1: Q-Flash Plus button and indicator lights for BIOS updates.
- Niżżel l-aħħar BIOS file mill-GIGABYTE uffiċjali websit għall-mudell speċifiku tal-motherboard tiegħek.
- Semmi mill-ġdid il-BIOS imniżżel file to GIGABYTE.bin (or as specified in the BIOS update instructions).
- Ikkopja l-BIOS imsemmija mill-ġdid file għad-direttorju ewlieni ta' USB flash drive (format FAT32).
- With the system powered off, insert the USB flash drive into the designated Q-Flash Plus USB port on the rear I/O panel.
- Press the Q-Flash Plus button. The Q-Flash Plus LED will blink, indicating the update process has started.
- Wait for the LED to stop blinking, indicating the update is complete. Do not power off or interrupt the process.
3.3. Installazzjoni tas-sewwieq
After installing your operating system, install the necessary drivers for optimal performance. Drivers can be found on the GIGABYTE support websit għall-mudell tal-motherboard tiegħek.
- Sewwieqa taċ-Ċipset
- Sewwieqa tal-LAN
- Wi-Fi/Bluetooth Drivers
- Sewwieqa tal-Awdjo
- SATA/NVMe Drivers
3.4. Memory Profile Configuration (EXPO/DOCP)
To achieve the advertised speeds of your DDR5 memory, enable the EXPO (Extended Profiles for Overclocking) or DOCP (D.O.C.P.) profile in the BIOS/UEFI. This will automatically configure the memory timings and voltage għall-aħjar prestazzjoni.
4. Manutenzjoni
Manutenzjoni regolari tgħin biex tiżgura l-lonġevità u t-tħaddim stabbli tal-motherboard u s-sistema tiegħek.
- Tneħħija tat-Trab: Periodically clean dust from the motherboard, heatsinks, and fan blades using compressed air. Ensure the system is powered off and unplugged before cleaning.
- Aġġornamenti tal-BIOS/UEFI: Iċċekkja regolarment il-GIGABYTE website for new BIOS/UEFI versions. Updates can provide performance improvements, bug fixes, and support for new hardware.
- Aġġornamenti tas-sewwieq: Keep your system drivers updated. This includes chipset, graphics, audio, and network drivers, which can be found on the GIGABYTE support page or component manufacturer websiti.
- Ġestjoni tal-Kejbil: Ensure all cables are neatly routed and not obstructing airflow within the case.
- Kontrolli tal-Konnessjoni: Occasionally check that all power cables, data cables, and expansion cards are securely seated.
5 Issolvi l-problemi
Din it-taqsima tindirizza kwistjonijiet komuni li tista’ tiltaqa’ magħhom u tipprovdi soluzzjonijiet potenzjali.
5.1. Ebda Qawwa / Ebda POST (Test Awtomatiku tal-Power-On)
- Iċċekkja l-Konnessjonijiet tal-Enerġija: Kun żgur li l-kejbils tal-enerġija tas-CPU ta' 24-pin ATX u 8-pin huma konnessi sew mal-motherboard u l-provvista tal-enerġija.
- Ivverifika l-Komponenti: Ensure CPU, RAM, and graphics card are properly seated. Try reseating them.
- CMOS ċar: Irreferi għall-manwal tal-motherboard tiegħek għal struzzjonijiet dwar kif tħassar is-settings tas-CMOS (Complementary Metal-Oxide-Semiconductor), li jistgħu jsolvu l-problemi tal-boot.
- Q-Flash Plus Indicator Lights: The motherboard has indicator LEDs (CPU, DRAM, VGA, BOOT) that light up during POST. If one stays lit, it indicates a problem with that specific component.
5.2. Instabbiltà tas-Sistema / Ħabtiet
- Iċċekkja t-Temperaturi: Ensure CPU and GPU temperatures are within safe operating limits. Overheating can cause instability.
- Kwistjonijiet tar-RAM: If you experience frequent crashes, test your RAM modules. Ensure EXPO/DOCP profiles are stable or try running RAM at default speeds.
- Kunflitti tas-Sewwieqa: Ensure all drivers are up-to-date and there are no conflicting drivers.
- Provvista tal-Enerġija: An insufficient or failing power supply can lead to instability.
5.3. L-ebda Output tal-Wiri
- Karta Grafika: Ensure your graphics card is properly seated in the PCIe slot and has all necessary power cables connected.
- Konnessjoni tal-monitor: Verify the display cable is securely connected to both the graphics card (or motherboard if using integrated graphics) and the monitor.
- Grafika Integrata: If your CPU has integrated graphics, try connecting the monitor to the motherboard's display outputs (HDMI, DisplayPort) to rule out a dedicated graphics card issue.
5.4. Kwistjonijiet ta' Konnettività tan-Netwerk
- Wi-Fi: Ensure the Wi-Fi antenna is securely connected to the rear I/O panel. Check Wi-Fi drivers.
- LAN: Verify the Ethernet cable is properly connected to the LAN port and your router/modem. Check LAN drivers.
6. Speċifikazzjonijiet
Detailed technical specifications for the GIGABYTE B850 Gaming WIFI6 Motherboard.
| Karatteristika | Speċifikazzjoni |
|---|---|
| Brand | GIGABYTE |
| Isem tal-Mudell | B850 GAMING WF6 |
| Socket tas-CPU | Sokit AM5 |
| Proċessuri Kompatibbli | AMD Ryzen Serje 7000, AMD Ryzen Serje 8000, AMD Ryzen Serje 9000 |
| Tip ta' Ċipset | AMD B850 |
| Teknoloġija tal-Memorja RAM | DDR5 |
| Daqs Massimu tal-Memorja RAM | 256 GB |
| Veloċità tal-Memorja | 5200 MHz (Bażi) |
| Dimensjonijiet tal-Prodott (LxWxH) | 12 x 9.6 x 1 pulzieri |
| Piż tal-oġġett | 3.25 liri |
| Pjattaforma | Windows 11 |
| Konnettività | PCIe 5.0, 3x M.2 Slots, USB-C, WIFI6E, 1GbE LAN |
7. Garanzija u Appoġġ
7.1. Informazzjoni dwar Garanzija
The GIGABYTE B850 Gaming WIFI6 Motherboard comes with a 5-Sena GaranzijaJekk jogħġbok żomm il-prova tax-xiri tiegħek għal talbiet taħt il-garanzija. Il-garanzija tkopri difetti fil-materjali u x-xogħol taħt użu normali.
7.2. Appoġġ Tekniku
Għal assistenza teknika, downloads ta' sewwieqa, aġġornamenti tal-BIOS, u aktar informazzjoni dwar il-prodott, jekk jogħġbok żur is-sit uffiċjali tal-appoġġ ta' GIGABYTE. websit:
You may also find helpful resources and community forums on the GIGABYTE brand store on Amazon: GIGABYTE Store.