
EcoChannels 33" x 19" x 10" Stainless Steel Undermount Kitchen Sink
EcoChannels Undermount Kitchen Sink User Manual
Model: 33" x 19" x 10" Stainless Steel Workstation Sink
1. Introduzzjoni
This manual provides detailed instructions for the installation, operation, and maintenance of your EcoChannels Undermount Kitchen Sink. This workstation sink is designed for efficiency and durability, featuring 16-gauge T-304 stainless steel construction and integrated accessories.

Image 1.1: The EcoChannels Undermount Kitchen Sink with included accessories such as the cutting board, colander, roll-up drying rack, and bottom grid.
2. Kontenut tal-Pakkett
Iċċekkja li l-komponenti kollha huma preżenti qabel tibda l-installazzjoni:
- Undermount Kitchen Sink (33" x 19" x 10")
- Heavy-duty Cutting Board
- Stainless Steel Colander
- Roll Up Dish Drying Rack
- Grilja tat-Tlaħliħ tal-Qiegħ
- Sink Drain Strainer
- Mudell tal-Qtugħ
- Ħardwer tal-Immuntar
- Gwida għall-Installazzjoni (dan id-dokument)
3. Setup u Installazzjoni
The EcoChannels kitchen sink is designed for undermount installation. Professional installation is recommended to ensure proper fit and sealing.
3.1 Kontrolli ta' qabel l-installazzjoni
- Ensure your cabinet size meets the minimum requirement of 36 inches.
- Ikkonferma li l-kontenut kollu tal-pakkett huwa preżenti u mhux imħassar.
- Review kodiċijiet u regolamenti lokali tal-plumbing.
3.2 Tħejjija tal-Countertop
Use the provided cutout template to accurately mark and cut the opening in your countertop. The recommended countertop cutout size is 31" W x 17" D with R10mm rounded corners.
3.3 Immuntar tas-Sink
- Apply a continuous bead of silicone sealant around the perimeter of the sink flange.
- Carefully position the sink under the countertop cutout.
- Secure the sink using the provided mounting hardware, ensuring even pressure.
- Wipe away any excess sealant immediately.
- Connect the drain strainer to the standard 3.5-inch drain opening.

Image 3.1: Detailed dimensions of the sink and a visual representation of an installed unit.
4. Operating Your Workstation Sink
Your EcoChannels sink features an integrated single-tier track that allows for seamless use of the included accessories, transforming your sink into a versatile workstation.
4.1 Using the Integrated Ledge
The integrated ledge provides a track for sliding the cutting board, colander, and roll-up drying rack. This design allows you to perform food preparation, rinsing, and drying tasks directly over the sink, maximizing countertop space.

Image 4.1: The sink configured with the stainless steel colander and roll-up drying rack.
4.2 Accessory Functions
- Bord tat-tqattigħ: Use for chopping and food preparation. Its placement over the sink allows for easy transfer of waste directly into the disposal or compost.
- Stainless Steel Colander: Ideal for rinsing fruits, vegetables, or draining pasta. It slides along the track for convenient use.
- Roll Up Dish Drying Rack: Provides a flexible surface for air-drying dishes, glasses, or produce. It can be rolled up and stored when not in use.
- Grilja tat-Tlaħliħ tal-Qiegħ: Protects the sink's bottom surface from scratches and allows water to drain freely.
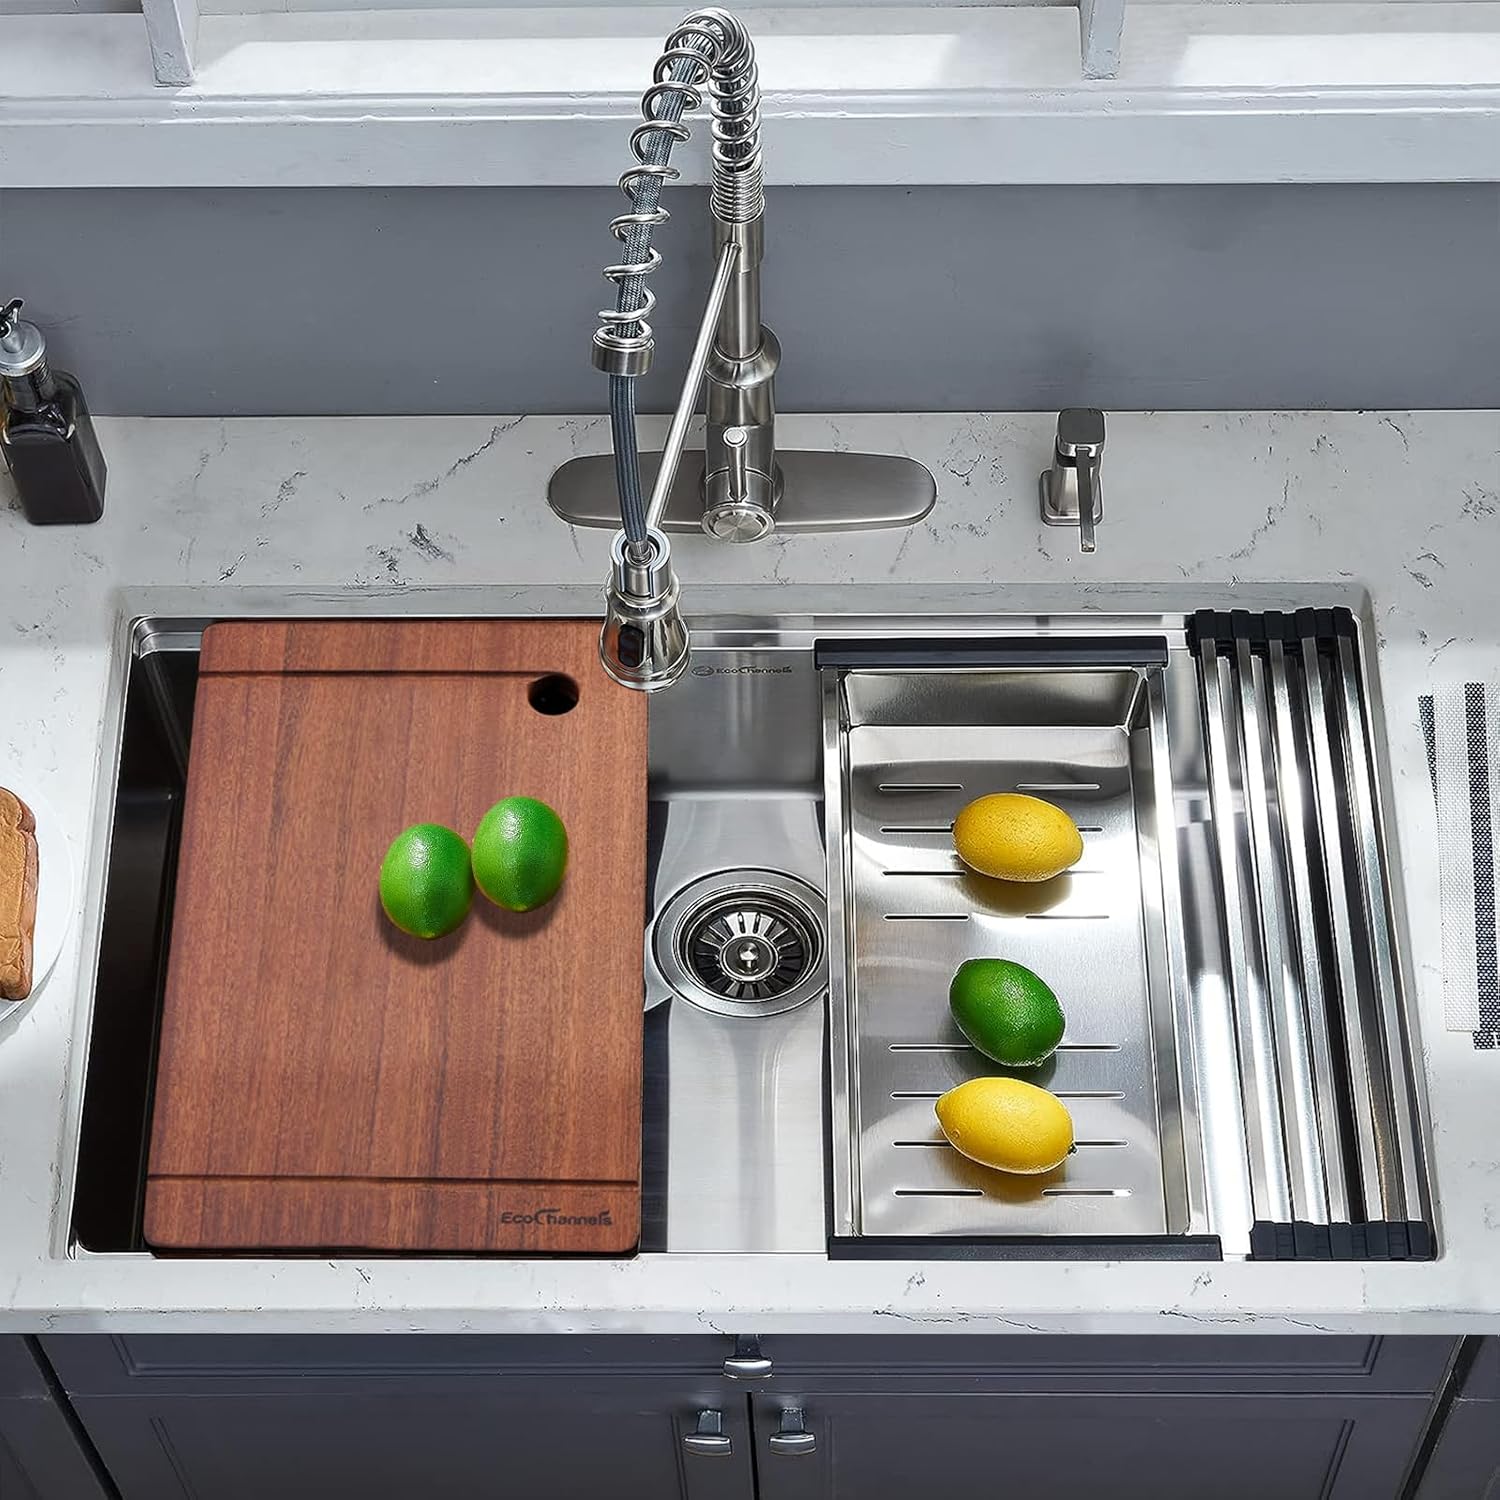
Image 4.2: The sink with the cutting board and colander positioned on the integrated ledge.
4.3 Efficient Drainage
The sink features a sloped bottom with innovative X-shaped drain grooves. This design facilitates quick water drainage and prevents water from pooling, contributing to a cleaner sink surface.
5. Kura u Manutenzjoni
Proper care will extend the life and maintain the appearance of your stainless steel sink.
5.1 Tindif ta 'Kuljum
For daily cleaning, use a soft towel or sponge with warm water and a mild dish soap. Wipe the sink surface in the direction of the grain to maintain the brushed finish. Rinse thoroughly and dry to prevent water spots.
5.2 L-Evitar tal-Ħsara
- Avoid using abrasive cleaners, steel wool, or scouring pads, as these can scratch the stainless steel surface.
- Do not leave acidic foods (e.g., citrus, tomatoes) or harsh chemicals in contact with the sink for extended periods, as they can cause discoloration or pitting.
- The R10mm rounded corners are designed for easy cleaning, reducing areas where grime can accumulate.

Image 5.1: Detail of the R10 rounded corner design and the 16-gauge T304 stainless steel material.
6 Issolvi l-problemi
This section addresses common concerns you might encounter with your sink.
6.1 Storbju Eċċessiv Waqt l-Użu
The sink is equipped with anti-noise thick rubber padding on the bottom. If you experience unusual noise, ensure the sink is properly mounted and all connections are secure. The padding is designed to minimize sound from water and dishware.
6.2 Condensation on Underside of Sink
The sink features an anti-condensation undercoating. This coating helps prevent moisture buildup on the underside of the sink, which can occur due to temperature differences between the sink and the cabinet interior. If condensation persists, ensure adequate ventilation in the cabinet area.

Stampa 6.1: View of the sink's underside, highlighting the rubber mute pads and anti-condensation coating.
6.3 Slow Drainage
Check the drain strainer for any debris or food particles that may be obstructing water flow. The X-shaped drain grooves are designed for efficient drainage, but blockages can occur if the strainer is not regularly cleaned.
7. Speċifikazzjonijiet
| Karatteristika | Speċifikazzjoni |
|---|---|
| Materjal | 16-Gauge T-304 Stainless Steel |
| Dimensjonijiet ta' barra (W x D x H) | 33" x 19" x 10" |
| Dimensjonijiet Interni (W x D x H) | 31" x 17" x 10" |
| Countertop Cutout Size | 31" W x 17" D x R10mm |
| Daqs Minimu tal-Kabinett | 36 pulzieri |
| Ftuħ tal-Ixxotta | Standard ta' 3.5-il pulzier |
| Tip ta' Installazzjoni | Jissottomettih |
| Tip Finish | Brushed |
| Forma | Rettangolari |
| Piż tal-oġġett | 24.7 liri |
| Għadd ta' toqob | 1 |
8. Garanzija u Appoġġ
Specific warranty details for this product are not provided in the available information. For warranty claims, technical support, or any product-related inquiries, please contact EcoChannels customer service directly. Retain your proof of purchase for any warranty-related requests.
Ask a question about this manual
Ask about setup, troubleshooting, compatibility, parts, safety, or missing instructions. Manuals+ will review the question and use this page’s manual context to help answer it.