Introduzzjoni
This manual provides comprehensive instructions for the setup, operation, and maintenance of your Reloop RP-7000 MK2 Professional Upper Torque Turntable System. Please read this manual thoroughly before using the product to ensure proper functionality and longevity.
Istruzzjonijiet tas-Sigurtà
- Ensure the turntable is placed on a stable, level surface away from direct sunlight, heat sources, and excessive moisture.
- Tesponix l-unità għax-xita jew għall-umdità biex tevita nar jew xokk elettriku.
- Always disconnect the power cord from the outlet before cleaning or performing any maintenance.
- Tippruvax tagħmel manutenzjoni fuq l-unità int stess. Irreferi għal kull manutenzjoni għand persunal tas-servizz kwalifikat.
- Żomm fejn ma jintlaħaqx mit-tfal.
Kontenut tal-Pakkett
Your Reloop RP-7000 MK2 Professional Upper Torque Turntable System package should include the following items:
- 2 x Reloop RP-7000 MK2 Professional Upper Torque Turntable System
- 2 x Reloop Dust Cover for RP-7000/8000
- Knox Gear Vinyl Record Care System (includes brush, velvet cleaner, stylus brush, and cleaning solution)
- Kejbils tal-Enerġija
- Kejbils RCA
- Kontrapiżijiet
- Slipmats
- Manwal għall-Utent

Image: The complete bundle including two Reloop RP-7000 MK2 turntables, two dust covers, and the Knox Gear vinyl record care solution.
Setup
1. Żpakkjar u Tqegħid
Carefully remove all components from the packaging. Place the turntable on a flat, stable surface. Ensure there is adequate space around the unit for ventilation and cable connections.

Immaġni: Angolata view of the Reloop RP-7000 MK2 turntable, highlighting its main components.
2. Attaching the Dust Cover
Gently place the dust cover onto the turntable. The dust cover helps protect the platter and tonearm from dust and debris when the turntable is not in use.
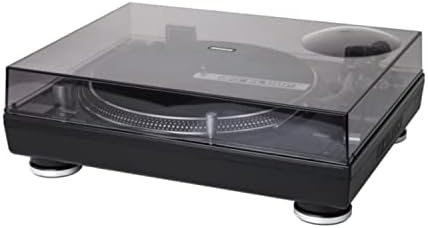
Image: The Reloop RP-7000 MK2 turntable with its protective dust cover in place.
3. Connecting Audio Cables
Connect the RCA cables from the turntable's output to the appropriate input on your mixer or amplifier. Ensure the ground wire is also connected to prevent hum.

Image: Rear panel of the Reloop RP-7000 MK2, displaying the RCA audio outputs, ground terminal, and power connection.
4. Konnessjoni tal-Enerġija
Connect the power cable to the turntable and then to a suitable power outlet. Ensure the power switch is in the OFF position before connecting.
Istruzzjonijiet Operattivi
1. Tixgħel u Mitfi
To power on the turntable, flip the power switch located on the front left side to the ON position. To power off, flip the switch back to OFF.

Immaġni: Minn fuq view of the Reloop RP-7000 MK2 turntable, illustrating the arrangement of its controls and components.
2. Daqq Rekord
- Poġġi rekord fuq il-platter.
- Select the appropriate speed (33, 45, or 78 RPM) using the speed buttons.
- Agħfas il- BIDU/WAQQF buttuna biex tibda r-rotazzjoni tal-platter.
- Carefully lower the tonearm onto the record using the cue lever.

Image: The Reloop RP-7000 MK2 turntable with a record playing, demonstrating the tonearm's position.
3. Pitch Control and Reverse Function
Use the pitch fader to adjust the playback speed. The REVERS button allows for reverse playback of the record.
Manutenzjoni
1. Tindif tat-Turntable
Regularly wipe the turntable's surface with a soft, dry cloth. For the dust cover, use a slightly damp cloth and avoid abrasive cleaners. The included Knox Gear Vinyl Record Care System can be used for cleaning records and the stylus.

Image: The Knox Gear Vinyl Record Care System, showing the velvet record brush, stylus brush, and cleaning solution bottle.
2. Kura tal-Istilus
Gently clean the stylus using the provided stylus brush. Always brush from back to front. A dirty stylus can degrade sound quality and damage records.
Issolvi l-problemi
| Problema | Kawża Possibbli | Soluzzjoni |
|---|---|---|
| Ebda qawwa | Kejbil tal-enerġija mhux imqabbad; Sokit tal-enerġija difettuż | Iċċekkja l-konnessjoni tal-kejbil tal-enerġija; Ipprova sokit differenti |
| L-ebda ħoss | Kejbils RCA mhux konnessi; Amplifier/mixer input incorrect; Stylus damaged | Check RCA connections; Select correct input on amplifier/mixer; Inspect and replace stylus if necessary |
| Ħoss ta’ twerwir | Ground wire not connected; Interference | Ensure ground wire is securely connected; Move turntable away from other electronic devices |
| Veloċità tal-plejbek mhux korretta | Wrong speed selected; Pitch fader not centered | Select correct RPM; Adjust pitch fader to center position |
Speċifikazzjonijiet
- Ditta: Reloop
- Mudell: RP-7000 MK2
- Teknoloġija tal-Konnettività: Bil-fili
- Karatteristiċi Speċjali: Balanced S-shaped Tone Arm, Dual Start/Stop Buttons, Precise Motor Control, Reverse Function, Freely Movable Aluminum LED Target Light
- Materjal: Plastik
- Piż tal-oġġett: 4.5 Kilograms (per turntable)
- Kulur: Deep black or classic silver metallic
- Apparati Kompatibbli: Kelliem, Headphone
Garanzija u Appoġġ
Reloop products are designed and manufactured to the highest quality standards. For warranty information and technical support, please refer to the official Reloop webis-sit jew ikkuntattja lid-distributur lokali tiegħek. Żomm il-prova tax-xiri tiegħek għal talbiet ta' garanzija.
Għal aktar għajnuna, żur il- Reloop Store on Amazon.