Tacklife PES01A
Tacklife PES01A Circular Saw User Manual
Model: PES01A
1. Introduzzjoni
Thank you for choosing the Tacklife PES01A Circular Saw. This powerful and versatile tool is designed for efficient and precise cutting of various materials, including wood and plastic. Featuring a robust 1500W motor, laser guide, and adjustable cutting capabilities, it is an ideal tool for both professional and DIY projects. Please read this manual thoroughly before operation to ensure safe and effective use of your new circular saw.

Figure 1.1: Tacklife PES01A Circular Saw overview.
2. Istruzzjonijiet Ġenerali dwar is-Sigurtà
Dejjem segwi l-prekawzjonijiet bażiċi ta’ sigurtà meta tuża għodda elettrika biex tnaqqas ir-riskju ta’ nar, xokk elettriku, u korriment personali. Żomm dan il-manwal għal referenza futura.
2.1. Sigurtà taż-Żona tax-Xogħol
- Żomm iż-żona tax-xogħol nadifa u mdawwal sew. Żoni imbarazz jew mudlama jistiednu inċidenti.
- Tħaddimx għodod elettriċi f'atmosferi splussivi, bħal fil-preżenza ta' likwidi, gassijiet jew trab li jaqbdu. Għodod tal-enerġija joħolqu xrar li jistgħu jaqbdu t-trab jew dħaħen.
- Żomm lit-tfal u lil dawk li jkunu fil-qrib 'il bogħod waqt li tħaddem għodda tal-enerġija. Distrazzjonijiet jistgħu jikkawżaw inti titlef il-kontroll.
2.2. Sigurtà Elettrika
- Il-plaggs tal-għodda tal-enerġija għandhom jaqblu mal-iżbokk. Qatt mmodifika l-plagg bl-ebda mod.
- Evita l-kuntatt tal-ġisem ma 'uċuħ ertjati jew ertjati, bħal pajpijiet, radjaturi, firxiet, u refriġeraturi. Hemm riskju akbar ta 'xokk elettriku jekk ġismek ikun ertjat jew ertjat.
- Tesponix l-għodod elettriċi għax-xita jew kundizzjonijiet imxarrba. L-ilma li jidħol f'għodda tal-enerġija jżid ir-riskju ta 'xokk elettriku.
- Tabbużax mill-korda. Qatt tuża l-korda biex iġorr, tiġbed jew tneħħi l-plagg tal-għodda tal-enerġija. Żomm il-korda 'l bogħod mis-sħana, żejt, truf li jaqtgħu, jew partijiet li jiċċaqilqu.
2.3. Sigurtà Personali
- Dejjem ilbes protezzjoni għall-għajnejn. Uża nuċċalijiet jew gogils tas-sigurtà.
- Ilbes protezzjoni għas-smigħ meta tħaddem l-għodda għal perjodi twal.
- Ilbes sew. Tilbesx ħwejjeġ maħlula jew dehbijiet. Żomm ix-xagħar u l-ilbies tiegħek 'il bogħod minn partijiet li jiċċaqilqu.
- Oqgħod attent, oqgħod attent x'qed tagħmel, u uża s-sens komun meta tħaddem għodda tal-enerġija.
- Use safety clamps or a vise to secure the workpiece. This is safer than using your hand and it frees both hands to operate the tool.
2.4. Circular Saw Specific Safety
- Żomm l-idejn 'il bogħod miż-żona tat-tqattigħ u x-xafra. Żomm it-tieni idejn tiegħek fuq il-manku awżiljarju, jew il-housing tal-mutur. Jekk iż-żewġ idejn qed iżommu s-serrieq, ma jistgħux jinqatgħu mix-xafra.
- Tlaħħaqx taħt il-biċċa tax-xogħol. Il-gwardja ma tistax tipproteġik mix-xafra taħt il-biċċa tax-xogħol.
- Aġġusta l-fond tat-tqattigħ għall-ħxuna tal-biċċa tax-xogħol. Inqas minn sinna sħiħa tax-xafra għandha tkun viżibbli taħt il-biċċa tax-xogħol.
- Qatt ma żżomm il-biċċa tax-xogħol f'idejk jew fuq is-sieq tiegħek waqt li taqta'. Żgura l-biċċa tax-xogħol fuq pjattaforma stabbli.
- Żomm l-għodda tal-enerġija b'uċuħ ta' qbid iżolati meta twettaq operazzjoni fejn l-aċċessorju tat-tqattigħ jista 'jikkuntattja wajers moħbija jew il-korda tiegħu stess.
- Always ensure the lower guard is closed before placing the saw down.
3. Komponenti u Karatteristiċi
Familiarize yourself with the parts of your Tacklife PES01A Circular Saw before operation.

Figura 3.1: Komponenti ewlenin tas-serrieq ċirkolari.
- 1. Mutur b'saħħtu: Ensures good heat dissipation.
- 2. Laser Switch: Activates the laser guide.
- 3. 3M Power Cord & Cable Tie: Convenient for storage and use.
- 4. Swiċċ Doppju tas-Sigurtà: Requires pressing both buttons to start, preventing accidental injury.
- 5. Rubberized Handle: For comfortable and secure grip.
- 6. Support Handle: Provides additional control.
- 7. Aluminum Alloy Cover: Durable housing.
- 8. Iron Base Plate: Sturdy base for cutting.
- 9. Iron Blade Guard: Protects the blade.
Aċċessorji inklużi:

Figure 3.2: Standard accessories included with the saw.
- 1 x Tacklife PES01A Circular Saw
- 1 x 185mm 24-Tooth TCT Blade (for wood/plastic)
- 1 x 185mm 40-Tooth TCT Blade (for wood/plastic)
- 1 x Hex Wrench (for blade changes)
- 1 x Parallel Guide Ruler
- 1 x Dust Port Adapter (35mm diameter)
- 1 x Manwal għall-Utent
- 1 x Karta tal-Garanzija
4. Setup u Assemblea
4.1. Blade Installation/Removal
- Kun żgur li s-serrieq huwa skonnettjat mis-sors tal-enerġija qabel ma tipprova tbiddel ix-xafra.
- Agħfas u żomm il-buttuna tal-qfil tal-magħżel.
- Using the hex wrench, loosen the blade bolt by turning it counter-clockwise.
- Erfa’ l-protezzjoni tax-xafra t’isfel u neħħi x-xafra l-qadima bir-reqqa.
- Place the new blade onto the spindle, ensuring the teeth are pointing in the direction of the arrow on the saw's guard.
- Replace the blade bolt and tighten it securely with the hex wrench while holding the spindle lock button.
- Release the spindle lock and check that the blade rotates freely and the guard moves smoothly.
4.2. Attaching the Parallel Guide Ruler
The parallel guide ruler helps achieve straight cuts parallel to the edge of the workpiece.
- Żerżaq ir-riga gwida fl-islott fuq quddiem tal-pjanċa tal-bażi tas-serrieq.
- Aġġusta r-riga għall-wisa' tat-tqattigħ mixtieqa.
- Issikka l-kamin tal-illokkjar biex twaħħal ir-riga f'postha.
4.3. Konnessjoni tal-Estrazzjoni tat-Trab
For a cleaner work environment, connect a vacuum cleaner to the dust port.
- Attach the 35mm dust port adapter to the dust outlet on the saw.
- Connect your vacuum cleaner hose to the adapter.
5. Istruzzjonijiet Operattivi
5.1. Aġġustament tal-Fond tat-Tqattigħ
The cutting depth can be adjusted to match the thickness of your material. The maximum cutting depth at 90° is 65mm (2.5 inches).

Figure 5.1: Adjusting cutting depth for straight and bevel cuts.
- Loosen the depth adjustment lever located at the rear of the saw.
- Raise or lower the base plate to the desired cutting depth. Ensure only a small portion of the blade teeth extends below the workpiece.
- Issikka sew il-lieva tal-aġġustament tal-fond.
5.2. Adjusting Bevel Angle (Miter Cut)
The saw can make bevel cuts up to 45°. The maximum cutting depth at 45° is 45mm (1.8 inches).
- Loosen the bevel adjustment knob/lever at the front of the saw.
- Tilt the base plate to the desired angle (0° to 45°).
- Issikka l-pum/lieva tal-aġġustament tal-bevel sew.
5.3. Using the Laser Guide
The integrated laser guide provides a visual line for precise cutting.

Figure 5.2: The laser guide assists in making straight cuts.
- Locate the laser switch on the saw.
- Flip the switch to turn the laser on. A red laser line will project onto your workpiece, indicating the cutting path.
- Align the laser line with your marked cut line on the material.
- Turn off the laser when not in use to conserve battery (if applicable) or prevent accidental activation.
5.4. Nagħmlu Qatgħa
Dejjem kun żgur li l-biċċa tax-xogħol tkun imqabbda sewamped qabel ma jinqata’.

Figure 5.3: Cutting a wooden board with the circular saw.

Figure 5.4: Cutting a plastic sheet with the circular saw.
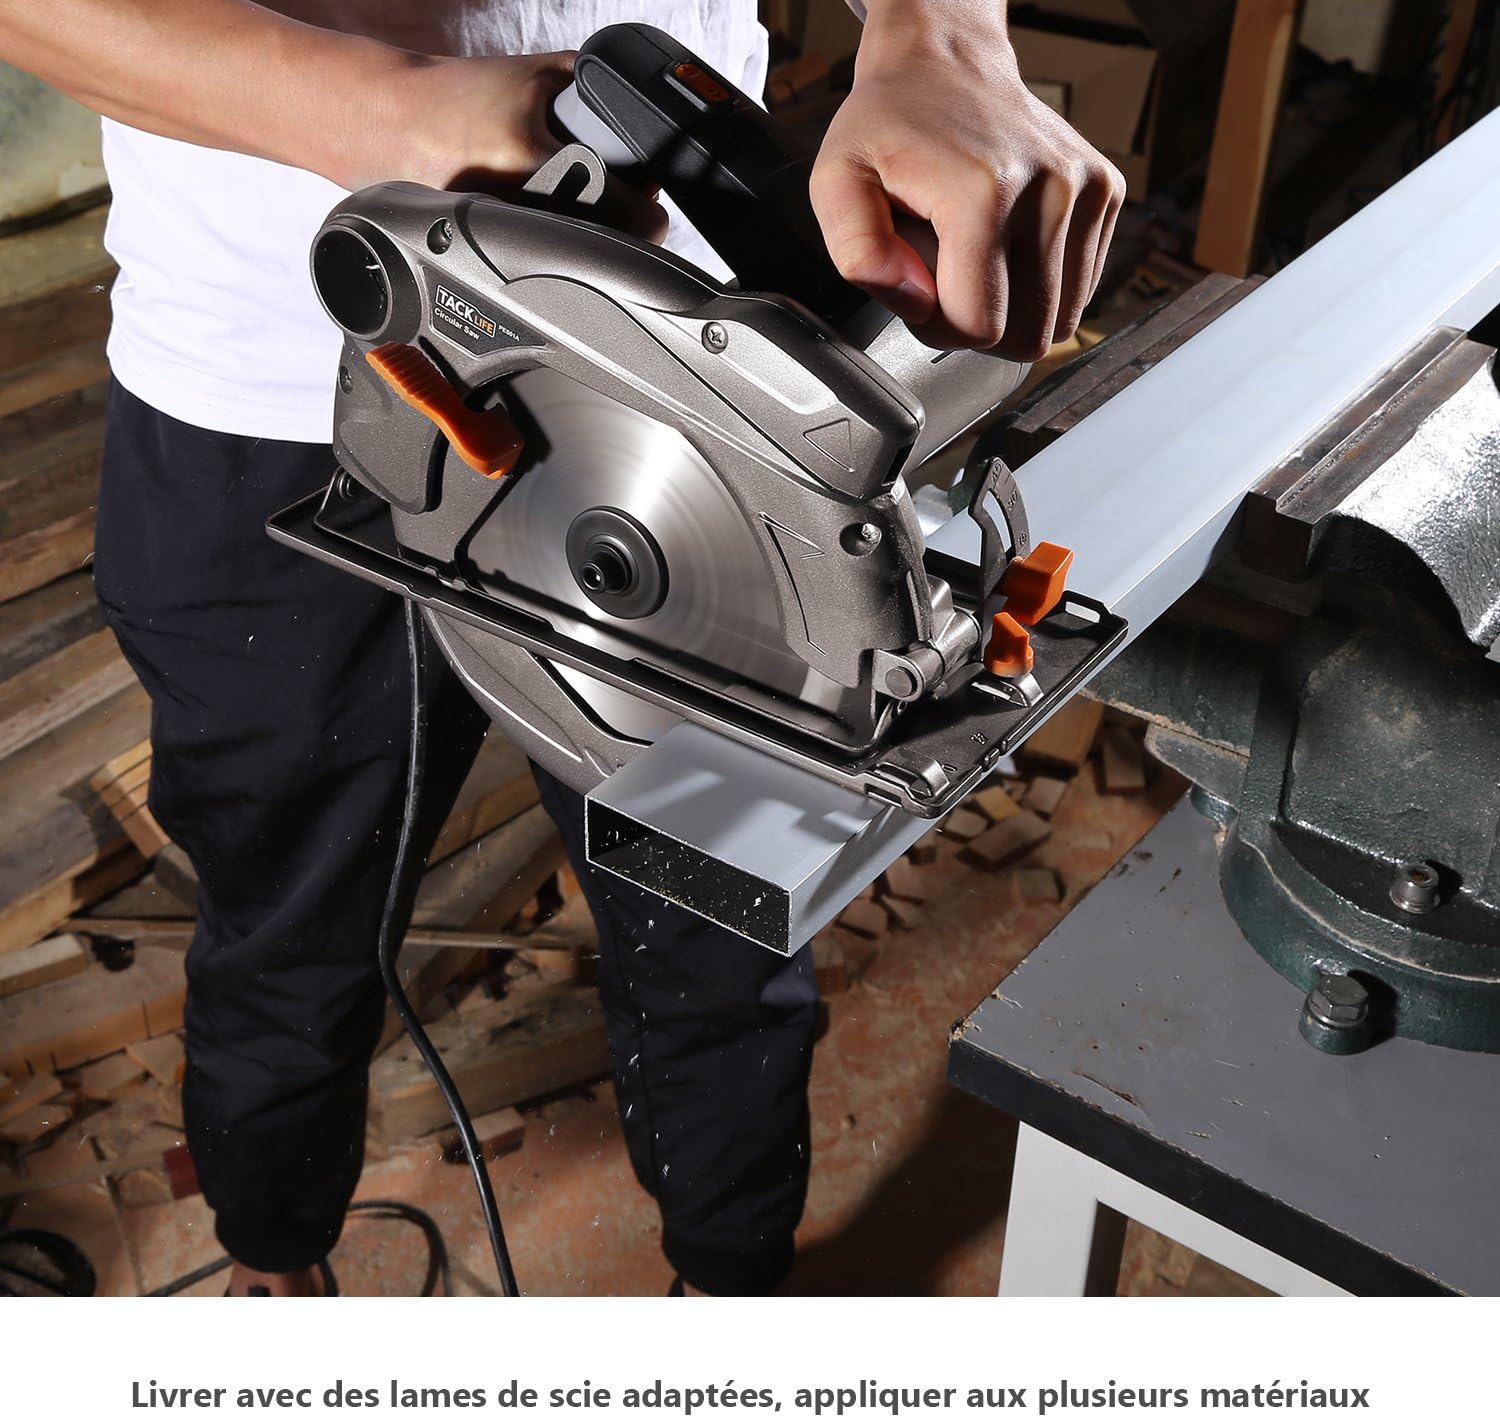
Figure 5.5: Cutting a metal profile with the circular saw (ensure appropriate blade is used).
- Ipplaggja s-serrieq f'sokit tal-enerġija adattat.
- Hold the saw firmly with both hands, ensuring a stable grip on the main and auxiliary handles.
- To start the saw, press the double safety switch (requires pressing both buttons simultaneously for safety).
- Ħalli x-xafra tilħaq il-veloċità sħiħa qabel tibda l-qatgħa.
- Guide the saw smoothly and steadily along your marked line. Do not force the saw; let the blade do the work.
- Maintain a consistent feed rate.
- Ladarba l-qtugħ ikun lest, itlaq il-grillu u ħalli x-xafra tieqaf kompletament qabel ma tneħħi s-serrieq mill-biċċa tax-xogħol.
- Unplug the saw after use.
6. Manutenzjoni
Manutenzjoni regolari tiżgura l-lonġevità u t-tħaddim sikur tas-serrieq ċirkolari tiegħek.
6.1. Tindif
- Dejjem aqla’ s-serrieq qabel ma tnaddaf.
- Use a soft brush or compressed air to remove dust and debris from the motor vents and blade guard.
- Wipe down the exterior of the saw with a damp drapp. Tużax kimiċi ħarxa jew tindif li joborxu.
- Keep the base plate clean to ensure smooth gliding over the workpiece.
6.2. Kura tax-Xafra
- Inspect blades regularly for dullness, cracks, or missing teeth. Replace damaged blades immediately.
- Clean resin and pitch buildup from blades using a suitable blade cleaner.
- Aħżen ix-xfafar kif suppost biex tevita l-ħsara u l-korrużjoni.
6.3. Ħażna
- Aħżen is-serrieq f'post niexef u sigur fejn ma jintlaħaqx mit-tfal.
- Ipproteġi l-korda tal-enerġija minn ħsara waqt il-ħażna.
7 Issolvi l-problemi
Din it-taqsima tindirizza kwistjonijiet komuni li tista' tiltaqa' magħhom bis-serrieq ċirkolari tiegħek.
| Problema | Kawża Possibbli | Soluzzjoni |
|---|---|---|
| Saw ma jibda. | No power supply; Safety switch not engaged; Faulty power cord. | Check power outlet and circuit breaker; Ensure both safety switch buttons are pressed; Inspect power cord for damage. |
| Ix-xafra mhux taqta’ bla xkiel jew taħraq l-injam. | Dull or dirty blade; Incorrect blade for material; Overfeeding the saw. | Replace or clean blade; Use appropriate blade for the material; Reduce feed rate. |
| Vibrazzjoni eċċessiva. | Loose blade; Damaged blade; Worn bearings. | Tighten blade bolt; Replace blade; Contact customer support if bearings are suspected. |
| Laser guide not working. | Laser switch off; Laser lens dirty; Laser module faulty. | Turn on laser switch; Clean laser lens; Contact customer support. |
| Dust collection is poor. | Dust port clogged; Vacuum not powerful enough; Hose not properly connected. | Clear dust port; Use a more powerful vacuum; Ensure hose is securely attached. |
8. Speċifikazzjonijiet Tekniċi
| Karatteristika | Speċifikazzjoni |
|---|---|
| Mudell | PES01A |
| Input tal-Enerġija | 1500 W |
| Voltage | 230 Volts |
| Veloċità Bla Tagħbija | 4700 RPM |
| Dijametru tax-xafra | 185 mm (7-1/4 pulzieri) |
| Fond Massimu tat-Tqattigħ (90°) | 65 mm (2.5 pulzieri) |
| Fond Massimu tat-Tqattigħ (45°) | 45 mm (1.8 pulzieri) |
| Kapaċità taċ-ċanfrin | 0° - 45° |
| Piż | 4.9 kg (10.8 lbs) |
| Gwida tal-Laser | Iva |
| Dijametru tal-Port tat-Trab | 35 mm |
9. Garanzija u Appoġġ
Tacklife products are manufactured to high-quality standards and are warranted against defects in materials and workmanship. Please refer to the included warranty card for specific terms and conditions, including the warranty period and registration process.
Figura 9.1: Eżample of included warranty card.
Appoġġ għall-Klijent:
For technical assistance, troubleshooting, or warranty claims, please contact Tacklife customer support. Contact information can typically be found on the warranty card or the official Tacklife websit.
- Websit: www.tacklife.com (Jekk jogħġbok iċċekkja l-uffiċjal webis-sit għall-aktar informazzjoni ta' kuntatt aġġornata.)
- Email: Refer to your warranty card or product packaging.
When contacting support, please have your product model (PES01A) and purchase date ready.
Ask a question about this manual
Ask about setup, troubleshooting, compatibility, parts, safety, or missing instructions. Manuals+ will review the question and use this page’s manual context to help answer it.