1. Introduzzjoni
This manual provides detailed instructions for the installation, operation, and maintenance of your VIKO Push-Rotary Dimmer Switch Rocker. Please read this manual thoroughly before installation and use to ensure safe and efficient operation. This device is designed for controlling lighting circuits with a 1-way configuration.
2. Informazzjoni dwar is-Sigurtà
- Periklu Elettriku: Installation must be performed by a qualified electrician or in accordance with local electrical codes. Turn off power at the circuit breaker before installation or servicing.
- Tinstallax b'idejn imxarrbin jew meta tkun wieqaf fuq uċuħ imxarrbin.
- Ensure the dimmer switch is compatible with your lighting fixtures and bulbs.
- Teċċedix il-klassifikazzjoni massima tal-kurrent ta' 1 Ampere.
- Dan il-prodott huwa għal użu fuq ġewwa biss.
3. Kontenut tal-Pakkett
- VIKO Push-Rotary Dimmer Switch Rocker (1 unit)
- Mounting Screws (quantity may vary)
- Manwal ta 'Istruzzjoni (dan id-dokument)
4. Setup u Installazzjoni
Follow these steps to install your dimmer switch. Always ensure power is OFF at the circuit breaker before beginning any electrical work.
- Itfi l-Enerġija: Sib is-circuit breaker li jikkontrolla l-apparat tad-dawl u itfi l-enerġija. Ivverifika li l-enerġija hija mitfija billi tuża voltagtester.
- Neħħi s-Swiċċ il-Qadim: Carefully remove the existing wall plate and switch from the wall box. Disconnect the wires from the old switch, noting their connections.
- Qabbad id-Dimmer bil-wajer: Connect the wires from the wall box to the VIKO dimmer switch terminals. This dimmer uses a Blade terminal type and is designed for 1-way circuits. Ensure secure connections.
- Immonta d-Dimmer: Gently push the wired dimmer switch into the wall box. Secure it with the provided mounting screws.
- Waħħal il-Pjanċa tal-Ħajt: Install the decorative wall plate over the dimmer switch.
- Irrestawra l-Enerġija: Ixgħel il-qawwa lura fis-circuit breaker.
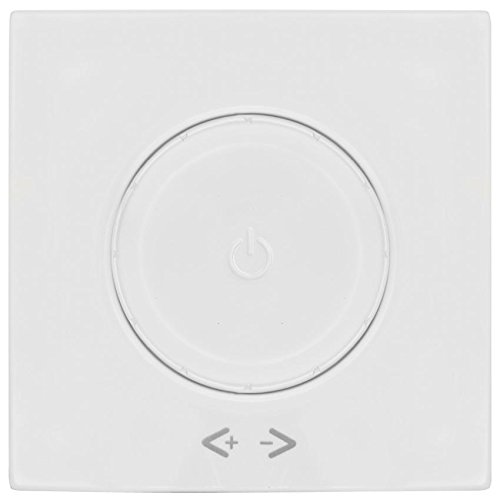
Image of the VIKO Push-Rotary Dimmer Switch Rocker, showing its front face and rotary knob. This image illustrates the general appearance of the device for installation reference.
5. Istruzzjonijiet Operattivi
The VIKO Push-Rotary Dimmer Switch Rocker features a simple and intuitive operation:
- Ixgħel/itfi: Press the rotary knob firmly to toggle the connected lights ON or OFF. The operation mode is ON-OFF.
- Dimming: Once the lights are ON, rotate the knob clockwise to increase brightness and counter-clockwise to decrease brightness. The actuator type is Rotary.
6. Manutenzjoni
- Tindif: To clean the dimmer switch, wipe it with a soft, damp cloth. Do not use abrasive cleaners or solvents, as these can damage the plastic material.
- Spezzjoni: Periodically inspect the dimmer switch for any signs of damage or loose connections. If any issues are found, turn off power at the circuit breaker and consult a qualified electrician.
7 Issolvi l-problemi
- Id-dwal ma jinxtegħlux:
- Iċċekkja jekk is-circuit breaker hux mixgħul.
- Kun żgur li l-konnessjonijiet tal-wajers kollha huma siguri.
- Verify that the light bulb is functional and properly installed.
- Dimming function does not work:
- Confirm that the light bulbs are dimmable. Not all LED or CFL bulbs are compatible with dimmers.
- Ensure the dimmer is correctly wired for dimming functionality.
- Dimmer is hot to the touch:
- A slight warmth is normal. If it's excessively hot, turn off power immediately and check for overloaded circuits or incorrect wiring. Do not exceed the 1 Ampere current rating.
8. Speċifikazzjonijiet
| Brand | Viko |
| Manifattur | VIKO |
| Mudell (ASIN) | B013Y3LL84 |
| Mod ta' Operazzjoni | ON-OFF |
| Klassifikazzjoni kurrenti | 1 Ampere |
| Tip ta' Kuntatt | Normalment Miftuħ |
| Tip ta' Swiċċ | Rocker Switch |
| Tip ta' Terminal | Xafra |
| Materjal | Plastik |
| Tip ta 'Ċirkwit | 1-mod |
| Tip ta 'Immuntar | Mount Wall |
| Tip ta' Attwatur | Jdur |
| Dimensjonijiet (Approx.) | 50 x 50 mm (based on product description) |
9. Garanzija u Appoġġ
Specific warranty details are not provided in the product information. For warranty claims or technical support, please contact your retailer or the manufacturer, VIKO, directly. Keep your proof of purchase for any warranty-related inquiries.