1. Introduzzjoni
This manual provides essential information for the safe and effective use of your ALM FL242 Metal Blade. This blade is designed as a replacement part for specific Flymo lawnmower models, ensuring an ideal cutting edge and long-lasting performance. Please read these instructions carefully before installation and operation.
The ALM FL242 Metal Blade is suitable for the following Flymo lawnmower models:
- Hovervac 35
- Turbo Compact 350
- Turbo Compact Vision 350
- Turbolite 350
- Vision Compact 350
- 350 Plus
2. Informazzjoni dwar is-Sigurtà
Always prioritize safety when handling and installing the lawnmower blade. Failure to follow safety instructions can result in serious injury.
- Skonnettja l-Enerġija: Always ensure the lawnmower is unplugged from the power source or the battery is removed before attempting any installation or maintenance.
- Ilbes Tagħmir Protettiv: Wear heavy-duty gloves and eye protection when handling the blade to prevent cuts and injuries.
- Truf li jaqtgħu: The blade has sharp edges. Handle with extreme care.
- Installazzjoni Sikura: Ensure the blade is securely fastened according to your lawnmower's specific instructions to prevent it from detaching during operation.
- Spezzjona regolarment: Before each use, inspect the blade for damage, cracks, or excessive wear. Replace immediately if any damage is found.
3. Kontenut tal-Pakkett
Ivverifika li l-komponenti kollha huma preżenti u mhux imħassra malli tiftaħ il-pakkett.
- 1 x ALM FL242 Metal Blade (35cm)
4. Setup / Installation
Follow these general steps for replacing your lawnmower blade. Always refer to your specific lawnmower's instruction manual for detailed, model-specific blade replacement procedures.
- Ipprepara l-magna tal-ħsad tal-ħaxix: Disconnect the lawnmower from its power source (unplug electric models, remove spark plug wire for petrol models).
- Position the Lawnmower: Carefully tilt the lawnmower onto its side, ensuring the carburetor (for petrol models) is facing upwards to prevent fuel leakage.
- Waħħal ix-Xafra: Use a block of wood or a specialized blade-holding tool to prevent the old blade from turning while you loosen the retaining nut/bolt.
- Neħħi x-Xafra l-Qadima: Using an appropriate wrench, loosen and remove the blade retaining nut/bolt. Carefully remove the old blade and any washers or spacers. Note their orientation.
- Installa Xafra Ġdida: Position the new ALM FL242 blade onto the blade boss, ensuring it is correctly aligned with any locating pins or grooves. The cutting edge should face the direction of rotation. Reinstall any washers or spacers in their original orientation.
- Issikka sew: Reinstall the retaining nut/bolt and tighten it firmly with the wrench. Ensure it is torqued to the manufacturer's specifications if available in your lawnmower manual.
- Kontroll Finali: Rotate the blade by hand to ensure it spins freely and is balanced. Reconnect the power source.
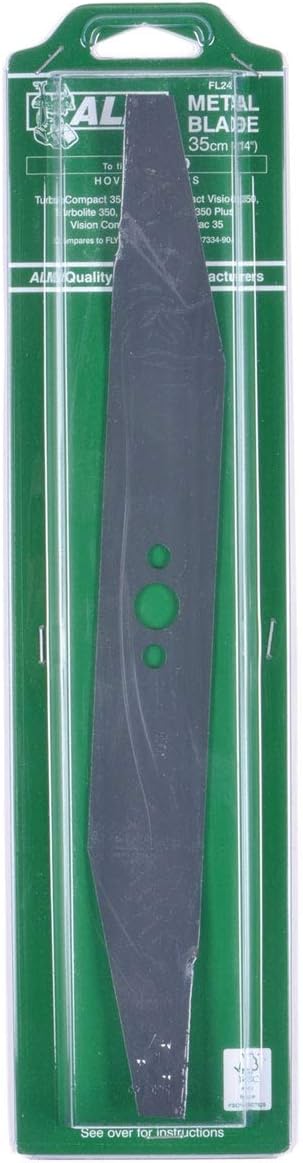
Image showing the ALM FL242 Metal Blade, 35cm (14 inch), in its clear plastic retail packaging. The blade is dark grey with three green circular holes for mounting.
5. Istruzzjonijiet Operattivi
Once the ALM FL242 Metal Blade is correctly installed, operate your lawnmower according to its original manufacturer's instructions. The new blade will provide an efficient and clean cut. Always ensure the cutting area is clear of debris before starting the lawnmower.
6. Manutenzjoni
Proper maintenance of your ALM FL242 Metal Blade will extend its lifespan and ensure optimal cutting performance.
- Tindif: After each use, disconnect the lawnmower from power and carefully clean any grass clippings and debris from the blade and the underside of the mower deck. This prevents buildup that can affect performance and balance.
- Spezzjoni: Regularly inspect the blade for signs of wear, nicks, bends, or cracks. Even minor damage can lead to an unbalanced blade, causing excessive vibration and poor cutting quality.
- Sostituzzjoni: Replace the blade if it becomes dull, bent, cracked, or excessively worn. A dull blade tears grass rather than cutting it cleanly, which can harm your lawn.
- Ħażna: When storing the lawnmower for extended periods, ensure the blade is clean and dry to prevent rust.
7 Issolvi l-problemi
If you encounter issues after installing the new blade, consider the following common troubleshooting steps:
- Qatgħa irregolari: Ensure the blade is installed correctly and securely. Check for any debris caught under the blade or deck. If the blade is bent or damaged, it will need replacement.
- Vibrazzjoni Eċċessiva: This often indicates an unbalanced blade. Check if the blade is securely tightened. If the blade has hit a hard object, it might be bent or damaged, requiring replacement.
- Lawnmower Not Starting (after blade change): Double-check that all power connections are re-established (e.g., spark plug wire reconnected, battery inserted, power cord plugged in).
8. Speċifikazzjonijiet
| Manifattur | ALM |
| Numru tal-Parti | FL242 |
| Numru tal-Mudell tal-Oġġett | FL242 |
| Piż tal-oġġett | 9.9 uqija |
| Dimensjonijiet tal-Prodott | 3.94 x 4.72 x 15.75 pulzieri |
| Daqs | 35ċm |
| Materjal | Metall |
| Sors tal-Enerġija | AC/DC (Lawnmower compatibility) |
| Komponenti Inklużi | ALM FL242 Metal Blade for Select Lawnmowers |
9. Garanzija u Appoġġ
This ALM product is manufactured to high-quality standards. For information regarding warranty coverage or technical support, please refer to the packaging or contact your retailer. Keep your proof of purchase for any warranty claims.