1. Pengenalan
This manual provides detailed instructions for the safe and efficient operation of your Generic HiFi Tube Preamplifier. Please read this manual thoroughly before use and retain it for future reference. This device is designed to enhance your home stereo sound system by providing a warm, clear, and dynamic audio experience through its vacuum tube technology.
2. Maklumat Keselamatan
- Bekalan Kuasa: Gunakan hanya penyesuai kuasa yang disediakan. Pastikan volumtage sepadan dengan bekalan kuasa tempatan anda.
- Pengudaraan: Letakkan praamplifier in a well-ventilated area. Do not cover ventilation openings.
- Kelembapan: Jauhkan peranti daripada air, kelembapan dan kelembapan yang tinggi.
- haba: Elakkan meletakkan unit berhampiran sumber haba atau di bawah cahaya matahari langsung.
- Tiub Vakum: Vacuum tubes can become hot during operation. Avoid touching them directly. Allow the unit to cool before handling tubes.
- Servis: Jangan cuba menservis unit ini sendiri. Rujuk semua servis kepada kakitangan yang berkelayakan.
3. Kandungan Pakej
Sila pastikan semua item ada dalam pakej:
- 1 x HiFi Vacuum Tube Preamplebih hidup
- 1 x Manual Pengguna (dokumen ini)
- 1 x Penyesuai Kuasa (Palam AS)
- 2 x JAN5654 Vacuum Tubes
4. Produk Lebihview
The Generic HiFi Tube Preamplifier is designed to deliver a pleasant, transparent, and mellow sound quality with a wide soundstage. It features adjustable treble, midrange, and bass controls for precise audio customization.
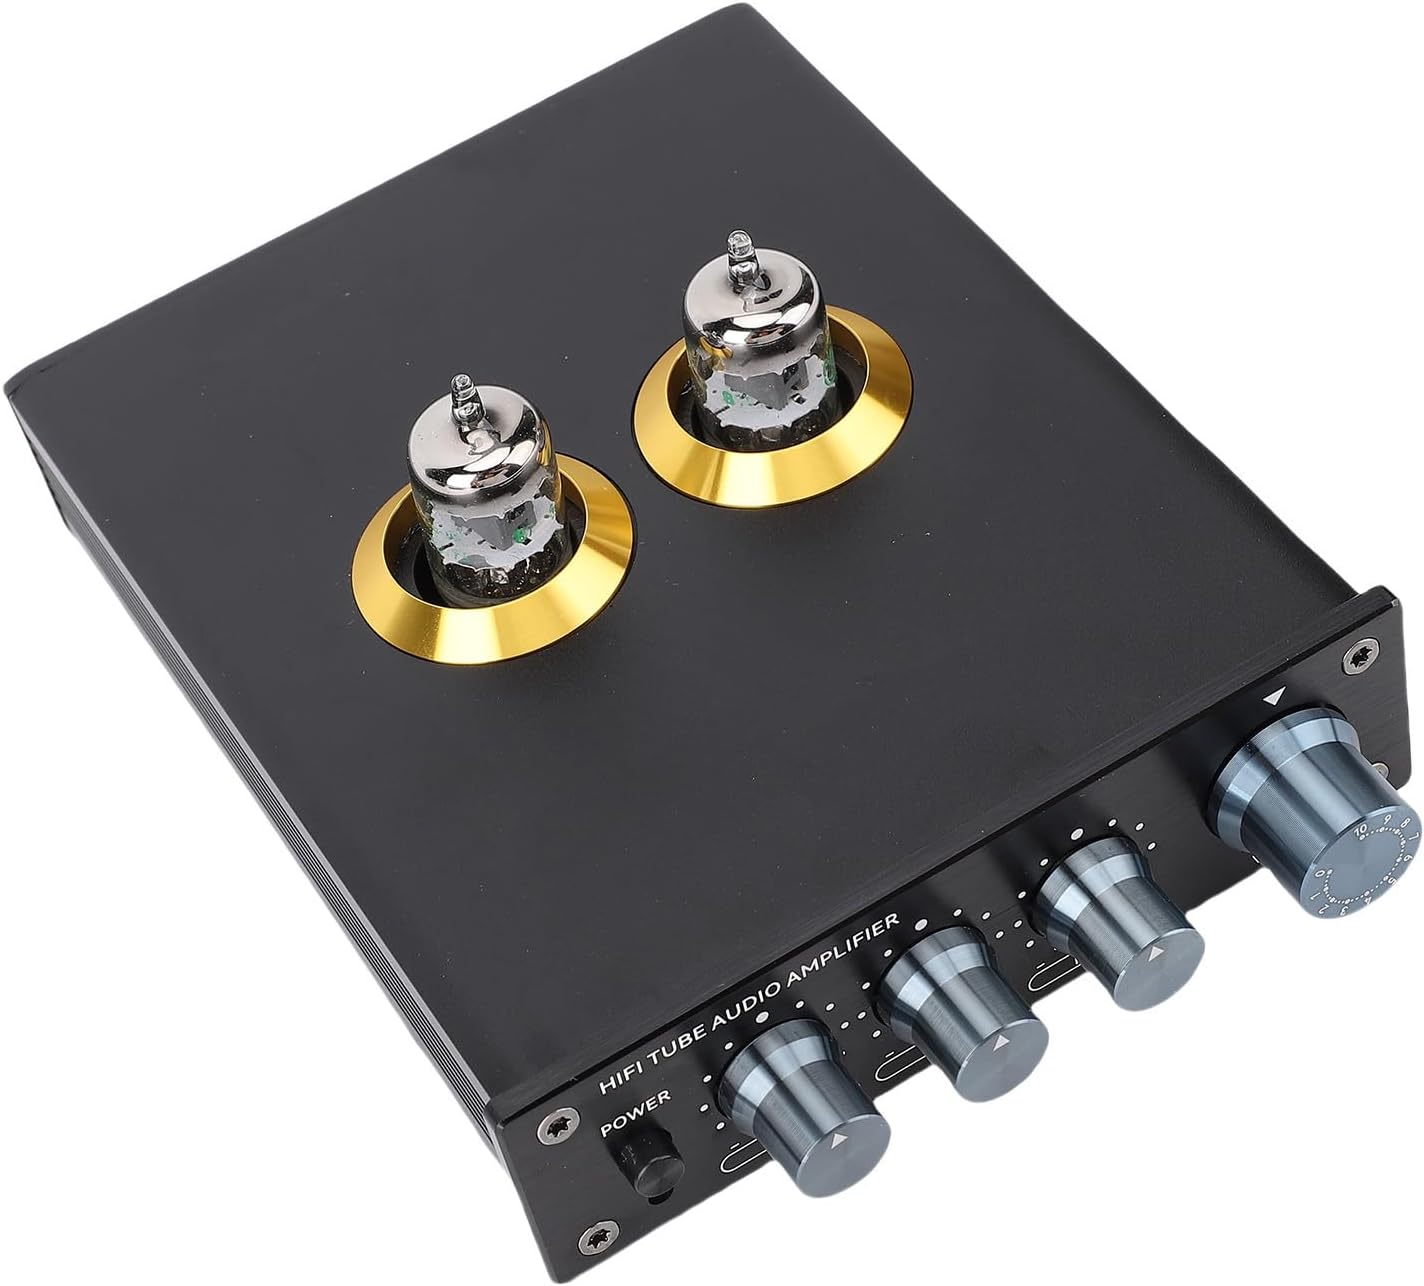
Rajah 4.1: Depan dan atas view of the HiFi Tube Preamppenguat, pertunjukancasing the two visible vacuum tubes and the front panel controls for power, low, mid, high, and volume.
Kawalan Panel Hadapan

Rajah 4.2: Terperinci view daripada praamplifier's front panel. From left to right: Power button, Low (bass) adjustment knob, Mid (midrange) adjustment knob, High (treble) adjustment knob, and a larger Volume control knob.
- Butang Kuasa: Menghidupkan dan mematikan unit.
- Tombol RENDAH: Adjusts the bass frequencies (±6dB).
- Tombol TENGAH: Adjusts the midrange frequencies (±6dB).
- Tombol TINGGI: Adjusts the treble frequencies (±6dB).
- Tombol VOLUME: Mengawal volum keluaran keseluruhan.
Sambungan Panel Belakang

Rajah 4.3: belakang view daripada praamplifier. It features stereo RCA input jacks (L/R), stereo RCA output jacks (L/R), and a DC ±15V power input port.
- INPUT (RCA L/R): Connect your audio source (e.g., CD player, DAC, streamer) to these jacks.
- OUTPUT (RCA L/R): Connect these jacks to your power amppembesar atau pembesar suara aktif.
- DC ±15V: Port input kuasa. Sambungkan penyesuai kuasa yang disediakan di sini.
5. Arahan Persediaan
- Pemasangan tiub: Carefully insert the two JAN5654 vacuum tubes into their respective sockets on the top of the preamplifier. Ensure they are seated firmly and correctly oriented.
- Sambungkan Sumber Audio: Using RCA cables, connect your audio source (e.g., CD player, media player) to the 'INPUT' RCA jacks on the rear panel of the preamplifier. Ensure left and right channels are correctly matched.
- Sambung ke Amppenguat/Pembesar suara: Using RCA cables, connect the 'OUTPUT' RCA jacks on the rear panel of the preamppenguat kepada input kuasa anda amplifier or active speakers. Ensure left and right channels are correctly matched.
- Sambungkan Kuasa: Connect the provided power adapter to the 'DC ±15V' input on the rear panel of the preamplifier, then plug the adapter into a suitable wall outlet.
- Kuasa Awal Hidup: Ensure all connections are secure. Press the 'POWER' button on the front panel to turn on the preamplifier. The tubes will glow as they warm up.
6. Arahan Operasi
- Hidupkan/Mati Kuasa: Press the 'POWER' button on the front panel to turn the unit on or off. Allow a few moments for the tubes to warm up after powering on.
- Pelarasan Kelantangan: Use the large 'VOLUME' knob to adjust the overall output level. Start with a low volume and gradually increase it to a comfortable listening level.
- Kawalan Nada: Use the 'LOW', 'MID', and 'HIGH' knobs to adjust the bass, midrange, and treble frequencies according to your preference. These controls allow for fine-tuning of the sound to match your audio source and listening environment.
- Tube Rolling (Optional): The JAN5654 vacuum tubes can be replaced with compatible tubes such as 6J1, 6J4, 6J5, 6AK5, or 6*1N to explore different sound characteristics. Ensure the unit is powered off and cooled down before attempting to replace tubes. Handle tubes carefully by their base.
7. Penyelenggaraan
- Pembersihan: Disconnect the power before cleaning. Use a soft, dry cloth to wipe the exterior of the unit. Do not use liquid cleaners or abrasive materials.
- Penjagaan Tiub: Avoid touching the glass part of the tubes with bare hands, as oils can leave residue. If tubes become dirty, wipe gently with a clean, lint-free cloth.
- Storan: If storing the unit for an extended period, disconnect it from power and store it in a cool, dry place, away from direct sunlight and extreme temperatures.
8. Penyelesaian masalah
- Tiada Bunyi:
- Pastikan penyesuai kuasa disambungkan dengan kukuh dan unit dihidupkan.
- Check all RCA audio connections between the source, preamppenguat, dan amppembesar/ pembesar suara.
- Verify that the volume knob is not set to minimum.
- Confirm your audio source is playing and its output volume is adequate.
- Bunyi Herot:
- Reduce the volume level on both the preamplifier dan sumber audio anda.
- Check if the tubes are properly seated.
- Pastikan kabel tidak rosak atau tidak berfungsi.
- Bunyi Berdengung:
- Pastikan semua kabel dilindungi dan disambungkan dengan betul.
- Try moving the preamplifier away from other electronic devices that might cause interference.
- Check for ground loop issues; try plugging all audio components into the same power strip.
- Tiub Tidak Bercahaya:
- Pastikan unit dihidupkan.
- Check if tubes are correctly inserted.
- If only one tube is not glowing, it might be faulty and require replacement.
9. Spesifikasi
| Model | Generichn0e5pdrs4-11 |
| Jenama | Generik |
| Praamp Keuntungan | 5x |
| Bass Treble Range | ±6dB |
| Vol Operasitage | DC±15V |
| Sensitiviti Input | 0.2V |
| Respons Kekerapan | 20Hz-20kHz (±3dB) |
| herotan | 0.1% |
| Nisbah Isyarat kepada Bunyi | ≥98dB |
| bahan | Aloi Aluminium |
| Berat Barang | 1.5 paun |
| Dimensi Produk | 11.81 x 7.48 x 2.36 inci |
10. Waranti dan Sokongan
Sila rujuk kepada dokumentasi pembelian anda atau peruncit website for specific warranty details and terms. For technical support or assistance with your Generic HiFi Tube Preamplifier, please contact your point of purchase or the manufacturer directly.


