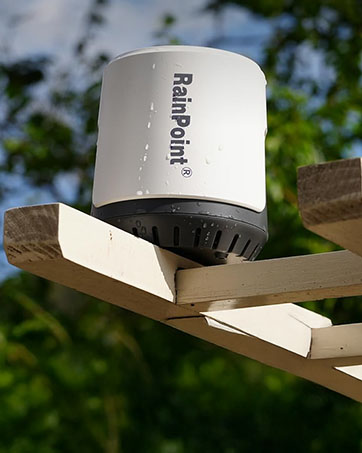
BALDR WG0102P-V1
RAINPOINT WG0102P-V1 Water Timer User Manual
Model: WG0102P-V1
pengenalan
Thank you for choosing the RAINPOINT Water Timer. This device is designed to automate your garden watering, providing precise control over irrigation schedules to help maintain a healthy garden while conserving water. Please read this manual thoroughly before installation and operation to ensure proper use and longevity of your product.
Maklumat Keselamatan
- Do not immerse the timer in water. It is water-resistant, not submersible.
- Use only with cold water.
- Do not use with appliances.
- Jangan campurkan bateri lama dan baru. Jangan campurkan bateri beralkali, standard (karbon-zink), atau boleh dicas semula (nikel-kadmium).
- Remove batteries when the timer is not in use for extended periods or during freezing temperatures.
- Jauhkan daripada kanak-kanak.
Kandungan Pakej
- RAINPOINT Water Timer (1)
- Manual Pengguna (1)
- PTFE Thread Seal Tape (1 roll)
Produk Selesaiview
The RAINPOINT Water Timer features a simple one-button control for setting watering schedules. It is designed for easy installation and reliable performance.

Imej: Depan view of the RAINPOINT Water Timer, showing the green control dial and grey body.
Komponen Utama:
- Penyambung Masuk: Connects to your outdoor faucet.
- Dial Kawalan: Used to set watering frequency and duration.
- Manual/OFF Button: For manual watering or turning the timer off.
- Petak Bateri: Houses 3 AAA batteries.
- Penyambung Outlet: Bersambung ke hos taman anda.
Persediaan
1. Pemasangan Bateri
- Rotate the green control dial counter-clockwise to detach the battery compartment from the main unit.
- Insert 3 new AAA alkaline batteries (not included) into the compartment, ensuring correct polarity (+/-).
- Reattach the battery compartment by aligning it and rotating clockwise until secure. Ensure the seal is tight to prevent water ingress.

Image: Close-up of the battery compartment, showing where to insert three AAA batteries.
2. Connecting the Timer
- Pastikan pili paip luar anda dimatikan.
- Apply the included PTFE thread seal tape to the threads of your faucet for a watertight seal.
- Screw the timer's inlet connector onto your outdoor faucet. Hand-tighten only. Do not overtighten.
- Screw your garden hose onto the timer's outlet connector. Hand-tighten only.
- Slowly turn on your outdoor faucet completely.

Image: The water timer installed on an outdoor faucet, with a garden hose connected and a sprinkler watering a lawn.
Operasi
Mod Penyiraman Automatik
The RAINPOINT Water Timer offers predefined watering plans. To set an automatic watering schedule:
- Rotate the green control dial to select your desired watering frequency and duration. The dial has sections for "12H" (every 12 hours), "24H" (every 24 hours), "48H" (every 48 hours), and "WEEK" (once a week).
- Within each frequency section, you can choose a specific watering duration (e.g., 3 min, 5 min, 10 min for 12H; 30 min, 60 min, 90 min for 24H/48H; 60 min, 90 min, 120 min for WEEK).
- Once a setting is selected, the timer will begin its cycle according to the chosen plan.

Image: Diagram illustrating the automatic watering mode options on the timer's dial, showing various frequency and duration settings.
Mod Penyiraman Manual
To water manually outside of the programmed schedule:
- Ensure the control dial is set to "OFF" or any automatic program.
- Press and hold the center button for approximately 3 seconds. The timer will activate and begin watering.
- To stop manual watering, press the center button again.

Image: A hand pressing the central button on the water timer to initiate manual watering.
Turning Off the Timer
To completely stop all watering functions, rotate the control dial to the "OFF" position.
Penyelenggaraan
Membersihkan Penapis
The timer includes a built-in filter to prevent debris from entering the unit. Periodically check and clean the filter to ensure optimal water flow and prevent blockages.
- Matikan bekalan air pada paip.
- Tanggalkan pemasa dari paip.
- Remove the filter screen from the inlet.
- Rinse the filter screen under running water to remove any accumulated debris.
- Reinsert the clean filter screen and reattach the timer to the faucet.
Imej: A terperinci view of the water timer's inlet, showing the mesh filter screen.
Musim sejuk
Before the first frost, remove the water timer from the faucet. Remove the batteries and store the timer indoors in a dry, frost-free location. Failure to do so may result in damage to the unit due to freezing water.
Menyelesaikan masalah
| Masalah | Kemungkinan Punca | Penyelesaian |
|---|---|---|
| Timer does not turn on/off. | Bateri mati atau tidak dipasang dengan betul. | Gantikan bateri dengan bateri alkali AAA baharu, memastikan kekutuban yang betul. |
| Air tidak mengalir. | Faucet is off; clogged filter; low water pressure. | Ensure faucet is fully open. Clean the filter screen. Check water pressure. |
| Timer leaks from connections. | Loose connections; missing or damaged washer; insufficient thread tape. | Tighten connections (hand-tighten only). Ensure washers are properly seated. Apply PTFE thread seal tape. |
| Automatic program not working. | Dial set to "OFF" or "MANUAL"; incorrect program selection. | Ensure the dial is set to a desired automatic watering program. Verify battery level. |
Spesifikasi
- model: WG0102P-V1
- Kekerapan Penyiraman: 12 Hours / 24 Hours / 48 Hours / Weekly
- Tempoh Penyiraman: 3-120 minutes (depending on frequency setting)
- Tekanan Kerja Maks: 8 Bar (120 PSI)
- Suhu Kerja: 3℃-50℃ (38℉-120℉)
- Penilaian Kalis Air: IP54
- Kadar Aliran Maksimum: 35 L / Min
- Sumber Kuasa: 3 x Bateri Beralkali AAA (tidak termasuk)
- Dimensi: 2.5 x 2 x 1 inci (anggaran)
- Berat: 7.8 auns (anggaran)
Waranti dan Sokongan
RAINPOINT products are designed for reliability and performance. For warranty information, technical support, or customer service inquiries, please refer to the contact information provided with your purchase or visit the official RAINPOINT webtapak.
Webtapak: www.rainpointonline.com (Cthamppautan le, pautan sebenar mungkin berbeza-beza)
Ask a question about this manual
Ask about setup, troubleshooting, compatibility, parts, safety, or missing instructions. Manuals+ will review the question and use this page’s manual context to help answer it.