
1. परिचय
The Yaxun YX-9205 Digital Multimeter is a versatile and reliable instrument designed for measuring various electrical parameters. It is suitable for professional electricians, hobbyists, and students for testing and troubleshooting electronic circuits and devices. This manual provides essential information for safe and effective operation of your multimeter.
2. सुरक्षितता माहिती
Always observe safety precautions when using any electrical testing equipment. Failure to do so may result in injury or damage to the multimeter or the equipment under test.
- Ensure the multimeter is in good working condition before use.
- व्हॉल्यूम लागू करू नकाtage or current that exceeds the maximum specified limits for each range.
- फंक्शन्स किंवा रेंज बदलण्यापूर्वी नेहमी सर्किटमधून टेस्ट लीड्स डिस्कनेक्ट करा.
- व्हॉल्यूमसह काम करताना सावधगिरी बाळगाtag३० व्ही एसी आरएमएस, ४२ व्ही पीक किंवा ६० व्ही डीसी पेक्षा जास्त, कारण यामुळे शॉकचा धोका निर्माण होतो.
- अचूक वाचन सुनिश्चित करण्यासाठी कमी बॅटरी इंडिकेटर दिसल्यावर बॅटरी बदला.
- Do not operate the multimeter in explosive atmospheres or in the presence of flammable gases or dust.
- Keep fingers behind the probe barriers during measurements.
3. उत्पादनाची वैशिष्ट्ये
The Yaxun YX-9205 Digital Multimeter offers a range of functions and features for comprehensive electrical testing:
- Multi-scale measurements for various electrical parameters.
- Measures DC Voltage, AC Voltage, DC Current, AC Current, Resistance, Capacitance, Diode, and Continuity.
- Transistor hFE gain test function.
- Large LCD display with 4 digits, maximum reading 1999.
- Data Hold function to freeze displayed values.
- Auto Power Off function to conserve battery life.
- Audible continuity signal.
- कमी बॅटरी सूचक.
- Integrated kickstand for convenient viewing
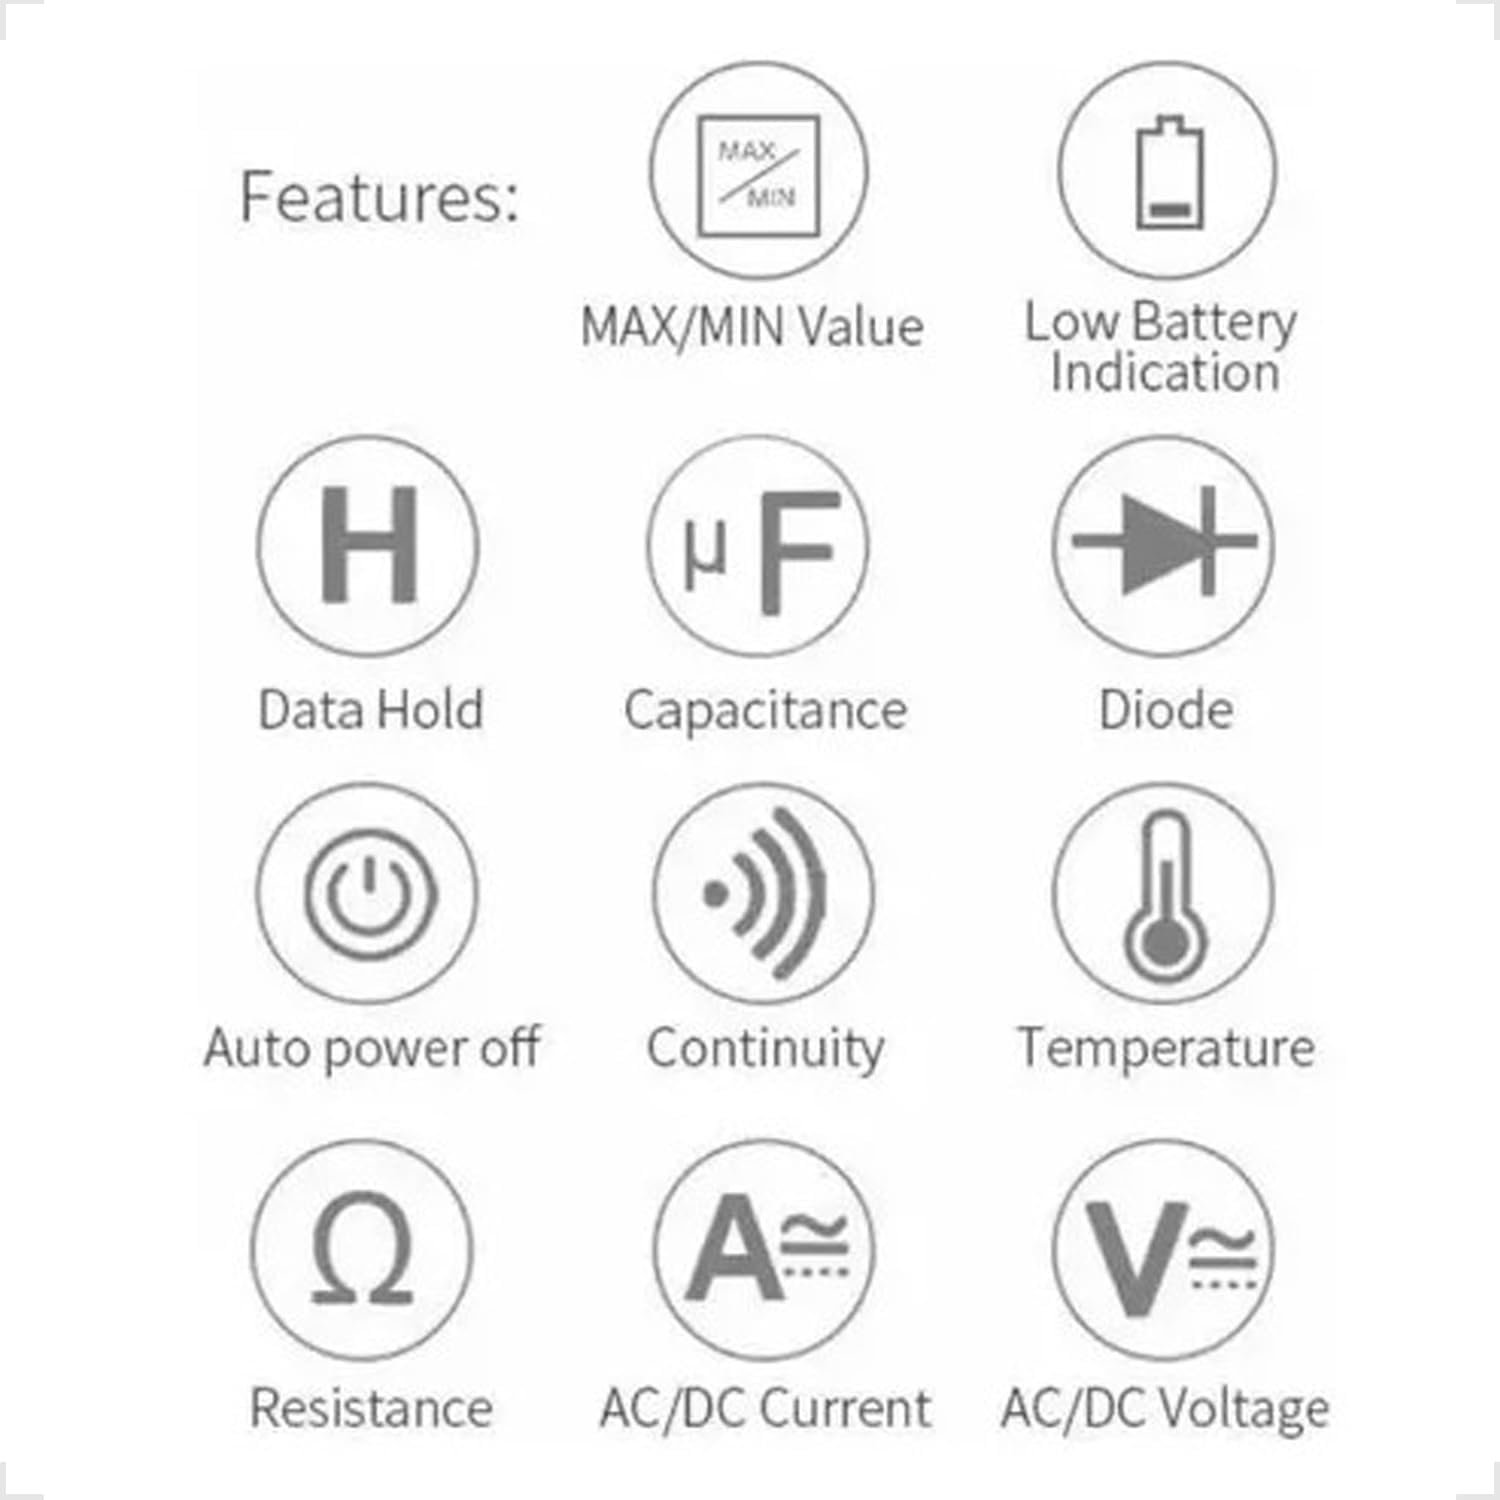
Figure 3.1: Feature Icons. This image displays a set of icons illustrating the key functions and capabilities of the Yaxun YX-9205 Digital Multimeter, such as data hold, capacitance measurement, diode testing, and auto power off.
4. पॅकेज सामग्री
तुमच्या पॅकेजमध्ये सर्व वस्तू आहेत का ते तपासा:
- Yaxun YX-9205 Digital Multimeter
- चाचणी लीड्स (लाल आणि काळा)
- 9V Battery (6F22 type)
- Temperature Probe (K-type thermocouple, if included)
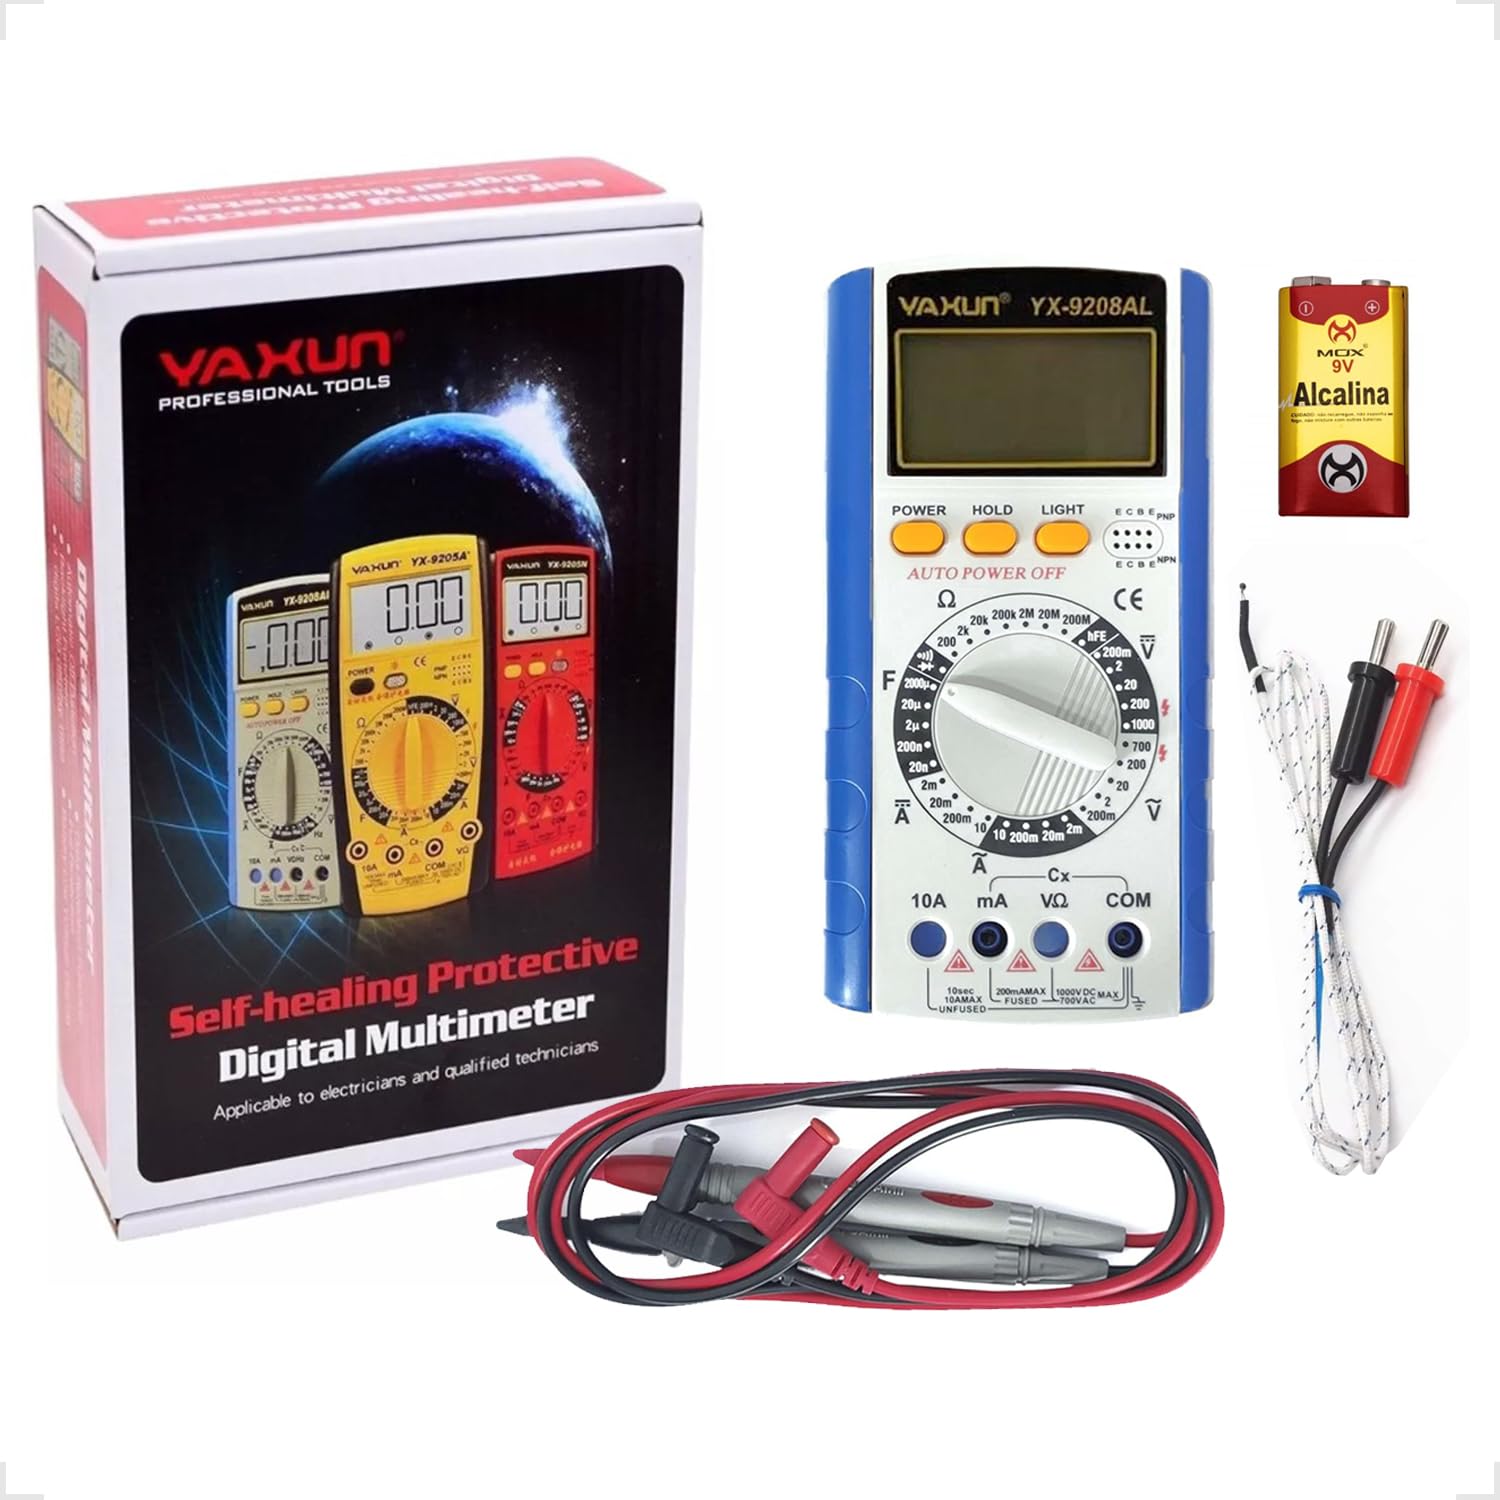
Figure 4.1: Package Contents. This image shows the Yaxun YX-9205 Digital Multimeter, along with its included red and black test leads and a 9V battery.
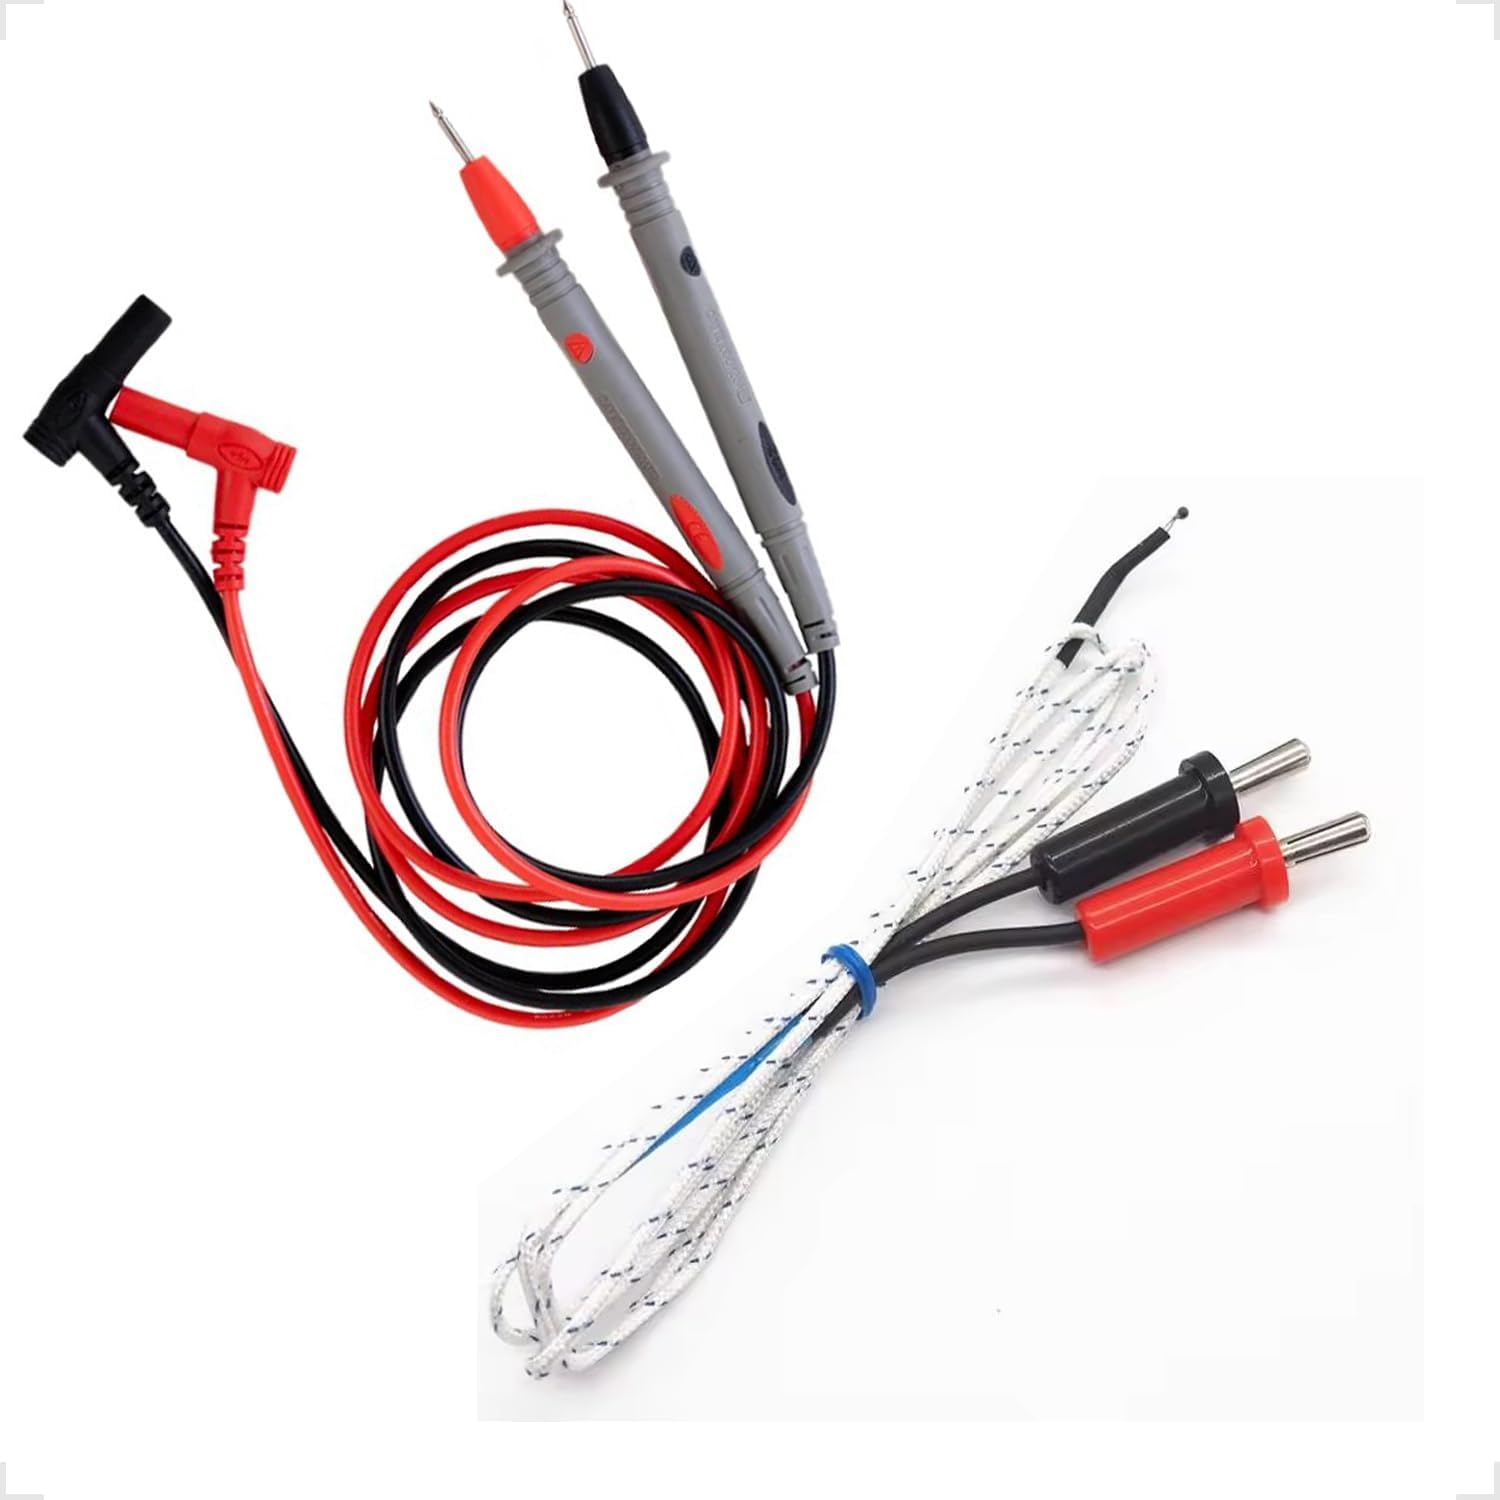
Figure 4.2: Test Leads and Temperature Probe. This image details the included red and black test leads, essential for making electrical measurements, and a white temperature probe.
5. सेटअप
5.1 बॅटरी इंस्टॉलेशन
The multimeter requires a 9V battery for operation. Follow these steps to install or replace the battery:
- मल्टीमीटर बंद आहे आणि चाचणी लीड्स डिस्कनेक्ट झाले आहेत याची खात्री करा.
- मल्टीमीटरच्या मागील बाजूस बॅटरी कंपार्टमेंट कव्हर शोधा.
- Use a screwdriver to remove the screw securing the cover, then lift the cover off.
- Connect the 9V battery to the battery clip, observing correct polarity.
- बॅटरी डब्यात ठेवा आणि कव्हर बदला, स्क्रूने ते सुरक्षित करा.

Figure 5.1: Battery Compartment. This image shows the rear of the multimeter, highlighting the battery compartment cover, which needs to be opened for battery installation or replacement.
४.२ चाचणी लीड्स कनेक्ट करणे
Proper connection of test leads is crucial for accurate and safe measurements:
- Insert the black test lead into the "COM" (Common) jack.
- बहुतेक व्हॉल्यूमसाठीtage, resistance, and continuity measurements, insert the red test lead into the "VΩmA" jack.
- For high current measurements (up to 10A), insert the red test lead into the "10A" jack. Ensure the rotary switch is set to the appropriate current range.
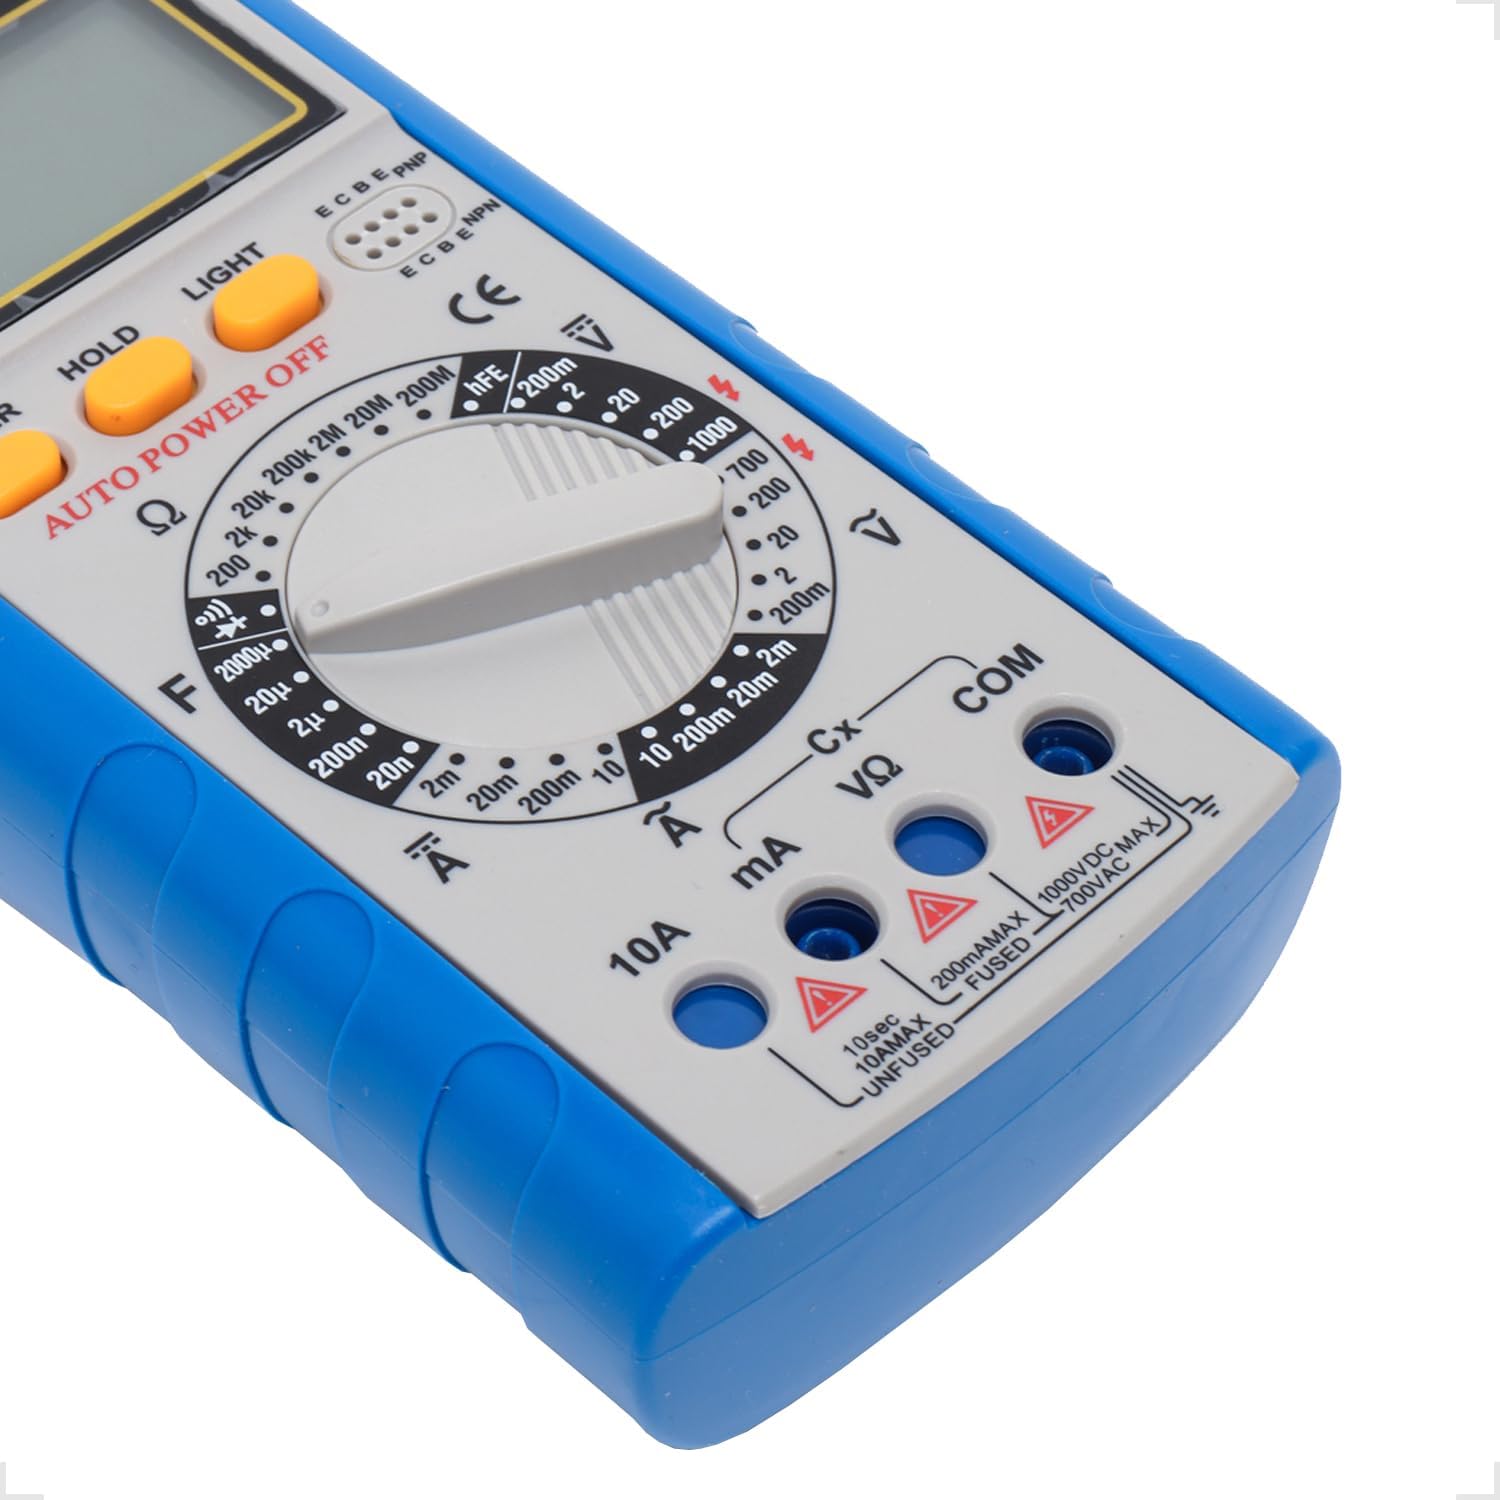
Figure 5.2: Input Jacks. This image provides a detailed view of the multimeter's input jacks: COM (common), VΩmA (for voltage, resistance, and low current), and 10A (for high current measurements).
5.3 किकस्टँड वापरणे
The multimeter features a built-in kickstand for hands-free operation and improved viewing angle. Simply pull out the kickstand from the back of the unit to deploy it.

Figure 5.3: Multimeter with Kickstand. This image shows the multimeter standing upright with its integrated kickstand extended, providing a stable and convenient viewing angle during use.
6. ऑपरेटिंग सूचना
6.1 सामान्य ऑपरेशन
The YX-9205 multimeter is operated primarily using the rotary switch and function buttons.
- रोटरी स्विच: Selects the desired measurement function (e.g., VDC, VAC, ADC, AAC, Ω, F, Diode, Continuity, hFE).
- पॉवर बटण: Turns the multimeter on or off.
- बटण दाबून ठेवा: डिस्प्लेवरील वर्तमान वाचन गोठवते. सोडण्यासाठी पुन्हा दाबा.
- लाइट बटण: Activates the display backlight for better visibility in low-light conditions.

Figure 6.1: Control Panel. This image provides a detailed view of the multimeter's main controls, including the central rotary switch for function selection and the Power, Hold, and Light buttons.
6.2 मापन डीसी व्हॉल्यूमtage (VDC)
- Insert the black lead into the COM jack and the red lead into the VΩmA jack.
- Turn the rotary switch to the desired DC Voltage श्रेणी (उदा., 200mV, 2V, 20V, 200V, 1000V). जर व्हॉल्यूमtage अज्ञात आहे, सर्वोच्च श्रेणीपासून सुरुवात करा आणि आवश्यकतेनुसार कमी करा.
- Connect the test probes across the component or circuit to be measured, observing polarity.
- खंड वाचाtagएलसीडी डिस्प्लेवरील e मूल्य.
6.3 मापन AC व्हॉल्यूमtage (VAC)
- Insert the black lead into the COM jack and the red lead into the VΩmA jack.
- रोटरी स्विचला इच्छित एसी व्हॉल्यूमवर वळवा.tage श्रेणी (उदा., 200mV, 2V, 20V, 200V, 700V). जर व्हॉल्यूमtage is unknown, start with the highest range.
- Connect the test probes across the component or circuit to be measured. Polarity is not critical for AC voltage.
- खंड वाचाtagएलसीडी डिस्प्लेवरील e मूल्य.
6.4 Measuring DC Current (ADC)
Caution: Always connect the multimeter in series with the circuit when measuring current. Never connect it in parallel across a voltage source, as this can damage the multimeter and the circuit.
- Determine the expected current. For currents up to 200mA, use the VΩmA jack for the red lead. For currents up to 10A, use the 10A jack for the red lead. The black lead always goes into COM.
- Turn the rotary switch to the appropriate DC Current range (e.g., 2mA, 20mA, 200mA, 10A).
- Open the circuit where current is to be measured and connect the test leads in series.
- LCD डिस्प्लेवरील वर्तमान मूल्य वाचा.
6.5 Measuring AC Current (AAC)
Caution: Always connect the multimeter in series with the circuit when measuring current. Never connect it in parallel across a voltage source, as this can damage the multimeter and the circuit.
- Determine the expected current. For currents up to 200mA, use the VΩmA jack for the red lead. For currents up to 10A, use the 10A jack for the red lead. The black lead always goes into COM.
- Turn the rotary switch to the appropriate AC Current range (e.g., 2mA, 20mA, 200mA, 10A).
- Open the circuit where current is to be measured and connect the test leads in series.
- LCD डिस्प्लेवरील वर्तमान मूल्य वाचा.
४.५ प्रतिकार मोजणे (Ω)
Caution: Ensure the circuit or component under test is completely de-energized before measuring resistance. Disconnect power and discharge any capacitors.
- Insert the black lead into the COM jack and the red lead into the VΩmA jack.
- Turn the rotary switch to the desired Resistance range (e.g., 200Ω, 2kΩ, 20kΩ, 200kΩ, 2MΩ, 20MΩ, 200MΩ).
- मोजण्यासाठी घटकावर चाचणी प्रोब जोडा.
- एलसीडी डिस्प्लेवरील रेझिस्टन्स व्हॅल्यू वाचा.
6.7 Measuring Capacitance (F)
Caution: Ensure capacitors are fully discharged before testing. High voltage capacitors can store dangerous charges.
- Insert the black lead into the COM jack and the red lead into the VΩmA jack.
- Turn the rotary switch to the Capacitance (F) function and select the appropriate range (e.g., 20nF, 200nF, 2µF, 20µF, 200µF).
- कॅपेसिटर टर्मिनल्सवर चाचणी प्रोब जोडा.
- एलसीडी डिस्प्लेवरील कॅपेसिटन्स मूल्य वाचा.
6.8 डायोड चाचणी
- Insert the black lead into the COM jack and the red lead into the VΩmA jack.
- Turn the rotary switch to the Diode symbol.
- लाल प्रोबला एनोडशी आणि काळा प्रोब डायोडच्या कॅथोडशी जोडा. डिस्प्ले फॉरवर्ड व्हॉल्यूम दर्शवेलtage drop (typically 0.5V to 0.8V for silicon diodes).
- Reverse the probes. The display should show 'OL' (Open Loop) for a good diode. A reading in both directions or 'OL' in both directions indicates a faulty diode.
6.9 सातत्य चाचणी
- Insert the black lead into the COM jack and the red lead into the VΩmA jack.
- Turn the rotary switch to the Continuity symbol (often shared with the Diode function).
- सर्किट किंवा घटकामध्ये चाचणी प्रोब जोडा.
- If the resistance is below approximately 50Ω, the buzzer will sound, indicating continuity. The display will also show the resistance value.
6.10 Transistor hFE Test
- रोटरी स्विच hFE स्थितीत वळवा.
- ट्रान्झिस्टर NPN आहे की PNP आहे ते ओळखा.
- Insert the transistor's emitter, base, and collector leads into the corresponding holes in the hFE socket on the multimeter.
- एलसीडी डिस्प्लेवरील एचएफई (डीसी करंट गेन) मूल्य वाचा.
7. तपशील
| पॅरामीटर | श्रेणी | अचूकता |
|---|---|---|
| डीसी व्हॉलtage | 200mV, 2V, 20V, 200V, 1000V | ±(०.१% + २ अंक) |
| एसी व्हॉलtage | 200mV, 2V, 20V, 200V, 700V | ±(२.८% + ८ अंक) |
| डीसी करंट | २ एमए, २० एमए, २०० एमए, १० ए | ±(०.१% + २ अंक) |
| एसी करंट | २ एमए, २० एमए, २०० एमए, १० ए | ±(२.८% + ८ अंक) |
| प्रतिकार | 200Ω, 2kΩ, 20kΩ, 200kΩ, 2MΩ, 20MΩ, 200MΩ | ±(०.१% + २ अंक) |
| क्षमता | 20nF, 200nF, 2µF, 20µF, 200µF | ±(२.८% + ८ अंक) |
| डिस्प्ले | 1999 counts, 60 x 31.5mm LCD | |
| वीज पुरवठा | 9V Battery (6F22) | |
| परिमाण (L x W x H) | 180 x 86 x 35 मिमी | |
8. देखभाल
8.1 स्वच्छता
मल्टीमीटर साफ करण्यासाठी, जाहिरातीने केस पुसून टाकाamp cloth and a mild detergent. Do not use abrasives or solvents. Ensure the multimeter is completely dry before use.
8.2 बॅटरी बदलणे
When the low battery indicator appears on the display, replace the 9V battery as described in the 'Battery Installation' section (5.1). A weak battery can lead to inaccurate readings.
8.3 फ्यूज बदलणे
Caution: Always disconnect test leads and turn off the multimeter before replacing the fuse. Use only fuses of the specified type and rating.
If the multimeter fails to measure current, the fuse may be blown. To replace the fuse:
- Turn off the multimeter and disconnect all test leads.
- विभाग ५.१ मध्ये वर्णन केल्याप्रमाणे बॅटरी कंपार्टमेंट कव्हर उघडा.
- Carefully remove the old fuse.
- Install a new fuse of the correct type and rating (e.g., F200mA/250V for mA ranges, F10A/250V for 10A range). Refer to the markings near the fuse holder if available.
- बॅटरी कंपार्टमेंट कव्हर बदला आणि स्क्रूने सुरक्षित करा.
9. समस्या निवारण
| समस्या | संभाव्य कारण | उपाय |
|---|---|---|
| डिस्प्ले नाही किंवा मंद डिस्प्ले नाही | बॅटरी बंद किंवा कमकुवत | 9 व्ही बॅटरी बदला. |
| चुकीचे वाचन | Incorrect range selected, poor lead connection, weak battery | Select the correct range, ensure leads are firmly connected, replace battery. |
| No current measurement | Blown fuse, incorrect lead connection | Check and replace fuse if necessary, ensure leads are in correct current jacks and connected in series. |
| 'OL' (Overload) displayed | Measurement exceeds selected range, open circuit | Select a higher range, check for open circuit. |
10. हमी आणि समर्थन
This Yaxun YX-9205 Digital Multimeter is designed for reliability and performance. For specific warranty information, please refer to the purchase documentation or contact your retailer. For technical support or inquiries, please reach out to the Yaxun customer service department or your local distributor.