
Craig CR45372
Craig CR45372 LED Alarm Clock with AM/FM Radio User Manual
मॉडेल: CR45372
1. महत्वाची सुरक्षितता माहिती
Please read these instructions carefully before operating the unit and retain them for future reference. Observe all warnings and instructions marked on the product.
- उर्जा स्त्रोत: Operate the unit only from the type of power source indicated on the marking label.
- वायुवीजन: कोणत्याही वायुवीजन छिद्रांना अडथळा आणू नका. योग्य वायुप्रवाहासाठी युनिटभोवती पुरेशी जागा सुनिश्चित करा.
- पाणी आणि ओलावा: Do not use this product near water (e.g., bathtub, sink, wet basement, swimming pool).
- स्वच्छता: Unplug this product from the wall outlet before cleaning. Use a dry cloth for cleaning. Do not use liquid cleaners or aerosol cleaners.
- उष्णता: Do not place the product near heat sources such as radiators, heat registers, stoves, or other products (including amplifiers) जे उष्णता निर्माण करतात.
- सर्व्हिसिंग: या उत्पादनाची स्वतः सेवा करण्याचा प्रयत्न करू नका कारण कव्हर उघडणे किंवा काढून टाकणे तुम्हाला धोकादायक व्हॉल्यूमच्या समोर येऊ शकतेtagई किंवा इतर धोके. सर्व सेवांचा संदर्भ पात्र सेवा कर्मचाऱ्यांना द्या.
2. उत्पादन संपलेview
Familiarize yourself with the various parts and controls of your Craig CR45372 LED Alarm Clock with AM/FM Radio.
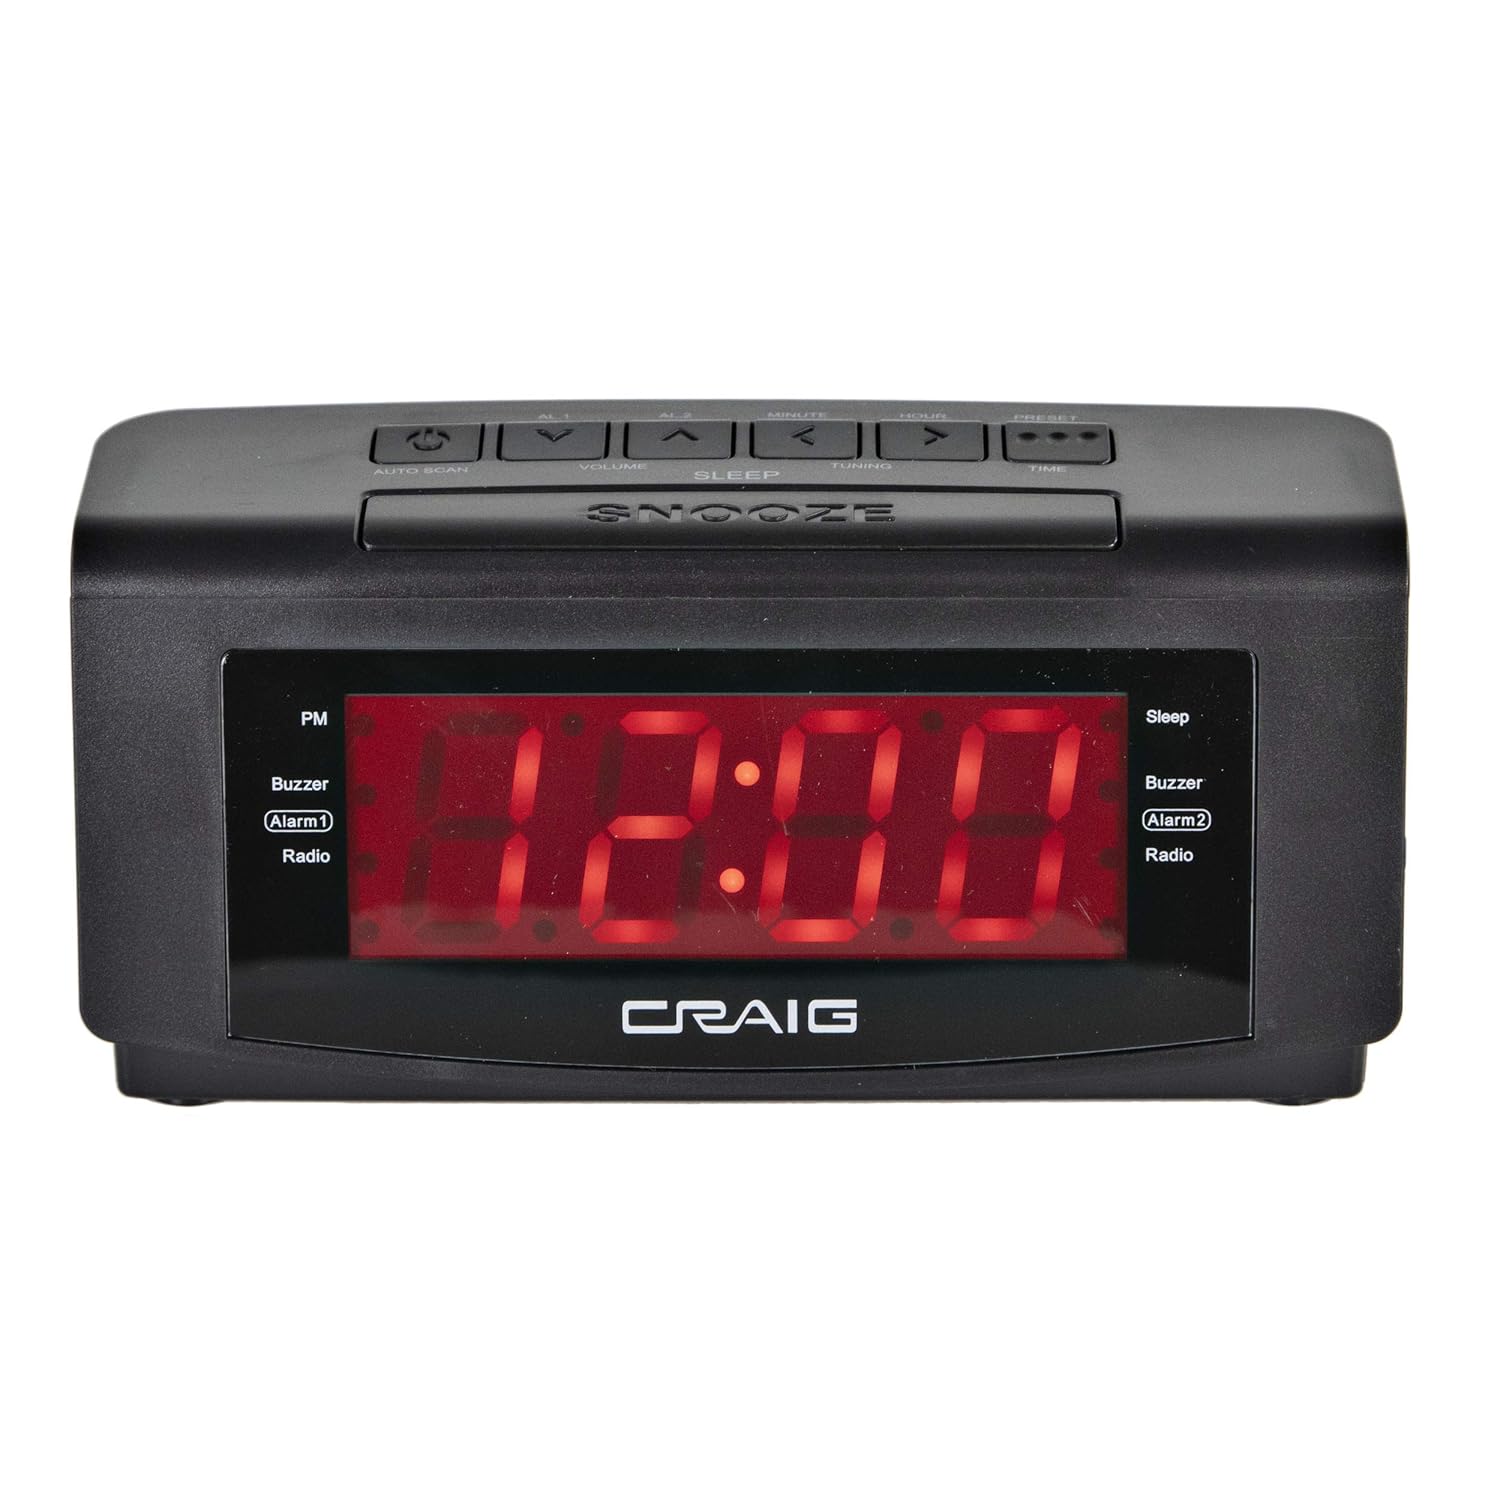
प्रतिमा १: समोर view of the Craig CR45372 LED Alarm Clock. This image displays the large red LED time display, the 'PM' indicator, and indicators for Alarm 1 (Buzzer/Radio) and Alarm 2 (Buzzer/Radio), along with the 'Sleep' indicator. The 'CRAIG' logo is visible below the display.

प्रतिमा १: Labeled features of the Craig CR45372 LED Alarm Clock. This diagram highlights key features such as Dual Alarm Clock with Radio, Battery Backup, Red LED Display, Digital PLL FM Radio, Snooze and Sleep Function, and 30 FM Preset Radio Stations.
शीर्ष पॅनेल नियंत्रणे
प्रतिमा १: वर view of the Craig CR45372 LED Alarm Clock, illustrating the control buttons. From left to right, these include the Power/Auto Scan button, AL1, AL2, Volume Down, Volume Up, Minute, Hour, Preset, and Time Set buttons. The large 'SNOOZE' bar is located at the front of the top panel.
- पॉवर बटण (⏻): युनिट चालू किंवा बंद करते.
- AL1 / AL2 Buttons: Used to set and activate Alarm 1 and Alarm 2.
- Volume Up/Down (▲ / ▼): Adjusts the radio volume.
- Minute (◀) / Hour (▶): Used to set the time and alarm times.
- प्रीसेट बटण: Used to save and recall radio stations.
- वेळ सेट बटण: वेळ सेटिंग मोड सुरू करते.
- Auto Scan Button: एफएम रेडिओ स्टेशन स्वयंचलितपणे स्कॅन करते आणि सेव्ह करते.
- SNOOZE Bar: Temporarily silences the alarm for a short period.
- स्लीप बटण: स्लीप टाइमर फंक्शन सक्रिय करते.
मागील पॅनेल वैशिष्ट्ये

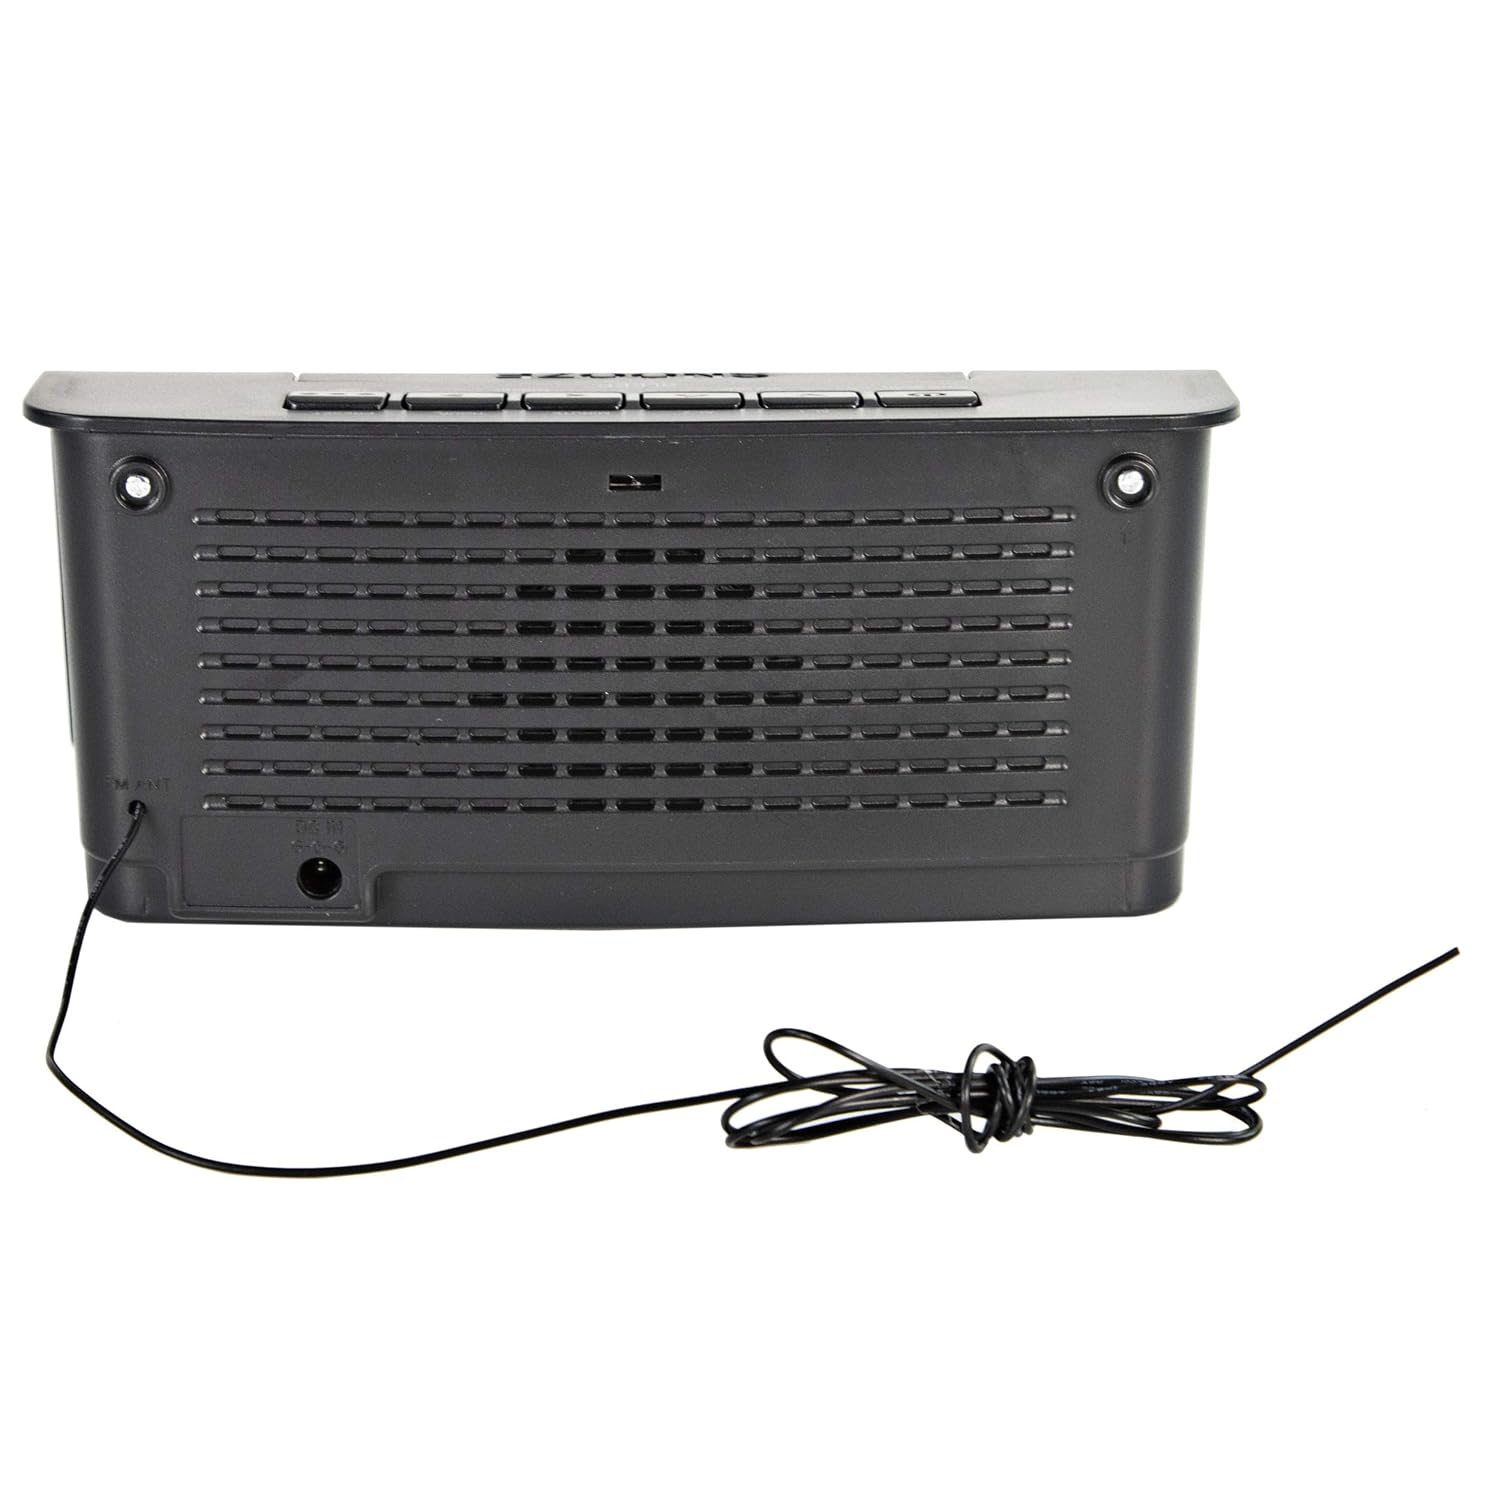
प्रतिमा १: मागील view of the Craig CR45372 LED Alarm Clock. This image shows the built-in wire antenna for FM reception, the DC IN jack for the power adapter, and the battery compartment cover.
- एफएम अँटेना: Wire antenna for FM radio reception. Extend fully for best reception.
- डीसी इन जॅक: Connects to the provided AC/DC power adapter.
- बॅटरी कंपार्टमेंट: Holds a 9V battery for time and alarm backup during power outages
3. सेटअप
3.1 वीज जोडणी
To power your alarm clock, connect the supplied AC/DC adapter to the DC IN jack on the rear of the unit and then plug the adapter into a standard wall outlet.

प्रतिमा १: The Craig CR45372 LED Alarm Clock shown with its accompanying AC/DC power adapter. The adapter is a black wall-plug type with a cable connecting to the unit.
५.२ बॅटरी बॅकअप इन्स्टॉलेशन
For continuous timekeeping and alarm settings during a power interruption, install a 9V battery (not included) into the battery compartment located on the rear of the unit.
- युनिटच्या मागील बाजूस असलेले बॅटरी कंपार्टमेंट कव्हर उघडा.
- Insert one 9V battery, observing the correct polarity (+ and -).
- बॅटरी कंपार्टमेंट कव्हर सुरक्षितपणे बंद करा.
Note: The battery backup only maintains time and alarm settings. The display will not illuminate during a power outage.
4. ऑपरेटिंग सूचना
२.२ वर्तमान वेळ निश्चित करणे
- दाबा आणि धरून ठेवा वेळ सेट बटण. तासाचे अंक चमकू लागतील.
- धारण करताना वेळ सेट, दाबा HOUR (▶) button repeatedly to adjust the hour. Observe the PM indicator for afternoon hours.
- धारण करताना वेळ सेट, दाबा MINUTE (◀) मिनिट समायोजित करण्यासाठी वारंवार बटण दाबा.
- सोडा वेळ सेट वेळ पुष्टी करण्यासाठी बटण.
4.2 Setting the Alarms (Alarm 1 and Alarm 2)
This unit features two independent alarms.
- दाबा आणि धरून ठेवा AL1 बटण (अलार्म १ साठी) किंवा AL2 बटण (अलार्म २ साठी). अलार्म तासाचे अंक फ्लॅश होतील.
- While holding the respective alarm button, press the HOUR (▶) button to set the alarm hour.
- While holding the respective alarm button, press the MINUTE (◀) button to set the alarm minute.
- Release the alarm button. The alarm time is now set.
- To select the alarm source (Buzzer or Radio), press the AL1 or AL2 button repeatedly (without holding) until the desired indicator (Buzzer or Radio) lights up next to the alarm number on the display.
4.3 स्नूझ फंक्शन
जेव्हा अलार्म वाजतो तेव्हा मोठा दाबा स्नूझ bar on the top of the unit. The alarm will temporarily stop and sound again after approximately 9 minutes.
4.4 Stopping the Alarm
To stop the alarm completely until the next day, press the AL1 or AL2 button once. The alarm indicator on the display will turn off.
4.5 रेडिओ ऑपरेशन
4.5.1 Turning On/Off and Volume
- दाबा POWER (⏻) रेडिओ चालू करण्यासाठी बटण.
- दाबा POWER (⏻) button again to turn the radio off.
- वापरा VOLUME UP (▲) आणि VOLUME DOWN (▼) ऐकण्याचा आवाज समायोजित करण्यासाठी बटणे.
४.३ स्टेशन्सवर ट्यूनिंग
- मॅन्युअल ट्यूनिंग: दाबा HOUR (▶) or MINUTE (◀) buttons briefly to tune the radio frequency step by step.
- स्वयंचलित ट्यूनिंग: दाबा आणि धरून ठेवा HOUR (▶) or MINUTE (◀) buttons for a few seconds. The radio will scan for the next available strong station and stop.
- ऑटो स्कॅन आणि सेव्ह करा: दाबा स्वयं स्कॅन button. The radio will automatically scan and save all available FM stations to preset memory locations.
4.5.3 Saving and Recalling Preset Stations
- Tune to your desired station using manual or automatic tuning.
- दाबा आणि धरून ठेवा प्रीसेट बटण. प्रीसेट नंबर डिस्प्लेवर फ्लॅश होईल.
- वापरा HOUR (▶) or MINUTE (◀) इच्छित प्रीसेट क्रमांक (P01-P30) निवडण्यासाठी बटणे.
- दाबा प्रीसेट button again to save the station to the selected preset number.
- प्रीसेट स्टेशन रिकॉल करण्यासाठी, थोडक्यात दाबा प्रीसेट button repeatedly to cycle through the saved stations.
4.5.4 Improving FM Reception
Extend the built-in wire antenna fully and adjust its position for optimal FM radio reception.
५.४ स्लीप टाइमर फंक्शन
स्लीप टाइमर रेडिओला आपोआप बंद होण्यापूर्वी एका निश्चित कालावधीसाठी प्ले करण्याची परवानगी देतो.
- रेडिओ चालू असताना, दाबा झोपा button repeatedly to cycle through the available sleep times (e.g., 90, 60, 30, 15 minutes, OFF).
- The 'Sleep' indicator will illuminate on the display. The radio will turn off automatically after the selected time.
5. देखभाल
5.1 युनिट साफ करणे
Unplug the unit from the power outlet before cleaning. Use a soft, dry cloth to wipe the exterior surfaces. Do not use abrasive cleaners, waxes, or solvents as they may damage the finish.
5.2 बॅटरी बदलणे
If the unit experiences frequent power outages or if the time/alarm settings are not retained during a power interruption, replace the 9V backup battery. Follow the instructions in Section 3.2.
6. समस्या निवारण
| समस्या | संभाव्य कारण | उपाय |
|---|---|---|
| युनिट चालू होत नाही. | पॉवर अॅडॉप्टर कनेक्ट केलेला नाही किंवा तो सदोष आहे. | पॉवर अॅडॉप्टर युनिट आणि कार्यरत वॉल आउटलेटमध्ये सुरक्षितपणे प्लग इन केले आहे याची खात्री करा. |
| अलार्म वाजत नाही. | Alarm not set or turned off. Incorrect alarm source selected. | Verify alarm time is set and the alarm indicator (Buzzer/Radio) is lit. Ensure volume is audible if radio alarm is selected. |
| खराब रेडिओ रिसेप्शन. | FM antenna not extended or positioned correctly. Interference. | Fully extend and adjust the FM wire antenna. Move the unit away from other electronic devices that may cause interference. |
| Time/alarm settings lost during power outage. | No 9V backup battery or battery is depleted. | Install a fresh 9V battery in the battery compartment. |
7. तपशील

प्रतिमा १: Dimensions of the Craig CR45372 LED Alarm Clock. The image indicates a width of 16cm and a height of 12cm for the unit.
- ब्रँड: क्रेग
- मॉडेल: CR45372
- डिस्प्ले प्रकार: डिजिटल एलईडी
- रंग: काळा
- विशेष वैशिष्ट्ये: Alarm, AM/FM Radio, Snooze, Sleep Timer, Battery Backup
- उर्जा स्त्रोत: AC 120V ~ 60Hz (via AC/DC adapter), 1 x 9V battery (for backup, not included)
- रेडिओ बँड: AM/FM
- परिमाण (LxWxH): अंदाजे 18 x 6.8 x 9.1 सेमी (7.1 x 2.7 x 3.6 इंच)
- आयटम वजन: २६६.५ ग्रॅम (०.५९ पौंड)
8. हमी आणि समर्थन
For warranty information or technical support, please refer to the documentation included with your purchase or contact Craig customer service directly. Keep your proof of purchase for warranty claims.
Ask a question about this manual
Ask about setup, troubleshooting, compatibility, parts, safety, or missing instructions. Manuals+ will review the question and use this page’s manual context to help answer it.