1. Танилцуулга
This manual provides detailed instructions for the proper installation, operation, and maintenance of your Spider SR-W122D 12-inch Dual Voice Coil Subwoofer. To ensure optimal performance and longevity of your product, please read this manual thoroughly before use and retain it for future reference.
2. Аюулгүй байдлын мэдээлэл
- Цахилгааны ажил эхлэхийн өмнө тээврийн хэрэгслийн аккумуляторын сөрөг терминалыг үргэлж салгаж байгаарай.
- Богино холболтоос сэргийлэхийн тулд бүх утсыг зөв тусгаарласан эсэхийг шалгаарай.
- Сабвуферын тэжээлийн шаардлагыг хангахын тулд цахилгаан болон чанга яригчийн холболтод тохирох хэмжигч утсыг ашиглана уу.
- Mount the subwoofer securely to prevent movement during vehicle operation, which could cause damage or injury.
- Сабвуферийг хэт их чийг эсвэл хэт температурт өртөхөөс зайлсхий.
- Do not operate the subwoofer beyond its rated power specifications to prevent damage.
3. Багцын агуулга
Савлагааг задлахдаа дараах зүйлс багтсан эсэхийг шалгана уу.
- 1x Spider SR-W122D 12-inch Dual Voice Coil Subwoofer
4. Бүтээгдэхүүн дууссанview
The Spider SR-W122D is a high-performance 12-inch subwoofer designed for car audio applications, featuring a dual voice coil for flexible wiring options and robust power handling.

Figure 4.1: Spider SR-W122D 12-inch Subwoofer shown with its retail packaging.

Зураг 4.2: Дээд тал view of the subwoofer, highlighting the cone and surround.

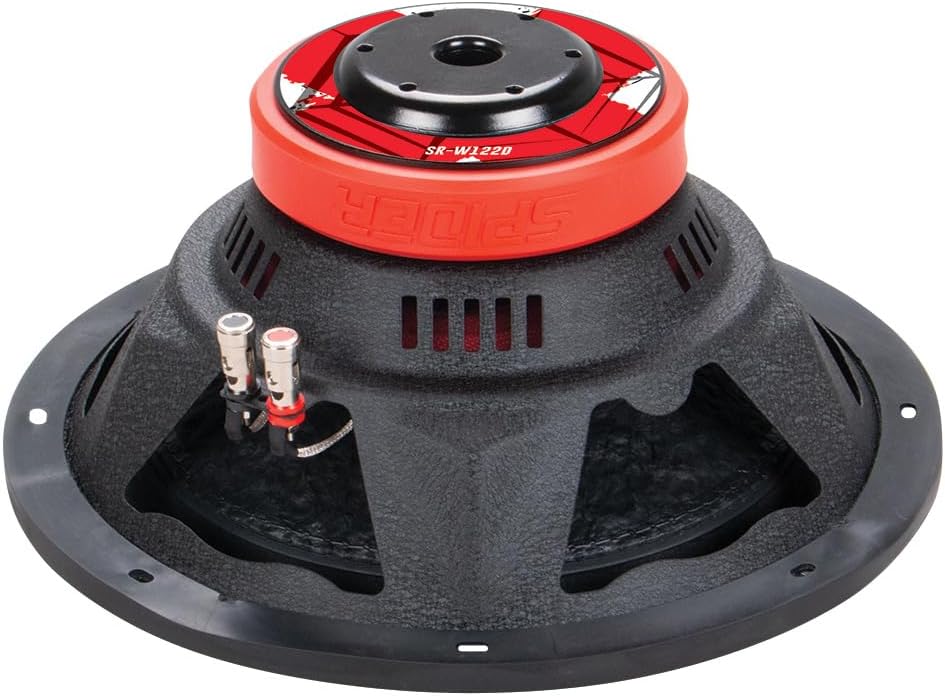
Зураг 4.3: Хажуу тал view of the subwoofer, illustrating the voice coil wiring and basket structure.
Зураг 4.4: Доод талд view of the subwoofer, displaying the magnet assembly and speaker terminals.
5. Тохиргоо ба суурилуулалт
5.1 Суулгацын өмнөх шалгалт
- Таныг баталгаажуул amplifier is compatible with a 4 Ohm load (or 2 Ohm/8 Ohm depending on wiring configuration).
- Verify that the mounting location and enclosure are suitable for a 12-inch subwoofer.
- Gather all necessary tools and wiring materials.
5.2 Wiring Configurations (Dual 4 Ohm Voice Coils)
The SR-W122D features dual 4 Ohm voice coils, offering flexibility in wiring to achieve different impedance loads for your ampнастан.
- Зэрэгцээ утас (2 Ом ачаалал): Хоёр дуут ороомгийн эерэг терминалуудыг хооронд нь холбоно, хоёр дуут ороомгийн сөрөг терминалуудыг холбоно. Дараа нь нийлмэл эерэгийг -д холбоно amplifier-ийн эерэг гаралт ба сөрөг нийлбэр ampөргөгчийн сөрөг гаралт. Энэ тохиргоо нь 2 Ом ачааллыг харуулж байна ampнастан.
- Цуврал утас (8 Ом ачаалал): Нэг дуут ороомгийн эерэг терминалыг нөгөө дуут ороомгийн сөрөг терминалтай холбоно уу. Дараа нь үлдсэн эерэг терминалыг ampөргөгчний эерэг гаралт болон үлдсэн сөрөг терминал руу ampөргөгчийн сөрөг гаралт. Энэ тохиргоо нь 8 Ом ачааллыг харуулж байна ampнастан.
Өөрийгөө үргэлж баталгаажуул amplifier is stable at the chosen impedance load. Consult your ampлифиерийн нийцтэй байдлын гарын авлага.
5.3 Enclosure and Mounting
- Install the subwoofer into a suitable enclosure (sealed or ported) designed for a 12-inch driver.
- Ensure the enclosure is robust and free from air leaks.
- Сабвуферыг тохирох боолт ашиглан хайрцагт бэхлээд, нягт битүүмжлэлийг хангана уу.
5.4-д холбогдох Ampнастан
- Connect the subwoofer's wired output (from your chosen impedance configuration) to the amplifier's subwoofer output terminals.
- Ensure correct polarity (+ to + and - to -) to avoid phase issues.
- Системийг асаахаас өмнө бүх холболтыг дахин шалгана уу.
6. Ашиглалтын заавар
6.1 Initial Power-Up and Settings
- -ээс эхэл ampөргөгч төхөөрөмжийн олшруулалтын хяналтыг хамгийн бага хэмжээнд тохируулсан.
- Turn on your audio system and play music with a good bass range.
- Аажмаар нэмэгдүүлэх ampХүссэн бассын түвшинд гажуудалгүйгээр хүрэх хүртэл өргөгч хүчийг нэмэгдүүлнэ.
- Adjust the low-pass filter (LPF) on your amplifier to blend the subwoofer's output with your main speakers (typically between 80Hz and 120Hz).
- Adjust the phase control (if available on your amplifier) to ensure optimal bass response.
6.2 Завсарлагааны хугацаа
Allow a break-in period of approximately 10-20 hours of moderate listening before operating the subwoofer at high volumes. This allows the suspension components to loosen up, leading to improved performance and longevity.
7. Засвар үйлчилгээ
- Цэвэрлэгээ: Use a soft, dry cloth to wipe down the subwoofer cone and surround. Avoid using harsh chemicals or excessive moisture.
- Шалгалт: Бүх утасны холболтууд нягт, зэврэлтийн шинж тэмдэг байгаа эсэхийг үе үе шалгаж байгаарай. Сабвуферын конус болон хүрээг урагдах, гэмтэх эсэхийг шалгана уу.
- Хадгалах: If storing the subwoofer for an extended period, ensure it is kept in a cool, dry place, away from direct sunlight and extreme temperatures.
8. Алдаа засах
| Асуудал | Боломжит шалтгаан | Шийдэл |
|---|---|---|
| Сабвуферээс дуу гарахгүй байна |
|
|
| Гажуудсан эсвэл тодорхойгүй басс |
|
|
| Сабвуфер халж байна |
|
|
9. Техникийн үзүүлэлтүүд
| Онцлог | Дэлгэрэнгүй |
|---|---|
| Загварын нэр | SR-W122D |
| Чанга яригчийн төрөл | Сабвуфер |
| Сабвуферийн диаметр | 12 инч |
| Эсэргүүцэл | Dual Voice Coil 4 Ohms (can be wired to 2 or 8 Ohms) |
| Хамгийн их цахилгаан гаралт | 1500 Вт |
| RMS цахилгаан | 750 Вт |
| Дууны ороомгийн хэмжээ | 2.5 инч |
| Voice Coil Winding | 15 мм |
| Соронзон жин | 40 унц |
| Материал | Металл |
| Өнгө | Улаан |
| Бүтээгдэхүүний хэмжээс | 35.5cm (Depth) x 35.5cm (Width) x 21.3cm (Height) |
| Бүтээгдэхүүний жин | 6 кг |
| Зөвлөмж болгож буй хэрэглээ | Машины аудио |
| Тохиромжтой төхөөрөмжүүд | Ampнастан |
| Холболтын технологи | RCA (for amplifier input, not subwoofer direct) |
| Ampбэхэлгээний төрөл | Идэвхгүй |
10. Баталгаат хугацааны мэдээлэл
This product is covered by a standard manufacturer's warranty against defects in materials and workmanship. The duration and terms of the warranty may vary by region and retailer. Please retain your proof of purchase for any warranty claims. Damage resulting from improper installation, abuse, or unauthorized modifications is not covered under warranty.
11. Дэмжлэг
For technical assistance, troubleshooting beyond this manual, or warranty inquiries, please contact your retailer or the manufacturer's customer support. Refer to your purchase documentation for specific contact details.