1. Kupu Whakataki
This manual provides detailed instructions for the operation and maintenance of your Generic XL-026N Electronic Stopwatch. Designed for precision timing, this device features a double-row display, 10-memory storage, and multiple functions including a clock, calendar, countdown timer, alarm, and metronome. Please read this manual thoroughly to ensure proper use and to maximize the lifespan of your stopwatch.
2. Hua Neke Atuview
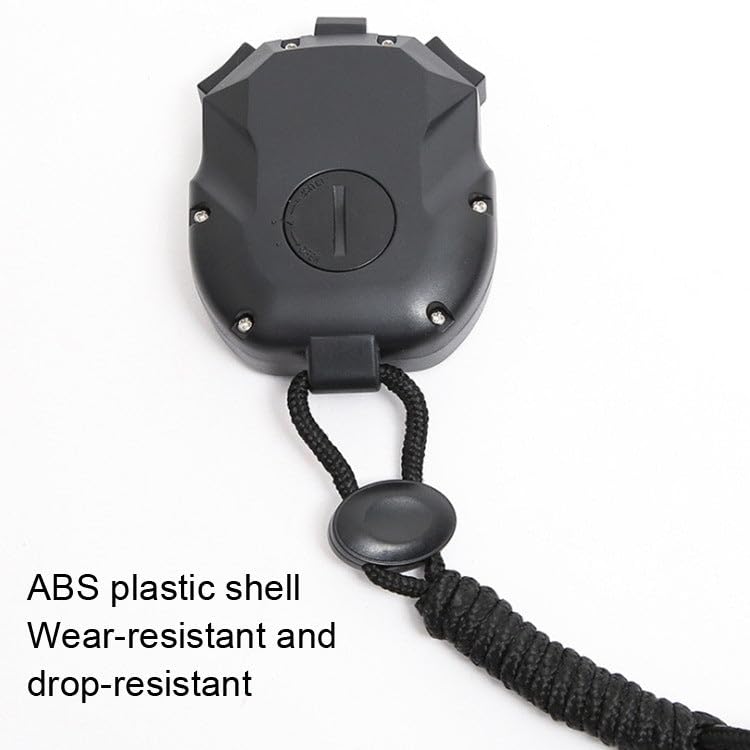
The XL-026N stopwatch is built with an ABS plastic shell, offering wear-resistant, drop-resistant, shock-resistant, and anti-skid properties. Its life waterproof design allows for use in various conditions, including light rain. The large screen display ensures numbers are clear and easy to read.
Āhuatanga matua:
- Double Row Display
- 10 Rokiroki Mahara
- Clock and Calendar Display
- Tatau Tatau
- 4 Groups of Alarm Clocks
- Mahi Metronome
- 1/100 Second Timing Accuracy
- 3-Key Operation for simplicity
- Life Waterproof Design
- Durable ABS Plastic Shell
- Powered by 1 x CR2032 Button Battery
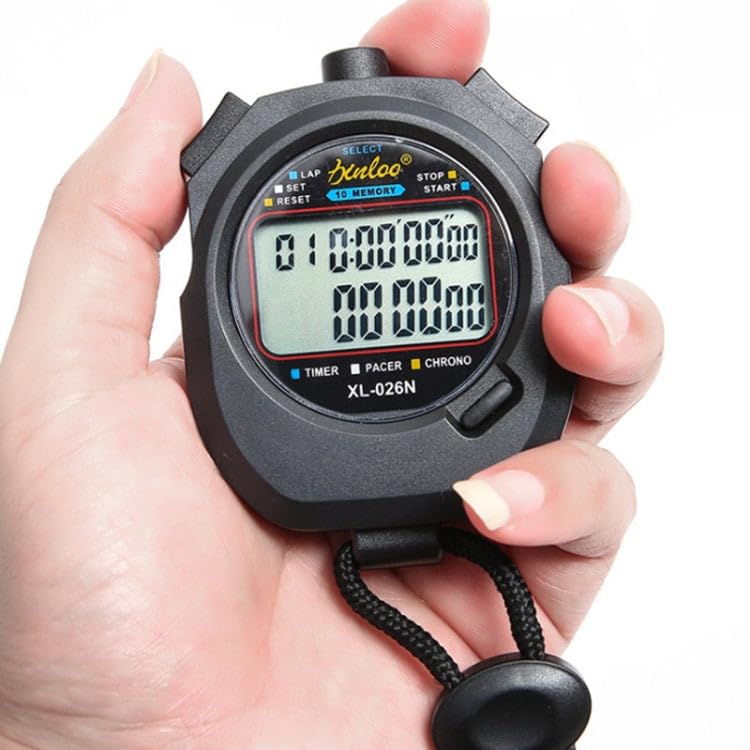
Whakaahua 2.1: Mua view of the XL-026N Electronic Stopwatch, showing the display and main buttons. The stopwatch is held in a hand, illustrating its compact size.
3. Tatūnga
3.1 Tāuta Pūhiko
The XL-026N stopwatch is powered by one CR2032 button battery. The battery is typically pre-installed. If the display is dim or unresponsive, the battery may need replacement.
- Kimihia te wāhi pākahiko kei muri o te uati mutu.
- Use a small screwdriver or coin to open the battery cover by turning it counter-clockwise.
- Tangohia te pākahiko CR2032 tawhito.
- Whakauruhia he pākahiko CR2032 hou me te taha pai (+) e anga whakarunga ana.
- Whakakapia te uhi pākahiko ka huri ki te karaka kia mau.
Whakaahua 3.1: Whakamuri view of the XL-026N Electronic Stopwatch, indicating the battery compartment for CR2032 battery replacement.
3.2 Hiko Tuatahi
Upon battery installation or first use, the stopwatch should automatically power on and display the current time or a default screen. If not, press any button to activate the display.
4. Nga Tohutohu Whakahaere
The XL-026N stopwatch features a simple 3-key operation. Familiarize yourself with the buttons:
- Tīpakohia: Used to switch between modes (Time, Stopwatch, Countdown, Alarm, Metronome) and to confirm settings.
- LAP/SET: Used to record lap times in stopwatch mode, and to enter/adjust settings in setup modes.
- START/STOP/RESET: Used to start, stop, and reset the timer functions.
Whakaatu 4.1: Taipitopito view of the XL-026N stopwatch's front panel, highlighting the SELECT, LAP/SET, and START/STOP/RESET buttons.
4.1 Time and Calendar Display
In the default mode, the stopwatch displays the current time (hour, minute, second) and date (month, day, day of the week).
- From any mode, press the KORERO button repeatedly until the clock icon or "TIME" indicator is visible on the display.
- Hei tautuhi i te waa me te ra:
- In Time mode, press and hold LAP/SET until the digits begin to flash.
- Perehi KORERO to cycle through hours, minutes, seconds, month, day, and year.
- Whakamahi START/STOP/RESET hei whakarite i te uara kanapa.
- Kia tika nga tautuhinga katoa, pehia LAP/SET ki te puta ano i te aratau tautuhinga.
4.2 Stopwatch Function (1/100 Timing)
This mode is used for precise timing of events.
- Perehi KORERO until the "CHRONO" or stopwatch icon appears.
- Perehi START/STOP/RESET ki te timata i te taima.
- To record a lap time, press LAP/SET. The lap time will be displayed on the upper row, while the running total time continues on the lower row.
- Perehi LAP/SET ano ki view the next lap time or return to the running display.
- To stop the timer, press START/STOP/RESET.
- To reset the timer to zero, press LAP/SET while the timer is stopped.
4.3 10 Memory Storage
The stopwatch can store up to 10 lap/split times.
- After stopping the stopwatch (see 4.2), press LAP/SET to enter memory recall mode.
- Whakamahi KORERO to scroll through the stored lap times. The memory number will be displayed.
- Perehi LAP/SET again to exit memory recall.
4.4 Kaute Taima
Set a specific time for the stopwatch to count down from.
- Perehi KORERO until the "TIMER" or countdown icon appears.
- Hei tautuhi i te wa tatau, pehia me te pupuri LAP/SET kia whiti nga mati.
- Whakamahi KORERO ki te neke i waenga i nga haora, meneti me nga hēkona.
- Whakamahi START/STOP/RESET hei whakarite i te uara kanapa.
- Perehi LAP/SET to confirm the setting and exit.
- Perehi START/STOP/RESET ki te timata i te tatau.
- Perehi START/STOP/RESET anō hei whakamutu/tīmata anō.
- Ina tae te tatau whakamuri ki te kore, ka tangi te whakaoho. Pēhia tētahi pātene hei whakamutu i te whakaoho.
4.5 Alarm Clocks (4 Groups)
The stopwatch supports setting up to 4 independent alarms.
- Perehi KORERO until the "ALARM" icon appears. Repeated presses of KORERO in this mode will cycle through AL1, AL2, AL3, AL4.
- To set an alarm, select the desired alarm (e.g., AL1) and press and hold LAP/SET until the hour digits flash.
- Whakamahi KORERO ki te huri i waenga i nga haora me nga meneti.
- Whakamahi START/STOP/RESET hei whakarite i te uara kanapa.
- Perehi LAP/SET hei whakaū i te wa whakaoho.
- To turn an alarm ON/OFF, in the alarm display mode, press START/STOP/RESET. An alarm icon will appear/disappear to indicate its status.
- When an alarm sounds, press any button to silence it.
4.6 Mahi Metronome
The metronome provides a rhythmic beat for training or pacing.
- Perehi KORERO until the "PACER" or metronome icon appears.
- To set the beat per minute (BPM), press and hold LAP/SET until the BPM value flashes.
- Whakamahi START/STOP/RESET to adjust the BPM.
- Perehi LAP/SET to confirm the BPM.
- Perehi START/STOP/RESET to start the metronome.
- Perehi START/STOP/RESET again to stop the metronome.
5. Tiaki
5.1 Te horoi
Horoia te wati mutu ki tētahi kakahu ngohengohe, maroke. Mō te paru uaua, he paku iti te paruamp cloth can be used. Avoid using harsh chemicals, abrasive cleaners, or solvents, as these can damage the casing whakaatu ranei.
5.2 Atete Wai
The XL-026N features a life waterproof design, meaning it is resistant to splashes and light rain. It is kaore suitable for swimming, showering, or submersion in water. Do not press buttons while the stopwatch is wet to prevent water ingress.
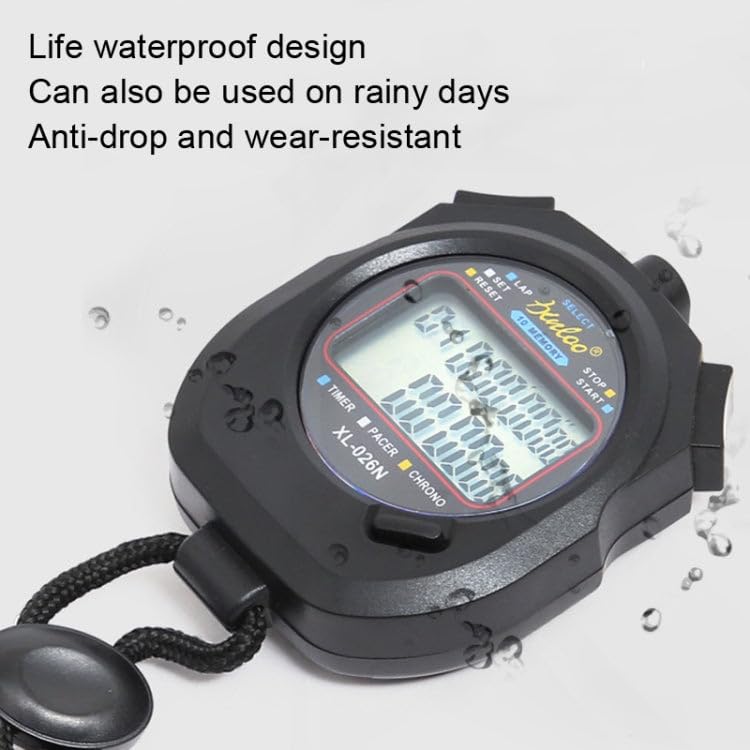
Figure 5.1: The XL-026N stopwatch demonstrating its life waterproof capability with water droplets on its surface.
5.3 Whakakapinga Pūhiko
Refer to Section 3.1 for instructions on replacing the CR2032 button battery. Ensure the battery is disposed of properly according to local regulations.
6. Te Raru
| Raruraru | Take pea | Rongoā |
|---|---|---|
| He putea, he atarua ranei te whakaaturanga. | He iti te pākahiko kua mate ranei. | Replace the CR2032 battery (refer to Section 3.1). |
| Kare e aro mai nga paatene. | Temporary software glitch or moisture. | Remove and reinsert the battery to perform a soft reset. Ensure the stopwatch is dry. |
| Hē te wā/rā. | Kāore i te tika te whakatakoto i te wā/te rā. | Refer to Section 4.1 to set the time and calendar. |
| Stopwatch not timing accurately. | Rarely a defect; usually user error. | Ensure you are in the correct mode and operating the buttons as described in Section 4.2. |
7. Whakatakotoranga
- Tauira: XL-026N
- Nga Mahi: Stopwatch (1/100s), Lap/Split Memory (10), Clock, Calendar, Countdown Timer, 4 Alarms, Metronome
- Whakaatu: Double Row, Large Screen
- Rauemi: ABS Kirihou
- Tuku Hiko: 1 x CR2032 Button Battery
- Ahu (āhua.): 7.9 cm x 6.2 cm x 2 cm (L x W x H)
- Taumaha (approx.): 85g
- Ātete wai: Life Waterproof (splash/rain resistant, not submersible)
8. Pūtāhui me te Tautoko
This product is manufactured by Generic. For any queries or support, please refer to your retailer or the point of purchase. Please retain your proof of purchase for any warranty claims. Specific warranty terms may vary by region and retailer.
For general inquiries, please contact the seller directly as indicated on your purchase platform.