
1. Nga Korero Haumaru Nui
Read all instructions thoroughly before operating this appliance to prevent injury or damage. Keep this manual for future reference.
- Haumaru Hiko: Ensure the freezer is connected to a properly grounded 115V/60Hz/1-ph electrical outlet with a NEMA 5-15P plug. Do not use extension cords or adapter plugs.
- Whakahau: Maintain adequate clearance around the unit for proper airflow and heat dissipation. Blocked vents can lead to overheating and reduced efficiency.
- Refrigerant mura: This unit uses R290 Hydrocarbon refrigerant. Handle with care and ensure proper ventilation during servicing. Do not puncture the refrigerant circuit.
- Taputapu Taamaha: The unit weighs approximately 137 pounds. Use appropriate lifting techniques and assistance during unpacking and installation to prevent injury.
- Te horoi: Momotuhia te hiko i mua i te horoi, te mahi tiaki ranei.
2. Hua Neke Atuview
The Atosa Undercounter Freezer (Model MGF24FGR) is a commercial-grade, one-section reach-in unit designed for efficient frozen storage. It features a durable stainless steel construction and precise temperature control.
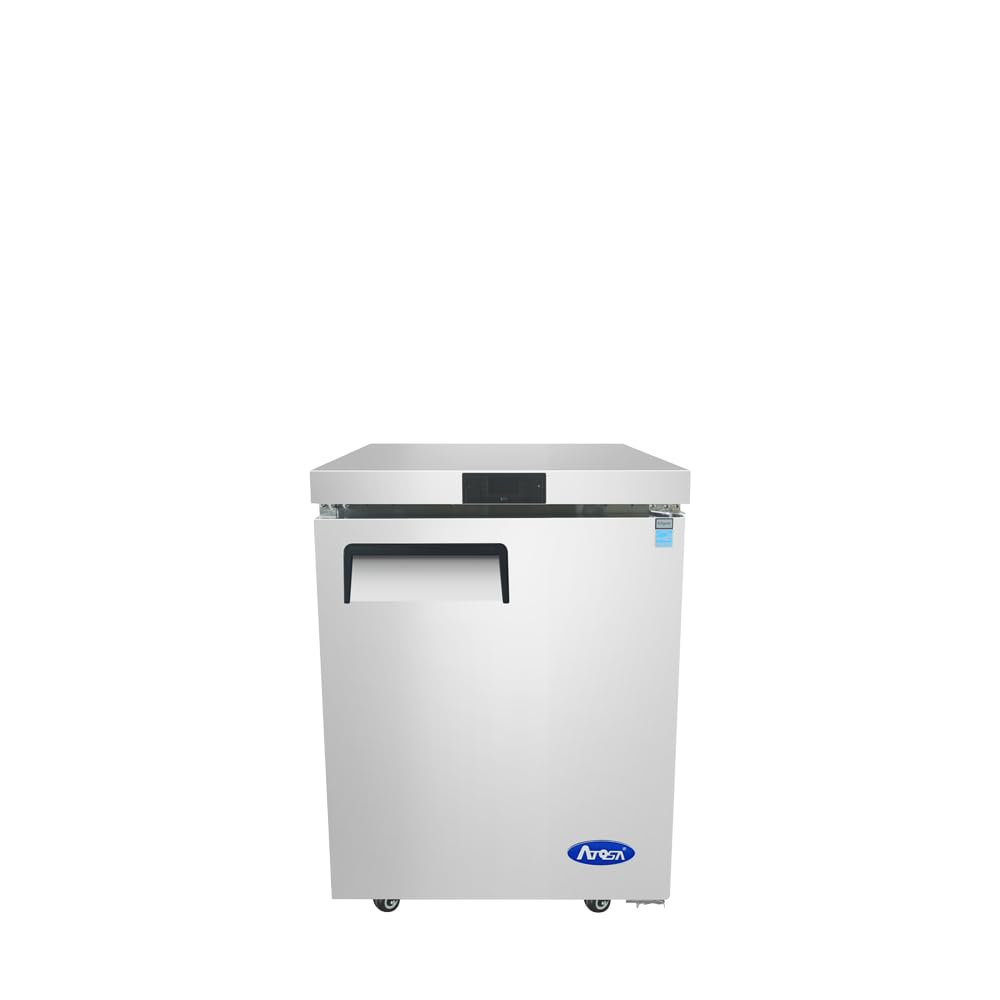
Whakaahua 2.1: Mua view of the Atosa Commercial Undercounter Freezer. This image shows the compact design and stainless steel finish of the unit, suitable for undercounter placement.
Āhuatanga matua:
- Raukaha: 4.8 cu. ft.
- Hanganga: Stainless steel interior and exterior, galvanized steel back.
- Pūnaha Whakamao: Rear-mounted, self-contained, with R290 Hydrocarbon refrigerant.
- Mana Pawera: Digital, maintaining -8°F to 0°F.
- Whata: Two adjustable shelves for flexible storage.
- Taakapa: Automatic evaporation and electric defrost.
- Te nekeneke: Equipped with 2-inch casters.
3. Te Wetewete me te Whakanoho
3.1 Te Wetewete
- Tangohia marietia ngā rauemi katoa mō te takai, tae atu ki te rīpene me te kiriata tiaki.
- Inspect the freezer for any shipping damage. Report any damage to the carrier immediately.
- Tangohia ngā rauemi tākai me ngā taputapu o roto.
3.2 Whakanoho
- Place the freezer on a strong, level surface capable of supporting its weight (approximately 137 lbs when empty, more when loaded).
- Ensure adequate clearance for ventilation: at least 4 inches from walls and other appliances on all sides (rear, top, and sides).
- Avoid direct sunlight, heat sources, or areas with high humidity.
- The 2-inch casters allow for easy repositioning; ensure they are locked once the unit is in its final location.
3.3 Hononga Hiko
- Connect the freezer to a dedicated 115V/60Hz/1-ph grounded electrical outlet.
- The unit draws 2.4 amps and is equipped with a NEMA 5-15P plug.
- Kaua e whakamahia ngā urutau maha-putanga, ngā taura toronga rānei.
4. Tatūnga
4.1 Whakanui-a-Tamatanga
- After positioning and connecting to power, allow the unit to stand for at least 2 hours before turning it on. This allows the refrigerant to settle.
- Plug in the freezer. The digital display should illuminate.
- Allow the freezer to run empty for 24 hours to reach its set temperature before loading with products.
4.2 Installing and Adjusting Shelves
- The freezer comes with two adjustable shelves.
- Locate the shelf clips on the interior side walls. Insert the clips at the desired height.
- Place the shelves onto the clips, ensuring they are level and securely seated.
- Adjust shelf positions as needed to accommodate different product sizes.
5. Nga Tohutohu Whakahaere
5.1 Mana Whakahaere Mamati
- The freezer is equipped with a digital temperature controller, typically located on the front panel.
- The default temperature range is -8°F to 0°F.
- Refer to the specific controller's manual (if provided separately) for detailed instructions on setting and adjusting the temperature. Generally, there are 'SET' and arrow buttons to modify the desired temperature.
- Avoid frequent door openings to maintain consistent internal temperatures and energy efficiency.
5.2 Automatic Evaporation and Electric Defrost
- This freezer features an automatic evaporation system for condensate water, eliminating the need for manual draining.
- Electric defrost cycles are automatically initiated by the controller to prevent ice buildup on the evaporator coil. During a defrost cycle, the internal temperature may temporarily rise slightly, which is normal.
6. Tiaki
Regular maintenance ensures optimal performance and extends the lifespan of your freezer. Always disconnect power before cleaning or servicing.
6.1 Whakapai i roto
- Clean the interior regularly with a mild soap and warm water solution.
- Horoi rawa ki te wai ma, ka whakamaroke ki te kakahu ngohengohe.
- Kaua e whakamahia ngā kaihoroi whakakoi, te huruhuru rino, ngā matū kino rānei, nā te mea ka kino pea te āhua o te rino kore waikura.
6.2 Te horoi o waho
- Horoia te taha waho o te maitai kore waikura ki te kakahu ngohengohe me te wai horoi maitai kore waikura kāore e mura.
- For galvanized steel back, a damp he rawaka te kakahu.
6.3 Whakapai i te Coil Condenser
- The condenser coil, located at the rear of the unit, should be cleaned every 30 days or more frequently in dusty environments.
- Momotuhia te mana.
- Use a stiff brush or vacuum cleaner with a brush attachment to remove dust and debris from the condenser fins.
- A dirty condenser coil reduces cooling efficiency and increases energy consumption.
6.4 Te Whakapaipai i te Puka o te Kuaha
- Inspect door gaskets regularly for cracks or tears.
- Clean gaskets with mild soap and water to ensure a tight seal. A poor seal can lead to temperature fluctuations and increased energy use.
7. Te Raru
I mua i te whakapā atu ki te ratonga, review ēnei take me ngā otinga e kitea whānuitia ana.
| Raruraru | Take pea | Rongoā |
|---|---|---|
| Ko te pouaka tio kaore i te whakamatao | No power; thermostat set too high; dirty condenser coil; door left open. | Check power supply; adjust thermostat; clean condenser coil; ensure door is closed properly. |
| Haruru nui | Kāore te waeine i te ōrite; ngā wāhanga e kore e rere; kua āraia te pā hau. | Level the unit; check for loose parts; ensure fan blades are clear. |
| Kaore i tika te hiri o te tatau | Dirty or damaged gasket; unit not level. | Clean or replace gasket; level the unit. |
| Te wai i runga i te papa | Drain pan overflowing; clogged drain line. | Check and clear drain line; ensure drain pan is correctly positioned. |
8. Whakatakotoranga
| Āhuahira | Taipitopito |
|---|---|
| Tauira | MGF24FGR |
| Te kaha | 4.8 cu. ft. |
| Ahu (W x D x H) | 23-13/16" x 25" x 32-1/2" |
| Taumaha Tūemi | 137 pauna |
| Awhe Pawera | -8°F ki te 0°F |
| Whakamaoho | R290 Hydrocarbon |
| Kōpeke | 1 / 5 HP |
| Hiko | 115V/60Hz/1-ph, 2.4 Amps |
| Momo Mono | NEMA 5-15P |
| Whata | 2, ka taea te whakarite |
| Rauemi | Stainless Steel (interior/exterior), Galvanized Steel (back) |
| Te nekeneke | 2" Casters |
9. Pūtāhui me te Tautoko
For specific warranty details, please refer to the warranty card included with your purchase or contact your authorized Atosa dealer. Warranty terms typically cover manufacturing defects for a specified period from the date of purchase.
For technical support, parts, or service inquiries, please contact your product supplier or an authorized Atosa service center. Ensure you have your model number (MGF24FGR) and serial number available when contacting support.