Kupu Whakataki
Welcome to your new vidaXL Galvanized Steel Garden Shed. This manual provides essential information for the safe and correct assembly, operation, and maintenance of your shed. Please read all instructions carefully before beginning assembly and retain this manual for future reference.
Mōhiohio Haumaru:
- Me mau tonu ngā taputapu haumaru e tika ana, tae atu ki ngā karapu me ngā tiaki kanohi, i te wā e huihui ana.
- Me whakarite kia mahorahora te wāhi huihuinga i ngā arai me ngā tamariki.
- Tokorua, neke atu ranei nga tangata e taunaki ana mo te huihuinga.
- Choose a level and stable foundation for the shed.
- Anchor the shed securely to prevent wind damage.
- Be aware of sharp edges on metal components.
Ihirangi mokete
Before assembly, verify that all parts are present and undamaged. Refer to the parts list provided in your packaging. If any parts are missing or damaged, contact customer support.

Image: A technical drawing illustrating the overall dimensions of the garden shed, including length, width, height, and door measurements. This helps in identifying the size of the shed and its components.
Tatūnga me te Runanga
1. Whakaritenga Pae
Select a flat, level, and well-drained area for your shed. A concrete slab or treated timber foundation is recommended for stability and longevity.
2. Foundation Assembly
Assemble the base frame according to the provided diagrams. Ensure all corners are square and the frame is level before proceeding.
3. Wall Panel Installation
Attach the galvanized steel wall panels to the base frame. Secure each panel using the designated screws and bolts. Work systematically around the shed, ensuring panels overlap correctly for weather resistance.

Whakaahua: He taha view of the brown garden shed, illustrating the structure with some wall panels already attached, providing a visual guide for panel installation.
4. Roof Structure and Panels
Construct the roof frame and attach it to the top of the wall panels. Install the roof panels, ensuring they are securely fastened and provide proper drainage. The shed features a sloped roof design for efficient water runoff.
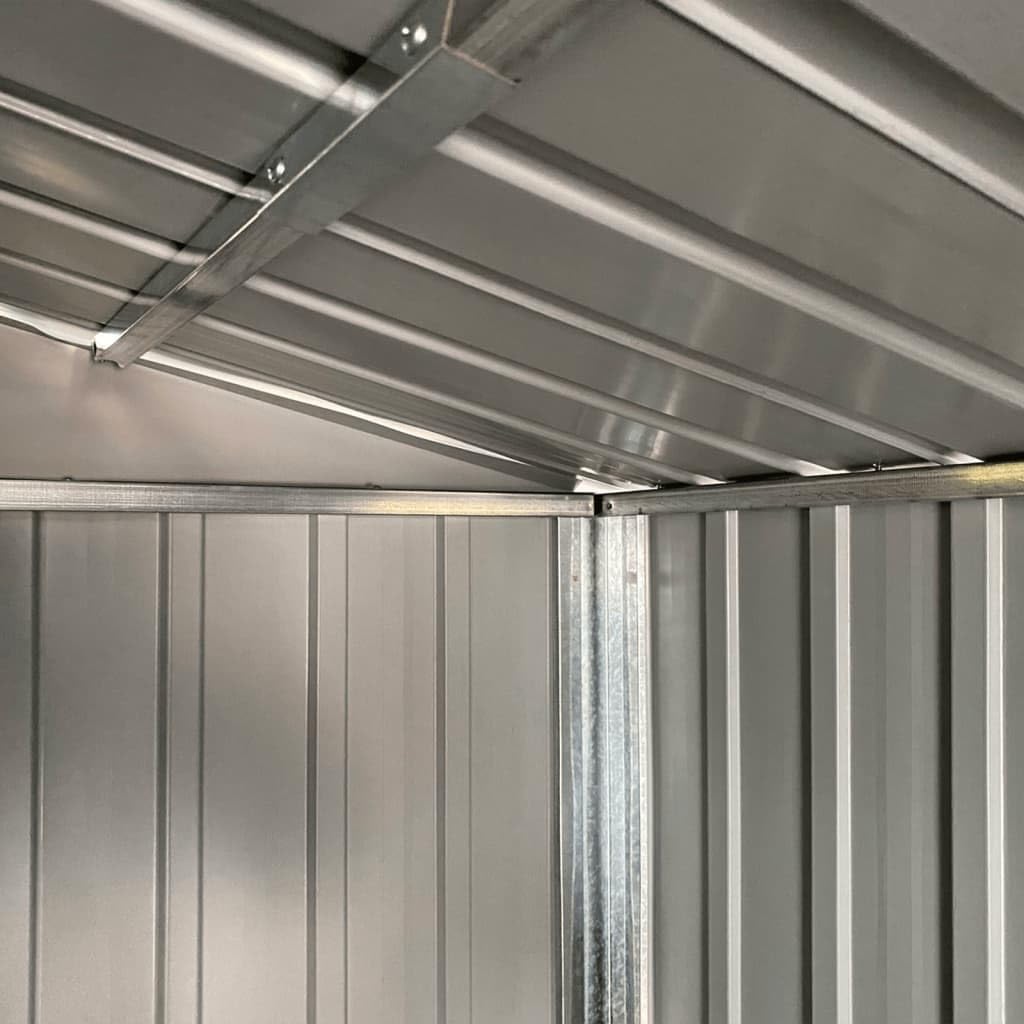
Image: An interior shot of the shed's roof, highlighting the galvanized steel support beams and the corrugated roof panels, demonstrating the structural integrity.
5. Te Whakataunga kuaha
Install the doors, ensuring they open and close smoothly. Attach the handles as instructed. The shed is equipped with practical handles for easy access.
6. Final Checks and Anchoring
Verify all screws and bolts are tightened. Anchor the shed to the ground using appropriate anchoring kits (not included) to prevent movement in strong winds.
Nga Tohutohu Whakahaere
The shed is designed for outdoor storage of garden tools, equipment, and firewood. The doors are equipped with handles for easy opening and closing. Ensure the doors are securely closed to protect contents from weather and pests.
The shed includes 4 ventilation vents to reduce moisture and odor buildup. Ensure these vents remain unobstructed for optimal airflow.
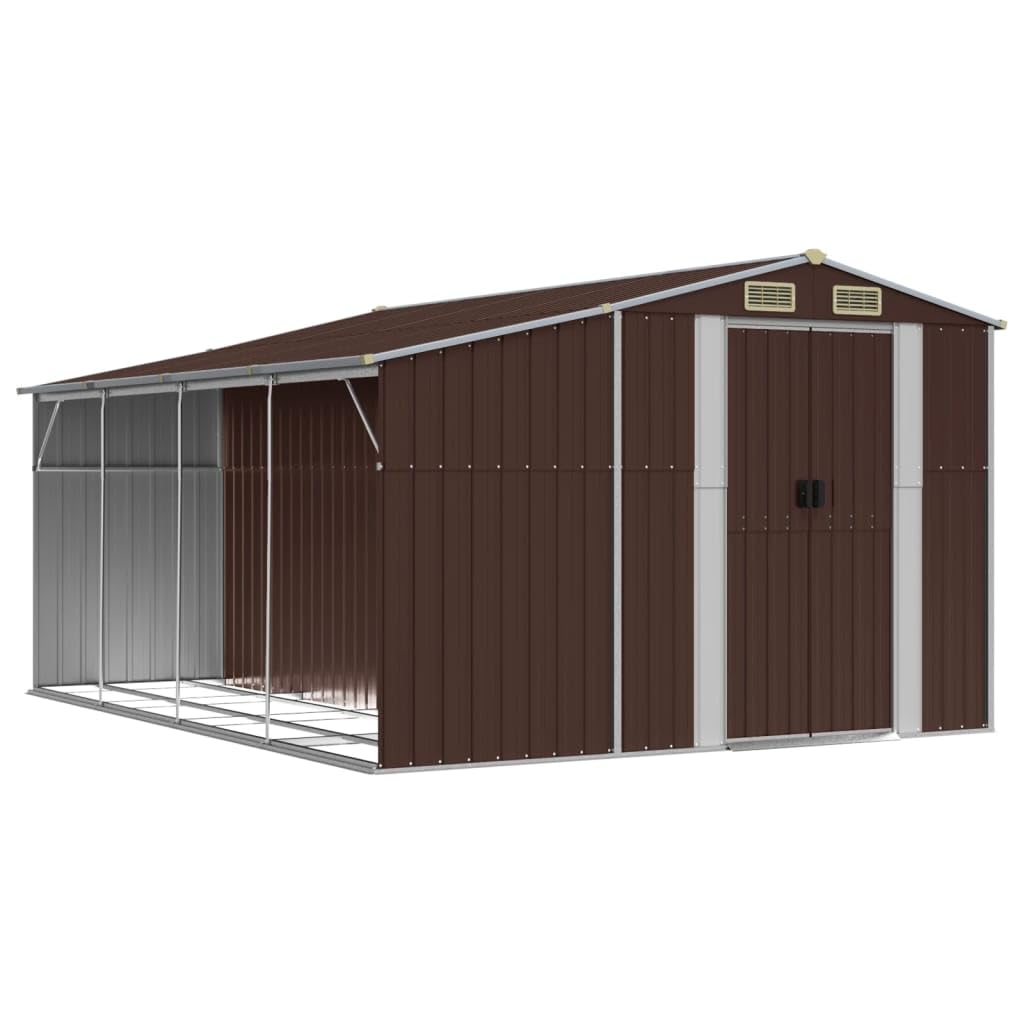
Image: The main product image showing the assembled brown garden shed with its double front doors and an integrated open side section for storing firewood.
Te tiaki
Regular maintenance ensures the longevity of your shed.
- Te horoi: Clean the exterior with mild soap and water periodically to remove dirt and debris. Avoid abrasive cleaners.
- Tirotiro: Annually inspect all fasteners for tightness and re-tighten if necessary. Check for any signs of rust or damage to the galvanized steel panels.
- Whakahau: Keep the ventilation vents clear of obstructions to maintain proper airflow and prevent moisture accumulation.
- Ngā Mahi o te Tatau: Lubricate door hinges and tracks if they become stiff.
Raparongoā
Raruraru: Kaore nga tatau e kati tika.
Rongoā: Check if the shed is level. Adjust the foundation or re-tighten frame screws. Ensure door hinges are not bent and are properly aligned.
Raruraru: Te rere o te wai i roto i te wharau.
Rongoā: Inspect roof and wall panel overlaps for proper sealing. Ensure all screws are tight. Apply silicone sealant to any gaps if necessary.
Raruraru: Excessive moisture or odor inside.
Rongoā: Verify that the ventilation vents are clear and unobstructed. Ensure the shed is not overfilled, allowing for air circulation.
Whakatakotoranga
| Āhuahira | Taipitopito |
|---|---|
| Waitohu | vidaXL |
| Tau tauira | 3188297 |
| Rauemi | He kowhiranga Kirira |
| Tae | Paraone |
| Nga Ahinga (D x W x H) | 1.79P x 2.77l x 1.79H meters (277 x 365.5 x 179 cm) |
| Taumaha Tūemi | 100.57 Kirokaramu |
| Te teitei o te tatau | 154 Henemita |
| Taumata Atete Wai | parewai |
| Huihuinga e hiahiatia ana | Ae |
Nga korero Whakaputanga
For information regarding the product warranty, please refer to the documentation included with your purchase or contact vidaXL customer service directly. Keep your proof of purchase for warranty claims.
Tautoko
If you encounter any issues or have questions not covered in this manual, please contact vidaXL customer support. Visit the official vidaXL webpae mo nga taipitopito whakapā me etahi atu rauemi.
Ka kitea e koe etahi atu korero me te tautoko i te vidaXL Brand Store.