MOYSUWE MDM201 Pro
MOYSUWE MDM201 Pro HDMI Digital Microscope User Manual
Model: MDM201 Pro | Brand: MOYSUWE
Kupu Whakataki
The MOYSUWE MDM201 Pro HDMI Digital Microscope is an advanced inspection tool designed for a wide range of applications, from intricate PCB soldering and watch repair to detailed observation of coins, plants, and insects. Featuring a stunning 7-inch IPS HD screen, a superior 16MP CMOS IMX sensor, and versatile connectivity options, this microscope provides a clear and immersive microscopic experience.
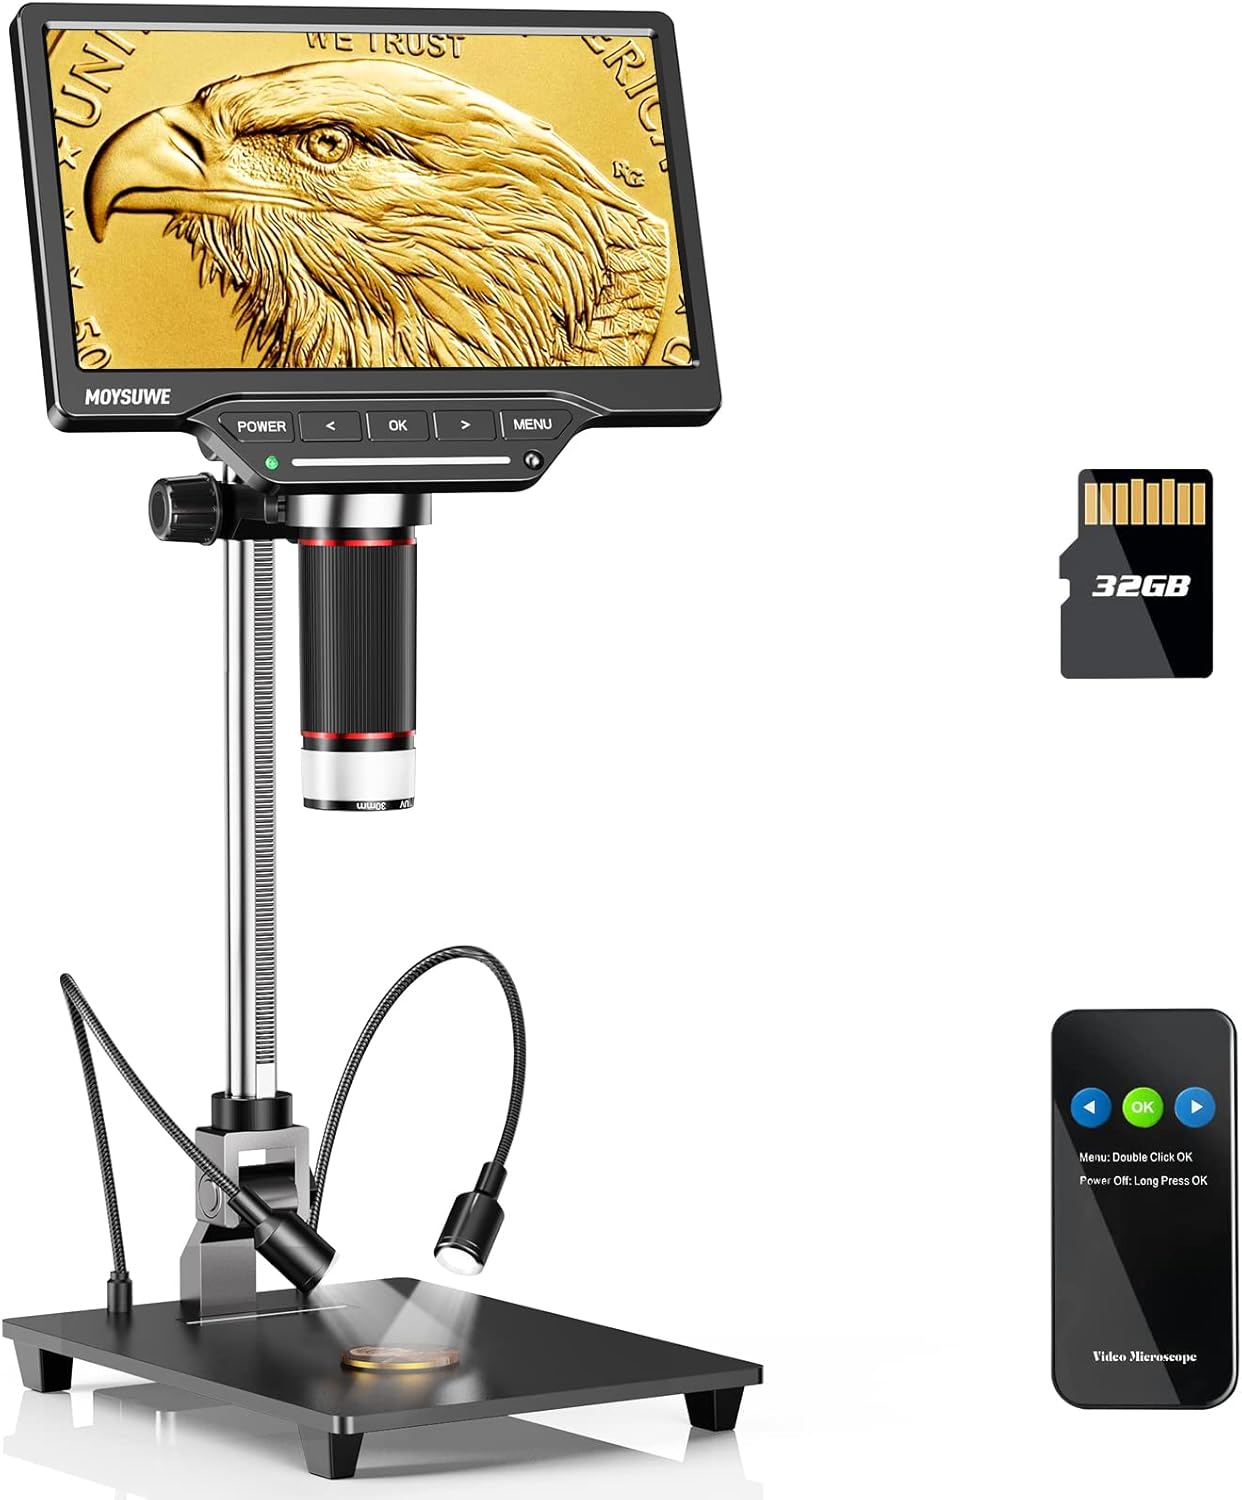
Figure 1: MOYSUWE MDM201 Pro HDMI Digital Microscope with its main components.
Āhuatanga matua:
- Stunning Visual Experience: New upgraded 7-inch IPS HD screen with 1024*600 resolution for crystal clear and vivid pictures with expansive 180° viewnga koki.
- Superior 16MP CMOS IMX Sensor: Ensures true-to-life images with accurate texture and detail reproduction, ideal for various inspection tasks.
- Upgraded 10-inch Bracket: Allows for a wider and higher field of view, easily accommodating entire coins like silver dollars.
- Smart Touch Control Brightness Adjustment: Equipped with 6 LED lights around the lens and 2 adjustable gooseneck lights, with independent touch control for optimal illumination.
- Excellent 3X-1300X Zoom: Provides detailed magnification for soldering, coins, plants, insects, and more.
- HDMI & USB Output: Connects directly to TV or computer screens for larger, clear real-time viewing without extra software.
- Easy to Setup & Use: User-friendly interface and intuitive controls make it accessible for all ages.
- More than a Microscope: Capable of recording 1920*1080 30fps & 1280*720 60fps videos and capturing up to 16MP (5376*3024) photos, saved on the included 32GB SD card.
He aha kei roto i te Pouaka

Figure 2: All components included with your MOYSUWE MDM201 Pro.
- Microscope Monitor (1)
- Aluminum Alloy Bracket (1)
- Aluminum Alloy Base (1)
- Mana Mamao Ahokore (1)
- Pūurutau Hiko (1)
- Taura HDMI (1)
- Taura USB (2)
- 32GB Kaari SD (1)
- Lens Cleaning Cloth (1)
- Pukapuka Kaiwhakamahi (1)
Tatūnga
1. Huihuinga
- Attach the aluminum alloy bracket to the aluminum alloy base using the provided screws.
- Secure the microscope monitor unit to the top of the bracket. Ensure it is firmly attached.
- Connect the two adjustable gooseneck LED lights to the base.
- Insert the included 32GB SD card into the micro SD card slot on the back of the monitor.
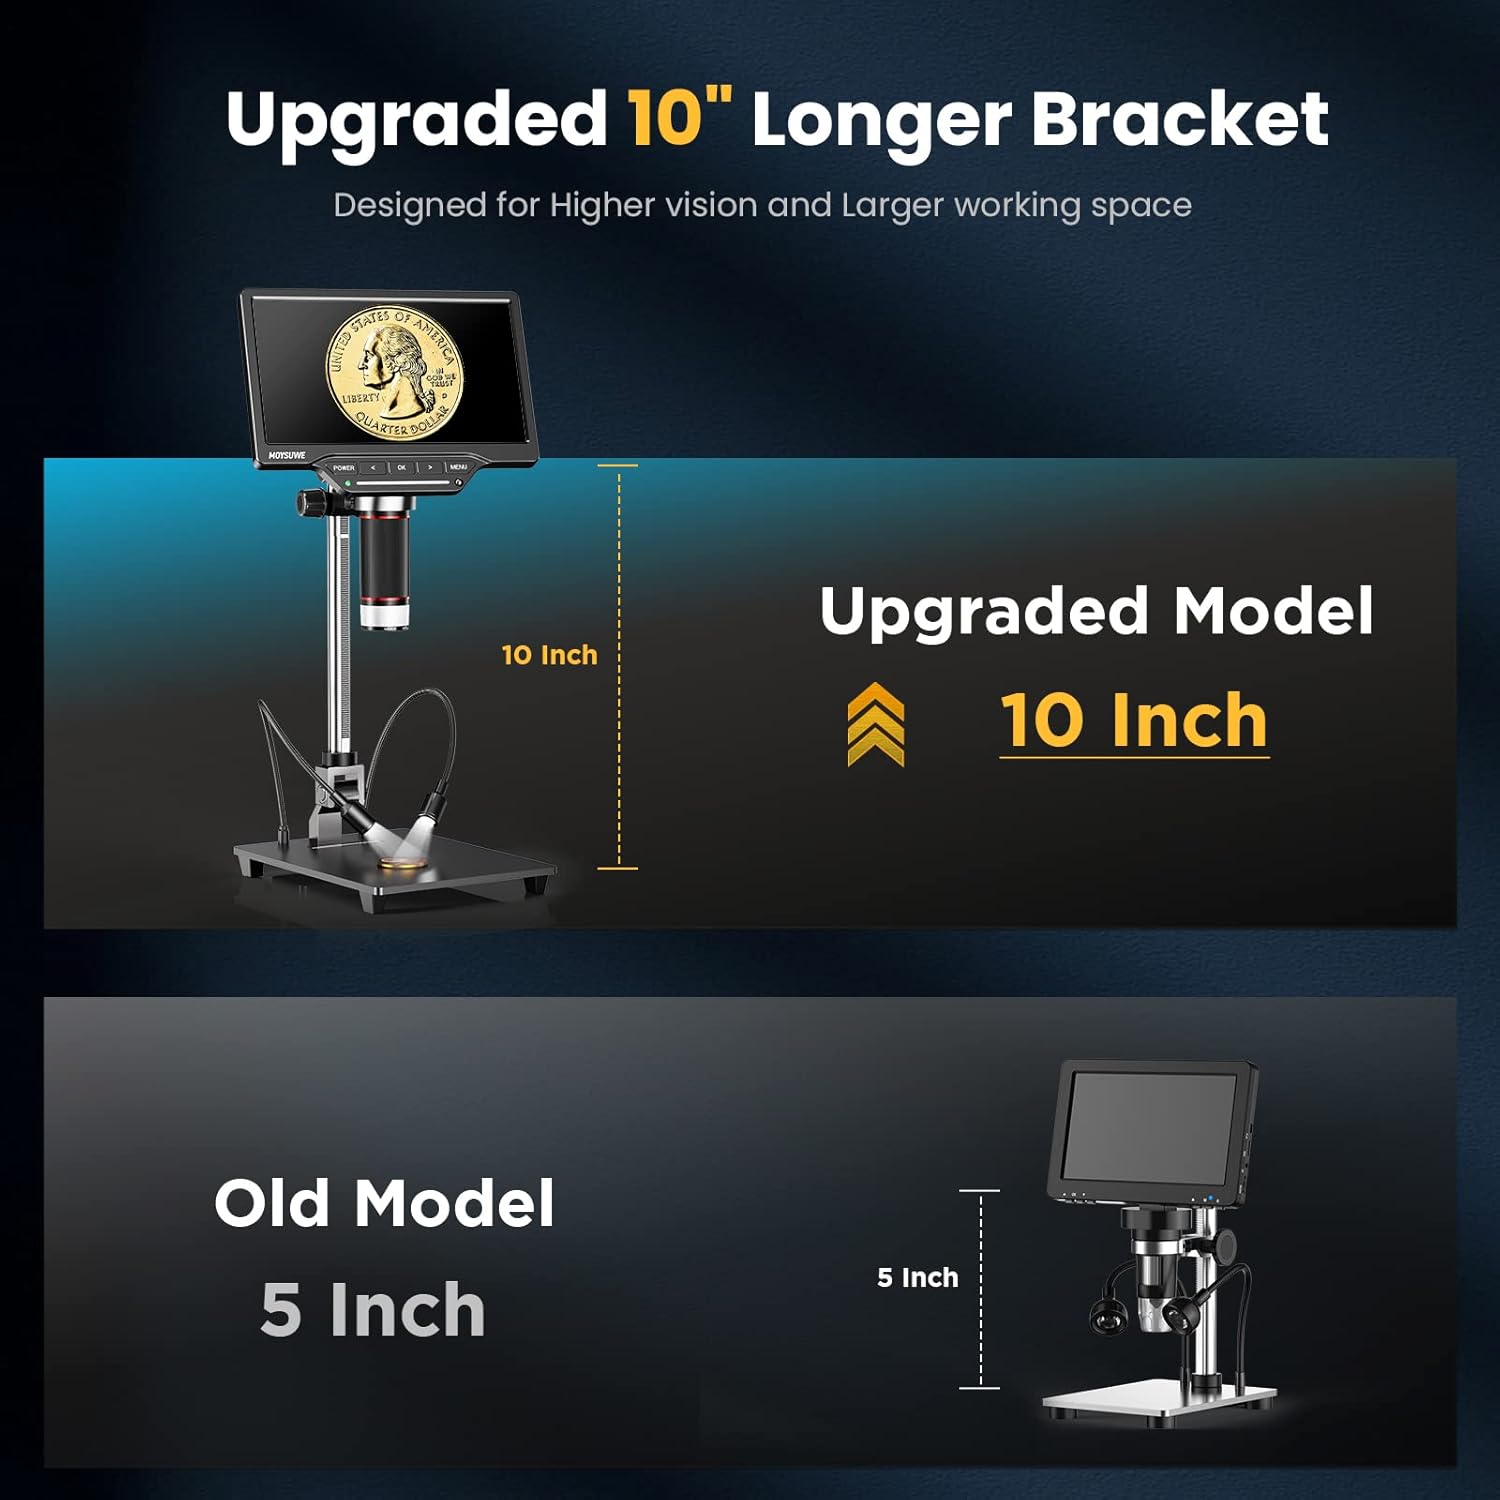
Figure 3: The upgraded 10-inch bracket provides ampte waahi mahi.
2. Te Whakakaha/Weto
- To power on, press and hold the 'POWER' button located on the front panel of the monitor until the screen illuminates.
- To power off, press and hold the 'POWER' button again until the screen shuts down.
- The device can operate on its internal rechargeable battery or be powered via the included power adapter.
3. Initial Screen Adjustment
- The 7-inch IPS HD screen can be tilted to various angles (up to 180°) for comfortable viewing. Adjust the screen to your preferred angle.

Figure 4: The 7-inch IPS HD monitor provides a clear view of the microworld.
Nga Tohutohu Whakahaere
1. Focusing and Zooming
- Place the object you wish to observe on the base plate directly under the microscope lens.
- Adjust the height of the microscope unit on the stand using the adjustment knob on the side of the bracket to get a rough focus.
- Fine-tune the focus by rotating the focus ring on the microscope lens itself.
- The microscope offers a magnification range from 3X to 1300X. Use the digital zoom function via the remote control or on-screen menu for further magnification.

Figure 5: Observe intricate details with the wide zoom range.
2. Te Whakatikatika i te Rama
- The microscope features 6 LED lights around the lens and 2 adjustable gooseneck lights on the base.
- Use the touch control bar on the monitor's front panel to turn on/off and adjust the brightness of the main LED lights.
- The gooseneck lights can be independently adjusted for position and brightness to eliminate shadows and provide optimal clarity.

Figure 6: Smart touch control for precise lighting adjustments.
3. Te Hopu Whakaahua me nga Ataata
- The microscope can capture photos up to 16MP (5376*3024) and record videos in 1920*1080 30fps or 1280*720 60fps.
- Press the 'OK' button on the monitor or the corresponding button on the wireless remote control to capture a photo or start/stop video recording.
- All captured media will be saved to the inserted 32GB SD card.

Figure 7: Easily record videos and capture high-resolution photos.
4. Mana Mamao Ahokore
- The included wireless remote control allows for convenient operation without touching the microscope, minimizing vibrations during capture.
- Functions include digital zoom, image flip, photo/video capture, and screen freeze.

Figure 8: Control your microscope remotely for stable captures.
5. Connecting to External Displays (HDMI & USB)
- Huaputa HDMI: Connect the microscope to a TV or projector using the provided HDMI cable for a larger, real-time HD view.
- Putanga USB: Connect to a Windows PC or Mac OS computer via USB. No extra software is needed; use default applications like "Windows Camera" (Windows) or "Photo Booth" (Mac OS).
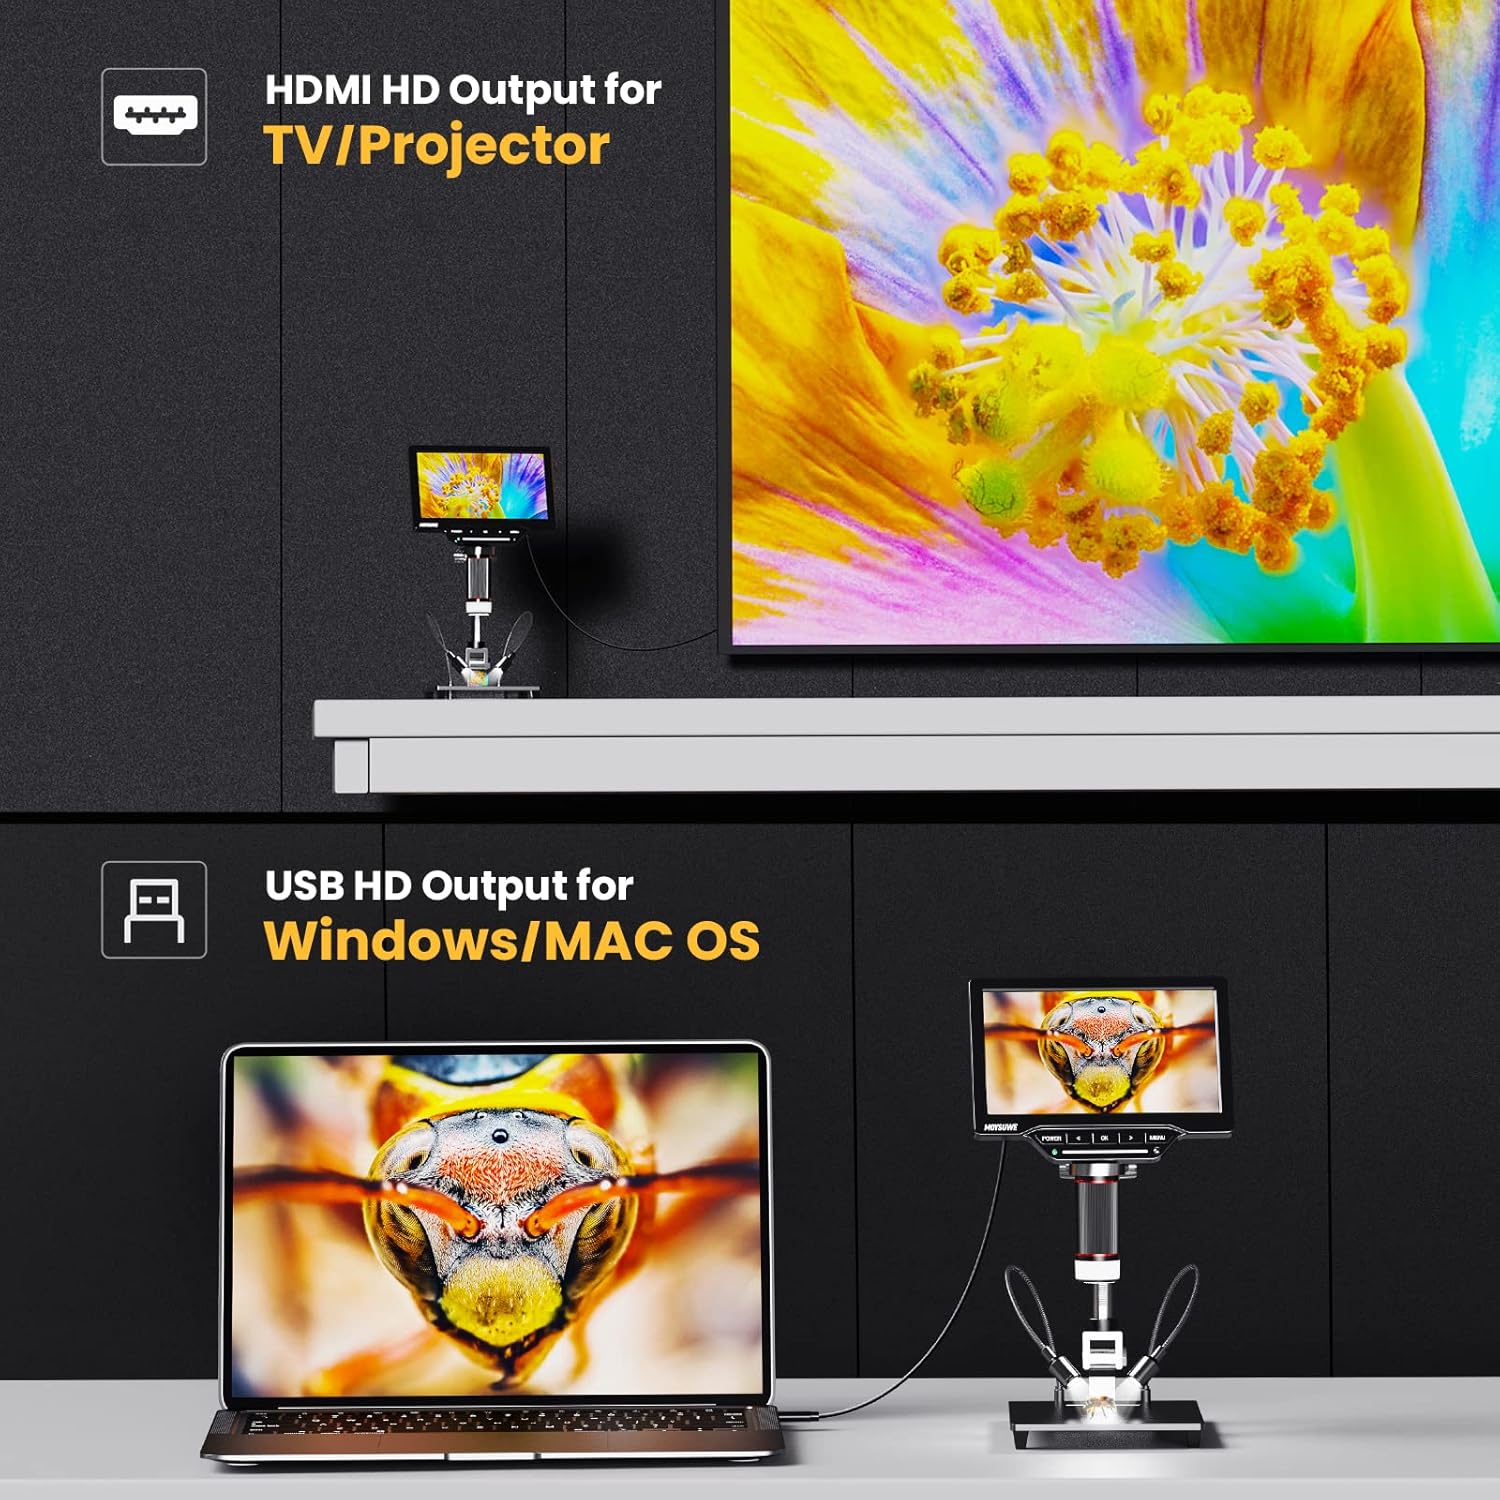
Figure 9: Connect to external displays for enhanced viewing and collaboration.
6. Whakatere me ngā Tautuhinga Tahua
- Press the 'MENU' button to access various settings, including image effects (color, B/W, negative), multi-direction image flip (horizontal mirror, vertical flip), and screen freeze modes (full screen, left screen, up screen, 1/4 screen).
- Use the arrow buttons to navigate through the menu options and 'OK' to select.

Figure 10: Customize your viewing experience with various image settings.

Figure 11: Utilize screen freeze modes for detailed comparison and analysis.
7. Ataata Hua Whaimana
Video 1: MOYSUWE MDM201 Pro 7" IPS HD HDMI Digital Microscope Overview. This video provides a comprehensive look at the microscope's features and functionality.
Te tiaki
- Te horoi: Use the provided lens cleaning cloth to gently wipe the lens and screen. For the body, use a soft, dry cloth. Avoid abrasive cleaners or solvents.
- Rokiroki: Penapenahia te karu hiko ki tētahi wāhi maroke, kore puehu ina kore e whakamahia.
- Tiaki Pūhiko: Hei whakaroa i te ora o te pākahiko, kaua e whakawetohia te pākahiko i ngā wā katoa. Whakautuhia i ia wā.
Raparongoā
- Kore Mana: Ensure the power adapter is correctly connected or the internal battery is charged.
- Atahanga Pouriuri: Adjust the height of the microscope unit and fine-tune the focus ring on the lens. Ensure adequate lighting.
- No Image on External Display: Verify HDMI/USB cable connections. Ensure the correct input source is selected on your TV/monitor. For PC/Mac, confirm the default camera application is running.
- Hapa Kaari SD: Ensure the SD card is inserted correctly. Try reformatting the card (this will erase all data) or use a different compatible SD card.
Whakatakotoranga
| Āhuahira | Taipitopito |
|---|---|
| Hunga Hua | 12.2 x 11.02 x 3.94 inihi |
| Taumaha Tūemi | 3.61 pauna |
| Tauira Tuemi | MDM201 Pro |
| Pūhiko | 1 nga pākahiko Lithium Ion e hiahiatia ana (kei roto) |
| Momo Puna Maama | LED |
| Koki Tuturu o View | 180 Waeine |
| Te Whakarahi Morahi | 1300 x |
| Voltage | 5 Volts |
| Pūrere Hototahi | Pona, Pouaka Whakaata |
| Whakaahuatanga o te Arotahi Whāinga | Achromatic |
Pūtāhui me te Tautoko
MOYSUWE is committed to providing high-quality products and excellent after-sales service. For any questions, technical support, or warranty claims, please refer to the contact information provided in your product packaging or visit the official MOYSUWE webpae.
Tena koa pupurihia to tohu hoko mo nga kaupapa whakamana.