1. Hua Neke Atuview
The Warrior 18V Cordless 3/8 Inch Drill/Driver Kit is designed for various drilling and driving tasks around the home and workshop. This versatile tool features a variable speed trigger, an electric brake, and 20 torque clutch settings for precise control. A keyless chuck allows for quick and easy bit changes, and a built-in LED light illuminates the work area for improved visibility in dark corners. The included 18V Lithium-Ion battery is interchangeable with other 18 Volt Warrior tools, offering convenience and flexibility.
Āhuatanga matua:
- Variable speed, reversible operation
- Electric brake for immediate stopping
- 20 torque clutch settings for diverse applications
- Keyless chuck for quick bit changes
- Integrated LED light for enhanced visibility
- 18 Volt Lithium-Ion battery, interchangeable with other Warrior 18V tools
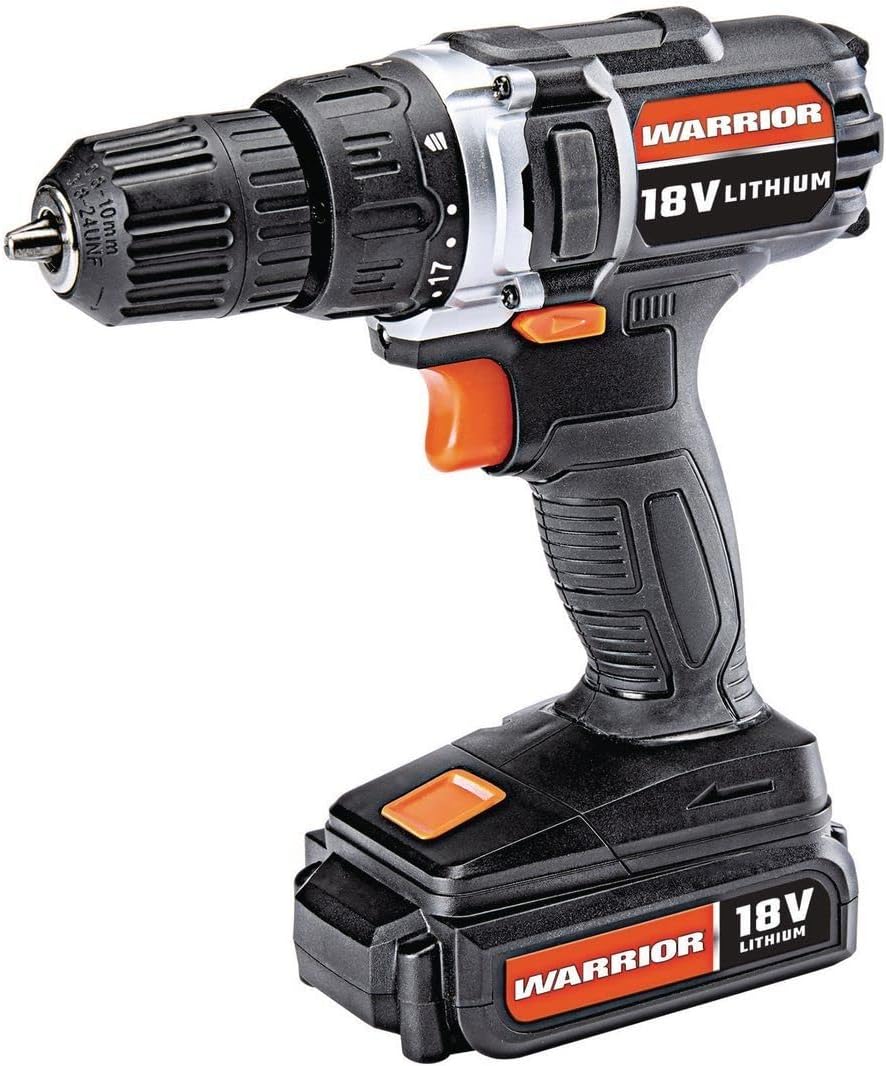
Figure 1: The Warrior 18V Cordless 3/8 Inch Drill/Driver Kit, showcasintōna hoahoa kiato me ngā āhuatanga matua.
2. Tatūnga
2.1 Te Whakaekea me te Whakanoho
- Te Whakataki i te Pūhiko: Connect the provided barrel charger to the charging port located on the battery pack. Plug the charger into a standard electrical outlet. The indicator light on the charger will show the charging status (e.g., red for charging, green for fully charged). Ensure the battery is fully charged before first use.
- Tāuta i te Pūhiko: Align the battery pack with the base of the drill handle. Slide the battery into place until it clicks securely. Ensure it is firmly seated to prevent accidental detachment during operation.
- Tango ana i te Patahiko: Press the battery release buttons (typically on the sides of the battery pack) and slide the battery out of the drill handle.
2.2 Inserting and Removing Drill Bits
- Whakatuwheratia te Pūrua: Rotate the front collar of the keyless chuck counter-clockwise until the jaws are wide enough to accept the desired drill bit or driver bit.
- Kōkuhu te Moka: Insert the shank of the drill bit or driver bit into the chuck jaws. Ensure the bit is centered and inserted as far as possible without touching the chuck body.
- Whakapaia te Chuck: Rotate the front collar of the chuck clockwise until the jaws firmly grip the bit. For maximum grip, give it an extra twist by hand.
- Tangohia te Momo: Rotate the front collar of the chuck counter-clockwise to loosen the jaws and remove the bit.

Whakaatu 2: Neke Atuview of the drill's features, including the 20 clutch settings, LED light, variable speed, and lightweight design.
3. Nga Tohutohu Whakahaere
3.1 Te Hia/Weto me te Mana Tere Taurangi
- To start the drill, press the trigger switch. The speed of the drill is controlled by the amount of pressure applied to the trigger; pressing it further increases the speed.
- To stop the drill, release the trigger switch. The electric brake will engage, stopping the chuck rotation quickly.
3.2 Te Huri Whakamua/Whakamuri
- Kei runga ake i te keu te pana kōwhiri whakamua/whakamuri.
- Pēhia te pana ki te taha mauī hei huri whakamua (mō te keri me te akiaki i ngā tīwiri).
- Pēhia te pana ki te taha matau hei huri whakamuri (hei tango i ngā tīwiri, hei whakamuri rānei i ngā mata wiri).
- When the switch is in the center position, the trigger is locked, preventing accidental startup.
3.3 Torque Clutch Settings
- The torque clutch ring is located behind the chuck. It has 20 numbered settings and a drill symbol.
- Rotate the ring to select the desired torque setting. Lower numbers provide less torque, suitable for smaller screws and softer materials to prevent over-driving or stripping. Higher numbers provide more torque for larger screws and harder materials.
- For drilling applications, select the drill symbol setting for maximum torque.
3.4 Maama Mahi LED
- The integrated LED work light automatically illuminates when the trigger is pressed, providing light to the work surface.

Figure 3: The Warrior 18V Cordless Drill in use, demonstrating its application for household tasks like installing a grab bar.
4. Tiaki
4.1 Whakapai Whanui
- Keep the tool's air vents clean and free of debris to ensure proper motor cooling.
- Horoia te taputapu ki te wai ma,amp kakahu. Kaua e whakamahi i nga matū kino me nga horoi horoi.
- Regularly inspect the chuck jaws for wear and clean any accumulated dust or debris.
4.2 Tiaki Pūhiko me te Rokiroki
- Whakaorangia te pākahiko ki te waahi makariri, maroke kia matara atu i te ra me te wera nui.
- For long-term storage, it is recommended to charge the battery to approximately 50% capacity.
- Avoid completely draining the battery before recharging, as this can reduce its lifespan.
5. Te Raru
5.1 Drill Does Not Operate
- Me whakarite kua whakakiia te pākahiko me te whakauru tika.
- Check that the forward/reverse selector switch is not in the center (locked) position.
- Verify that the charger is disconnected from the battery when attempting to operate the drill.
5.2 Reduced Power or Performance
- Kei te iti pea te utu o te pākahiko. Whakaorangia te pākahiko.
- The torque clutch setting may be too low for the task. Adjust to a higher setting or the drill mode.
- Ensure the drill bit is sharp and appropriate for the material being worked on.
6. Whakatakotoranga
| Āhuahira | Whakatakotoranga |
|---|---|
| Waitohu | Toa |
| Tau tauira | Warior-XXX |
| Puna Mana | Pūhiko Powered |
| Voltage | 18 Volts |
| Momo Pūtau Pūhiko | Lithium Ion |
| Tere Hurihuri Morahi | 900 RPM |
| Tautuhinga Torque | 20 Tautuhinga Mamau |
| Momo Chuck | Chuck Kore |
| Rakau Raukaha Te Keri | 1 Inihi |
| Taumaha Tūemi | 2.47 pauna |
| Rauemi | Kirihou |
| Nga waahanga motuhake | Variable Speed, LED Light |
| UPC | 798993496886 |
7. Pūtāhui me te Tautoko
Specific warranty information and customer support contact details were not provided in the product data. Please refer to the product packaging or the manufacturer's official webpaetukutuku mō ngā tikanga pūtāhui me ngā kōwhiringa tautoko hou rawa atu.