Kupu Whakataki
This manual provides detailed instructions for the installation, operation, and maintenance of your XVIM 8CH 1080P Home Security Camera System. Please read this manual thoroughly before using the product to ensure proper setup and functionality. Keep this manual for future reference.
Ka mutu te huaview
The XVIM 8CH 1080P Home Security Camera System includes an 8-channel Digital Video Recorder (DVR) with a 1TB hard drive and four 2MP HD outdoor IP66 waterproof cameras. The system is designed for reliable surveillance with features such as night vision and remote access capabilities.

Whakaahua: Ka mutuview of the XVIM 1080P HD Security Camera System, showing a camera and a smartphone displaying live view.
Ngā Āhuatanga Kāmera
- Whare Whakarewa IP66: Durable and weatherproof construction.
- 3.6mm HD Lens: E whakarato ana i te 75° viewkoki.
- Tātari Tapahi-IR: Ensures clear day and night vision.
- 24 rama: Offers up to 65ft night vision range.

Image: Diagram highlighting key camera features: IP66 metal housing, 3.6mm HD lens, IR-cut filter, and 24 LEDs.
Te Aroturuki i te Awatea me te Pō
The cameras are equipped with an IR-Cut filter and infrared LEDs to provide clear surveillance both during the day and at night. During the day, images are colorful and high definition. At night, the cameras automatically switch to infrared mode for clear black and white vision in low-light conditions.
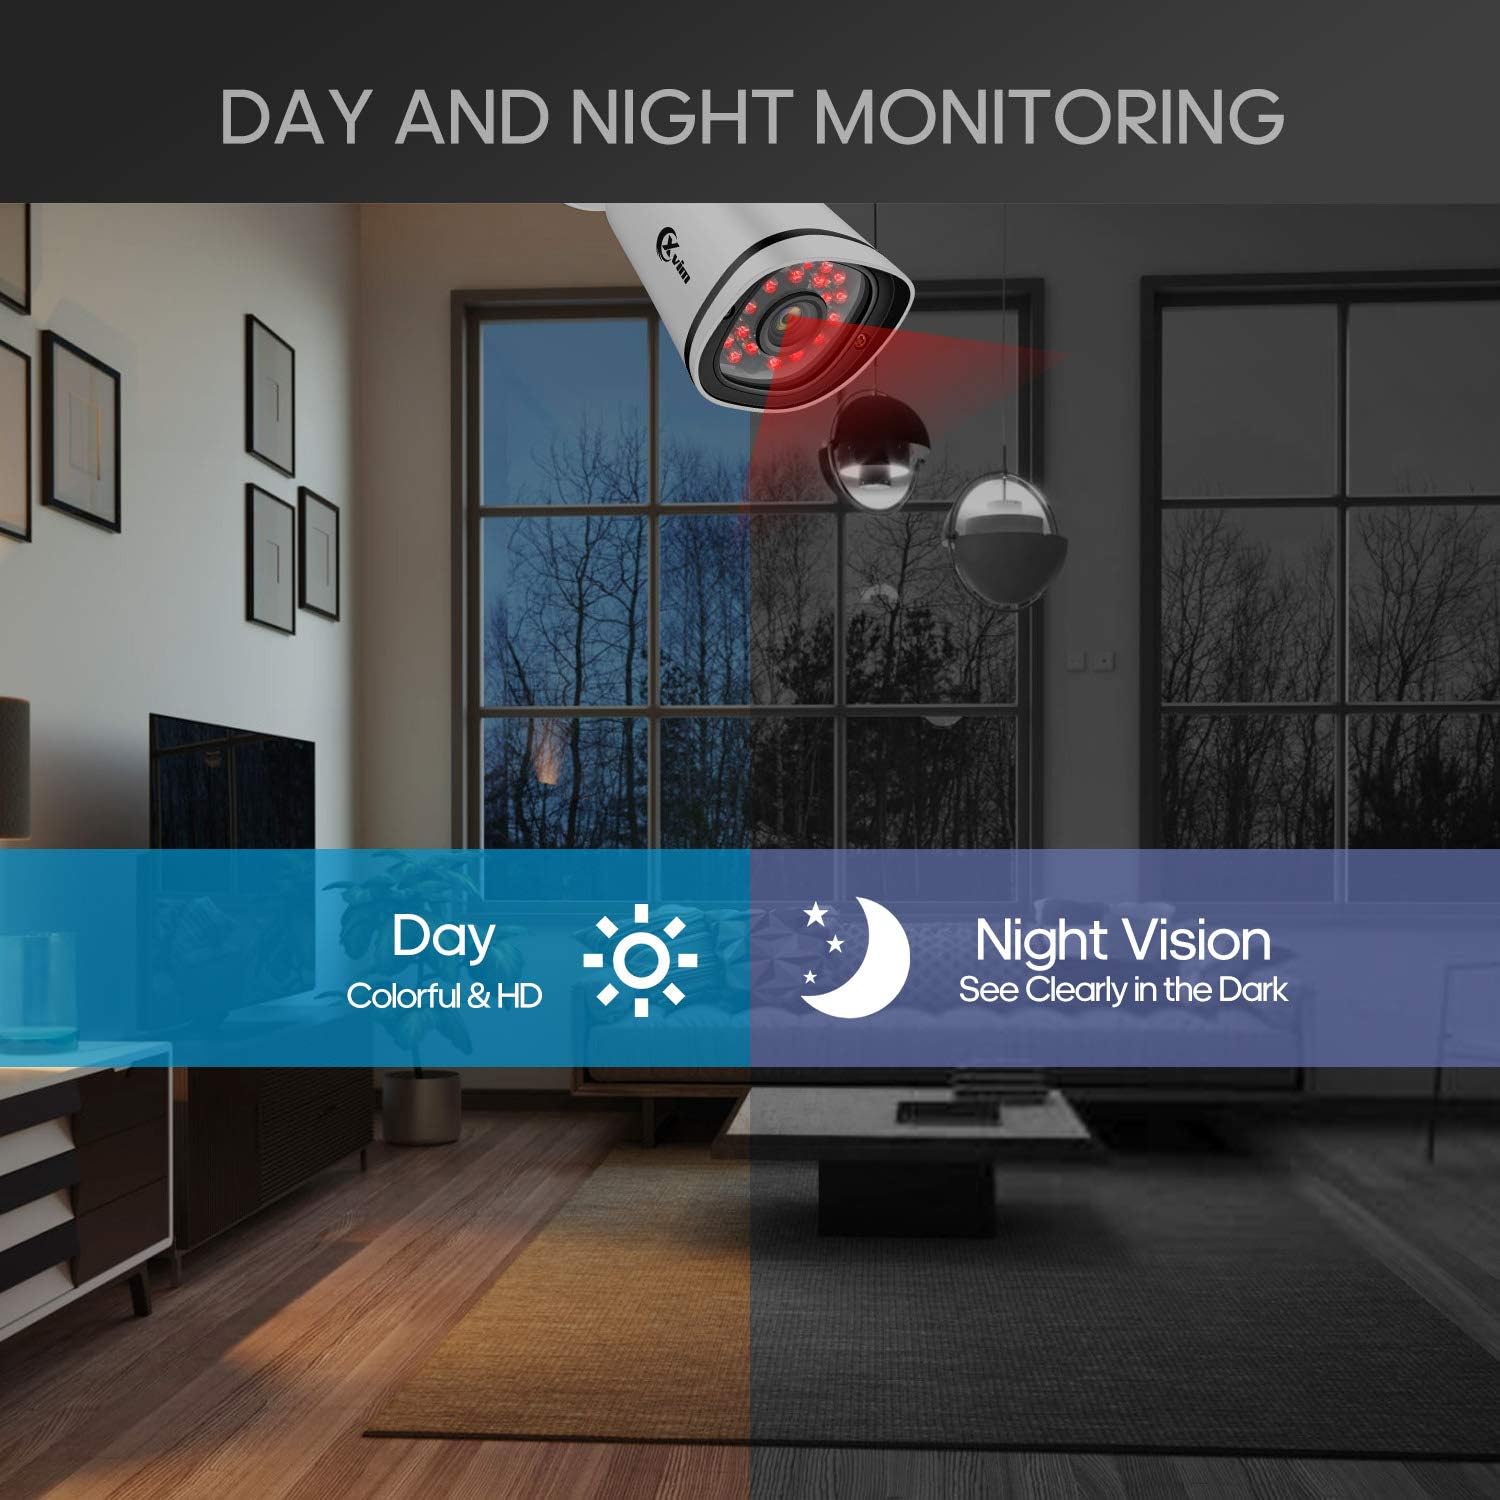
Image: Illustration showing the camera's ability to monitor both during the day (colorful HD) and at night (clear vision in the dark).
Hoahoa parewai
The cameras feature an IP66-rated metal housing, ensuring they are protected against dust and powerful water jets, making them suitable for outdoor installation in various weather conditions.
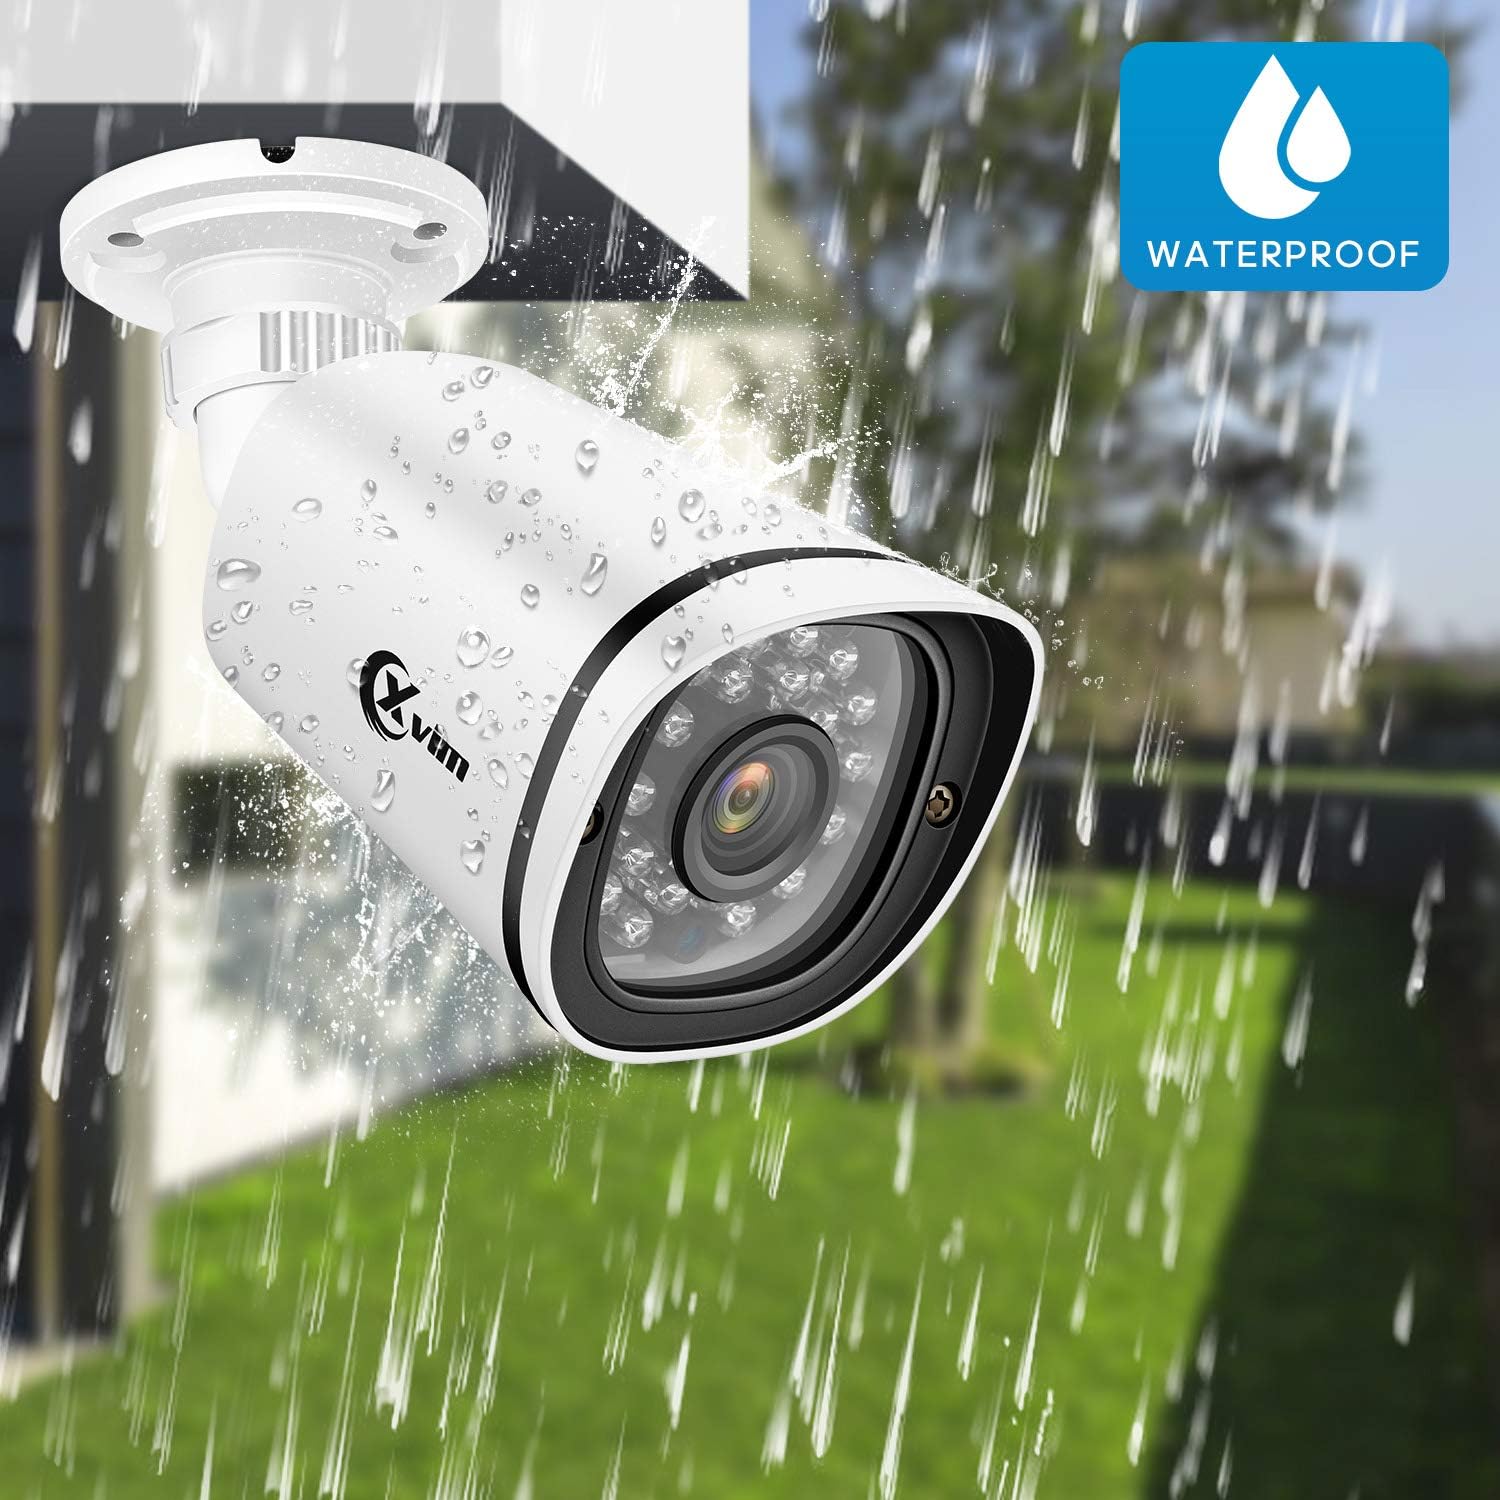
Image: An XVIM camera being sprayed with water, illustrating its waterproof design.
DVR Back Panel Overview
The DVR unit provides multiple ports for connecting cameras, a monitor, audio input/output, and network connectivity. Familiarize yourself with the ports before installation.
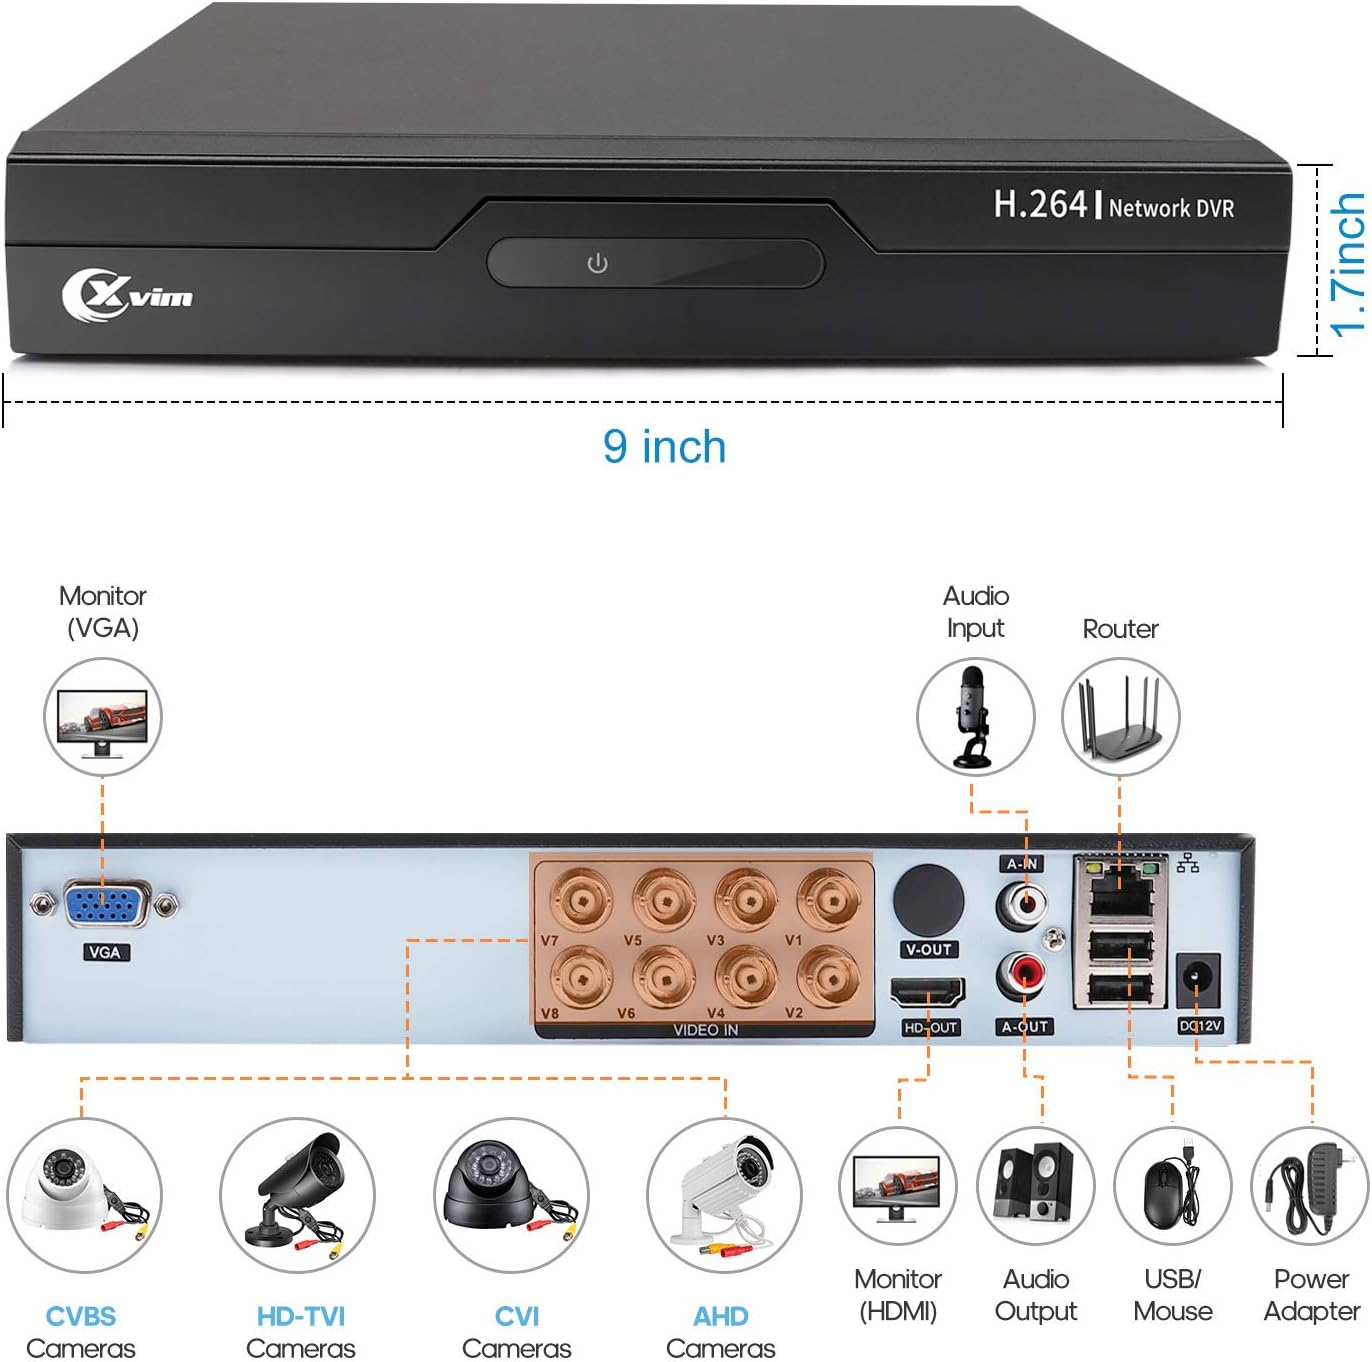
Image: Diagram of the DVR's back panel, showing ports for VGA, HDMI, video input (BNC), audio input/output, USB, and power.
Tohutohu Tatūnga
- Honoa ngā Kāmera ki te DVR: Connect each camera to the corresponding video input (BNC) port on the DVR using the provided cables. Ensure secure connections.
- Honoa te DVR ki te Aroturuki: Connect the DVR to a monitor using either the VGA or HDMI port.
- Honoa te DVR ki te Whatunga: For remote access, connect the DVR to your router using an Ethernet cable.
- Hono Hono: Connect the power adapters to the cameras and the DVR, then plug them into a power outlet. The system will power on automatically.
- Tatūnga Tuatahi: Follow the on-screen prompts on your monitor to complete the initial DVR setup, including setting up a password and configuring basic settings.
- Tatūnga Taupānga Pūkoro:
- Download the "XVR Pro" app from your smartphone's app store.
Tikiake mo te Android
Tikiake mo iOS - Rēhita mō tētahi pūkete i roto i te taupānga.
- Add your DVR device by scanning the QR code displayed on the DVR's monitor or by manually entering the device ID.
- Kia tāpirihia, ka taea e koe view your cameras remotely from anywhere.
- Download the "XVR Pro" app from your smartphone's app store.

Image: Step-by-step guide for connecting the system components and setting up the XVR Pro mobile application.
Nga Tohutohu Whakahaere
Ora View
Kia angitu te whakatūnga, ka taea e koe view ora footage from your cameras on the connected monitor or through the XVR Pro mobile app. The DVR interface allows you to switch between single-camera view me te matiti kamera-maha view.
Ngā Whakakotahitanga Whakamuri
The system supports various recording modes:
- Te tuhi ā-ringa: Start and stop recording manually via the DVR interface.
- Hukuhono Hukinga Huringa: Configure the system to record automatically when motion is detected in specified areas. This helps conserve hard drive space.
- Hopu Tono: Set specific times for continuous recording.
Refer to the DVR's on-screen menu for detailed configuration of recording schedules and motion detection zones.
Uru Mamao
The XVR Pro app enables you to:
- View live camera feeds from anywhere with an internet connection.
- Kua rekotia te purei footage stored on the DVR.
- Whiwhi matohi kitenga nekehanga.
- Control certain DVR settings remotely.
Camera Mode Switching (OSD Menu)
Each camera features an OSD (On-Screen Display) button on its cable, allowing you to switch between different video modes (Analog, AHD, TVI, CVI) to ensure compatibility with various DVRs. To access the OSD menu and switch modes:
- Analog (CVBS) Mode: Patohia te paatene OSD Whakarunga mo te 5 hēkona.
- AHD Mode: Patohia te paatene OSD Mauī mo te 5 hēkona.
- TVI Mode: Patohia te paatene OSD Matau mo te 5 hēkona.
- CVI Mode: Patohia te paatene OSD Whakararo mo te 5 hēkona.
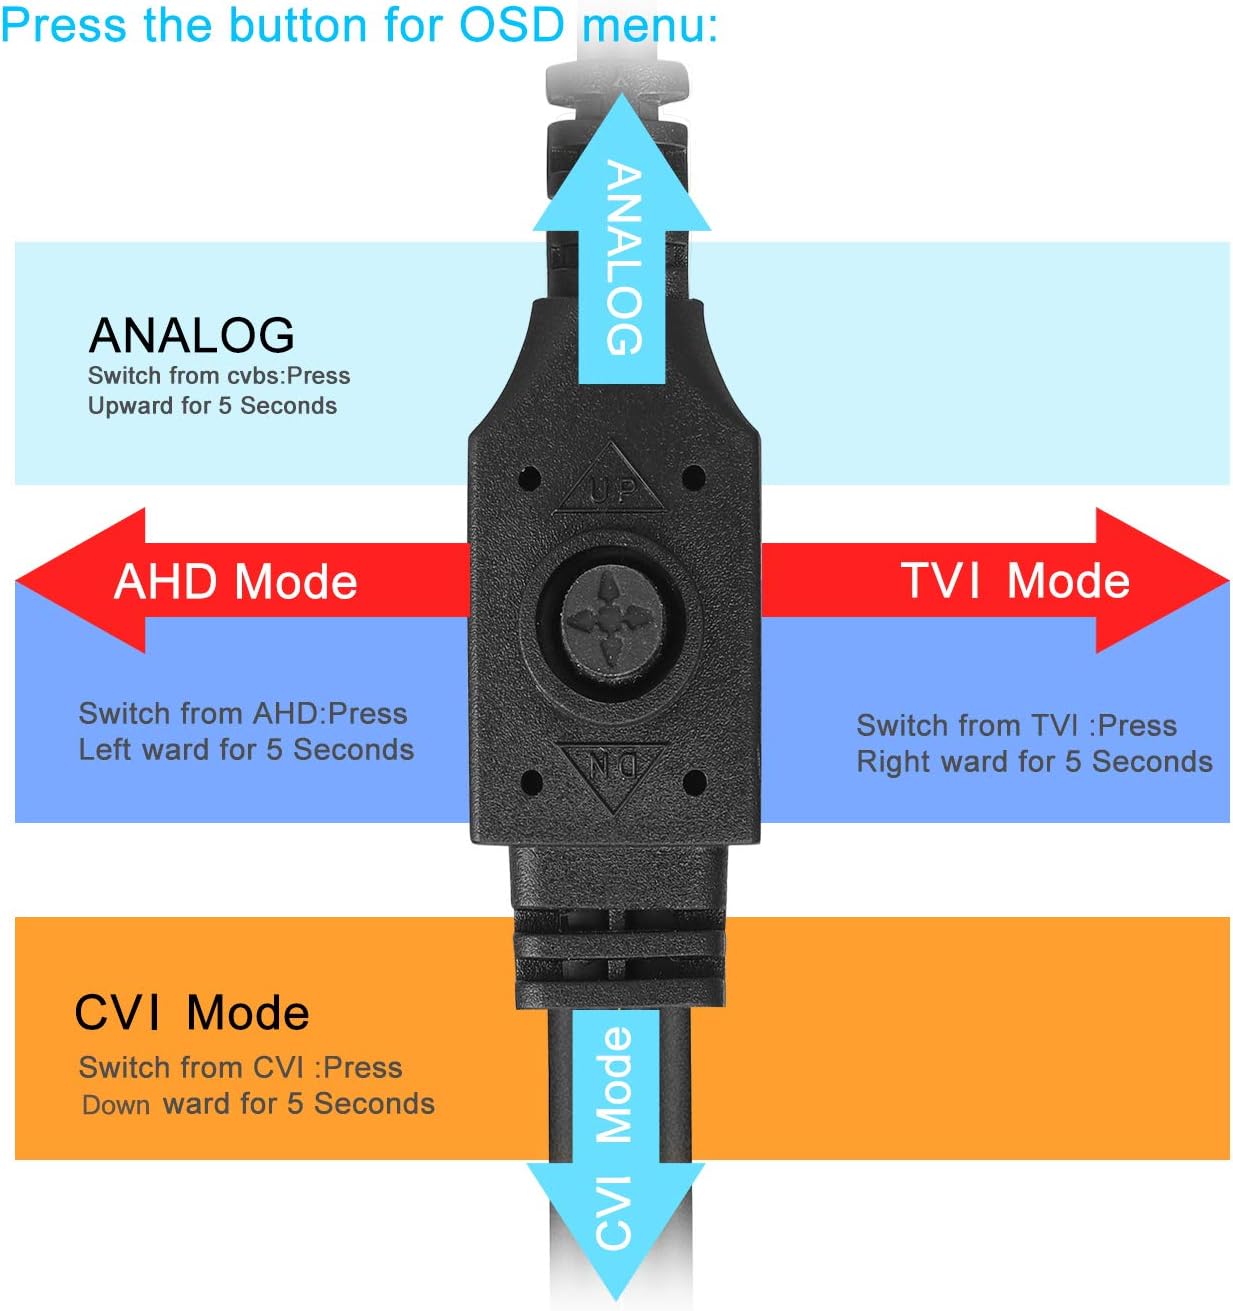
Image: Diagram illustrating how to use the OSD button on the camera cable to switch between Analog, AHD, TVI, and CVI video modes.
Te tiaki
- Whakapai kamera: Horoia ngā karāhe kāmera i ia wā ki te wai ngohengohe,amp kakahu hei whakarite kia marama te ahua o te ahua. A ape i te horoi horoi.
- Tirohanga taura: Periodically check all cables and connections for wear, damage, or loose connections.
- Whakahauātanga DVR: Me whakarite kia rawaka te hauhautanga o te waeine DVR hei ārai i te wera nui. Kia matara atu i ngā arai ngā hauhautanga.
- Whakahaere Puku Maama: Ka tuhirua aunoatia e te puku mārō 1TB te kōnae tawhito rawatage when full. Regularly back up important recordings if needed.
- Whakahōu Firmware: Check the XVIM official webpaetukutuku mō ngā whakahōu pūmanawa e wātea ana mō tō DVR hei whakarite i te mahi tino pai me te haumarutanga.
Raparongoā
Kāore he Whakaaturanga Ataata
- Check all power connections for the DVR and cameras.
- Verify that the monitor is correctly connected to the DVR via VGA or HDMI and is set to the correct input source.
- Ensure camera cables are securely connected to the DVR's video input ports.
- If a specific camera has no video, try switching its video mode using the OSD button (refer to "Camera Mode Switching" section).
Ngā Take Uru Mamao
- Confirm the DVR is connected to your router and has internet access.
- Tirohia te hononga ipurangi o to pouara.
- Ensure the XVR Pro app is updated to the latest version.
- Verify that the device ID is correctly added in the app and your login credentials are correct.
Poor Night Vision
- Me mohio kei te ma te arotahi kamera me te kore e aukati.
- Check for strong light sources near the camera that might interfere with the infrared LEDs.
DVR Not Recording
- Check the hard drive status in the DVR's system settings. Ensure it is detected and functioning.
- Manatokohia kua tika te whirihoranga o ngā kaupapa tuhi, ngā tautuhinga kite nekehanga rānei.
- Ensure there is sufficient hard drive space (though the system typically overwrites old footagme).
If you encounter persistent issues not covered here, please contact XVIM customer support for assistance.
Whakatakotoranga
| Waitohu | XVIM |
| Tau tauira | US-D8-4AHD7-1T-203 |
| Hangarau Hononga | Waea |
| Whakataunga Hopu Ataata | 1080p |
| Nga waahanga motuhake | Image, Motion Sensor, Night Vision, Waterproof |
| Te maha o nga hongere | 4 (cameras included, DVR supports 8 channels) |
| Te Rokiroki Mahara | 1 TB (Puku Mārō) |
| Puna Mana | Hiko Hiko |
| Rahi Tūemi (L x W x H) | 13.94 x 11.85 x 6.93 inihi |
| Awhe Tirohanga Po | 85 Puawai |
| Aratau tuhi | Manual, Motion Detection |
| Atanga Pūmārō | USB 3.0 Momo B |
| Momo Arotahi | Whakaritea |
| Whakauru Ataata | BNC, RCA (CVBS) |
| Viewing Koki | 81 Waeine |
Pūtāhui me te Tautoko
XVIM products are designed for reliability and performance. For specific warranty details, please refer to the warranty card included with your product or visit the official XVIM website. For technical support, troubleshooting assistance, or any inquiries, please contact XVIM customer service through their official channels.
Rauemi ipurangi: For additional support, FAQs, and software downloads, please visit the XVIM Store on Amazon or the official XVIM webpae.