Kupu Whakataki
This manual provides detailed instructions for the safe installation, operation, and maintenance of your Globe Electric 65186 Dobson 1-Light Flush Mount Ceiling Light. Please read all instructions carefully before beginning installation and retain this manual for future reference.
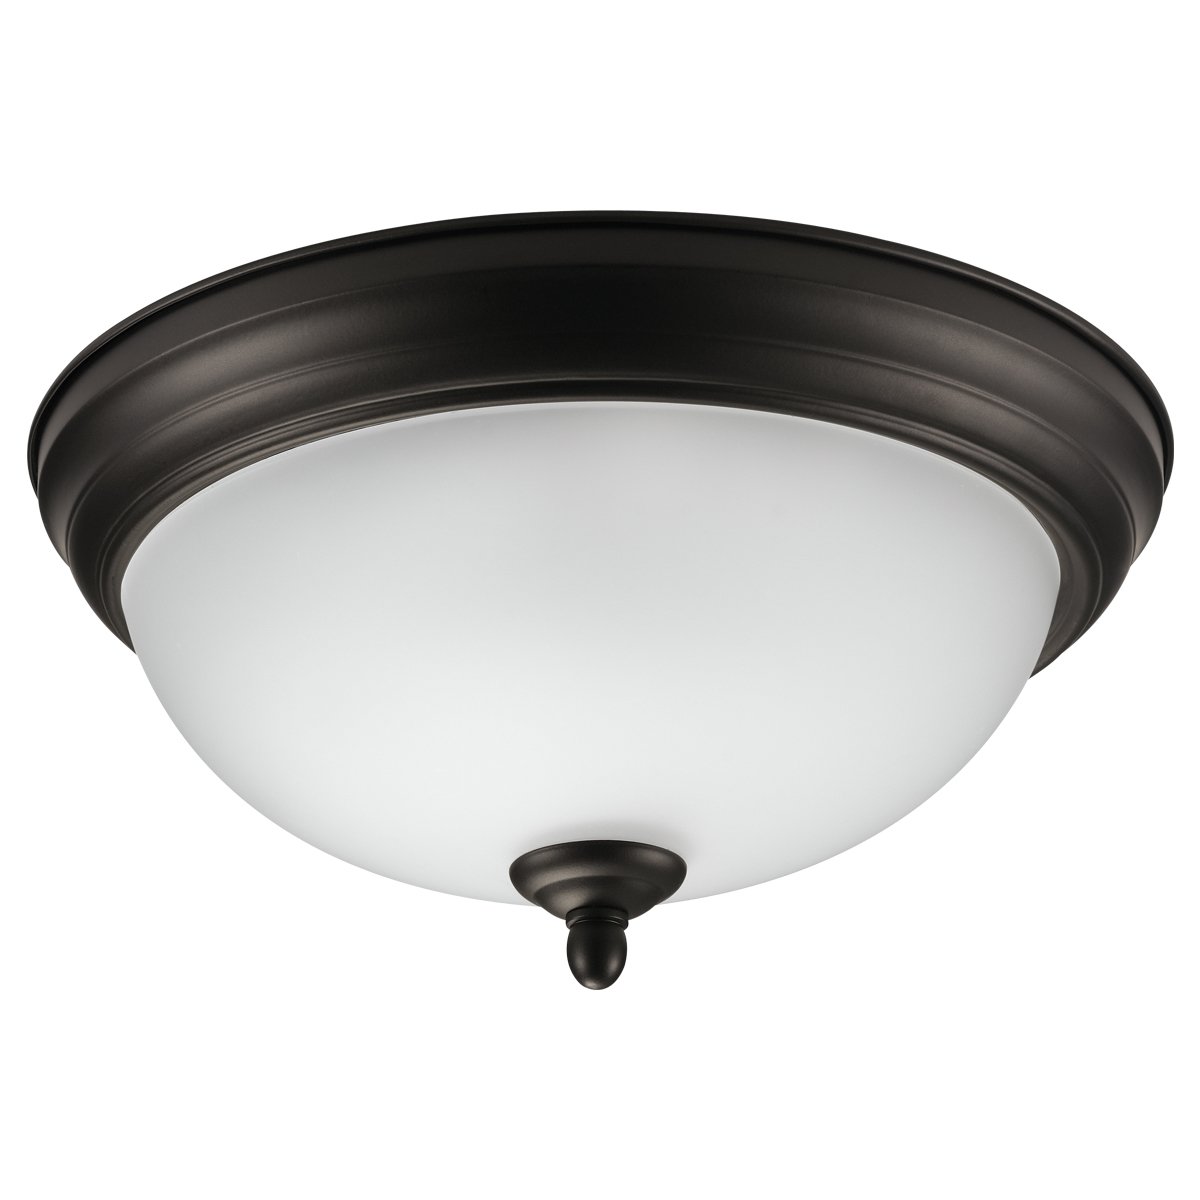
Figure 1: Globe Electric 65186 Dobson 1-Light Flush Mount Ceiling Light. This image shows the complete light fixture with its dark bronze finish and frosted glass shade.
Nga korero haumaru
WHAKATŪPATO: To avoid electric shock, ensure power is turned off at the circuit breaker before installation or servicing. All wiring must be in accordance with national and local electrical codes. If you are unsure about wiring, consult a qualified electrician.
- Kaua e whakauruhia tenei taputapu ki nga waahi maku. He pai mo te whakamahi o roto anake.
- Whakamahia te momo umanga me te wat anaketage kia kore e wera rawa.
- Kia tupato ki te hapai i nga waahanga karaihe kia kore ai e pakaru.
- Puritia ngā rauemi mura kia matara atu i te rama.
Ihirangi mokete
Manatokona kei te noho nga waahanga katoa i mua i te tiimata o te whakaurunga:
- 1 x Light Fixture (Dark Bronze finish)
- 1 x Frosted Glass Shade
- 1 x Kete Taputapu Whakamau (kei roto ko ngā tīwiri, ngā nati waea, me ētahi atu)
- 1 x Pukapuka Tohutohu
Note: 1x Medium Base/E26 A-Type 60W Bulb is kaore whakaurua me hoko motuhake.
Tatūnga me te Tāuta
Follow these steps for proper installation of your flush mount ceiling light:
- Whakaweto Hiko: Locate the circuit breaker controlling the light fixture's power supply and turn it off. Confirm power is off by attempting to turn on the light switch.
- Whakapaia te Mata Maunga: Ensure the ceiling junction box is securely mounted and capable of supporting the fixture's weight.
- Āpiti Taiapa Whakapuru: Secure the mounting bracket (included in hardware kit) to the junction box using the provided screws.
- Hononga Waea: Connect the fixture's wires to the corresponding house wires (black to black, white to white, ground to ground) using the provided wire nuts. Ensure all connections are secure.
- Secure Fixture to Bracket: Carefully align the fixture with the mounting bracket and secure it using the provided screws.
- Tāuta Pūrama: Screw in one E26 A-Type 60W maximum bulb (sold separately) into the socket.
- Whakapiria te Taumarumaru Karaehe: Carefully place the frosted glass shade onto the fixture and secure it according to the design (typically by twisting or using decorative nuts).
- Whakaora i te Mana: Whakahokia ano te hiko i te ara iahiko.
Whakaahua 2: Roto view of the light fixture, illustrating the E26 bulb base and ironwork chassis for secure bulb installation.
Aratohu Ataata Tāuta
Video 1: This video demonstrates the installation process for a similar flush mount ceiling light, providing a visual guide to complement the written instructions.
Nga Tohutohu Whakahaere
Once installed, your Globe Electric 65186 Dobson light fixture is ready for use.
- Whakakā/Weto: Whakahaerehia te rama mā te whakamahi i tō pana pakitara paerewa.
- Āhuahira Moama: This fixture is fully dimmable. If connected to a compatible dimmer switch (sold separately), you can adjust the light intensity to create your desired ambiance.
- Momo Puma: The fixture requires one E26 A-Type bulb. For optimal performance and safety, do not exceed the maximum wattage o 60W.
Te tiaki
Mā te tiaki auau ka roa te ora me te mahi tino pai o tō rama.
- Te horoi: Turn off power before cleaning. Wipe the fixture with a soft, dry cloth. Do not use abrasive cleaners or solvents, as they may damage the finish or glass.
- Whakakapi Purama: Turn off power before replacing the bulb. Allow the bulb to cool completely. Unscrew the old bulb and replace it with a new E26 A-Type 60W maximum bulb.
- Tirotiro: Tirohia ngā hononga hiko katoa me ngā taputapu whakamau i ia wā, i ia wā, mō te piripono.
Raparongoā
Mena ka pāngia koe e ngā raruraru me ngā otinga e pā ana ki tō rama, tirohia ngā raruraru me ngā otinga e whai ake nei:
| Raruraru | Take pea | Rongoā |
|---|---|---|
| Kaore e marama te rama. | 1. Kua momotu te hiko i te pūwhakamutu hiko. 2. Hononga waea wewete. 3. Pupuku hapa. | 1. Check and reset the circuit breaker. 2. Turn off power, check and secure all wire connections. 3. Whakakapia te rama. |
| Ka whiti marama. | 1. Pupura wetekina. 2. Incompatible dimmer switch. 3. Hononga waea wewete. | 1. Whakapirihia te pūangi. 2. Ensure dimmer switch is compatible with the bulb type. 3. Turn off power, check and secure all wire connections. |
| He iti rawa te marama. | 1. Waata ititage rama. 2. Dimmer setting is too low. | 1. Whakakapihia ki te wat teitei aketage umanga (tae atu ki te 60W). 2. Adjust the dimmer switch to a higher setting. |
Whakatakotoranga
- Waitohu: Globe Hiko
- Tau tauira: 65186
- Tae: Oil Bronze
- Rauemi: Metara, Karaehe
- Kāhua: Hou
- Puka Maama: Kati ki te Pouaka / Whakapiri Maunga
- Rahi Hua: 27.9L x 27.9W x 13.3H Centimetres (11L x 11W x 5.2H inches)
- Whakamahinga o roto/waho: Roo-roto
- Puna Hiko: Hardwire Electric
- Tikanga Mana: Pā (mā te pana pakitara)
- Te maha o nga puna marama: 1
- Voltage: 120 Volts
- Wattage: 60 Watts (mōrahi)
- Turanga Pupura: E26
- Embellishment Feature: Karekau
- Taumaha Tūemi: 1.25 kg
- Huihuinga e hiahiatia ana: Kao
Pūtāhui me te Tautoko
This Globe Electric product comes with a 2 tau te whakamana a te kaiwhakanao.
For technical support, warranty claims, or further assistance, please contact Globe Electric customer service. Refer to the product packaging or the official Globe Electric webpae mo nga korero whakapā o naianei.
Manufacturer Contact Information: Pointe-Claire, QC H9R 1A8, CA