
1. Important Safety Instructions
Read and understand all safety warnings and instructions before operating this electric hoist. Failure to follow these instructions may result in electric shock, fire, serious injury, or property damage. Keep this manual for future reference.
1.1 General Safety
- Always wear appropriate personal protective equipment (PPE), including safety glasses, gloves, and sturdy footwear.
- Ensure the work area is clear of obstructions, well-lit, and free from unauthorized personnel.
- Do not operate the hoist under the influence of drugs, alcohol, or medication.
- Inspect the hoist for damage before each use. Do not operate if damaged.
- Keep hands and body clear of moving parts and the load during operation.
1.2 Electrical Safety
- Connect the hoist only to a properly grounded power outlet with the specified voltage (220V).
- Do not expose the hoist to rain or wet conditions.
- Never use the power cord to carry, pull, or unplug the hoist.
- Ensure all electrical connections are secure and free from damage.
1.3 Lifting Safety
- Never exceed the rated load capacity of the hoist (125 kg for single cable, 250 kg for double cable).
- Ensure the load is properly balanced and securely attached to the hook.
- Do not lift people or objects over people.
- Avoid sudden starts or stops when lifting or lowering a load.
- Use the emergency stop switch immediately if an unsafe condition occurs.
2. Product Overview
The VEVOR Electric Wire Rope Hoist PAYX250-2 is designed for lifting heavy objects in various environments such as garages, warehouses, and factories. It features a robust pure copper motor, a durable steel wire rope, and a wired remote control for safe operation.
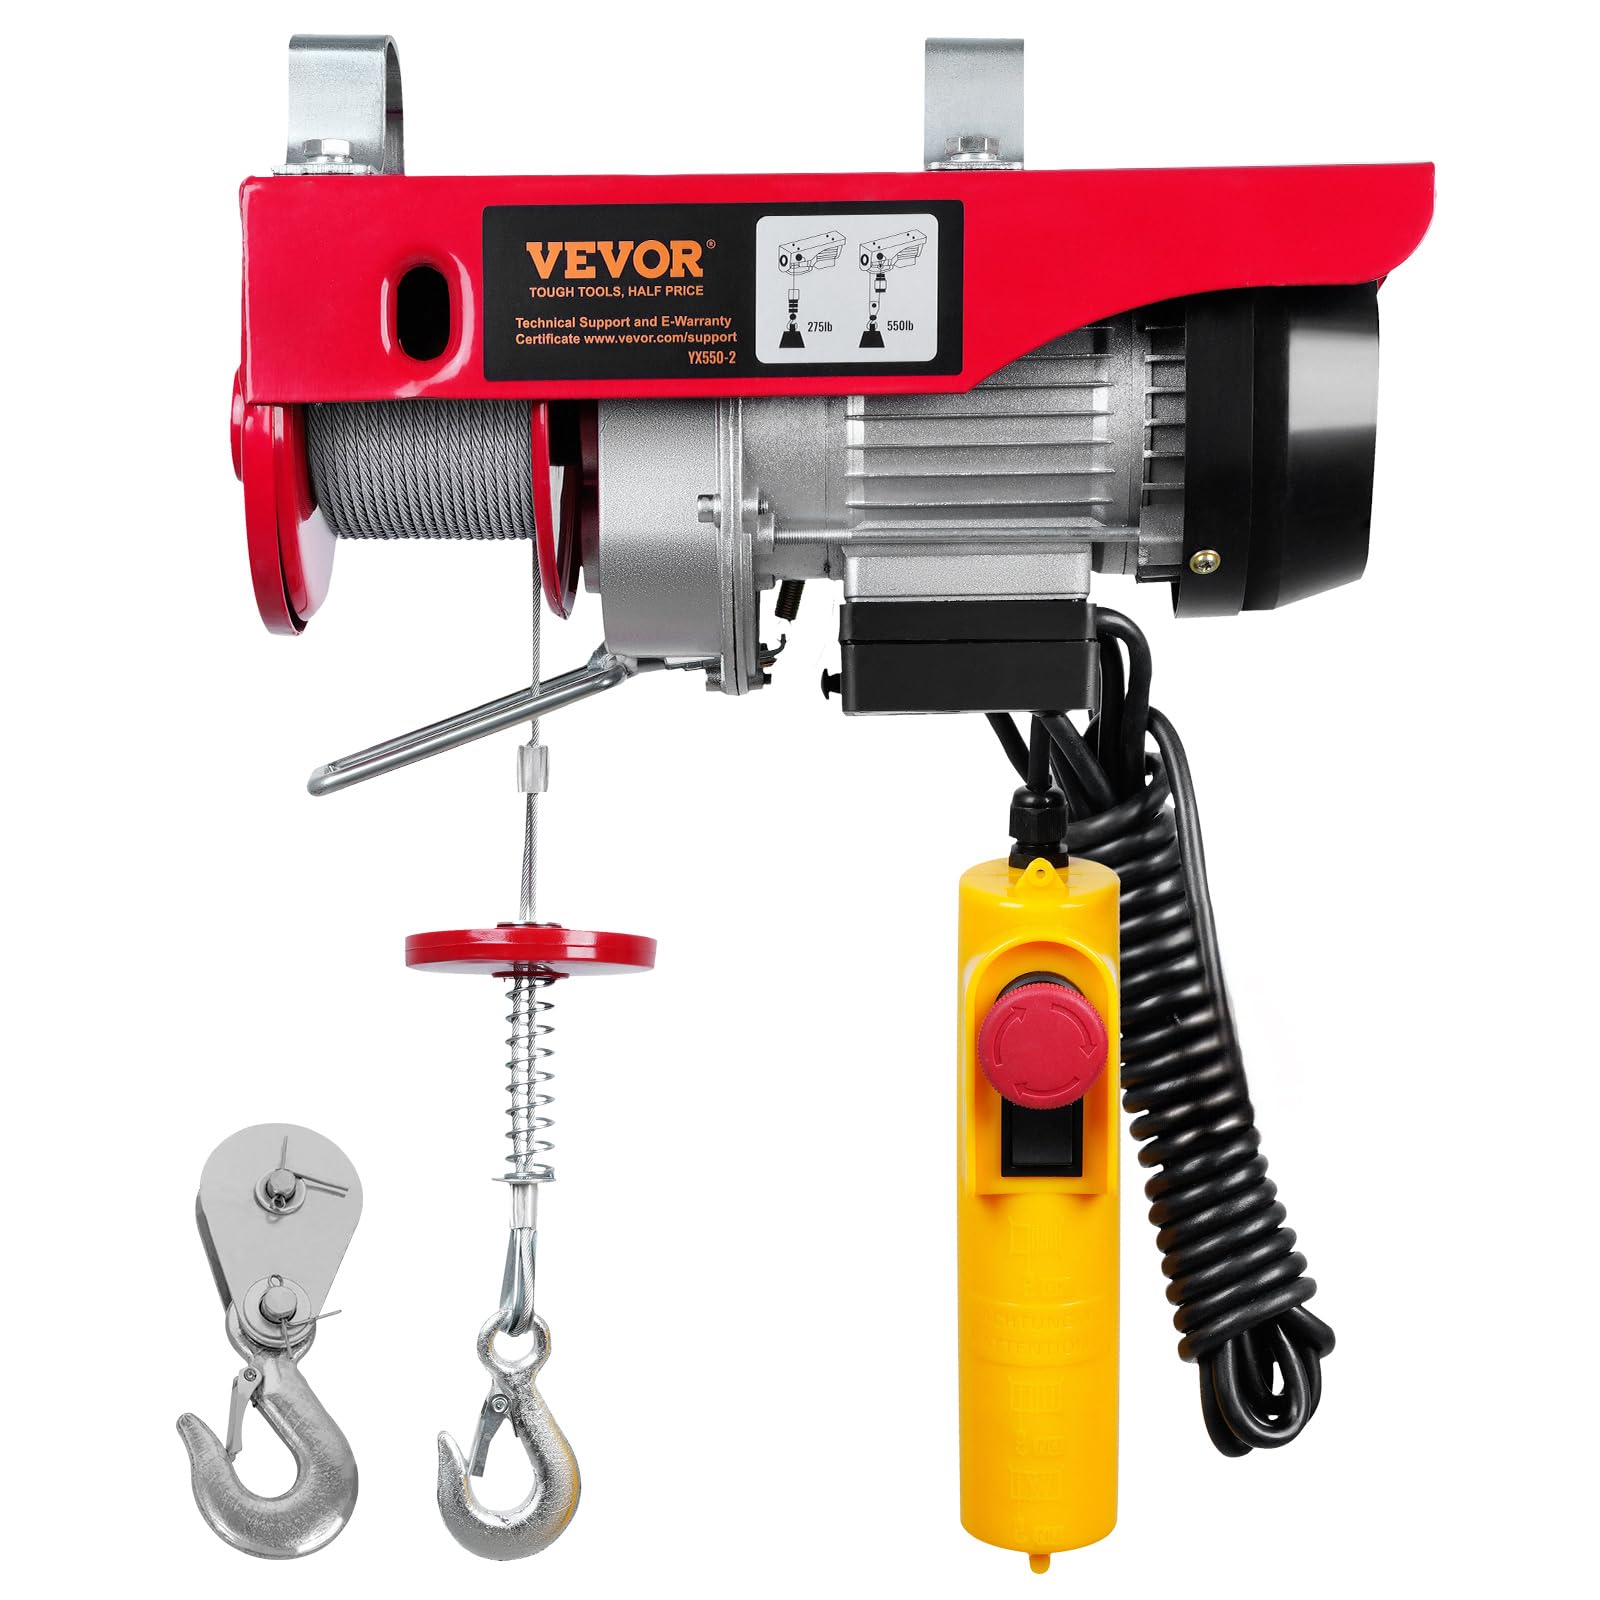
Figure 2.1: Main view of the VEVOR Electric Wire Rope Hoist, highlighting its compact design and robust construction.

Figure 2.2: The electric hoist installed in a typical garage environment, demonstrating its application for lifting tasks.
2.1 Key Components
- Motor: Pure copper motor with a cooling fan for efficient and prolonged operation.
- Wire Rope: Durable braided steel cable (Φ 3 mm * L 12 m, 19 strands).
- Hook: Alloy steel hook for secure load attachment. Includes a double hook for increased capacity.
- Remote Control: Wired remote with a 4m cable for safe operation from a distance, featuring an emergency stop button.
- Mounting Brackets: Two channel mounting brackets for easy installation.
- Safety Features: Emergency stop switch and electromagnetic braking system to prevent accidental slippage and overturning.
3. Setup
Proper installation is crucial for safe and effective operation of the hoist.
3.1 Mounting the Hoist
- Select a sturdy overhead beam or crossbar capable of supporting the hoist's weight and the maximum intended load.
- Attach the two provided channel mounting brackets to the hoist.
- Securely mount the hoist to the chosen overhead structure using appropriate fasteners. Ensure the brackets are tightly fastened to prevent movement during operation.
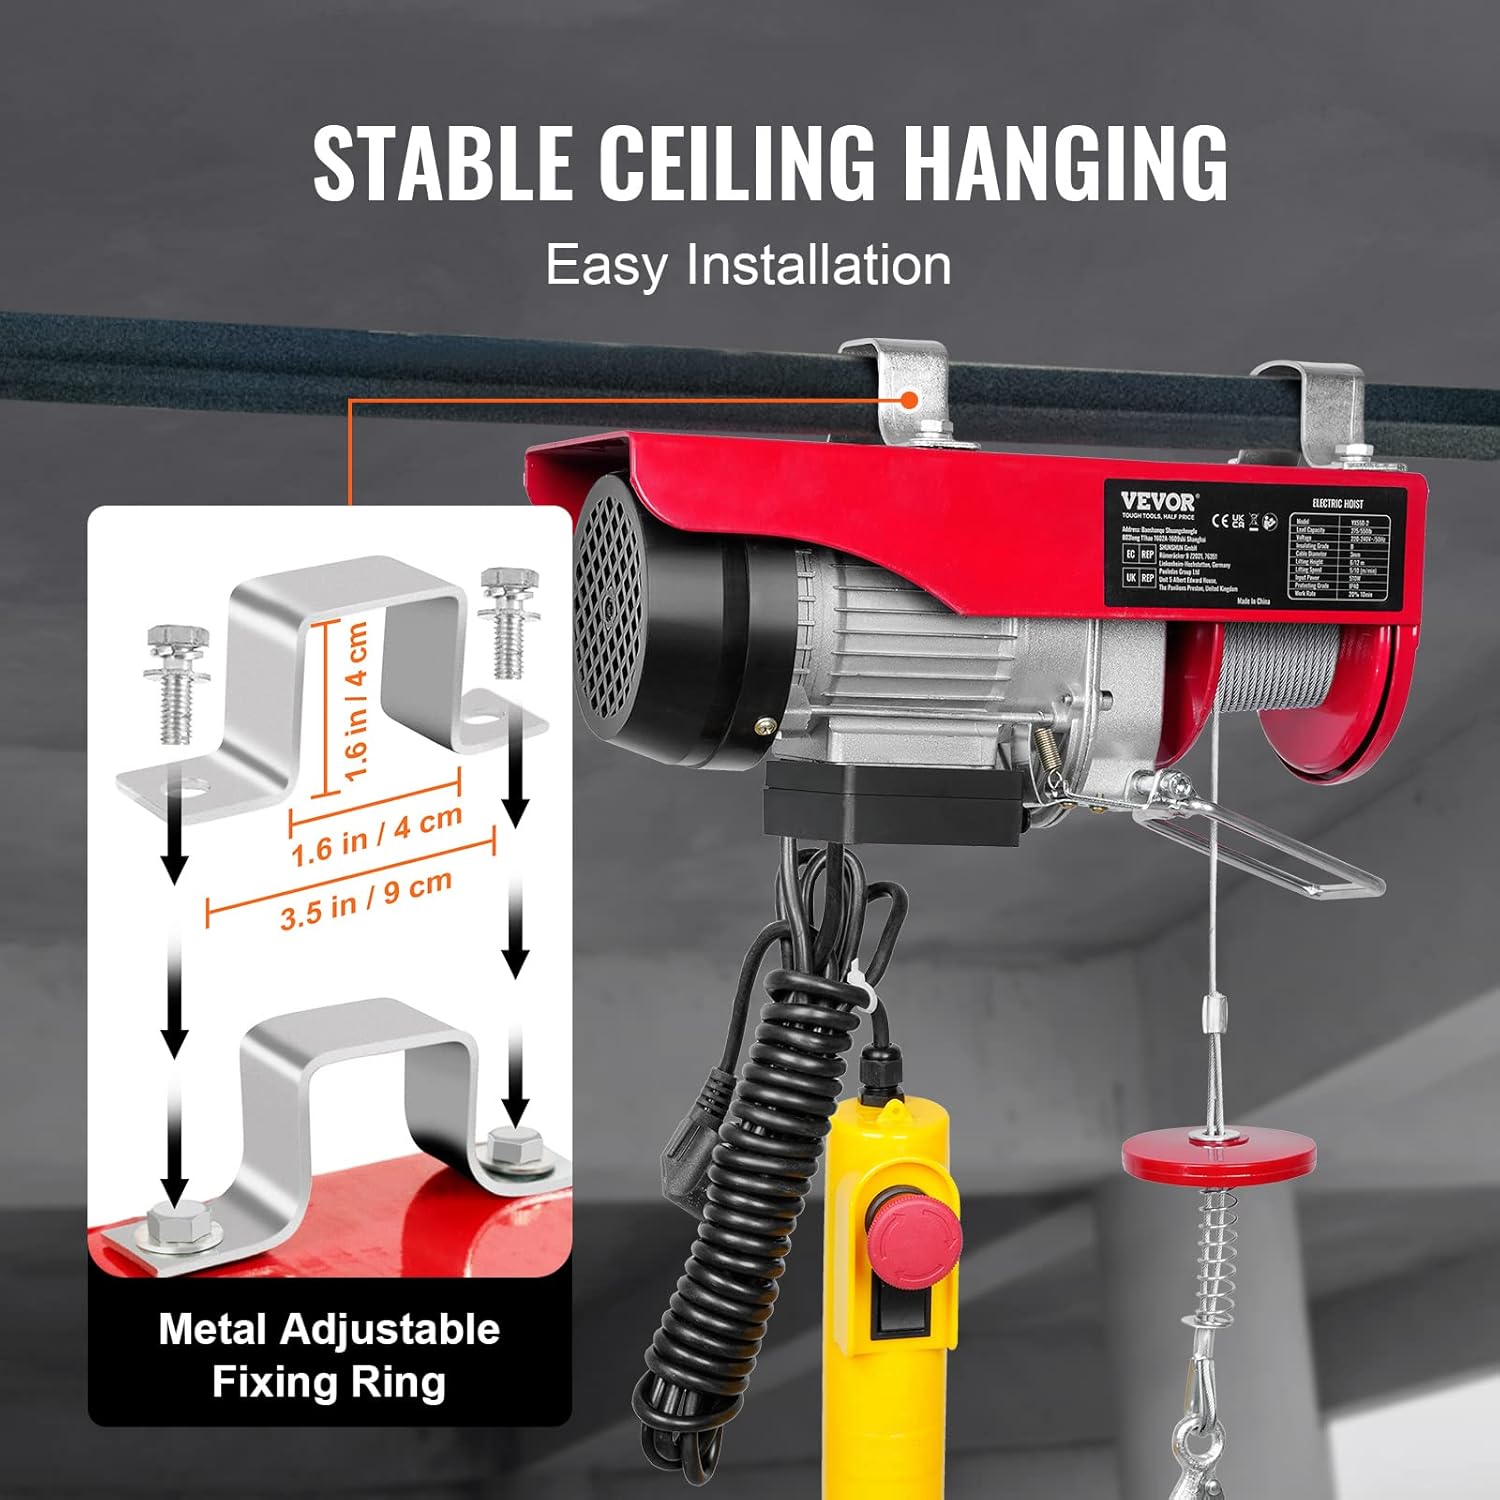
Figure 3.1: Illustration of the metal adjustable fixing rings (mounting brackets) and their dimensions for secure installation.
3.2 Electrical Connection
- Ensure the power supply matches the hoist's voltage requirement (220V).
- Plug the hoist into a grounded electrical outlet. Avoid using extension cords if possible; if necessary, use a heavy-duty, grounded extension cord rated for the hoist's power requirements.
3.3 Cable Configuration (Single vs. Double Line)
The hoist can be configured for single or double line lifting, affecting its capacity and lifting speed.
- Single Cable: Provides higher lifting height and speed (40 ft/12 m, 33 ft/min) with a capacity of 125 kg.
- Double Cable: Achieved by using the provided pulley hook, which doubles the lifting capacity to 250 kg but halves the lifting height and speed (19.7 ft/6 m, 16 ft/min).

Figure 3.2: Comparison of single cable setup (left) for higher speed and height, and double cable setup (right) using a pulley hook for increased lifting capacity.
4. Operating Instructions
Follow these steps for safe and effective operation of your electric hoist.
4.1 Using the Remote Control
The hoist is operated via a wired remote control, allowing you to maintain a safe distance from the load.
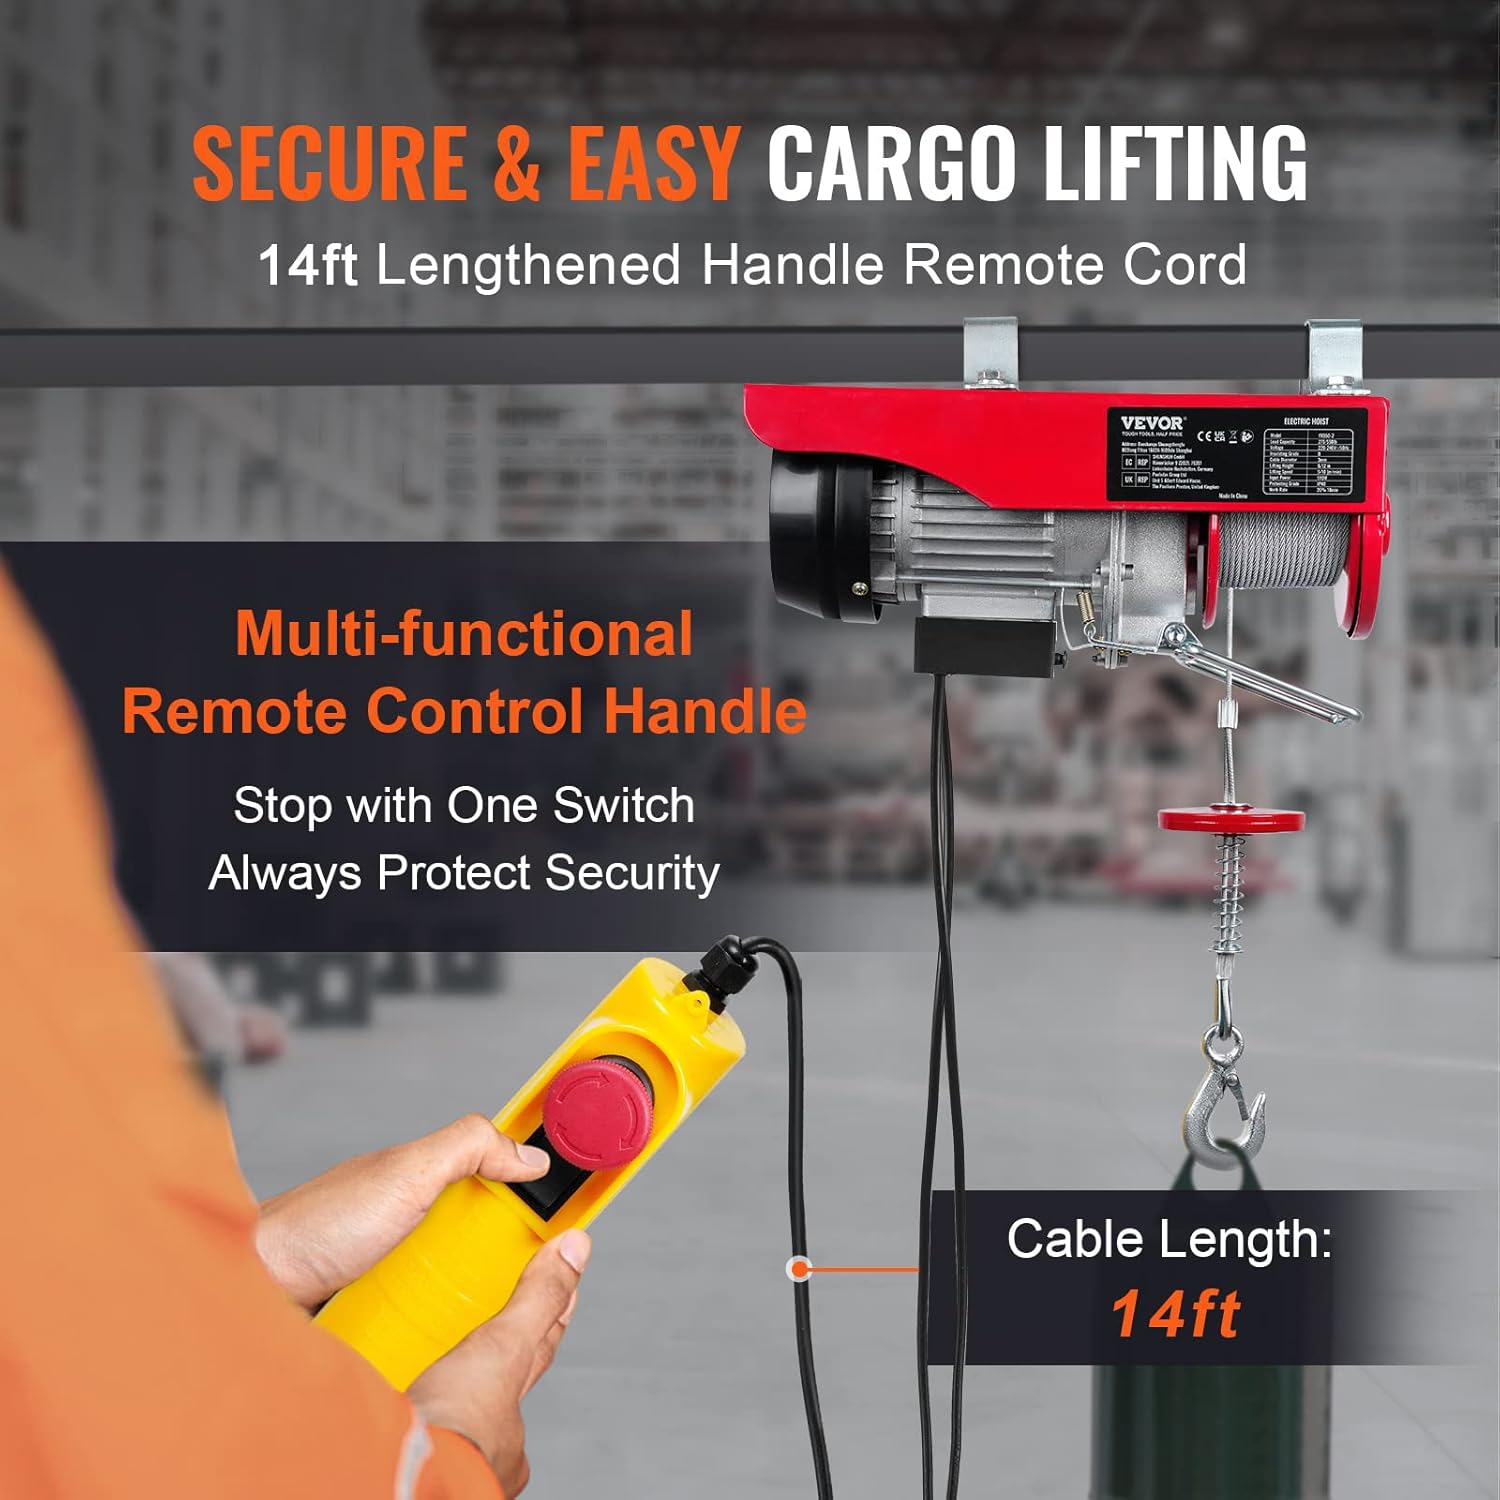
Figure 4.1: The multi-functional remote control handle with its 14ft (approx. 4m) cable, featuring an emergency stop button.
- Up Button: Press and hold to lift the load.
- Down Button: Press and hold to lower the load.
- Emergency Stop Button: Press the large red button to immediately stop all hoist operations in an emergency. Twist to reset.
- Always operate the hoist from a position where you have a clear view of the load and the surrounding area.
4.2 Lifting Procedures
- Before lifting, ensure the load is within the hoist's capacity and is securely attached to the hook.
- Slowly lift the load a few inches off the ground to check for balance and stability.
- If the load is stable, proceed to lift it to the desired height. Avoid swinging the load.
- When lowering, do so slowly and steadily. Guide the load if necessary, keeping hands clear.
- Never leave a suspended load unattended.
5. Maintenance
Regular maintenance ensures the longevity and safe operation of your hoist.
5.1 Regular Inspection
- Wire Rope: Inspect the wire rope for kinks, fraying, corrosion, or broken strands before each use. Replace if any damage is observed.
- Hook: Check the hook for deformation, cracks, or excessive wear. Ensure the safety latch operates correctly.
- Motor and Housing: Inspect for any visible damage, loose fasteners, or unusual noises during operation.
- Electrical Cable and Remote: Check for cuts, abrasions, or damage to the power cord and remote control cable.
5.2 Cleaning and Storage
- Keep the hoist clean and free from dirt, dust, and debris. Use a dry cloth to wipe down surfaces.
- Store the hoist in a dry, clean, and secure location away from moisture and extreme temperatures.
6. Troubleshooting
Refer to this section for common issues and their potential solutions.
| Problem | Possible Cause | Solution |
|---|---|---|
| Hoist does not operate | No power supply Emergency stop engaged Motor overload protection activated | Check power connection and outlet Release emergency stop button Allow motor to cool down, reduce load |
| Unusual noise during operation | Loose components Lack of lubrication Internal damage | Inspect for loose parts and tighten Consult a qualified technician Discontinue use and seek professional service |
| Load slips or drops | Brake malfunction Overload | Discontinue use immediately and contact service Ensure load is within capacity |
If you encounter problems not listed here or if the suggested solutions do not resolve the issue, contact VEVOR customer support.
7. Specifications
Technical data for the VEVOR Electric Wire Rope Hoist PAYX250-2.

Figure 7.1: Detailed product dimensions and a summary of key specifications.
| Parameter | Value |
|---|---|
| Model Number | PAYX250-2 |
| Lifting Load Capacity (Single Cable) | 125 kg (275 lb) |
| Lifting Load Capacity (Double Cable) | 250 kg (550 lb) |
| Lifting Height (Single Cable) | 12 m (40 ft) |
| Lifting Height (Double Cable) | 6 m (19.7 ft) |
| Lifting Speed (Single Cable) | 10 m/min (33 ft/min) |
| Lifting Speed (Double Cable) | 5 m/min (16 ft/min) |
| Motor Power | 510 W |
| Voltage | 220 V |
| Cable Size | Φ 3 mm * L 12 m (19 strands) |
| Product Dimensions (L x W x H) | 350 x 135 x 160 mm (13.8 x 5.3 x 6.3 inches) |
| Product Weight | 10.35 kg (22.82 lb) |
| Control Mode | Wired Remote Control |
| Rated Rotation Speed | 2800 rpm |
| Rated Torque | 1.1 Nm |

Figure 7.2: Diagram illustrating the internal motor components and the cooling fan designed for heat dissipation.
8. Warranty and Support
VEVOR products are designed for durability and performance. For warranty information, technical support, or service inquiries, please refer to the warranty card included with your product or visit the official VEVOR website. Keep your purchase receipt as proof of purchase.


